With list unsubscribe headers, recipients can easily unsubscribe from email lists. When users unsubscribe, their email address is added to Site Mailer’s list of suppressed emails. You also have the option to manually add and delete emails from the list of suppressed emails.
Manually add an email to the suppressed list
To add a user to your list of suppressed emails:
- From WP Admin, navigate to Elementor>Email Deliverability.
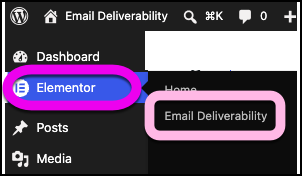
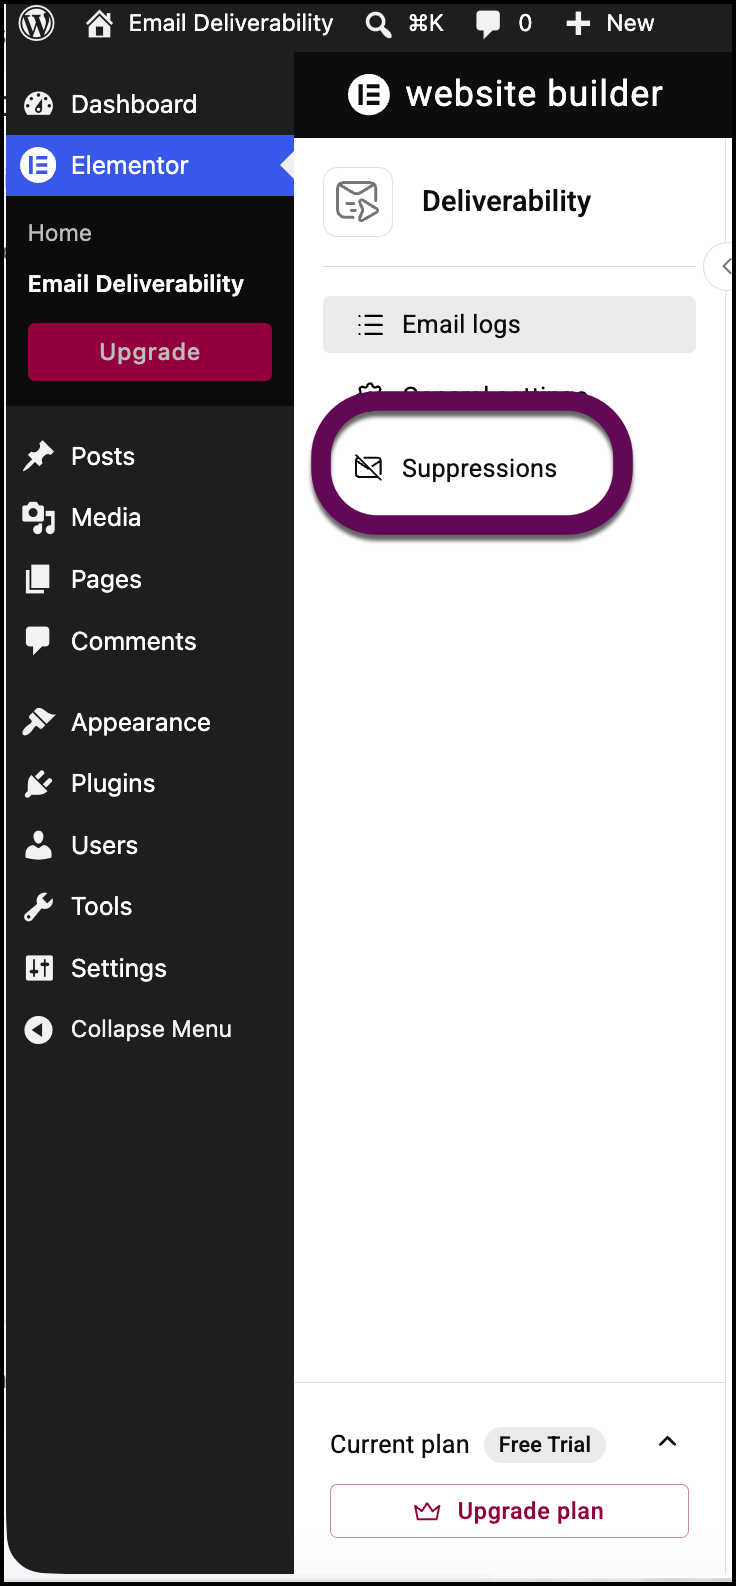
- In the left panel, click the Suppressions tab.
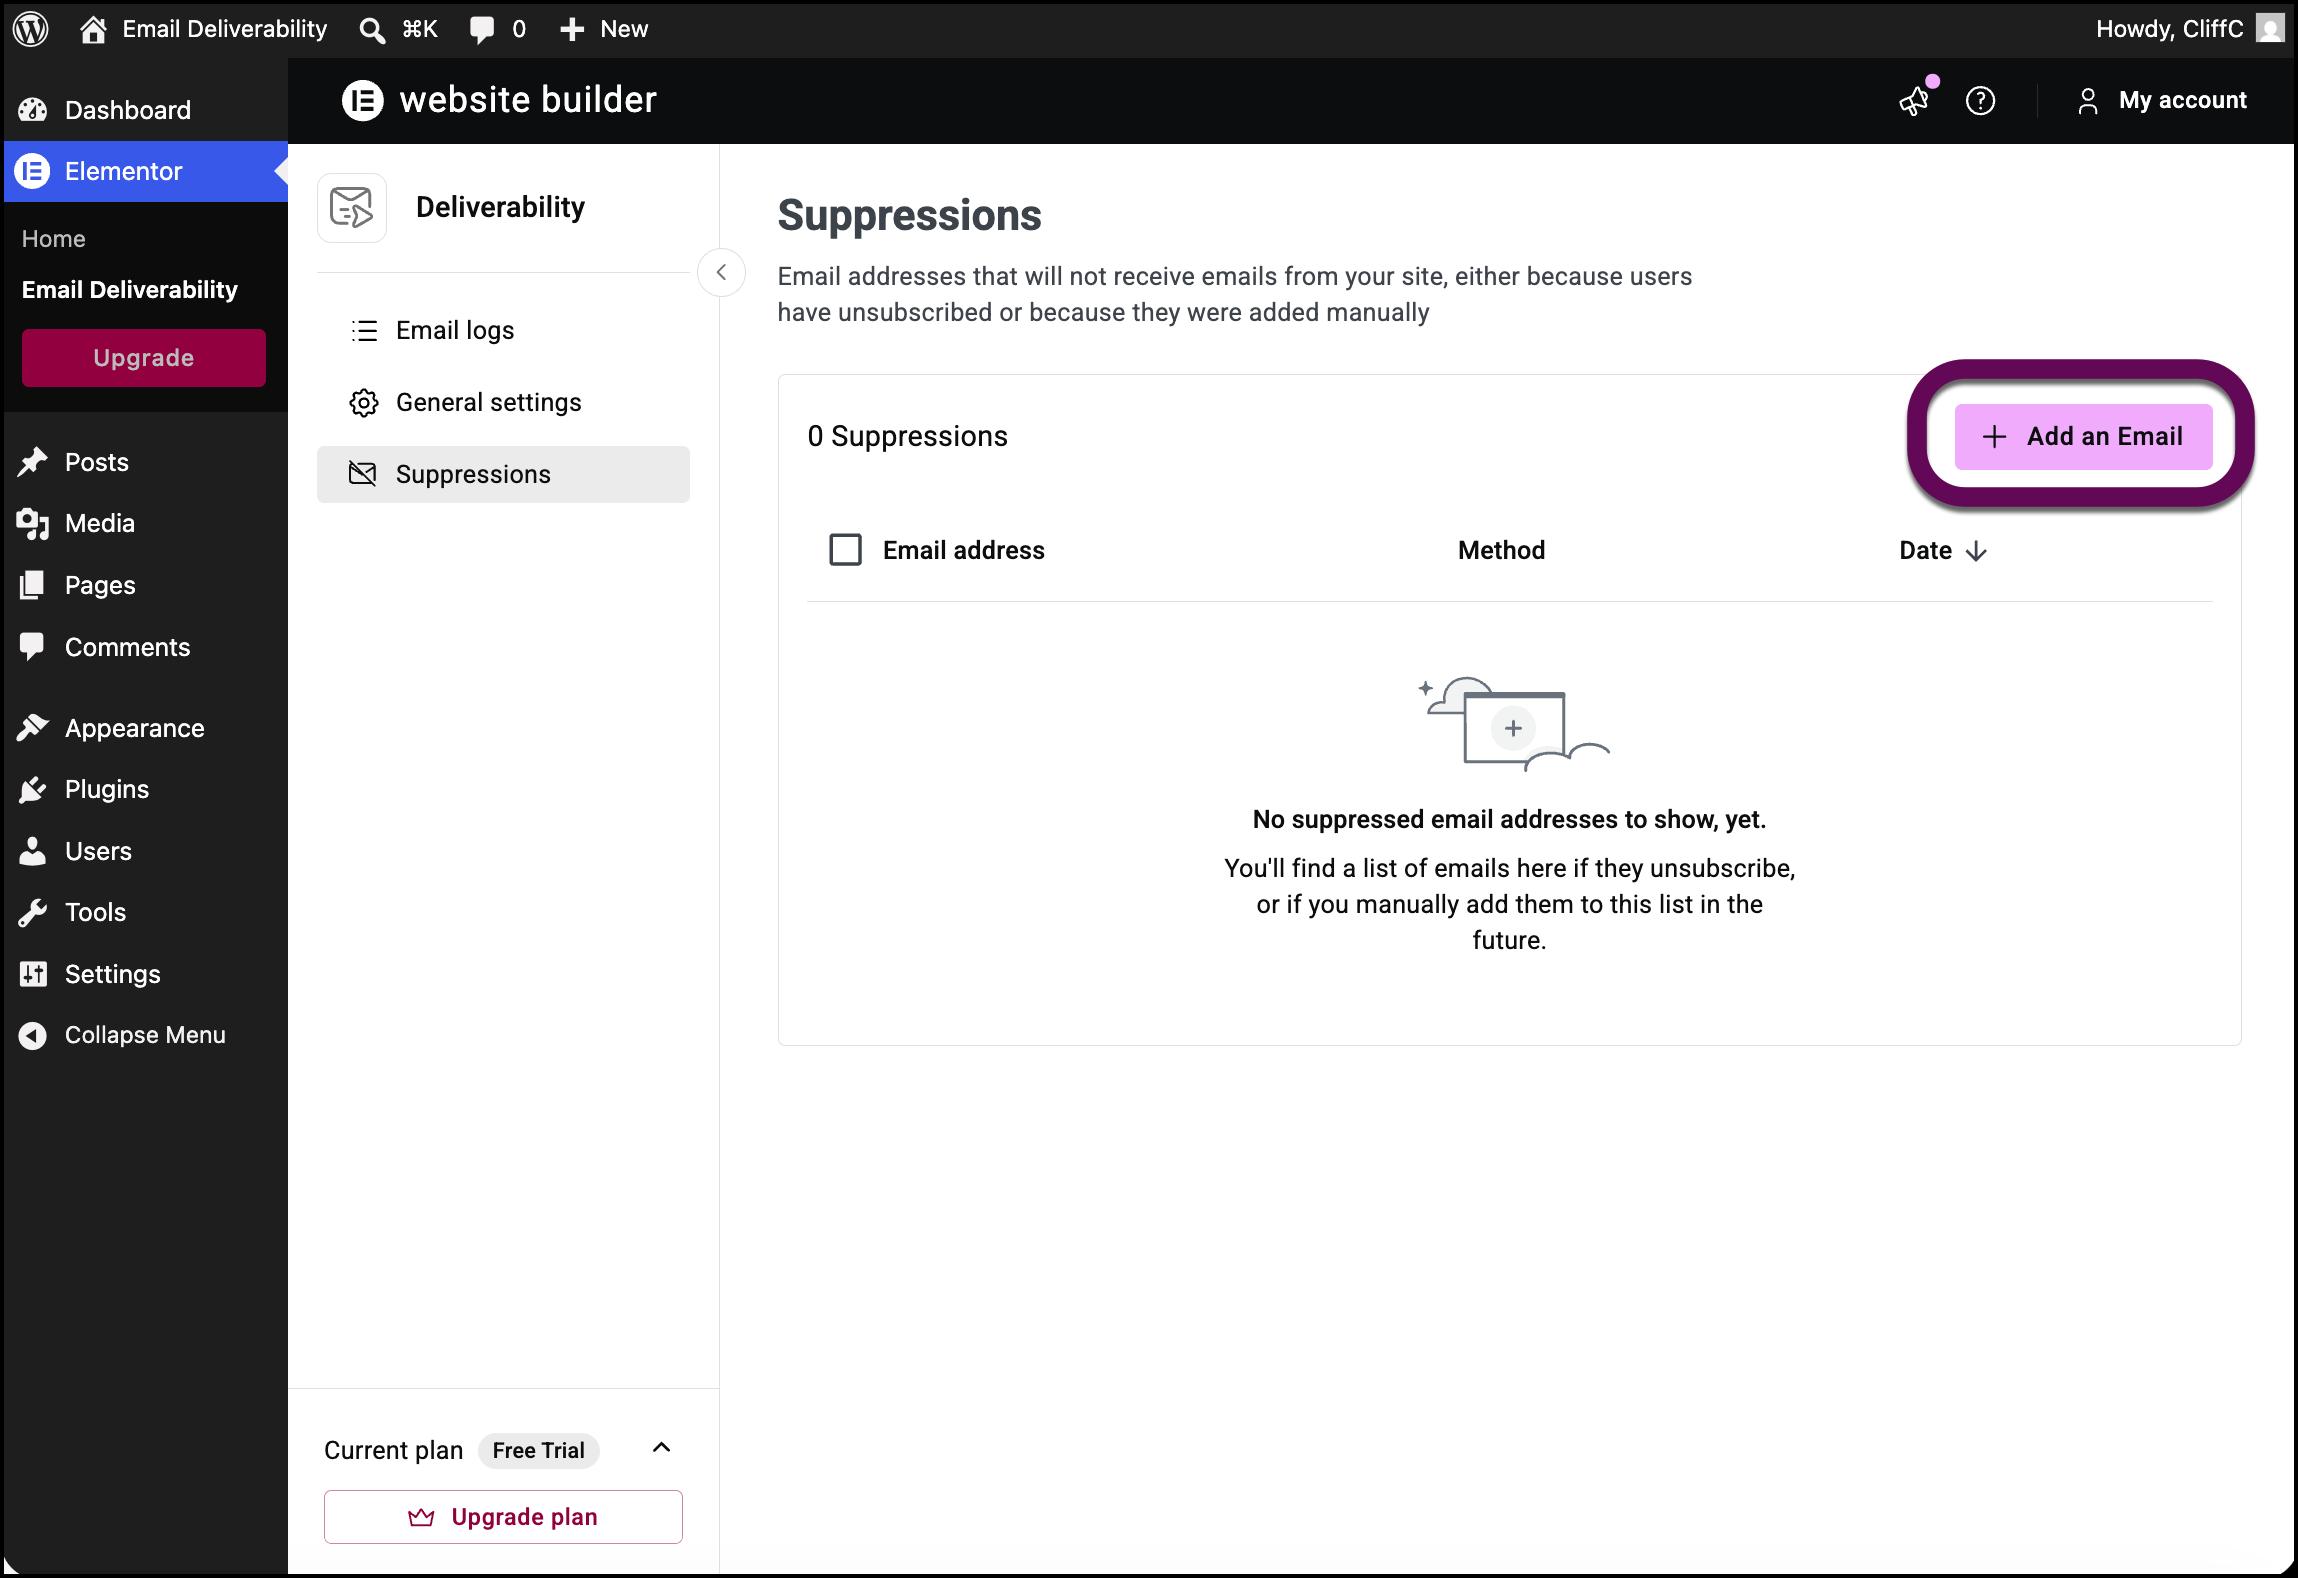
- Click Add an Email.
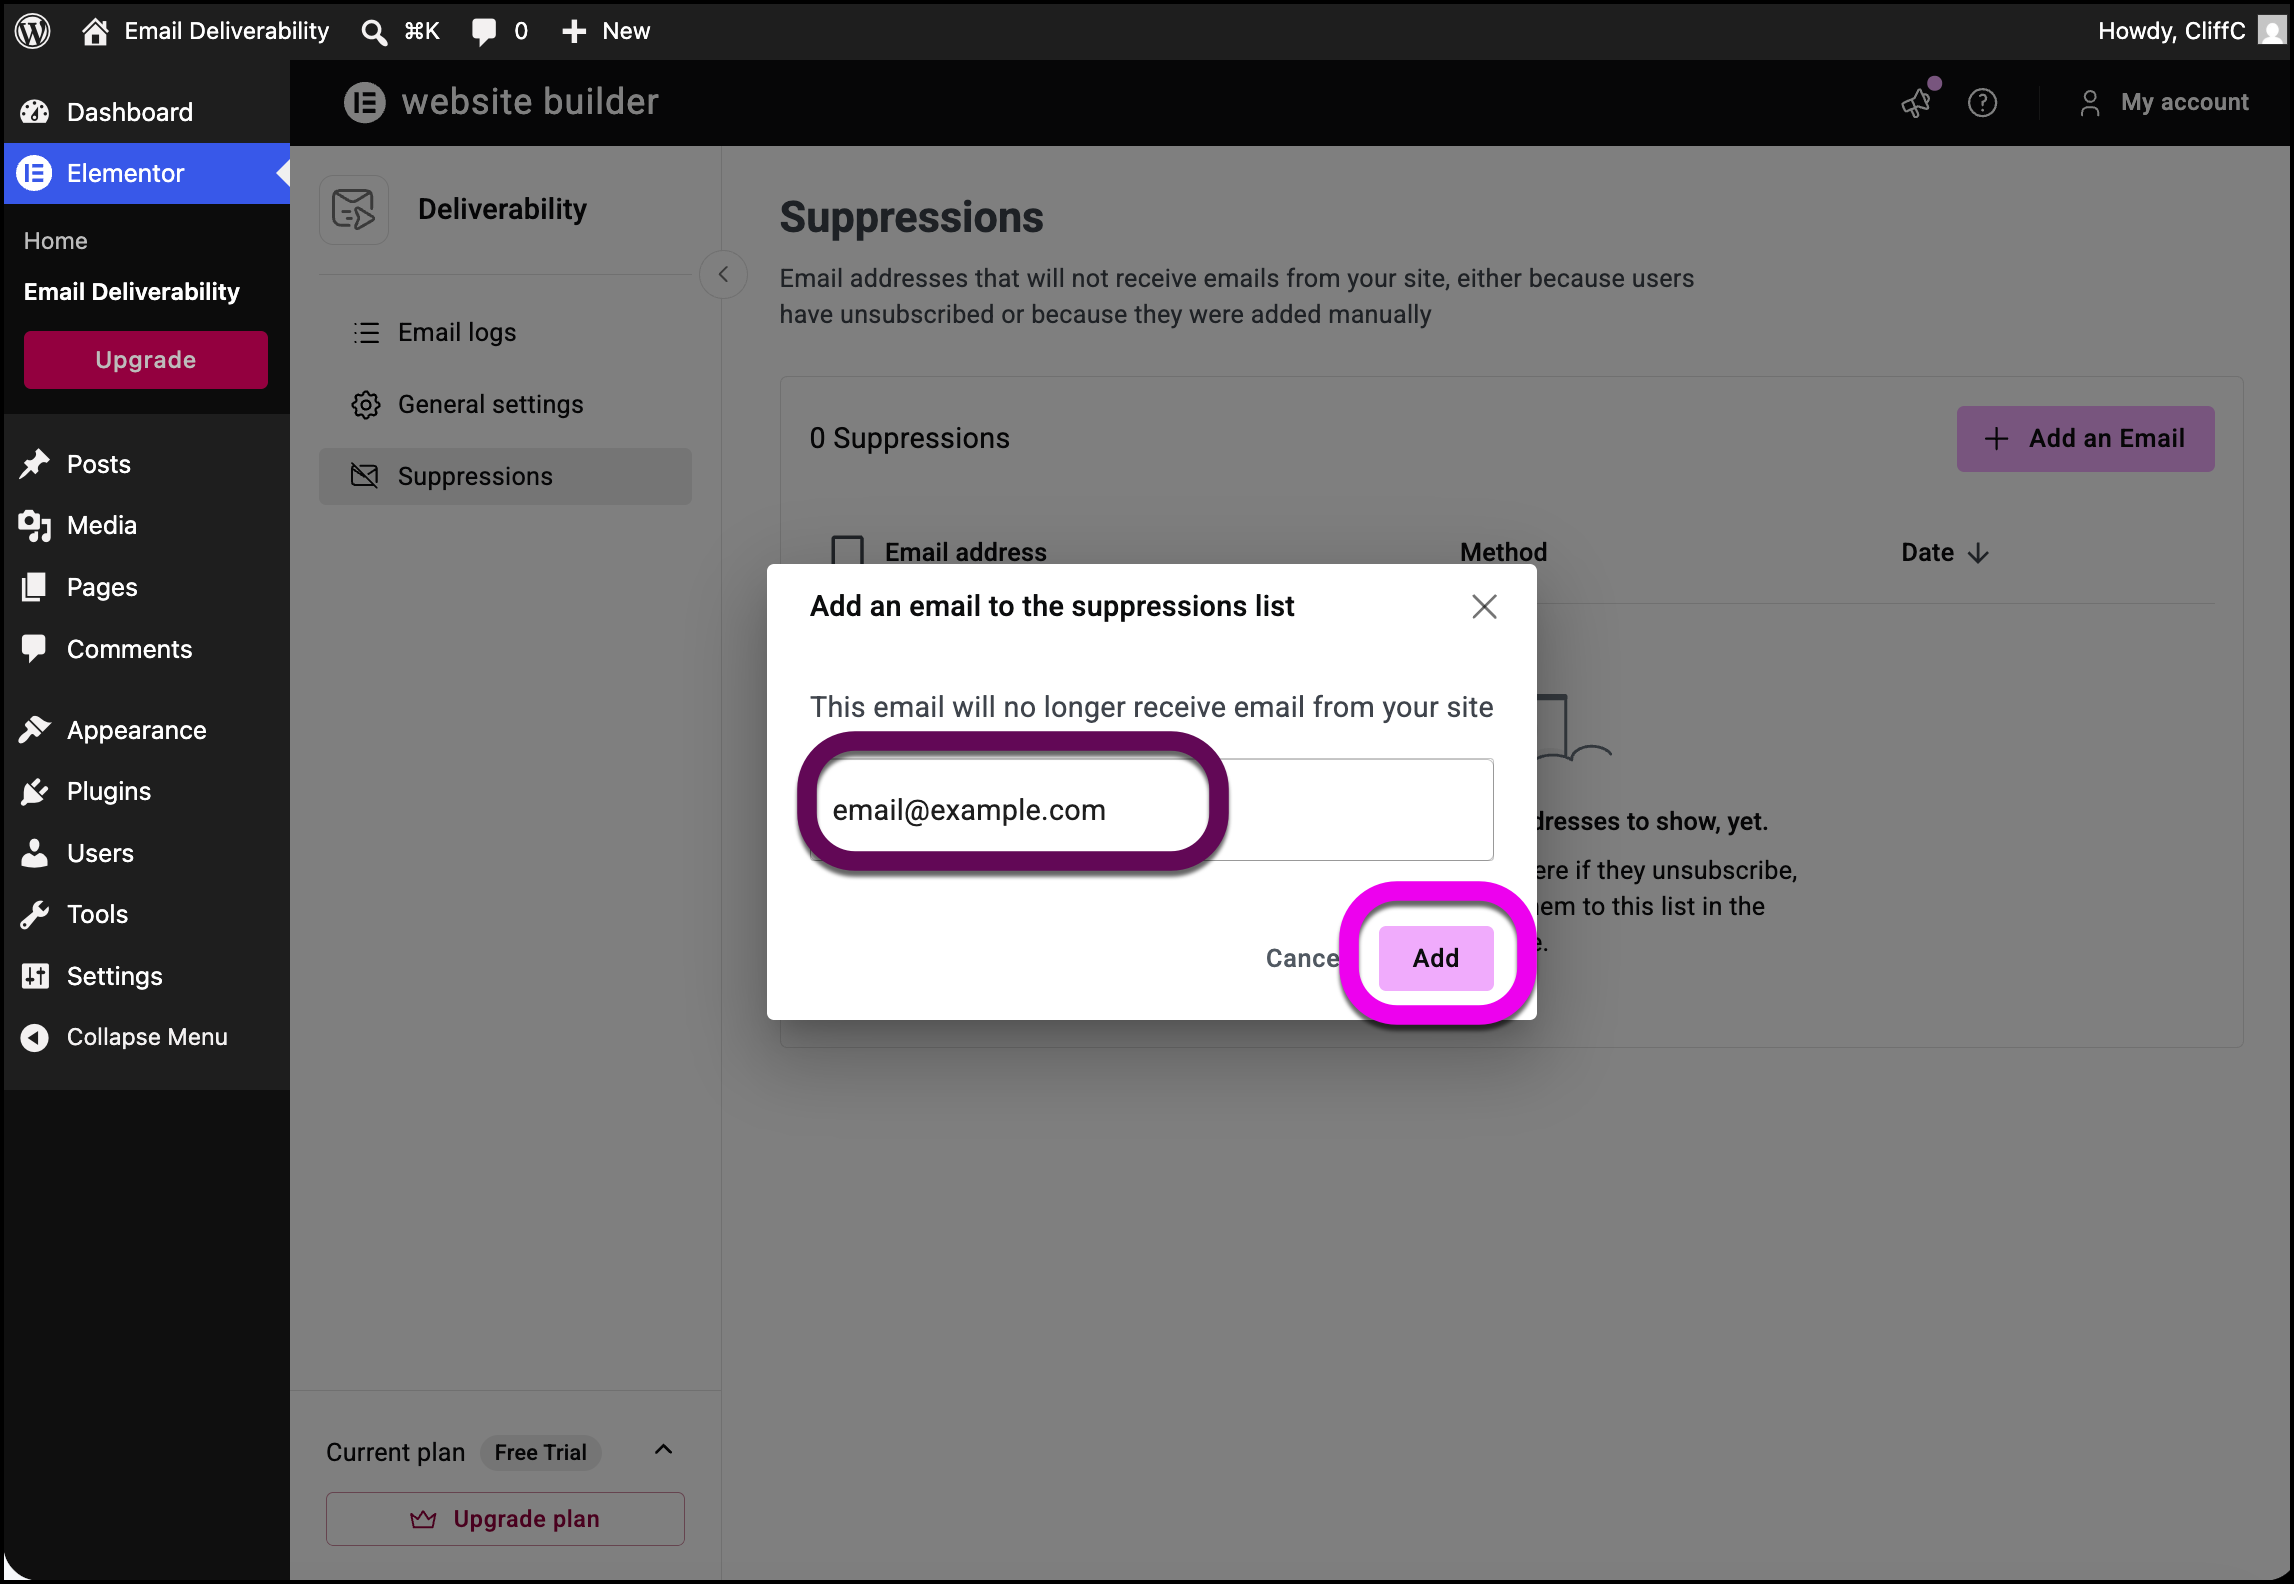
- Enter the email address you want to add to the suppression list and click Add.
The address is added to the list of suppressed emails.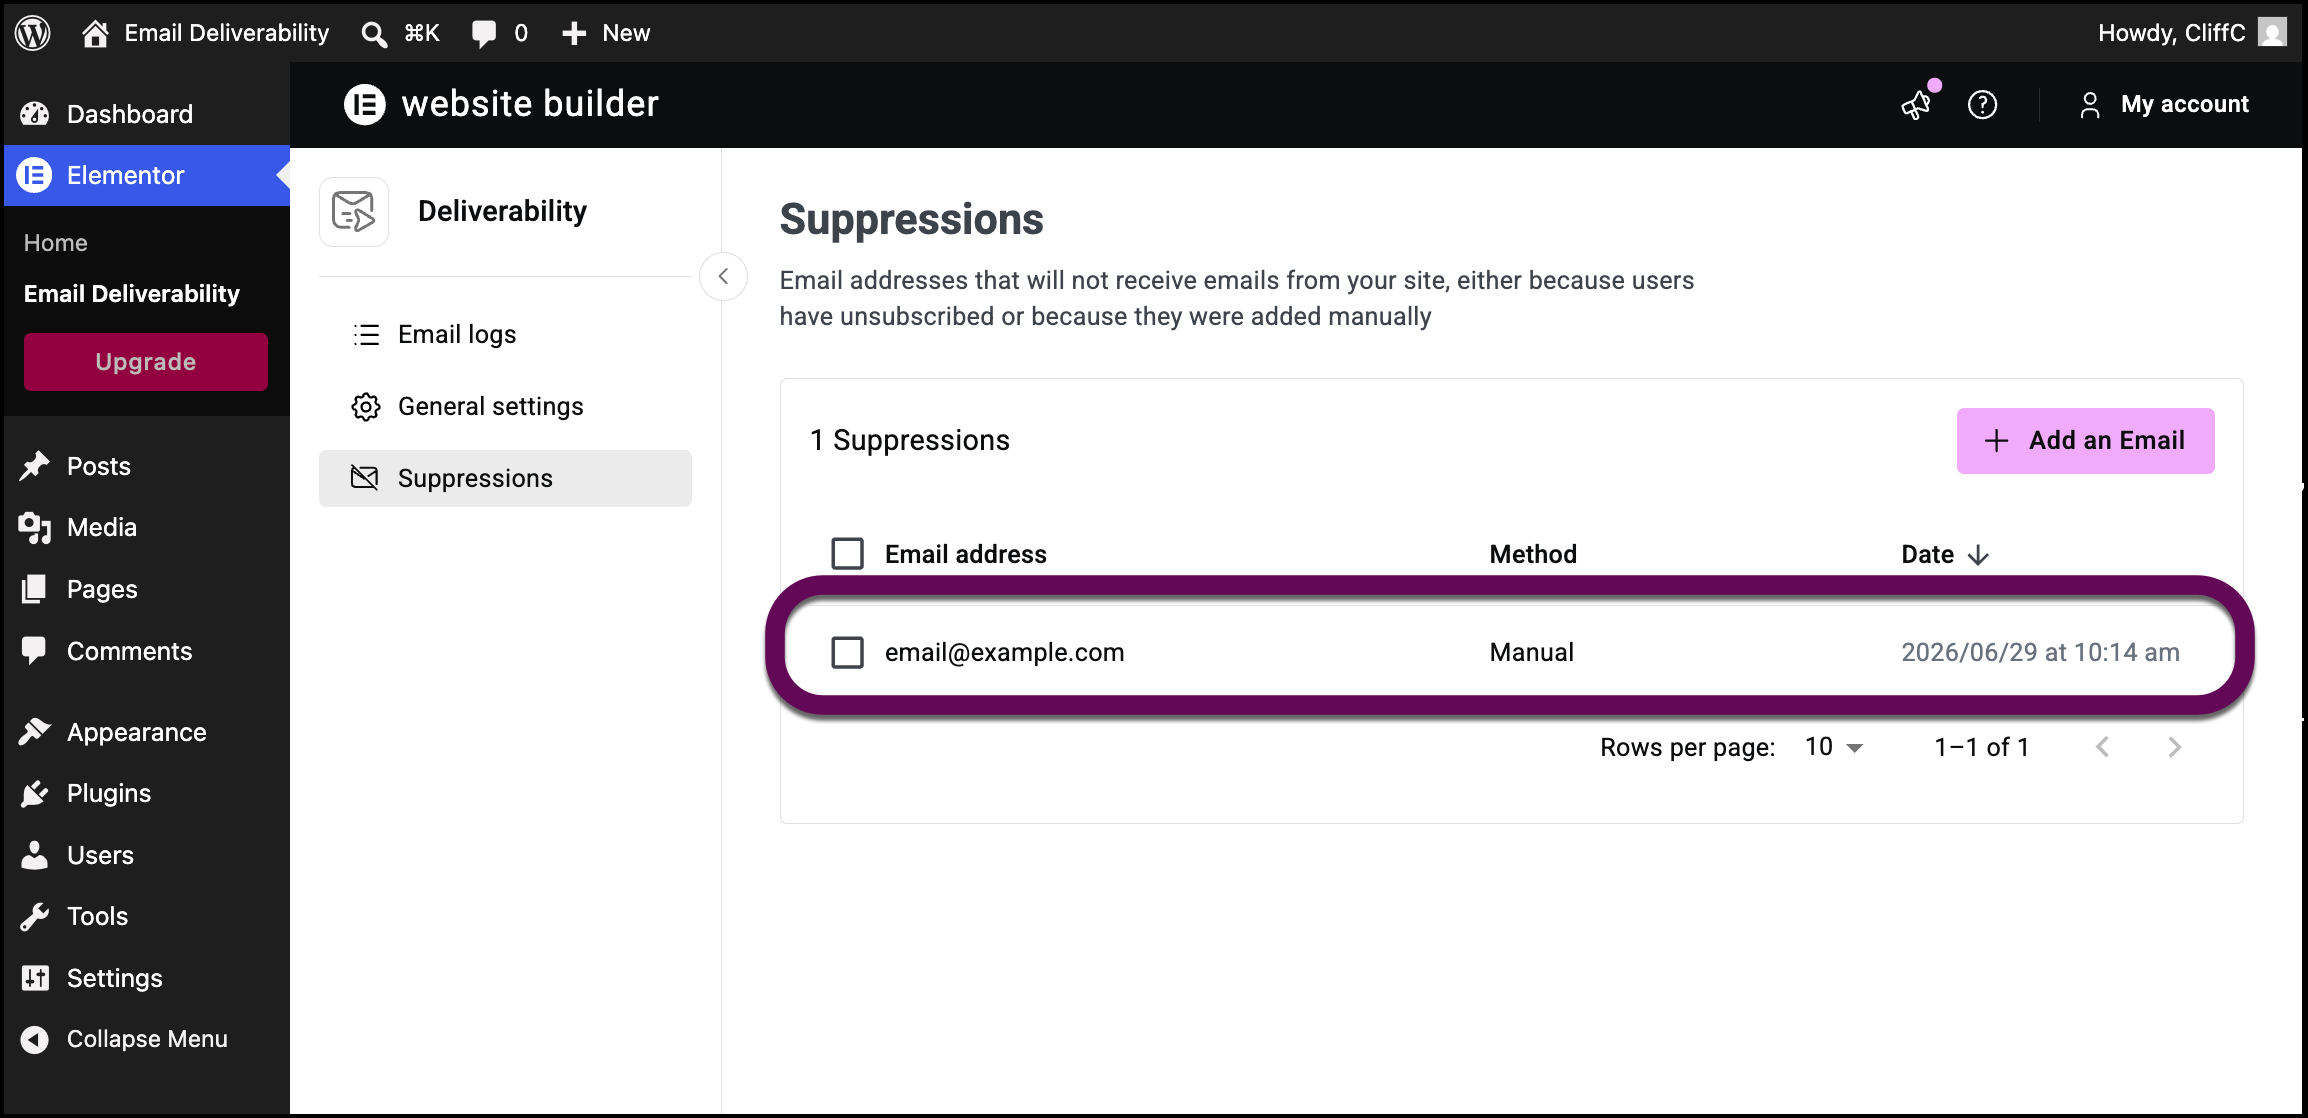
Note
Addresses added manually are marked Manual in the Method column. Addresses added by users unsubscribing are marked Unsubscribed.
Manually remove an email from the suppressed list
To add a user to your list of suppressed emails:
- From WP Admin, navigate to Elementor>Email Deliverability.
- In the left panel, click the Suppressions tab.
- Locate the email you want to remove and hover over it.
Click the delete icon to the right of the email.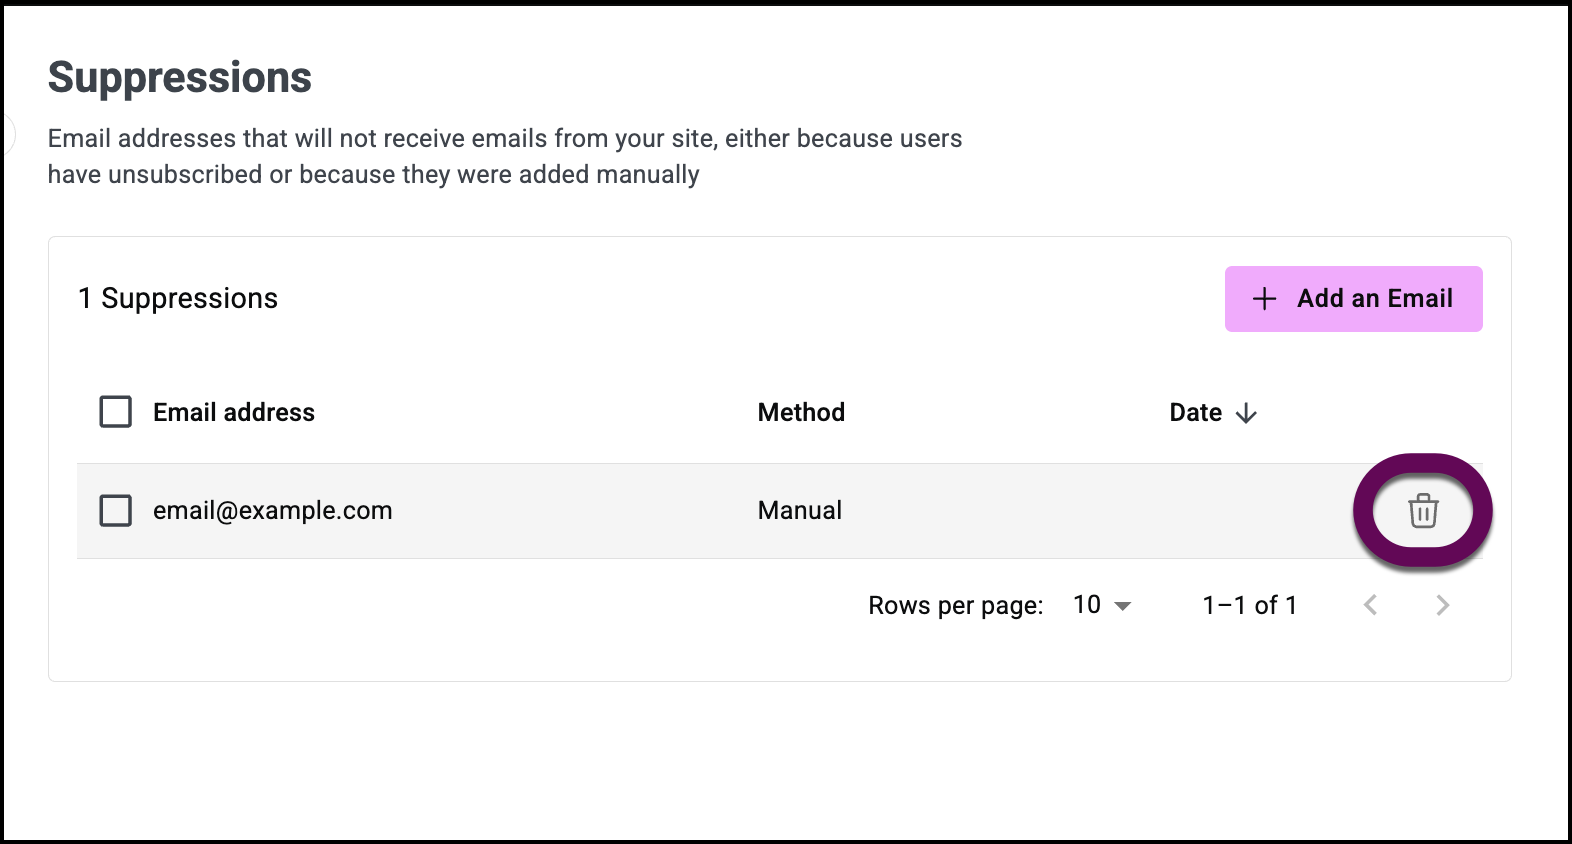
- Confirm the removal.
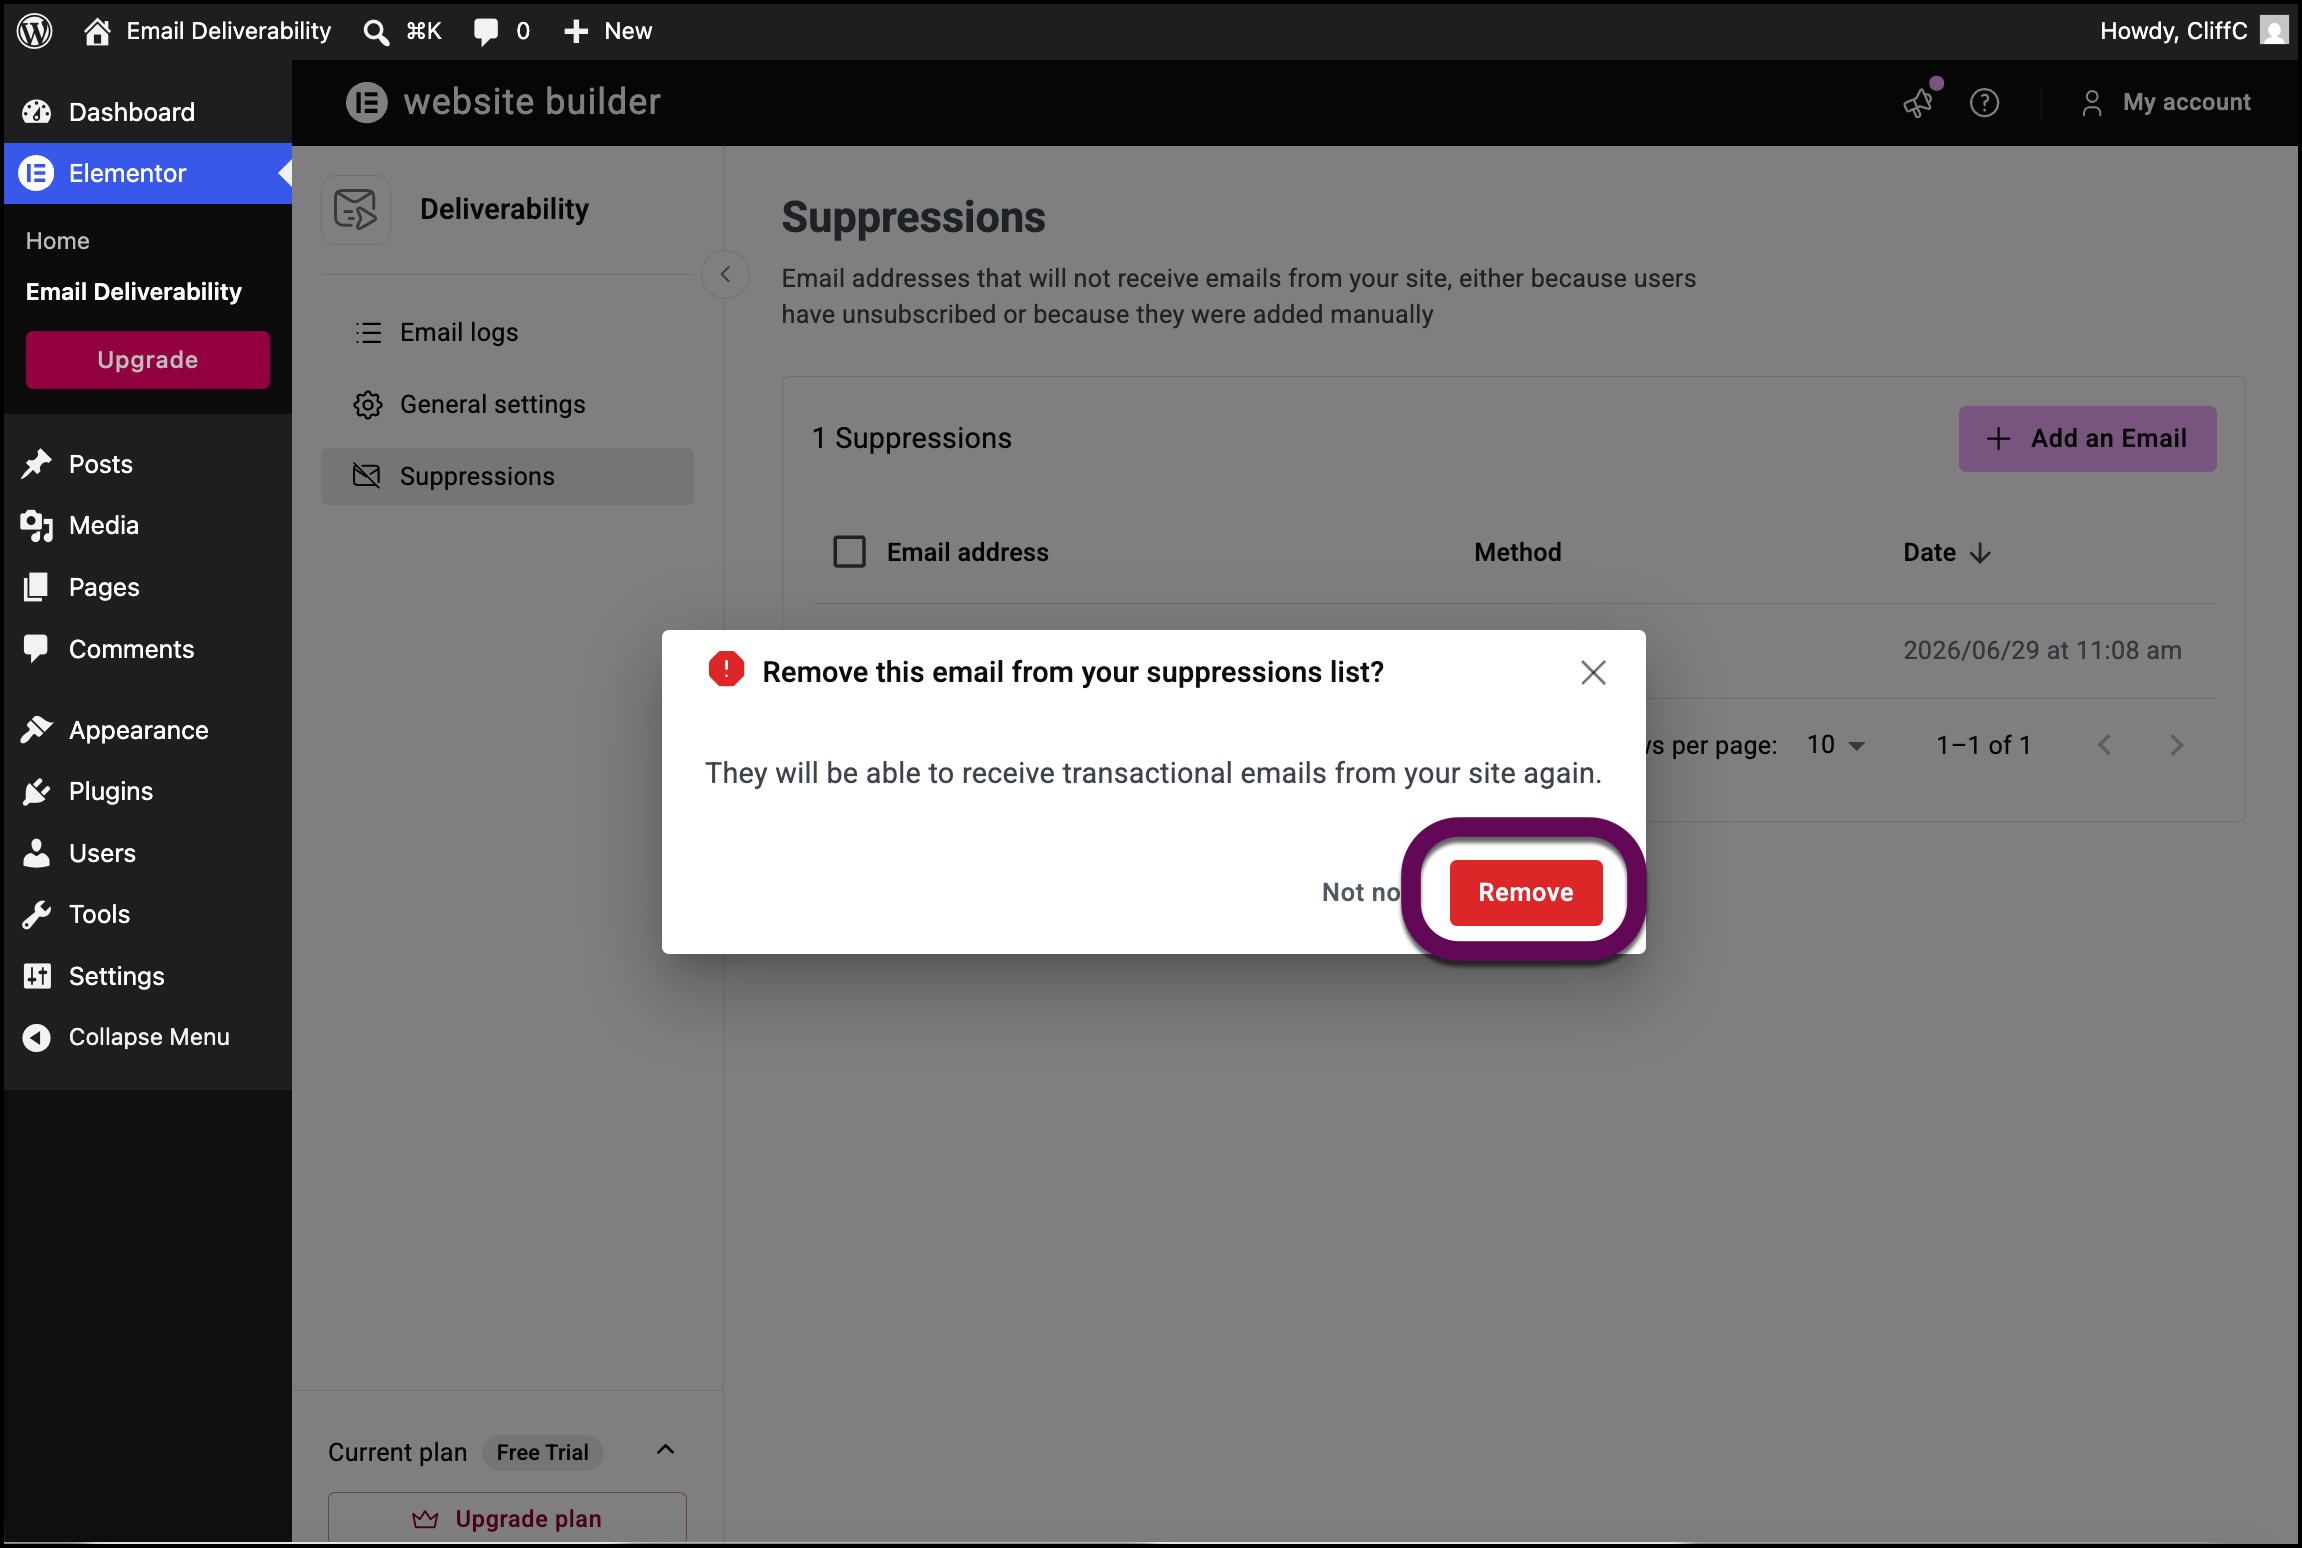
The address is removed from the suppressed list.
Attempting to send an email to a suppressed address
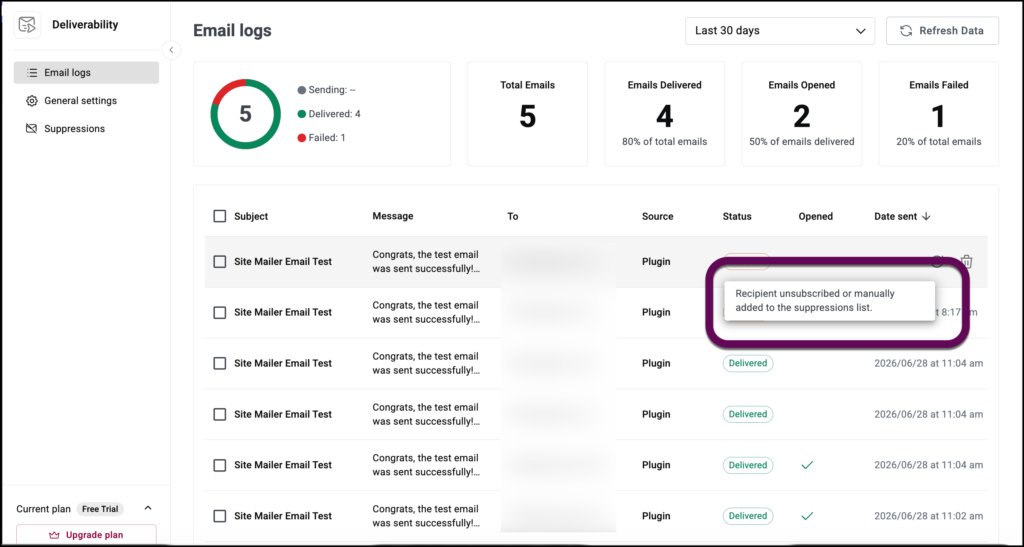
If Site Mailer attempts to send an email to a suppressed address, you will be notified immediately and the email is marked Not Sent.
Hovering over the Not Sent icon will notify you that the address is suppressed.