To get started with Elementor in WordPress, install and activate Elementor Core plugin from the WordPress repository, then open Elementor Editor from any page to begin designing layouts.
You can optionally upgrade to Elementor Pro by uploading the plugin archive and connecting your license to unlock advanced widgets and theme-building tools.
Note: If you are an Elementor One subscriber, refer to the dedicated Elementor One Onboarding Guide for custom setup instructions.
How do you install and activate Elementor Core?
Installing the Elementor Core allows you to begin creating custom page layouts directly from your WordPress admin panel:
-
Log in to your WordPress admin dashboard.
-
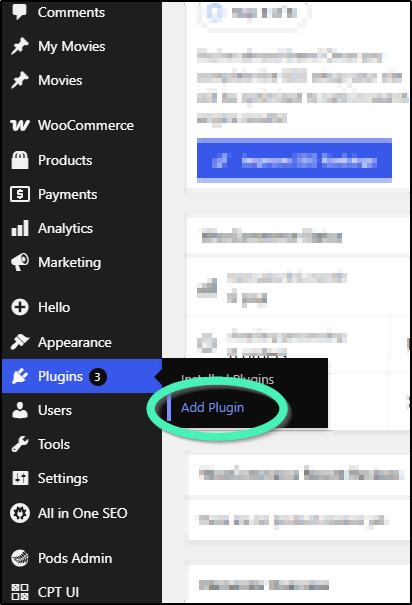
Navigate to Plugins > Add New Plugin.
-
Type Elementor into the search bar in the top-right corner.
-
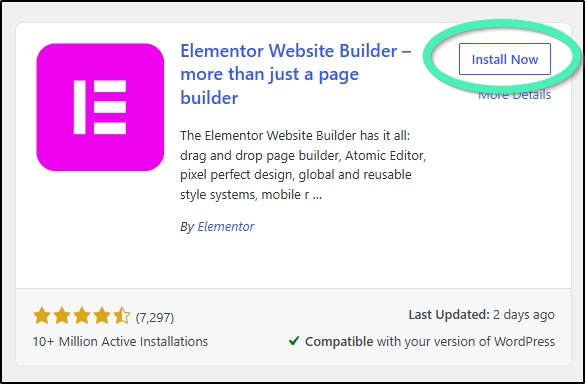
Click Install Now next to Elementor Website Builder.
-
Click Activate once the installation completes.
-
Follow the on-screen setup wizard to create or link your Elementor account. Connecting an account grants instant access to the Template Library and cloud assets.
How do you install Elementor Pro?
Get the most out of Elementor by unlocking even more features and professionally designed templates:
-
Purchase an Elementor Pro plan from the official Elementor website.
-
Log in to your Elementor My Account dashboard and download the Elementor Pro
.zipplugin file. -
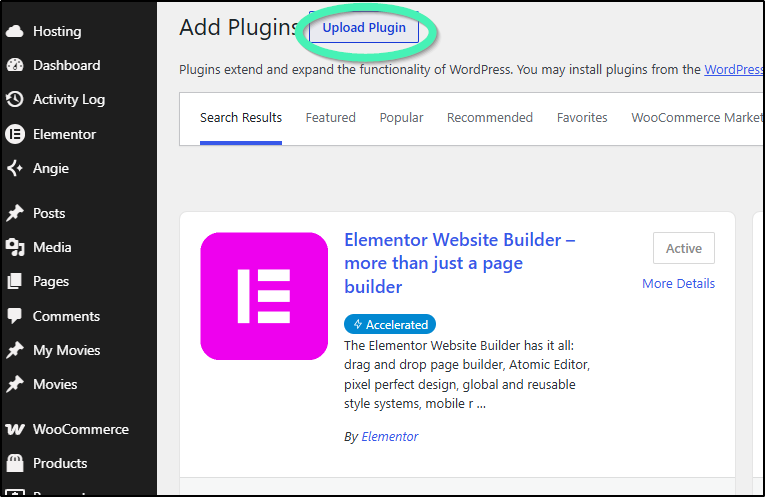
Return to your WordPress dashboard and navigate to Plugins > Add Plugin.
-
Click Upload Plugin at the top of the page.
-
Click Choose File, select the downloaded
.zipfile, and click Install Now. -
Click Activate Plugin.
Read more about installing and activating Elementor Pro.
How do you connect your Elementor Pro subscription?
In order to use the Pro features connect your Elementor Pro license.
-
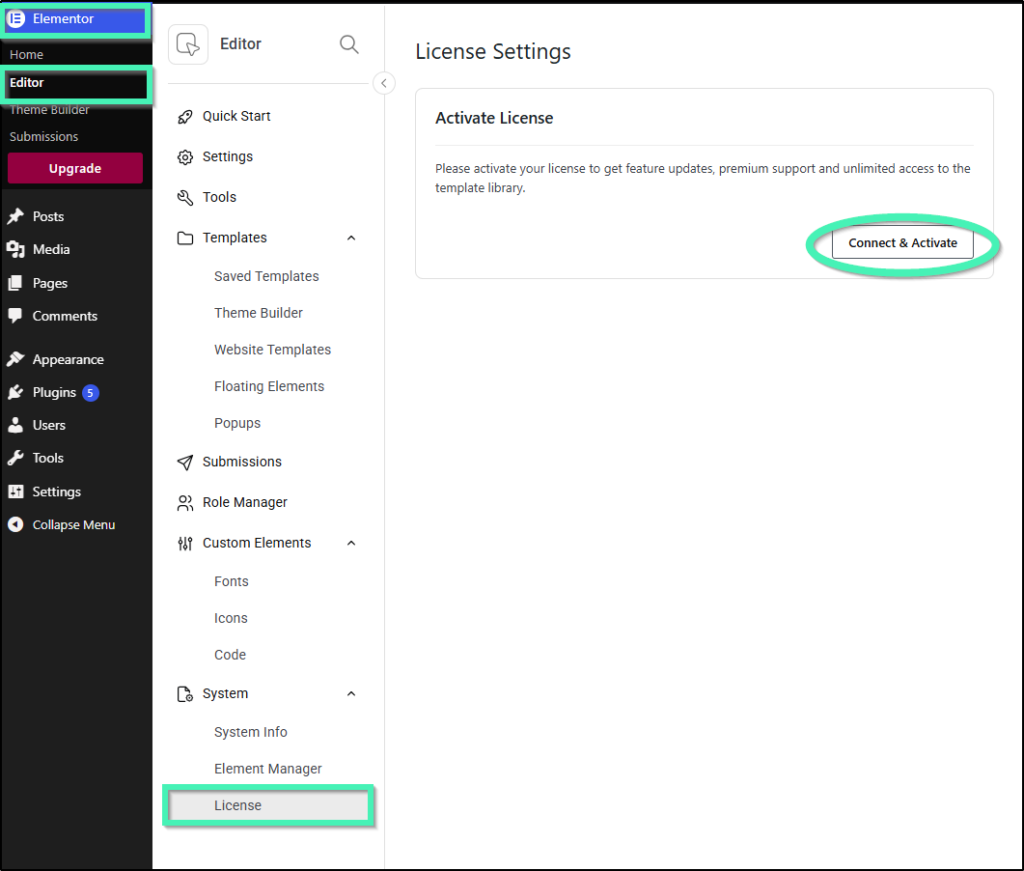
Navigate to Elementor > Editor > System > License in your WordPress dashboard.
-
Click Connect & Activate.
-
Log in with your Elementor account credentials if prompted.
-
Confirm the account pairing to unlock Pro widgets, theme builder capabilities, and premium templates.
How do you create your first page with Elementor?
Start your Elementor journey with some hands-on designing.
-
Go to Pages > Add New Page in your WordPress menu.
-
Add a title for your page in the standard editor.
-
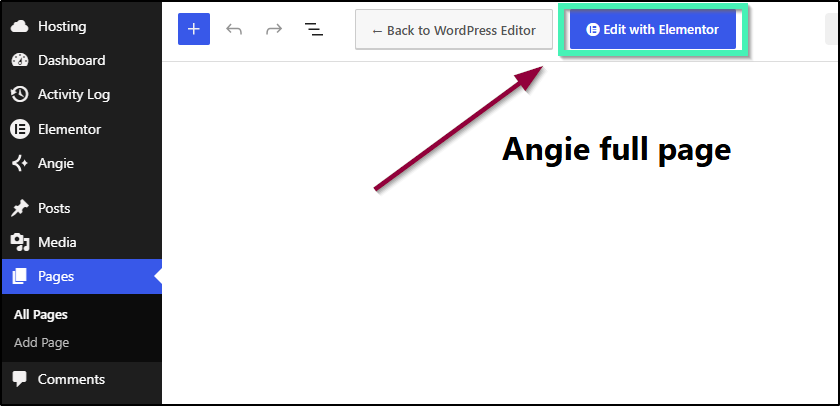
Click Edit with Elementor at the top of the screen to launch the visual builder.
-
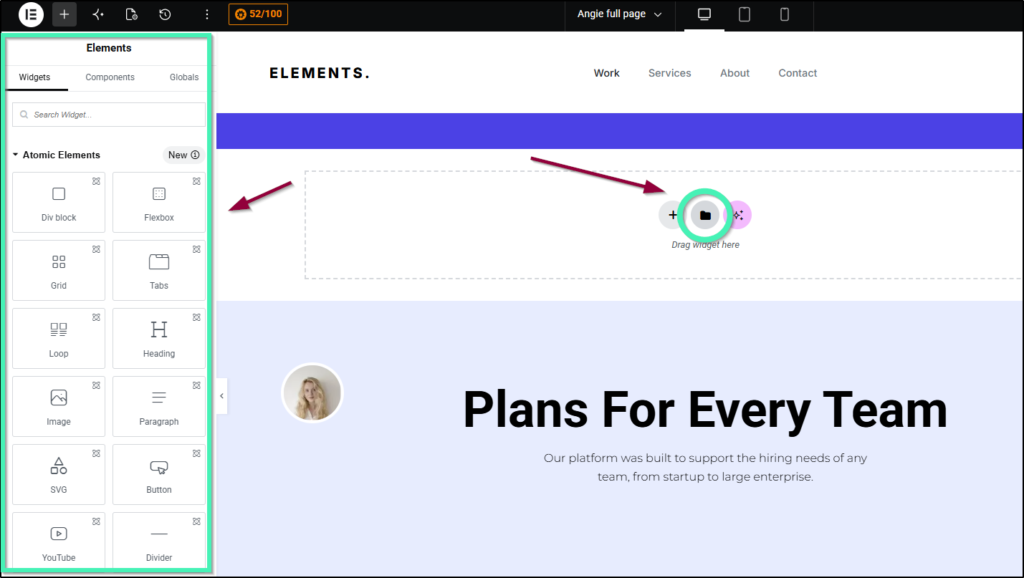
Drag widgets from the left sidebar onto your canvas, or click the Folder icon to insert a pre-designed template.
-
Click Publish to make your page live.