Web Accessibility installs an accessibility and usability widget on your website. When visitors click this widget, they are presented with a menu of options allowing them to customize your site for their needs.
Each section is organized by category. Visitors have the following customization options:
Text:
- Bigger text: Increases the size of your site’s text. Can help visually impaired visitors.
- Bigger line height: Increases the amount of space between the lines of text on your site. Can help visually impaired visitors.
- Text align: Allow visitors to align your site’s text to the right, left or center of the page. This can help visitors with cognitive issues or those with dyslexia.
- Readable font: Changes the font of your website to one that is more readable. This helps dyslexic visitors.
Visual:
- Grayscale: Turns the colors in your site to shades of black and white. This makes the site more readable for color blind visitors.
- Contrast: Uses a slider to adjust between different contrast modes: Negative, High, Light, and Dark Contrast. Helps color blind and visually impaired visitors.
- Hide images: Hides the images on a page to reduce distractions and make the page more readable. Helps visitors with attention deficit disorders.
- Pause animations: Prevents animations from running on a page and helps users focus on content. This makes reading the page easier for visitors suffering from an attention deficit disorder or those with cognitive issues.
Orientation:
- Highlight links: Underlines all links on the page to make them more visible. Helps visually impaired visitors and those with cognitive disabilities.
- Reading mask: Makes the cursor bigger or turns it into a reading guide that focuses on selected elements. This helps vision impaired visitors or those with reading disabilities.
- Page Structure: Displays header and links in a structured list. This helps screen readers navigate the page.
- Outline focus: Enhanced focus outline for better keyboard navigation and visual clarity, improving the overall accessibility experience.
Other capabilities:
- Skip to content link: Users have the option to change the content ID for the “Skip to Content” link to fit their site’s structure. This enables visitors to quickly navigate to the main content.
- Sitemap URL: Edit the sitemap link to enhance site structure visibility for the visitor.
- (Paid plans only) Screen Reader: Gives visitors the opportunity to have the content read to them.
- (Paid plans only) Logo Toggle: Toggle on to hide the Elementor logo in the accessibility menu.
Site owner options
As site owner, you have a number of options regarding the appearance, color, size color and placement of the icon.
Customize the appearance of the Web Accessibility icon
You can change the appearance of the Web Accessibility icon to fit your design.
To change the placement of the Web Accessibility icon:
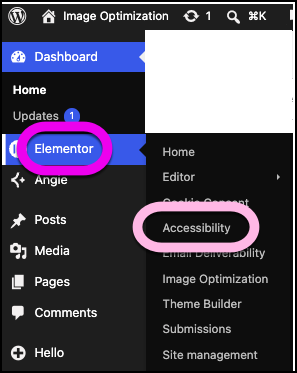
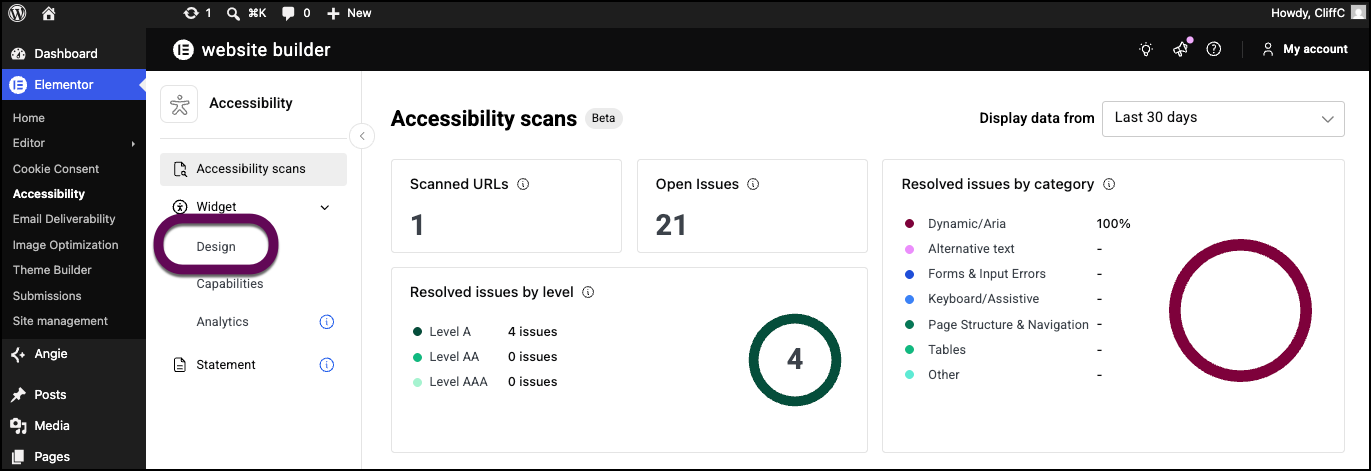
- From WP Admin, navigate to Elementor>Accessibility.
- In the left panel, click Design.
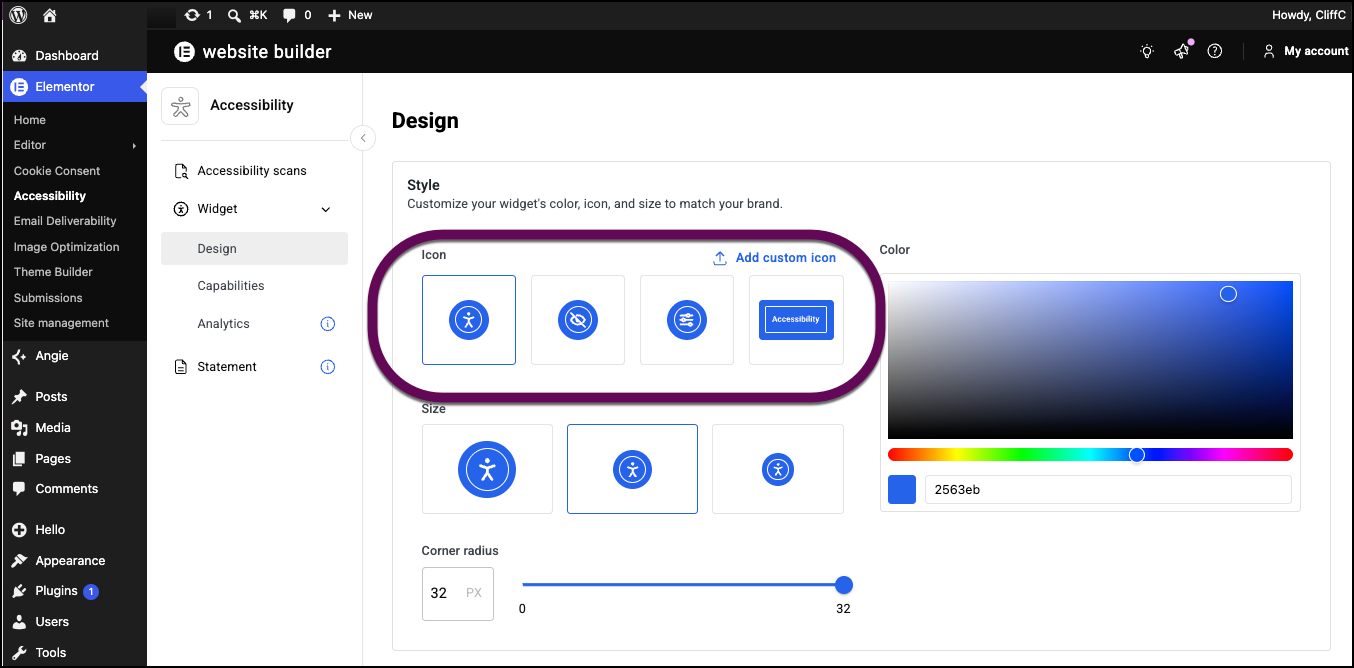
You can format the accessibility button with the following options:- Add your own accessibility icon by clicking Add custom icon and uploading an SVG file.
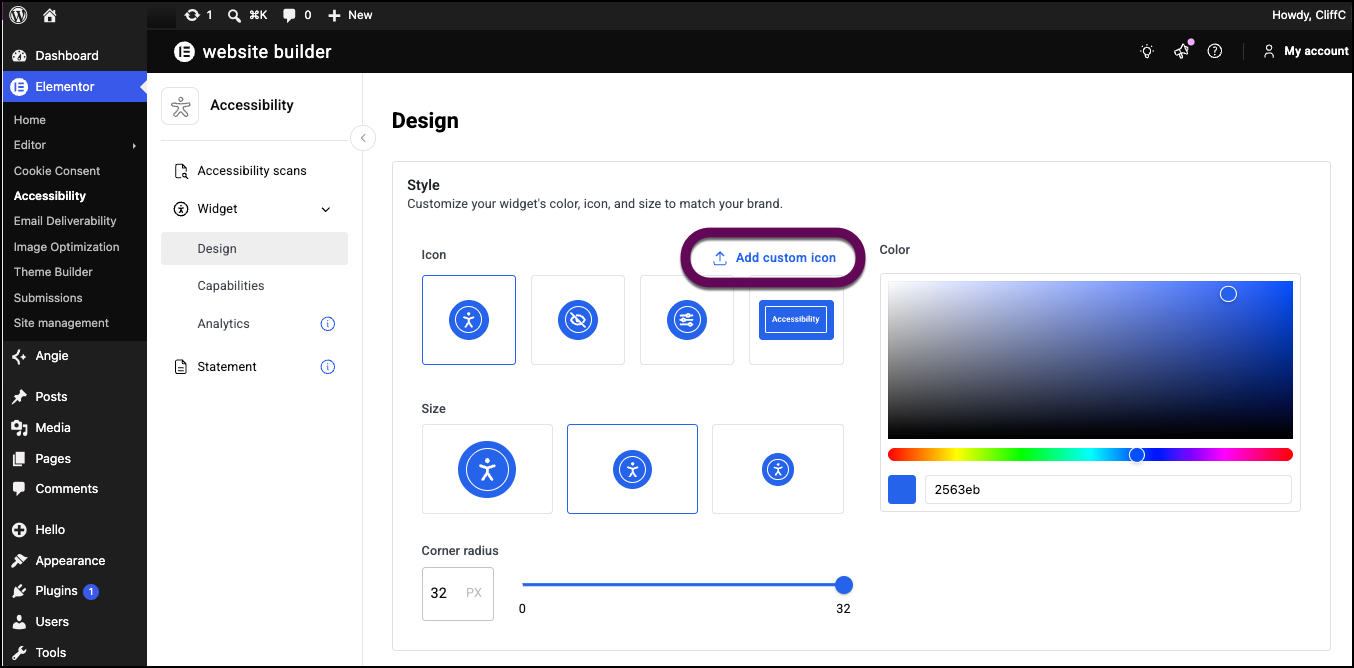
- Change the appearance of the accessibility icon appearing on your pages by selecting one of the Icon options.
- Change the size of the icon by selecting one of the size options.
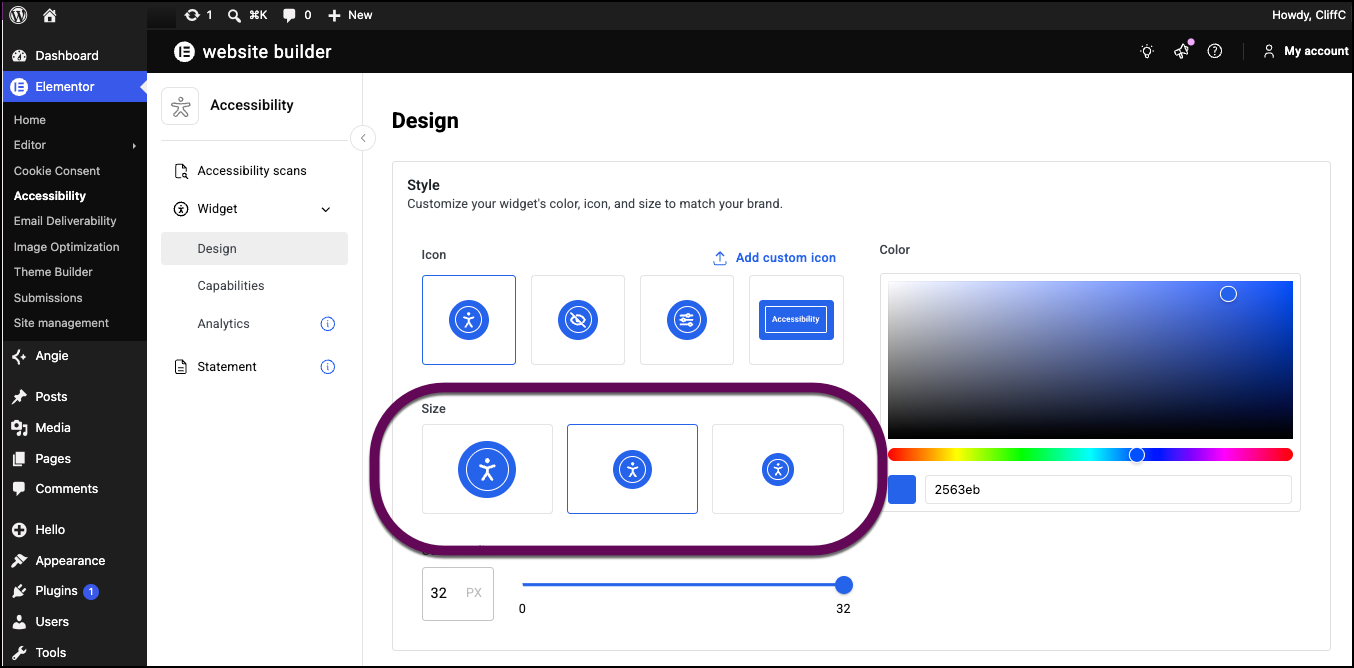
- Use the Corner radius slider to round the corners of the icon.
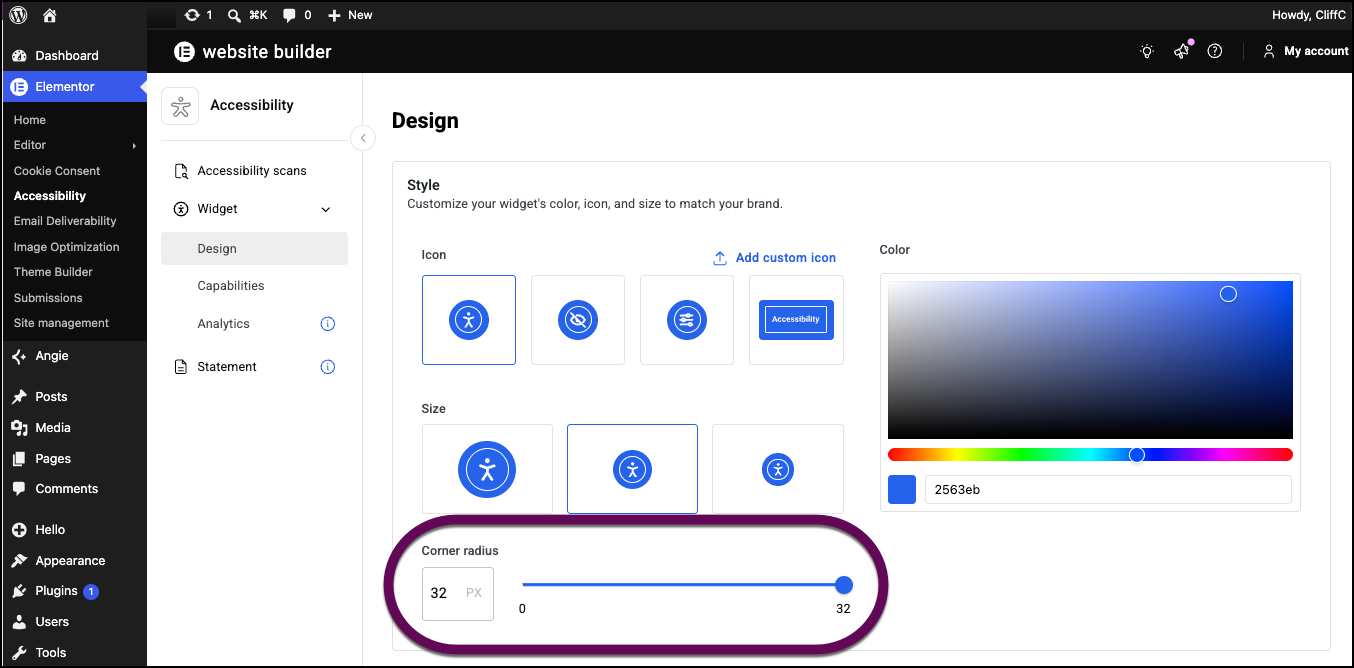
- Change the color of the icon with the color picker. For details, see Pick a color.
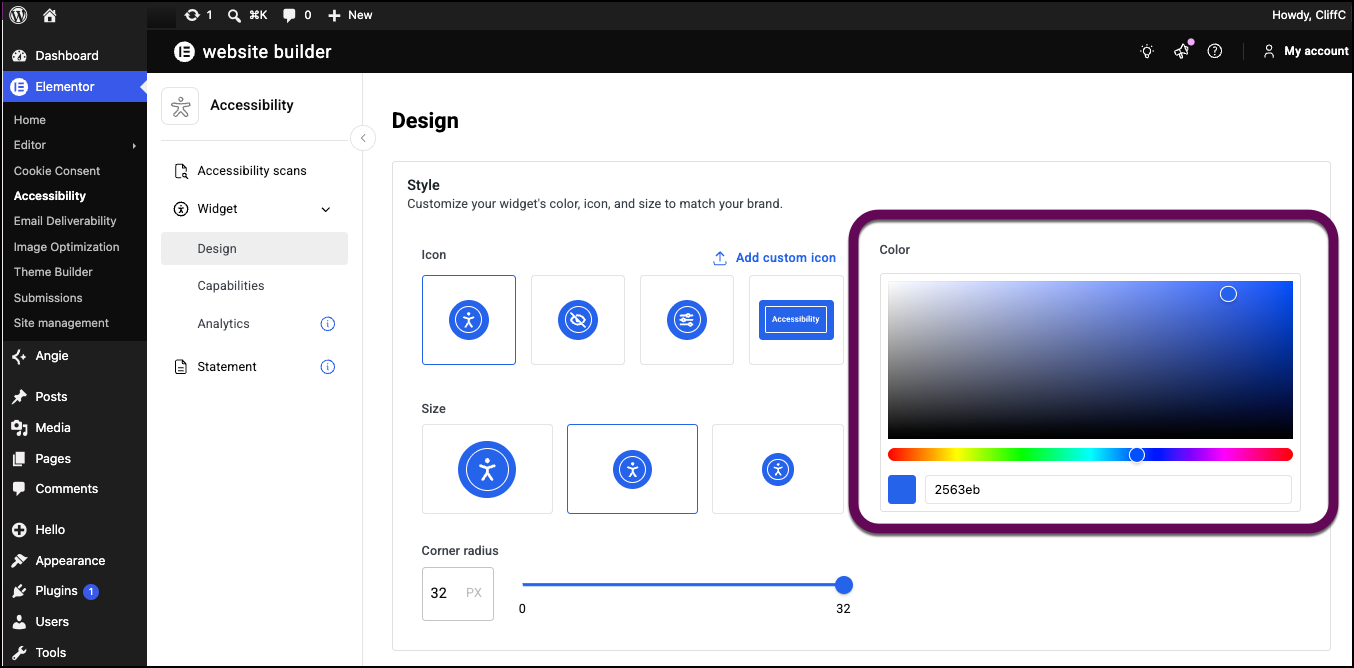
- Add your own accessibility icon by clicking Add custom icon and uploading an SVG file.
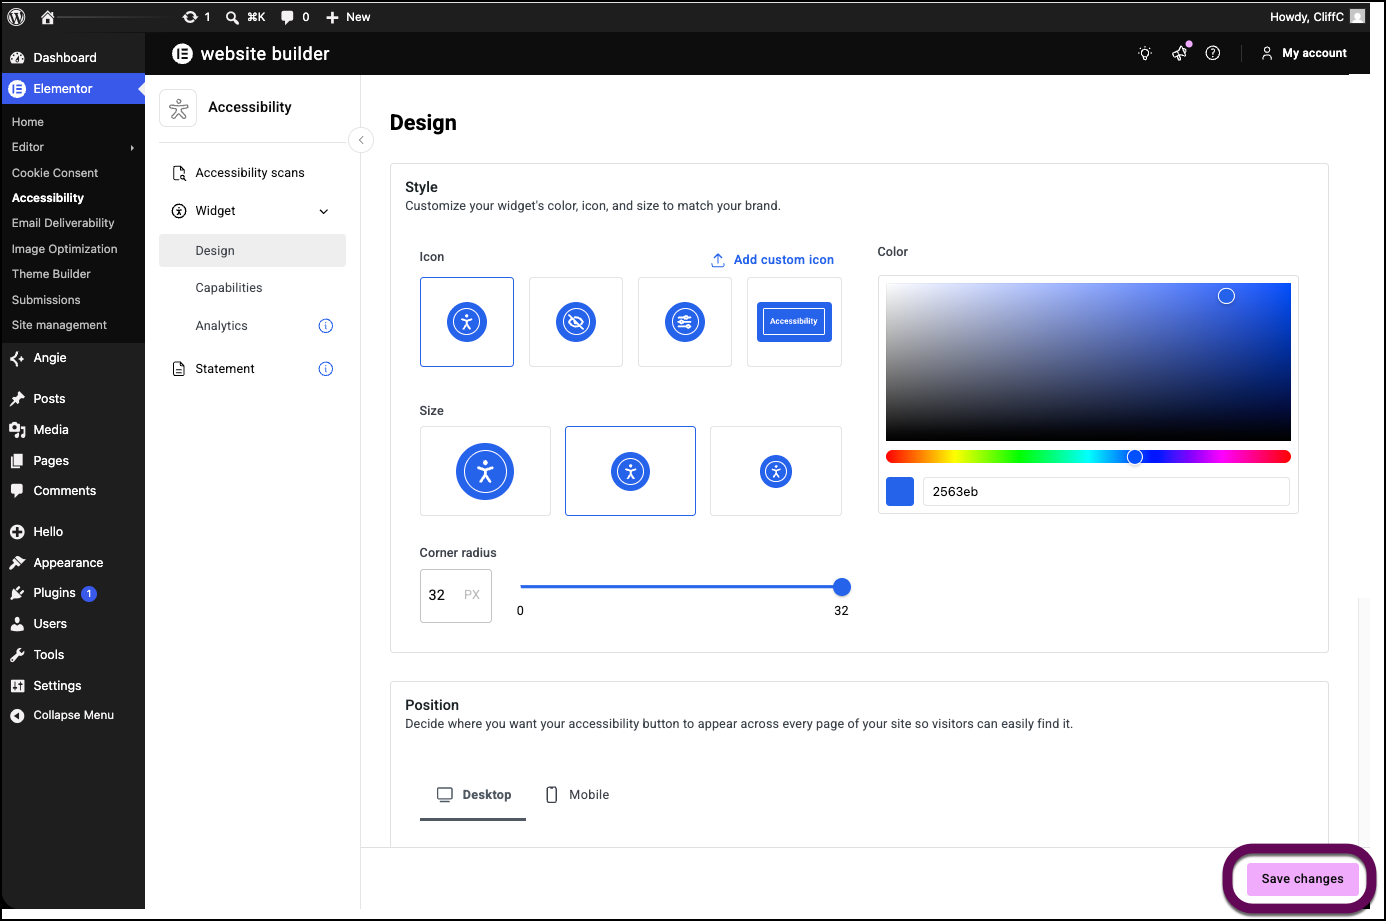
- When finished, scroll down to the bottom of the page and click Save changes.
Customize the position of the icon
You can change the position of the accessibility icon to fit your design.
To change the placing of the icon:
- From WP Admin, navigate to Elementor>Accessibility.
- In the left panel, click Design.
- Scroll down to the Position section.
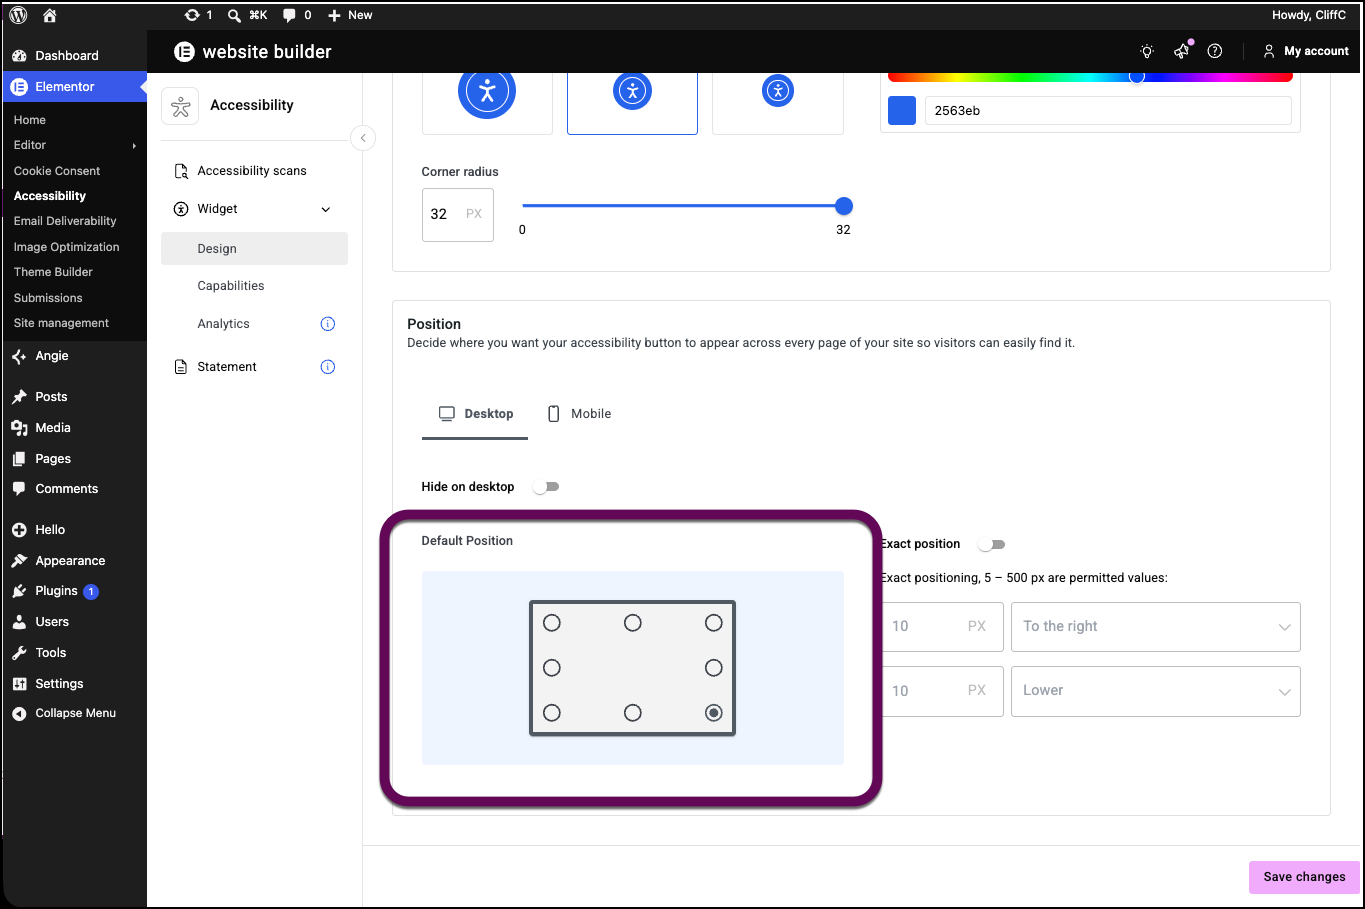
- Select either Desktop or Mobile to design for a particular device.
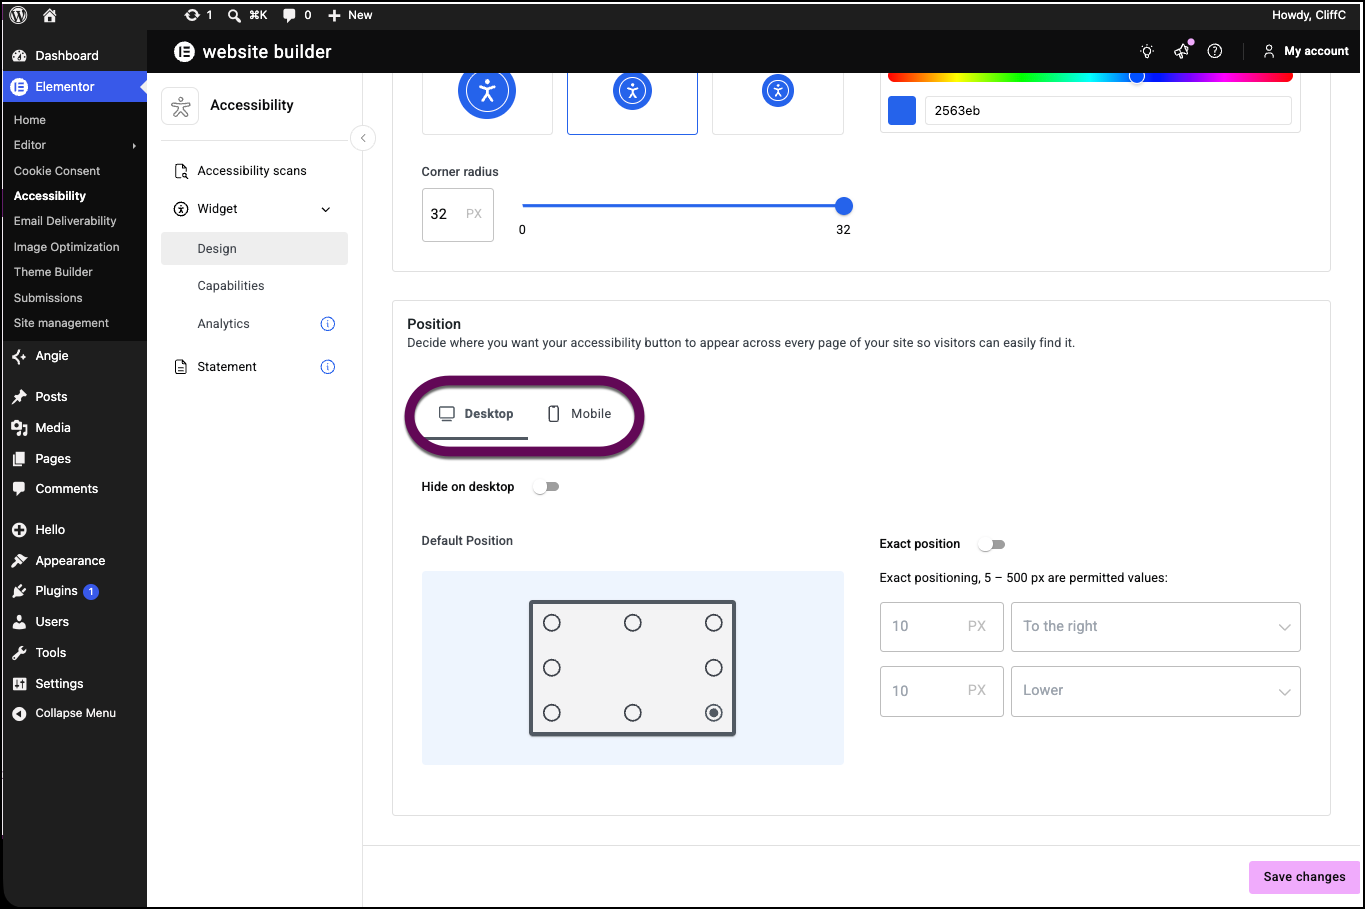
- Toggle Hide on desktop to on if you do not want the icon to appear when visitor are using a PC as opposed to a mobile.

- In the Default position section, click one of the eight positions to determine where the icon will appear.
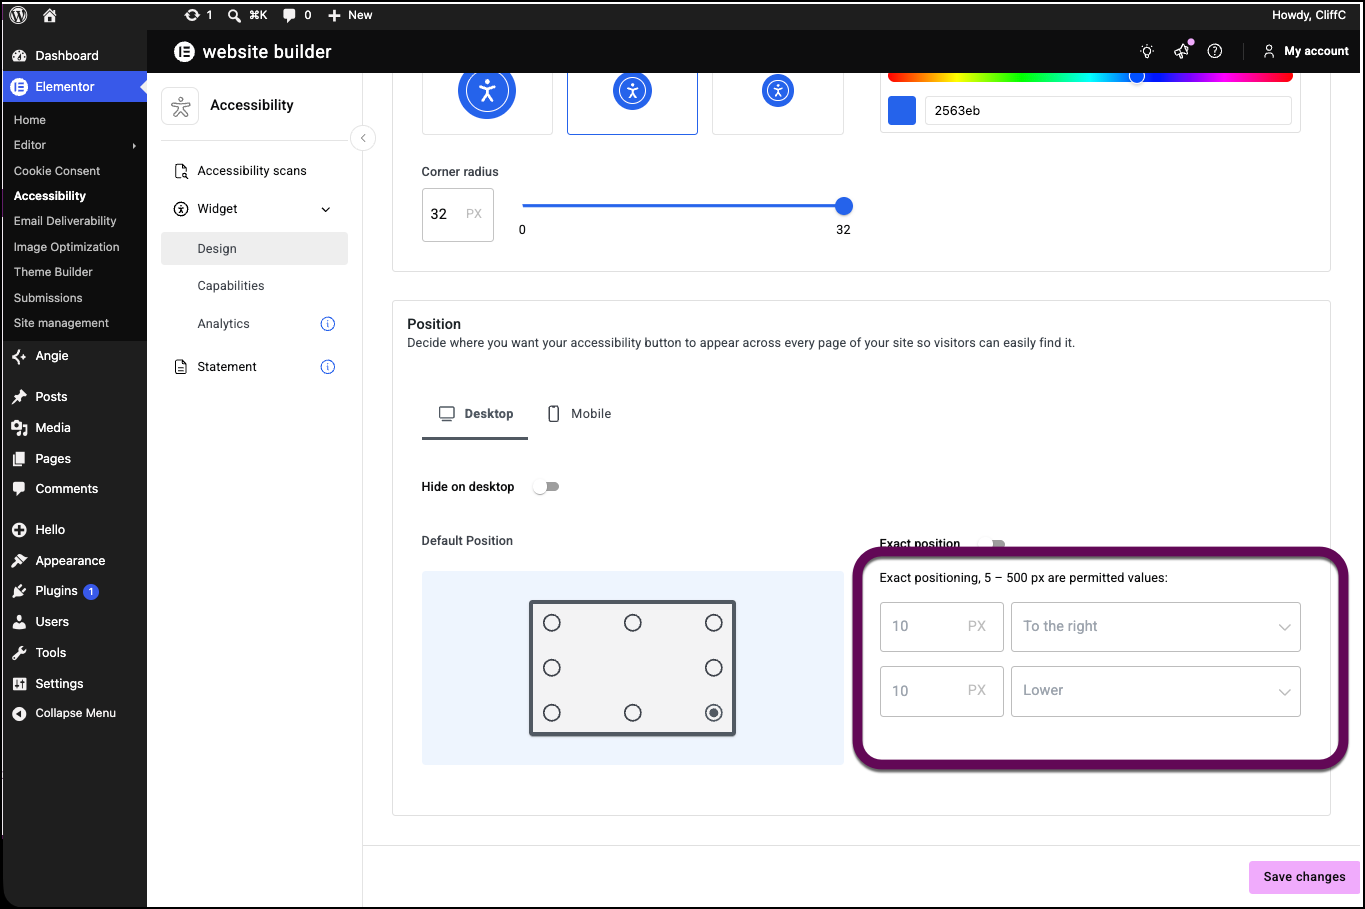
- Toggle Exact position on, if you want to fine-tune the icon’s position.
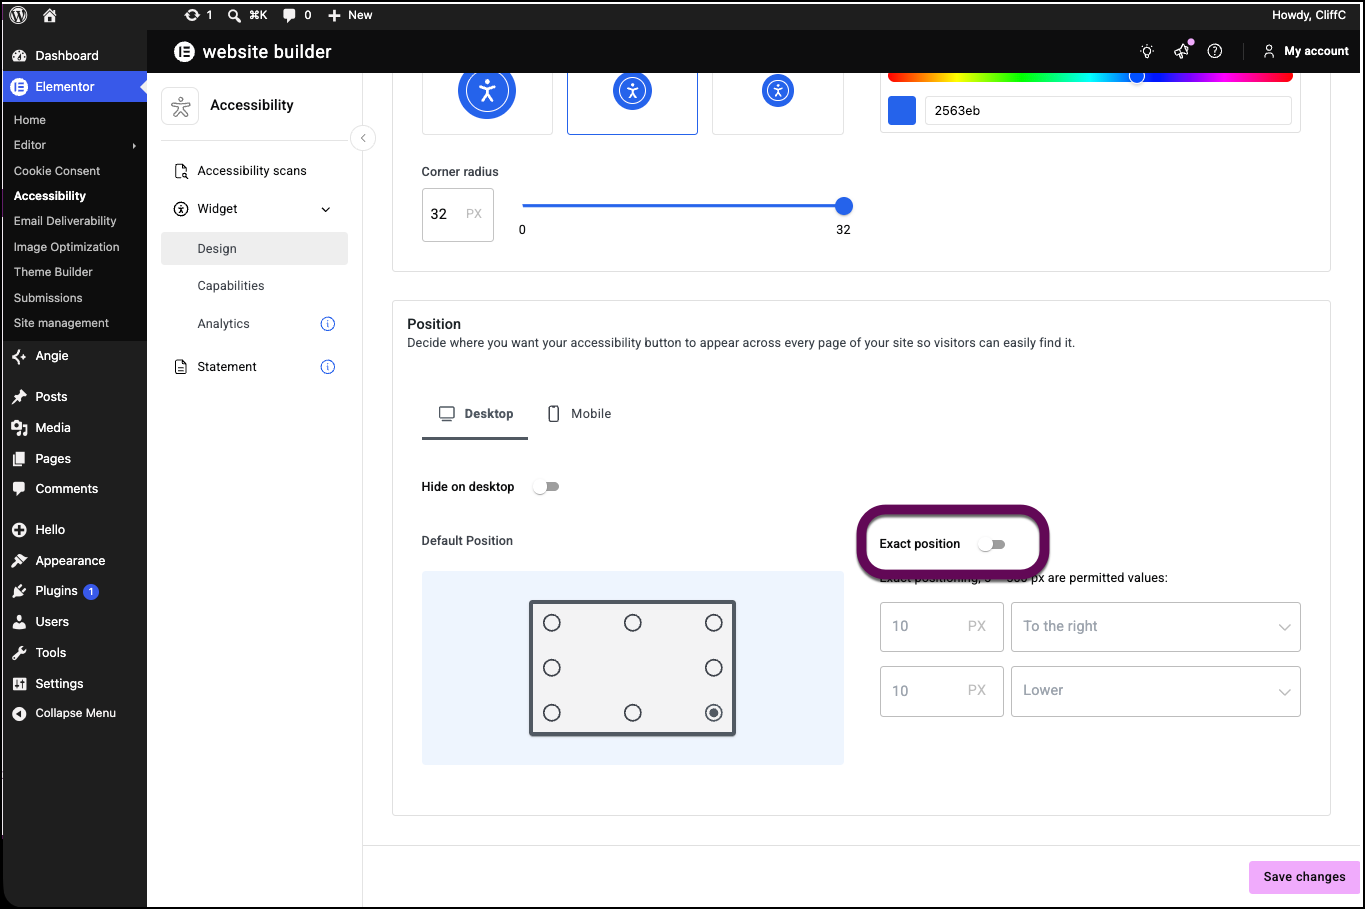
- Use the text boxes and dropdown menus to exactly position the icon.
- When finished, click Save Changes.
Customize the options available to visitors
You have the option of limiting what optimizations visitors can implement on your site. For instance, you can prevent visitors from adjusting the text size.
To customize the available options:
- From WP Admin, navigate to Elementor>Accessibility.
- In the left panel, click Capabilities.
- In the left panel, click Capabilities.
This brings up the capabilities options.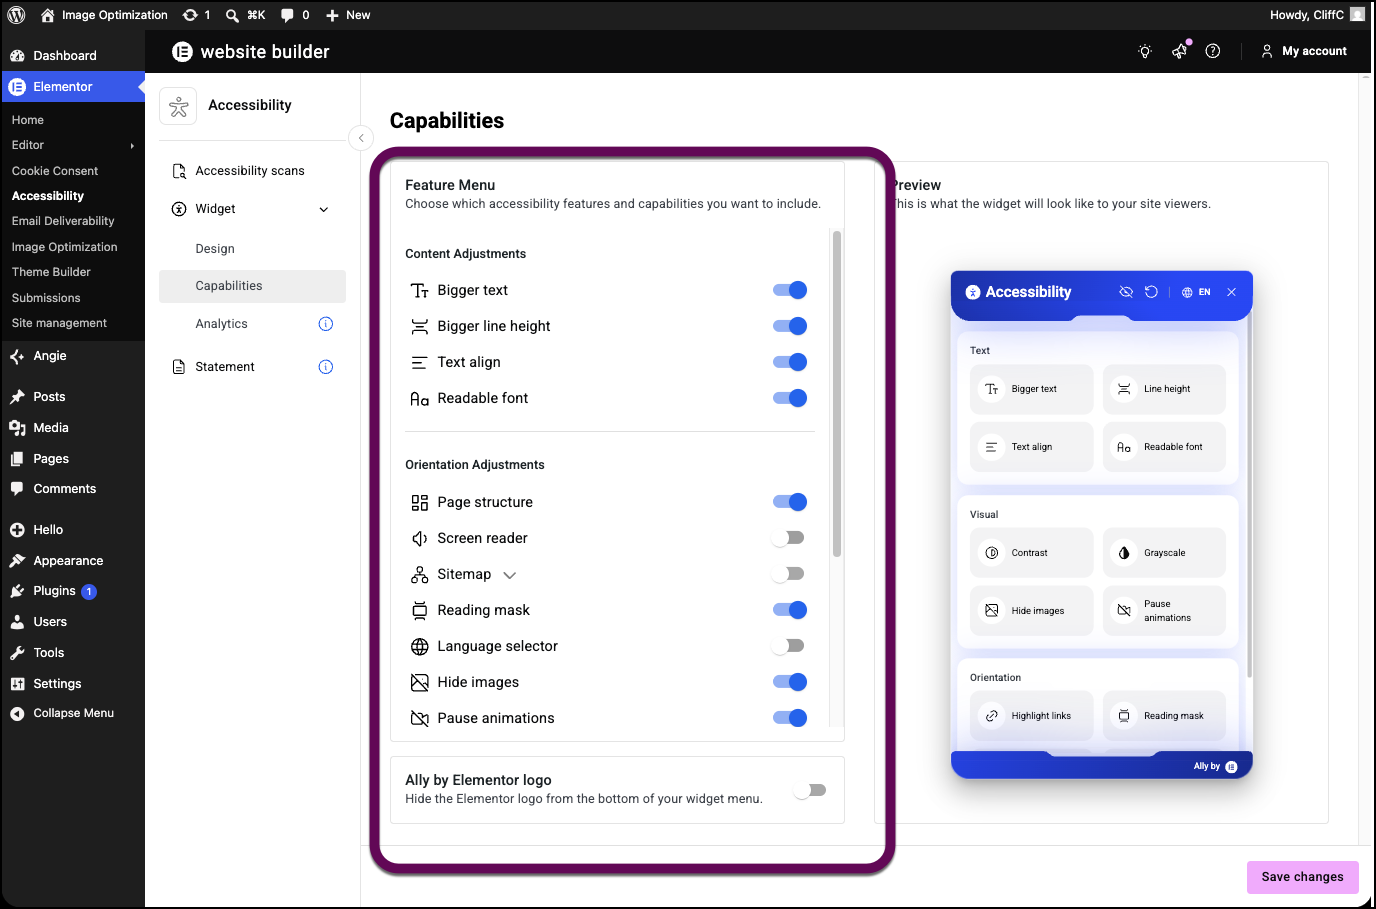
- Use the toggles in the Feature Menu to turn options on and off. Options that are turned off will not appear in the accessibility menu presented to visitors.NoteYou must have at least two options activated.
The Preview section shows you how the accessibility menu will appear on your site.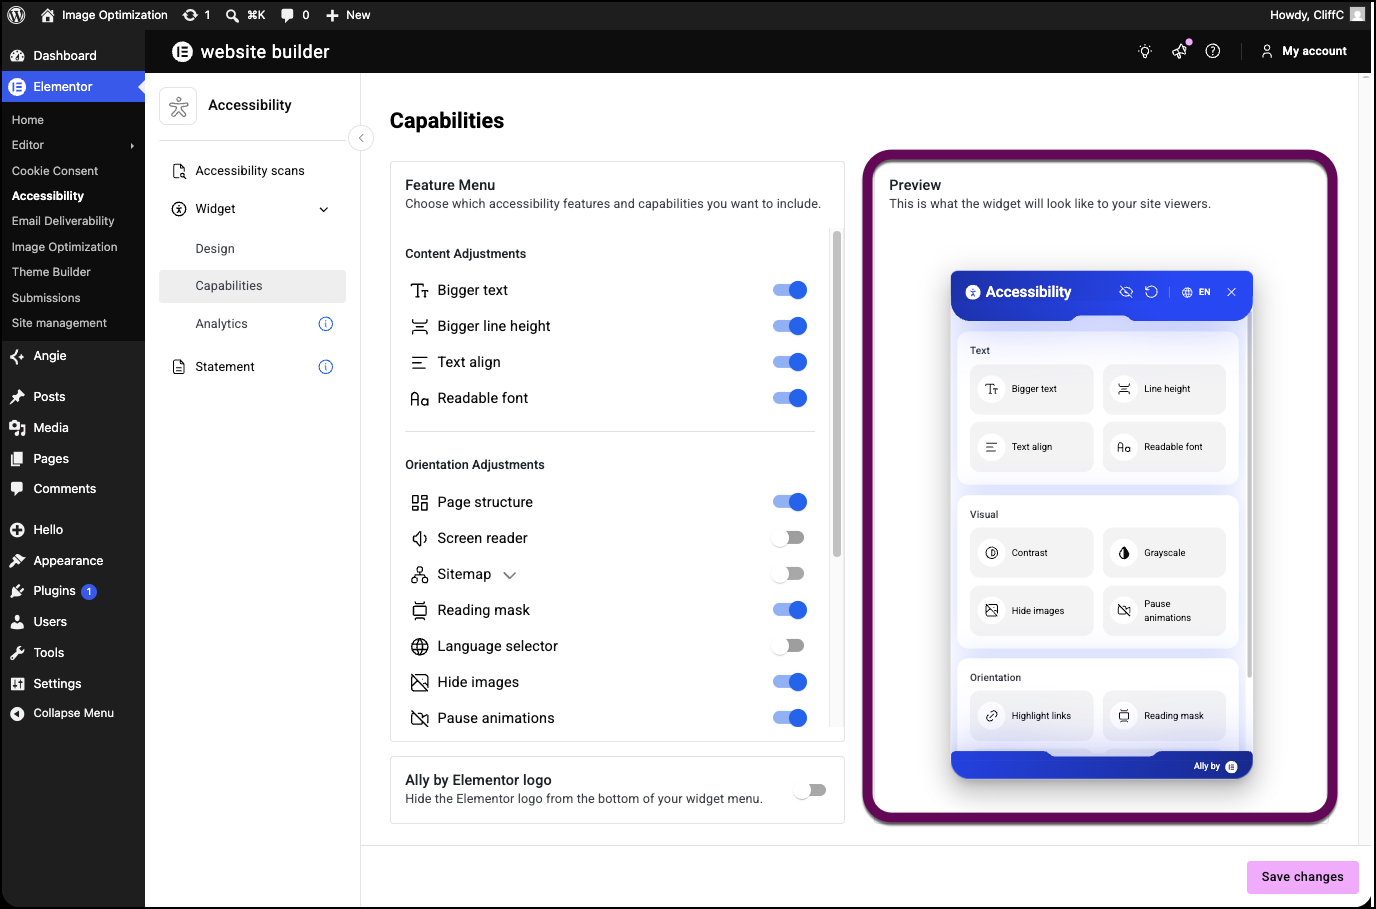
- Once you’ve finished selecting options, click Save changes.

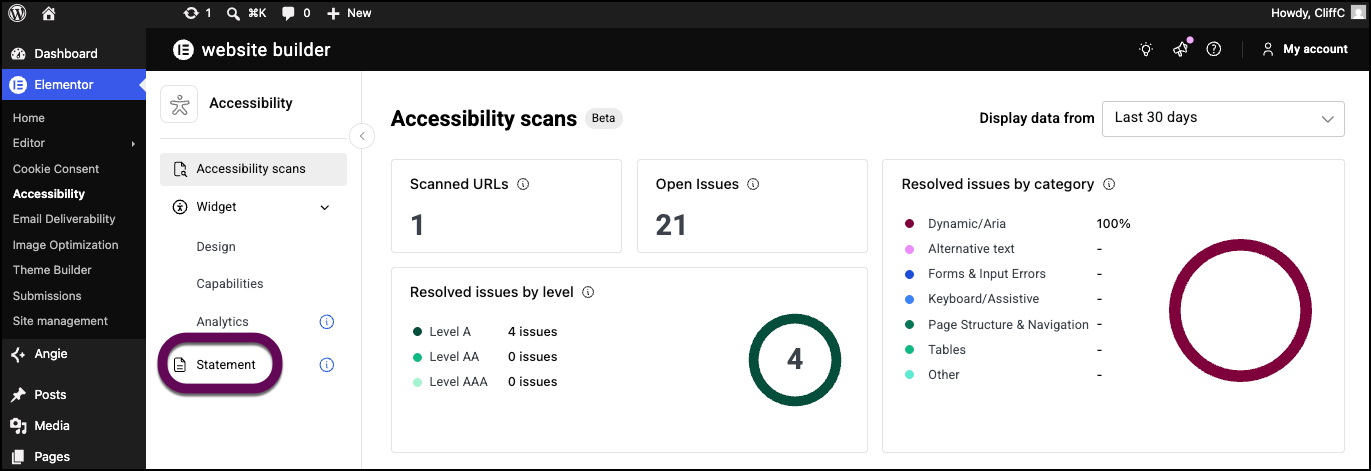
Create your Accessibility Statement
Web Accessibility also helps you create and include an accessibility statement for your site. To learn more about these statements, see What are web accessibility statements?
To create a Web Accessibility Statement:
- From WP Admin, navigate to Elementor>Accessibility.
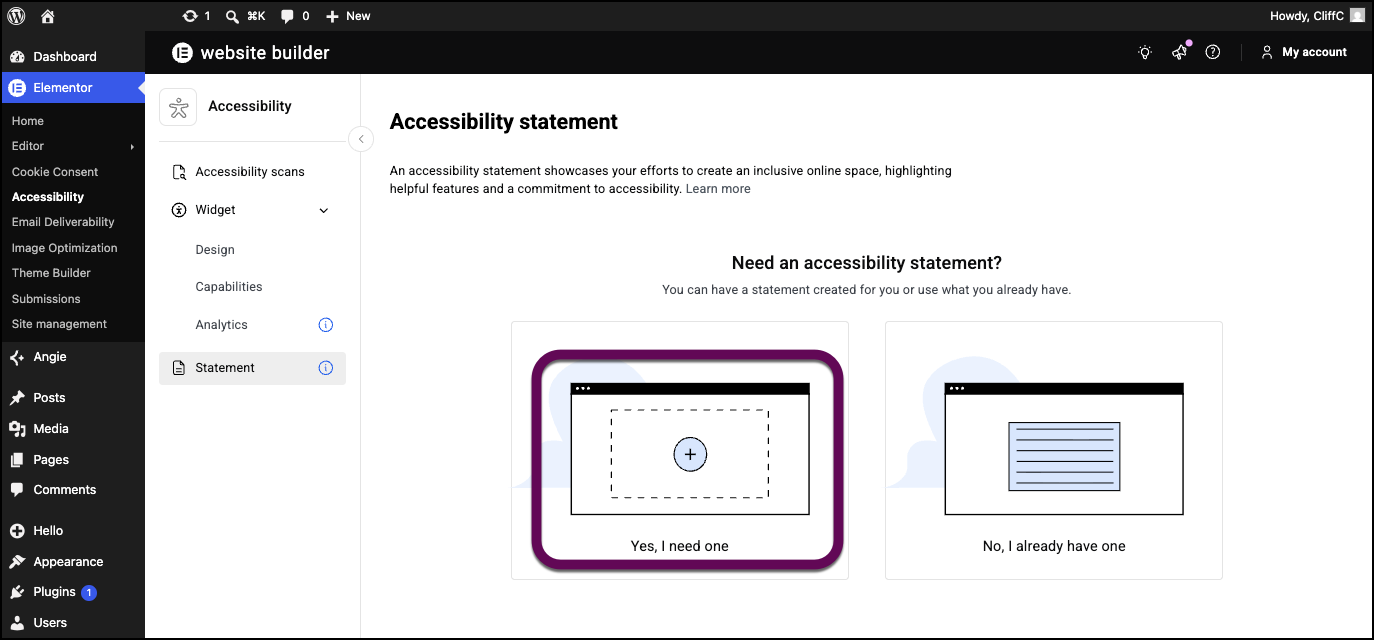
- In the left panel, click Statement.
If you want to automatically generate your statement.
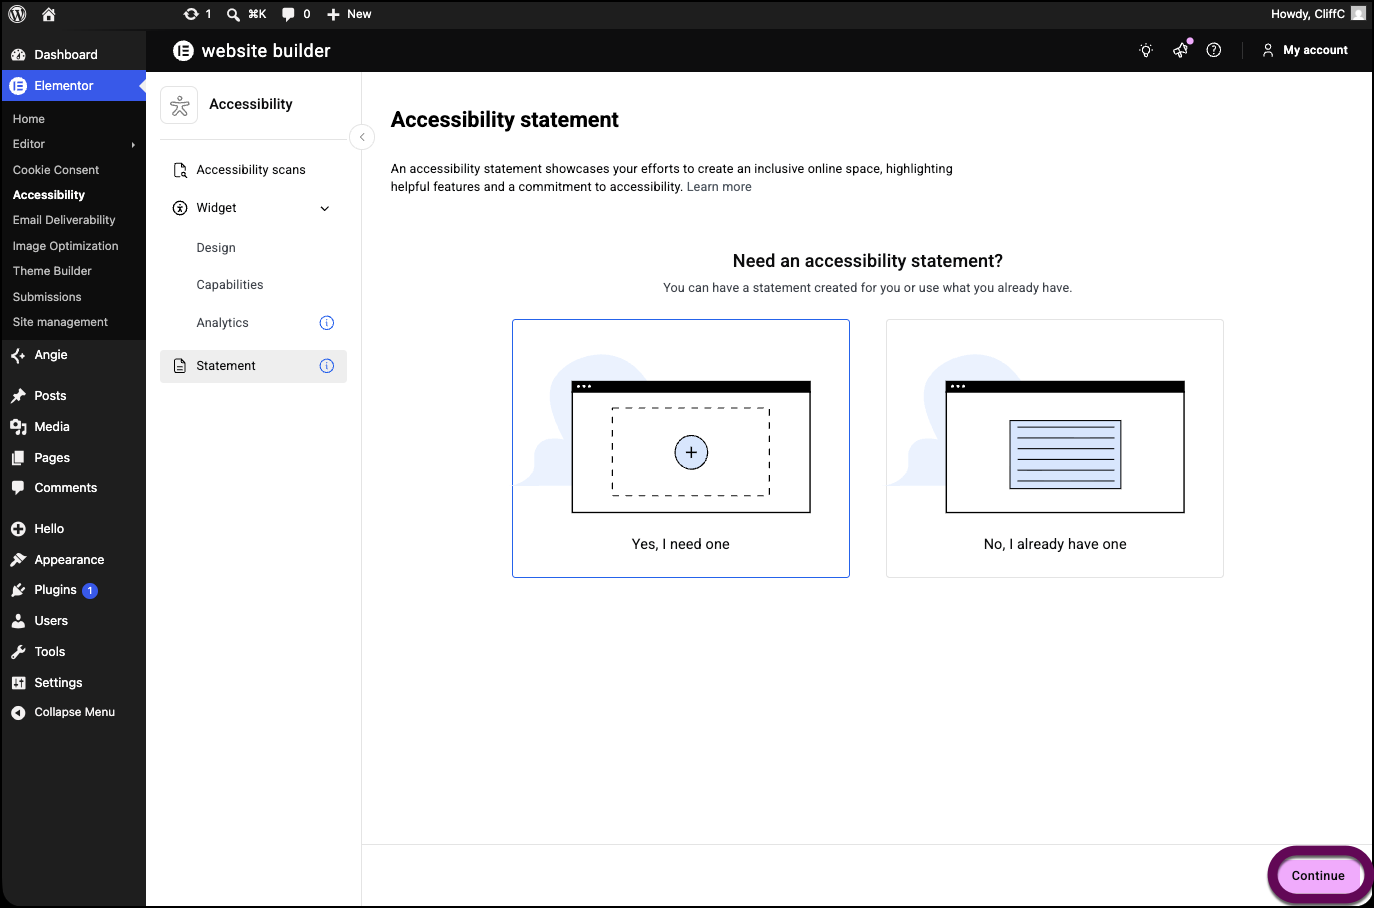
- Click Yes, I need one.
This will start the process of creating a statement. - Click Continue.
- Use the text boxes to fill in the website owner’s:
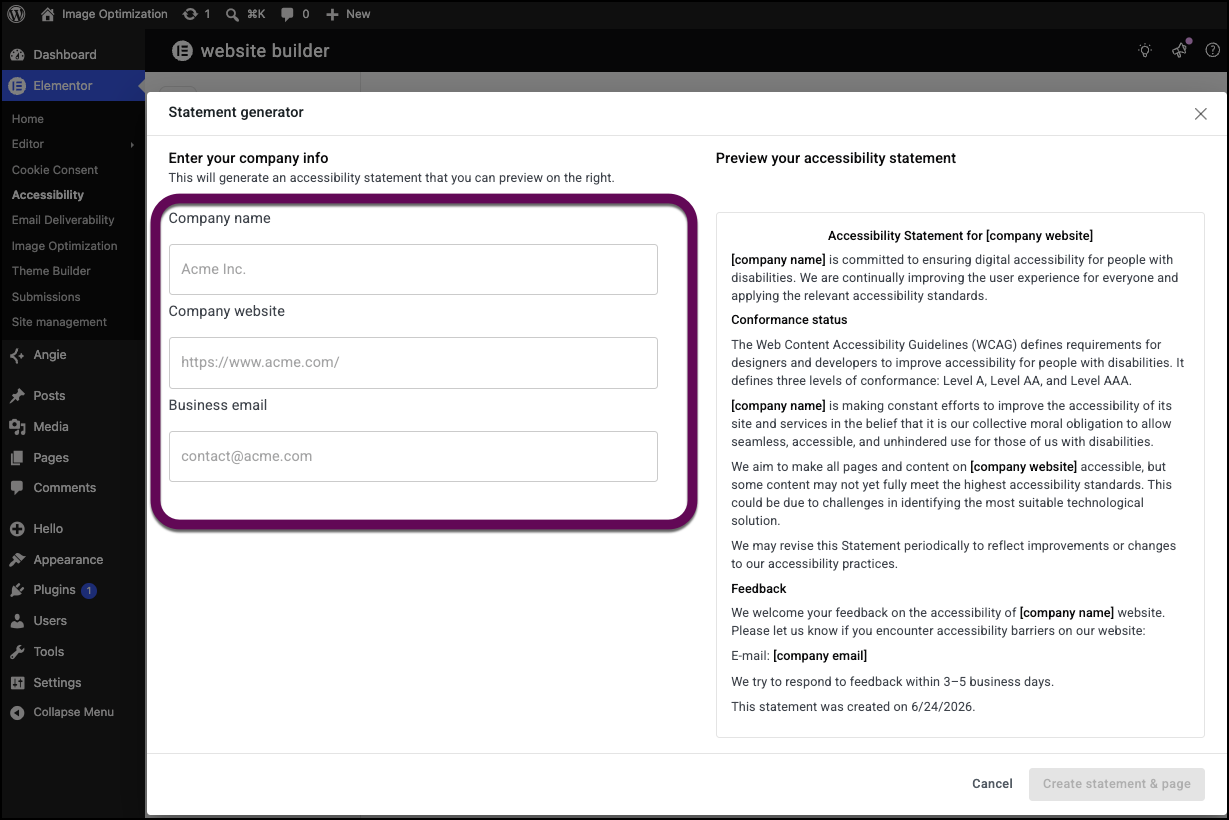
- Company name
- Company website address/URL
- Company contact information
- Preview the statement generated by Web Accessibility.
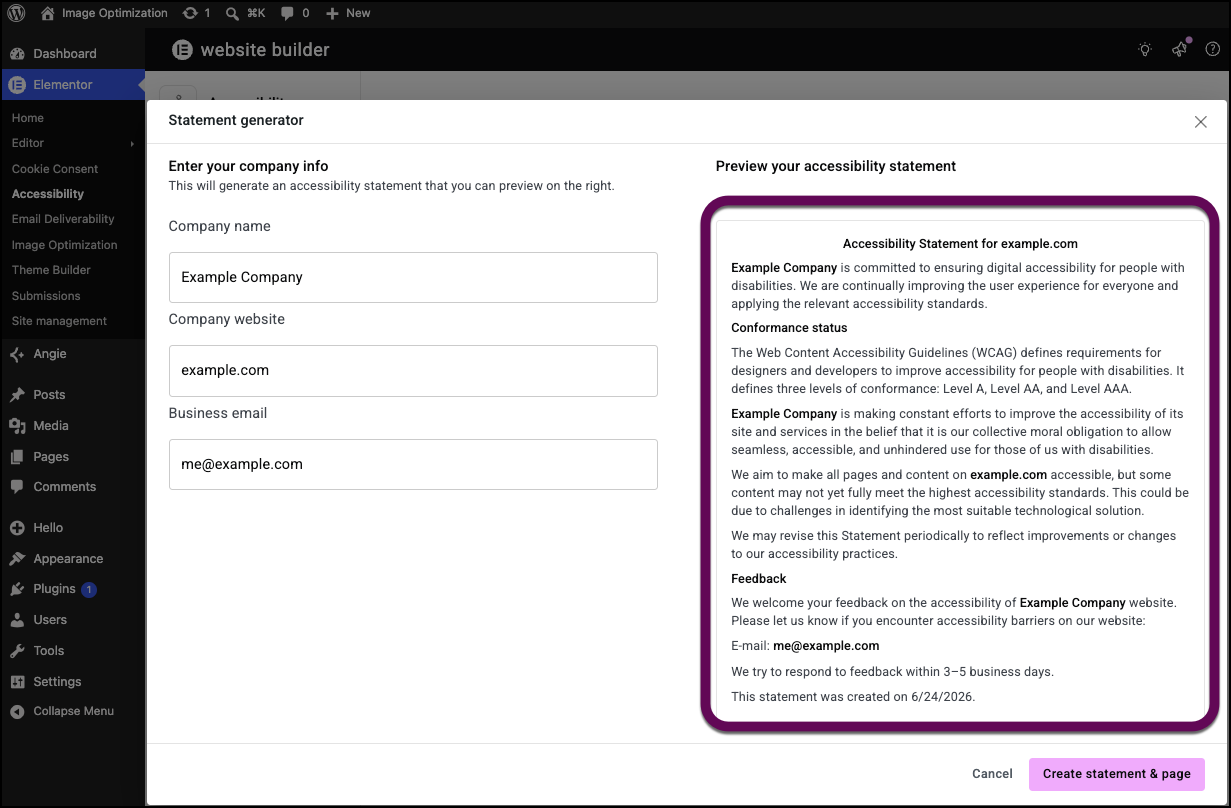
- Click Create statement and page.
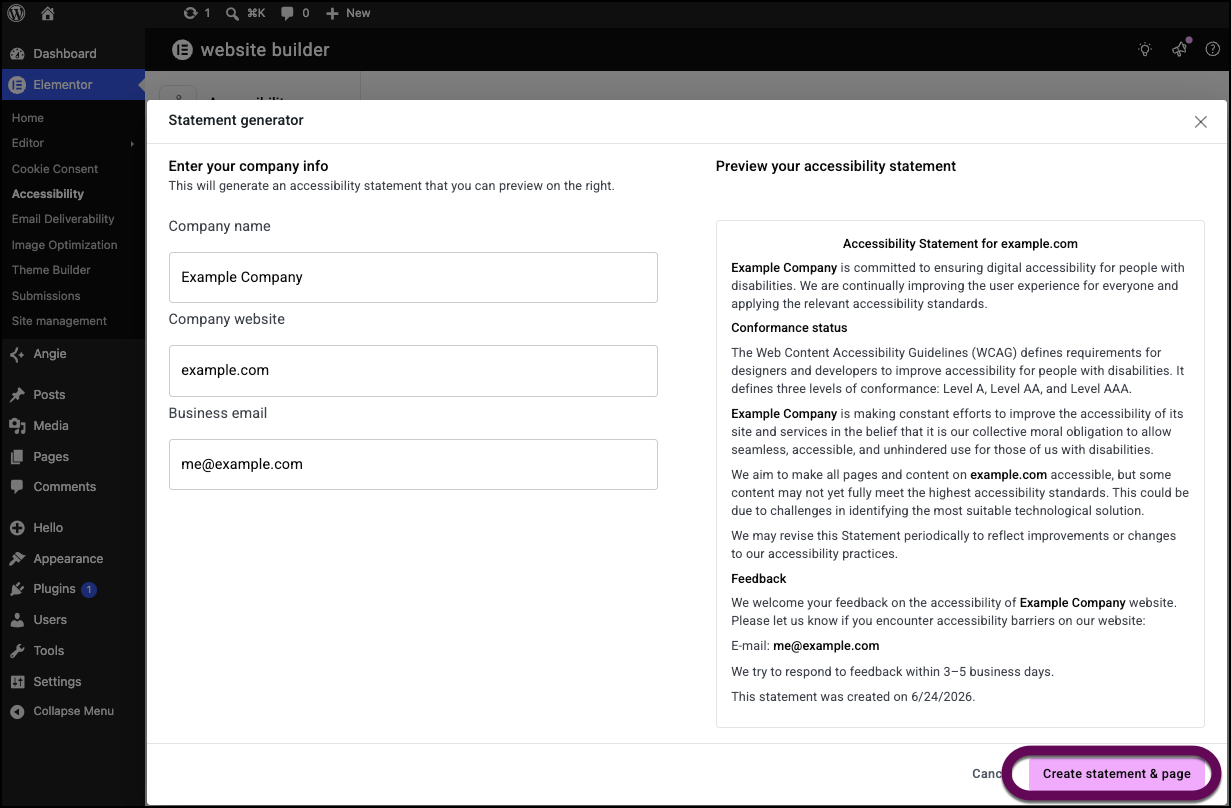
Web Accessibility will generate a standard website accessibility statement, which visitors will be able to access from the accessibility menu.
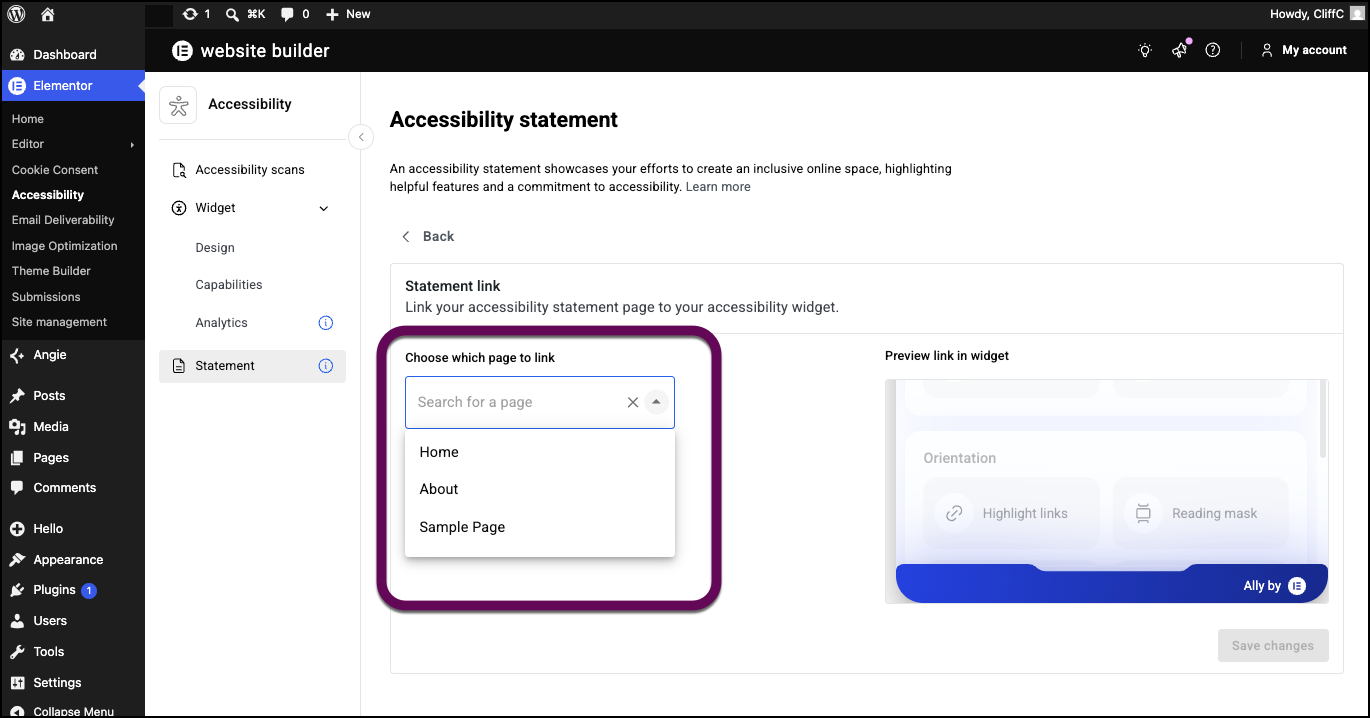
If you have your own accessibility statement.
- Click No I already have one.

This starts the process of adding your statement to the site. - Click Continue.

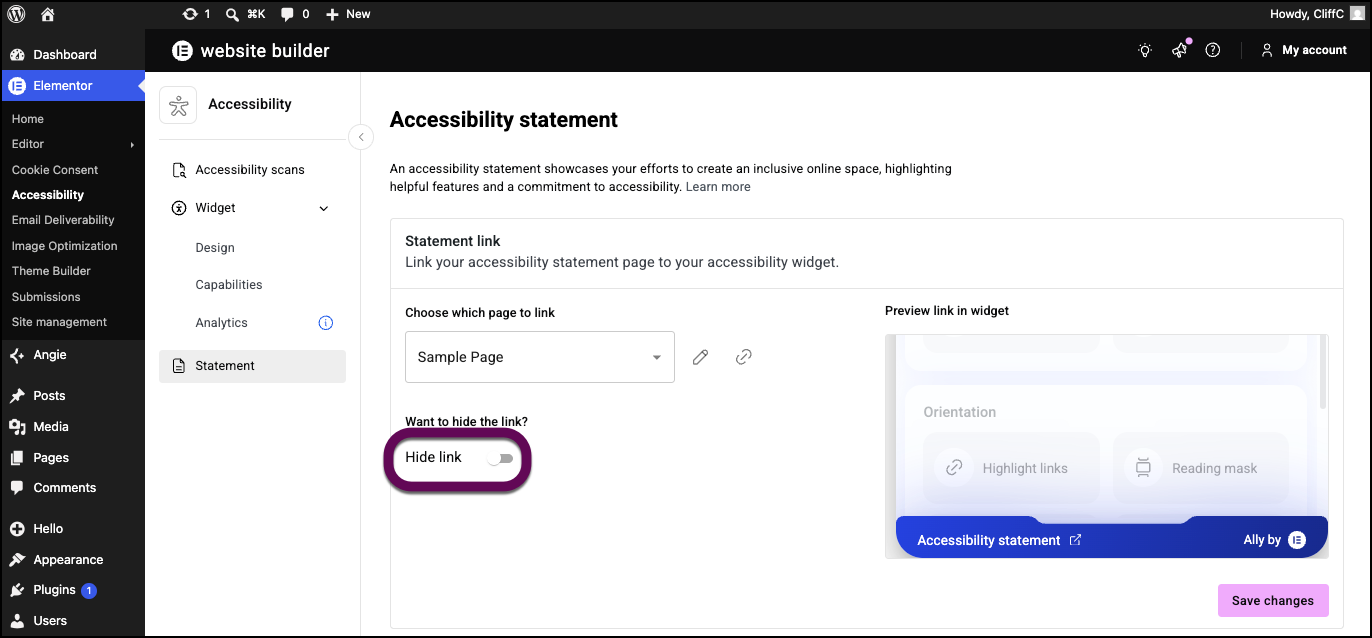
- Use the dropdown menu to select the page name of your website accessibility statement.NoteYour website accessibility statement must be a webpage.
- Click Save Changes.

- (Optional) If you don’t want visitors to access the statement from the accessibility menu, toggle Hide link to yes.
Visitors will be able to access the statement by clicking Accessibility statement from the Accessibility menu.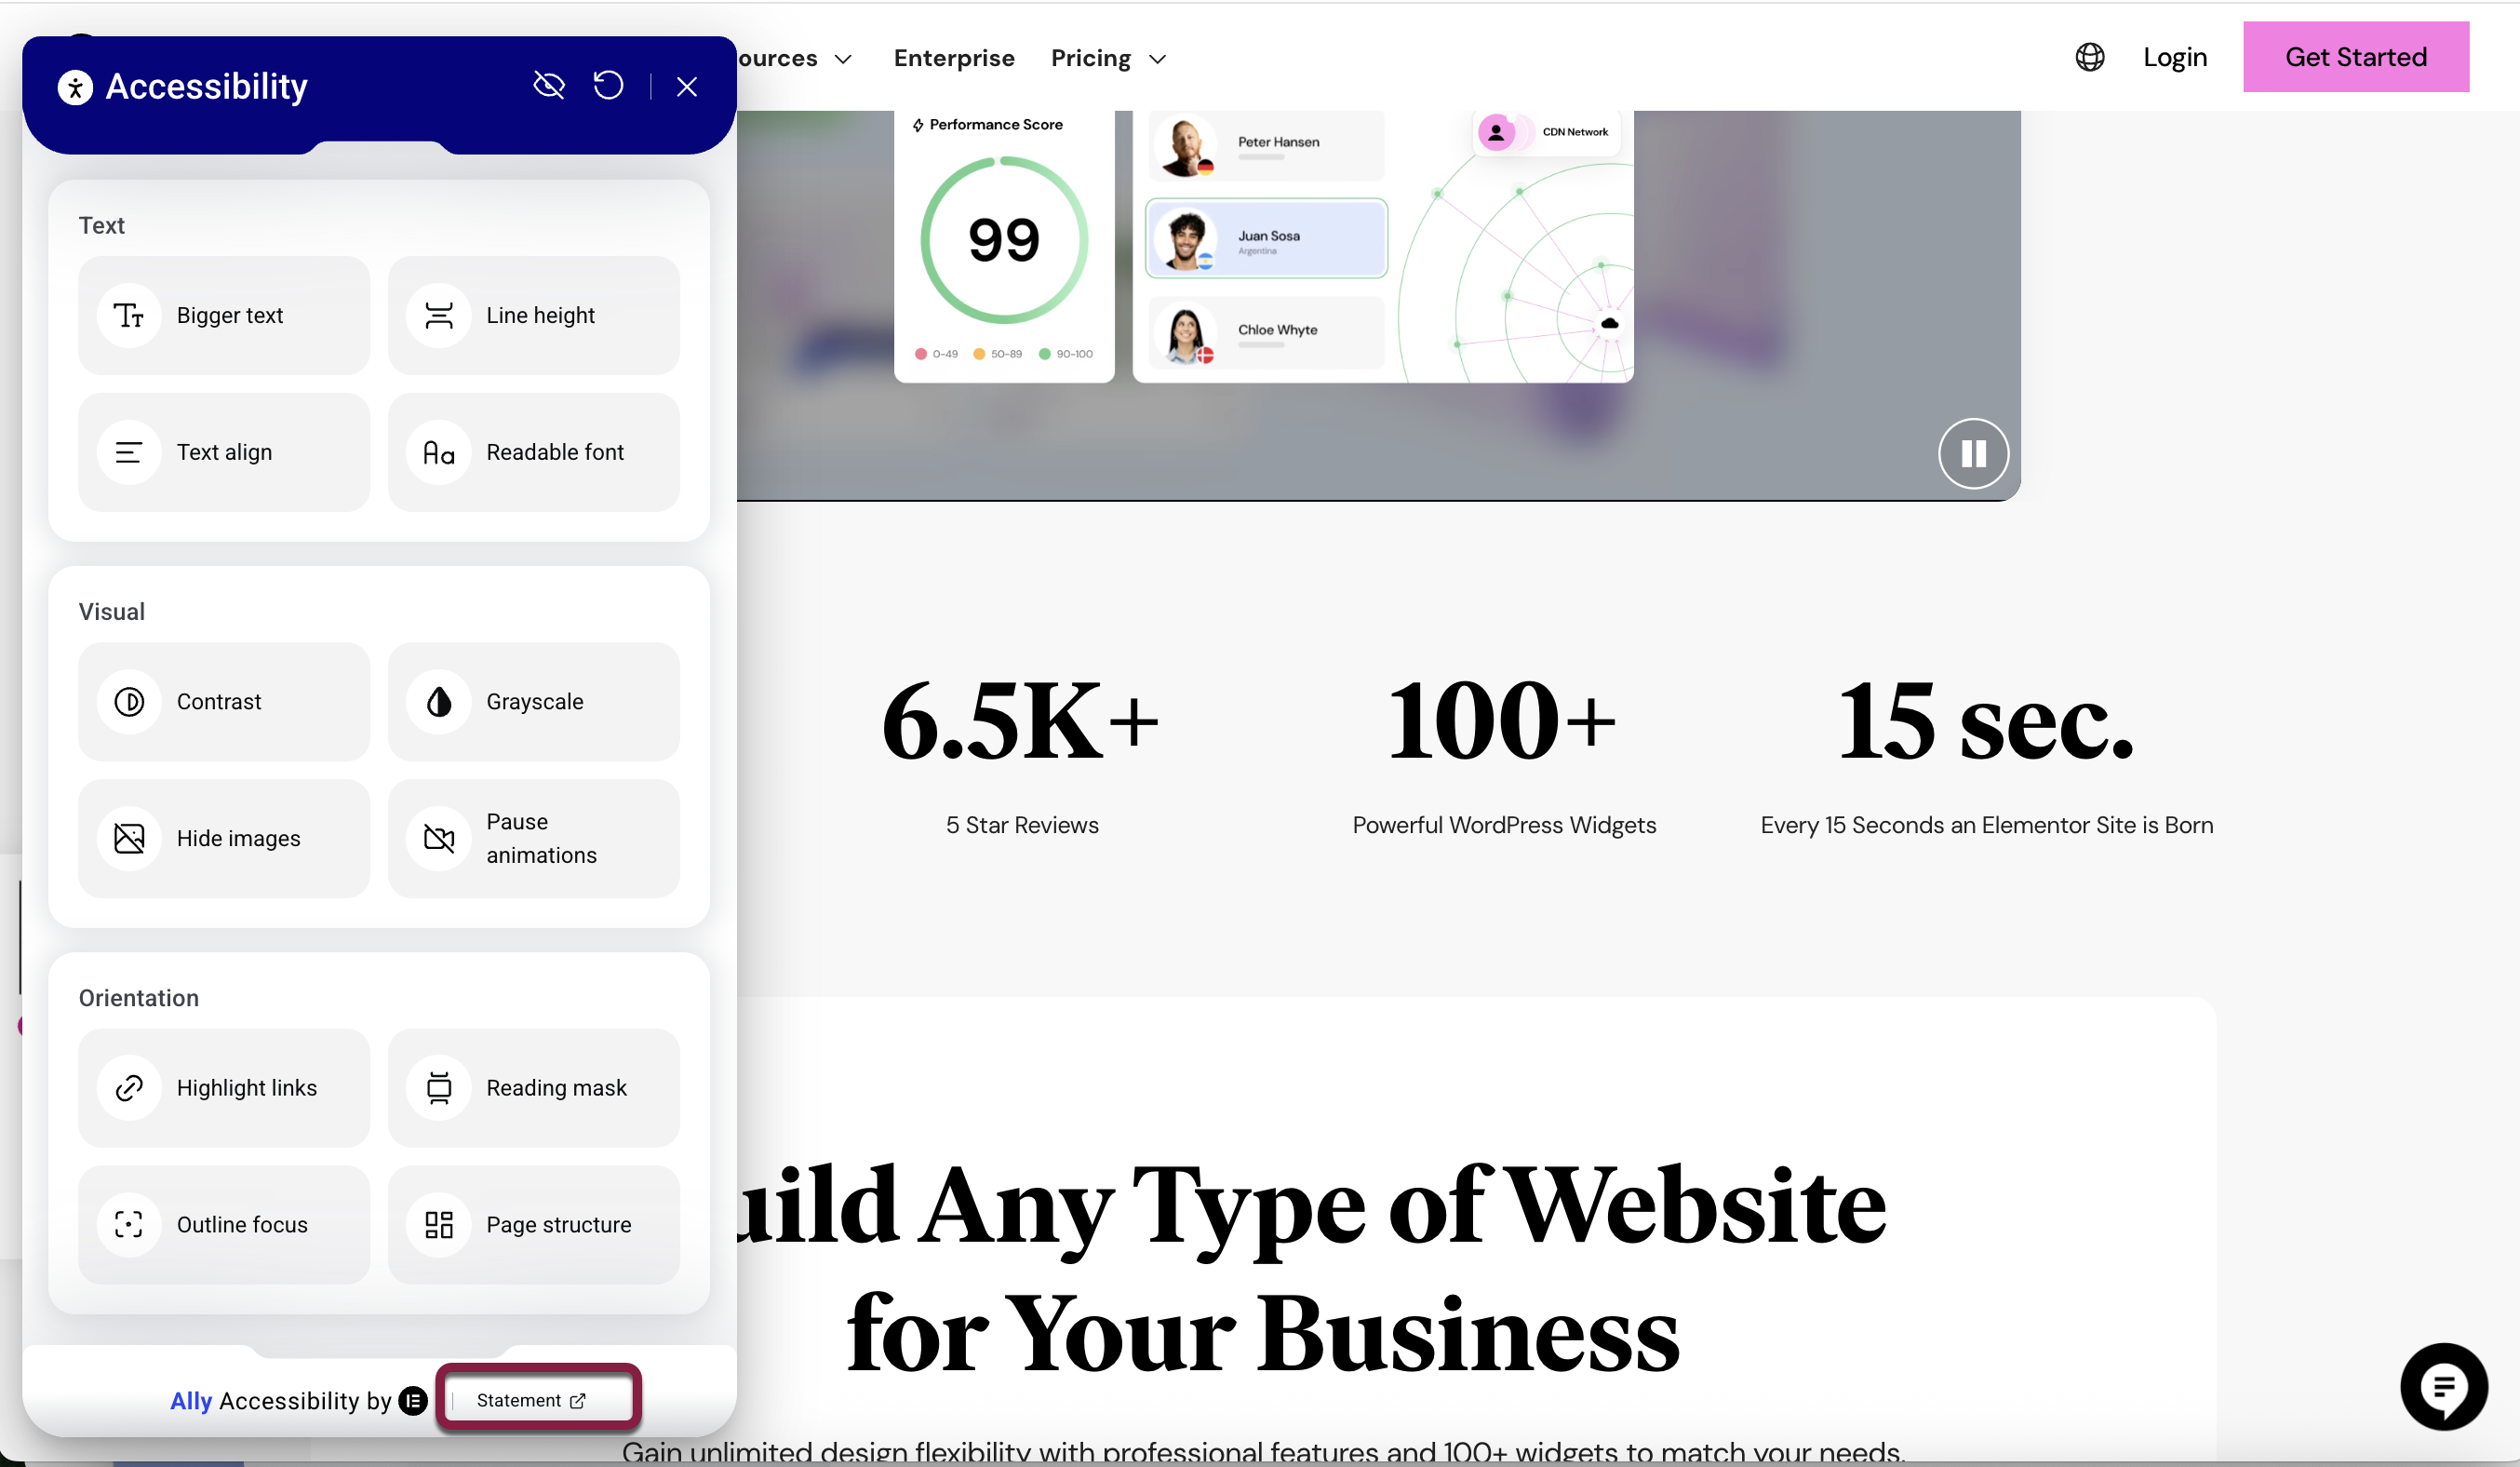
The Accessibility widget is customized for your site.
Web Accessibility and Google Tag Manager (GTM)
You cannot load Web Accessibility through Google Tag Manager.