In this article, you can learn how to create a sticky transparent header effect using Elementor’s CSS class.
Note
This CSS code only works if you’re using sections and columns. If you’re using containers, learn more about creating headers with containers in Create a header template using Flexbox Container.
Following are the steps:
- Open the header in the Elementor Editor.
- Edit the header by clicking its handle
 . The Edit Section panel shows on the left. For details on editing header, see How To Edit Header In WordPress With Elementor.
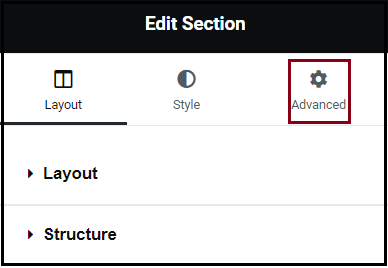
- Click Advanced.
- Expand Motion Effects.
- Use the Sticky dropdown menu to select the part of the screen the header will stick to:

- None – This disables the sticky header. Do not choose.
- Top – Choose to stick your header to the top of the screen.
- Bottom – Choose to stick your header to the bottom of the screen.
- In Sticky On, select which device the sticky setting should apply to Following are the options:
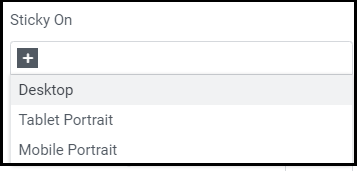
- Desktop – Sticky on desktop/laptops.
- Tablet Portrait – Sticky on tablets.
- Mobile Portrait – Sticky on mobiles.
- Set the following: (Displays only if Sticky is set to Top or Bottom)
- Offset – It pushes the sticky element up or down by a number of pixels.
- Effects Offset – This is the number of pixels the user must scroll before the sticky effect begins. This works only when you apply Custom CSS.
- Stay in Column – Toggle to Yes if you want the section or column to scroll up with the header when the header is offscreen. For details, see Sticky Inner Section Improvements.
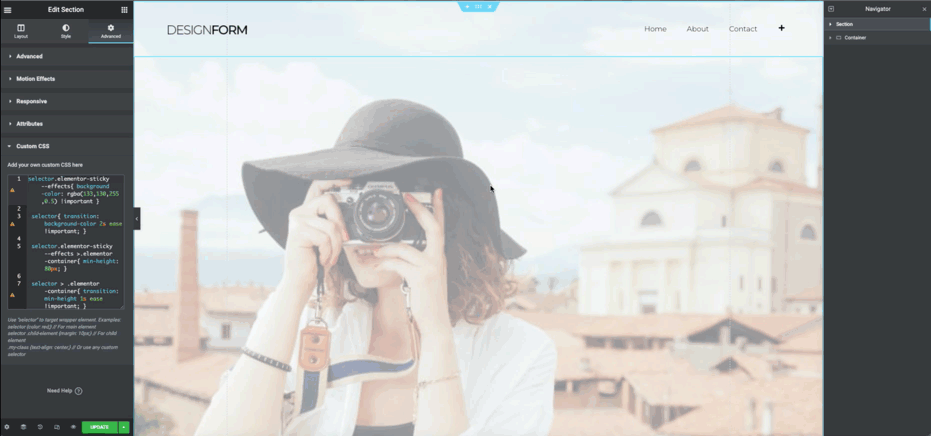
- Expand Custom CSS. The Add your own custom CSS code block shows.
- Enter the following CSS code to the block.
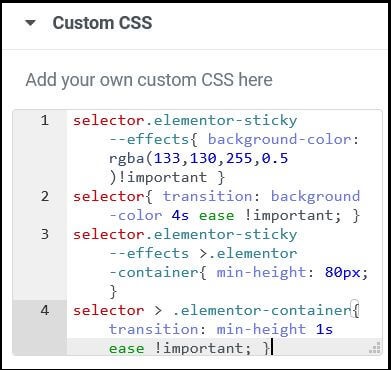
Following is an example:selector.elementor-sticky--effects{ background-color: rgba(133,130,255,0.5) !important }
selector{ transition: background-color 2s ease !important; } selector.elementor-sticky--effects >.elementor-container{ min-height: 80px; } selector > .elementor-container{ transition: min-height 1s ease !important; } - Click Publish.
Note
This CSS takes effect when the user has scrolled the number of pixels specified in the Effects Offset options under Motion Effects.