Introduction
Menus are a part of almost every website, giving your visitors easy access to all the different parts of your site. One way of create a menu for your site is through your theme’s customizer.
This tutorial will walk you through the process of adding pages, posts, and other site content to your navigation menu. In this case we’ll be using Elementor’s Hello Theme customizer. If you’re using another theme, you may need to refer to that theme’s documentation.
Getting Started
- From WP Admin, navigate to Appearance>Customize.
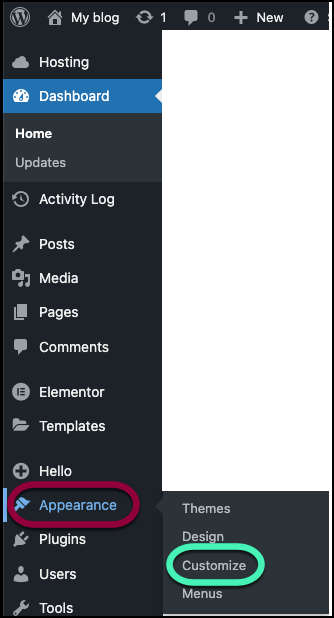
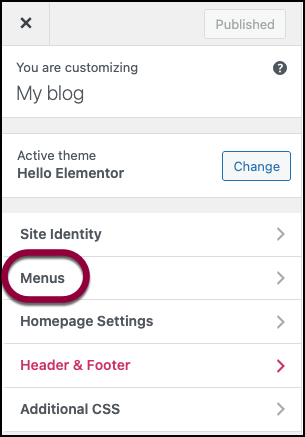
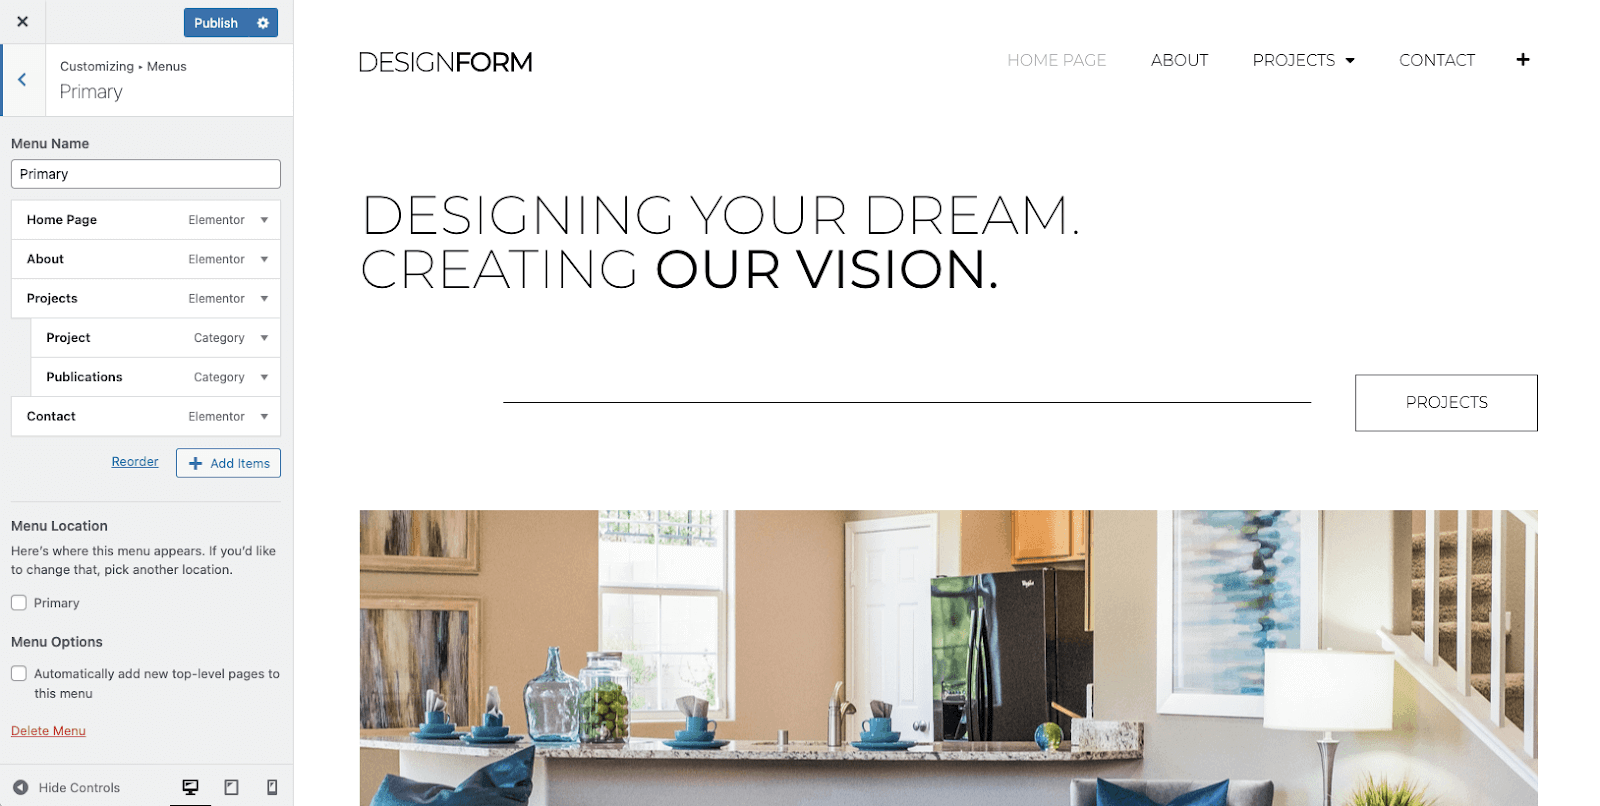
- Click Menus.
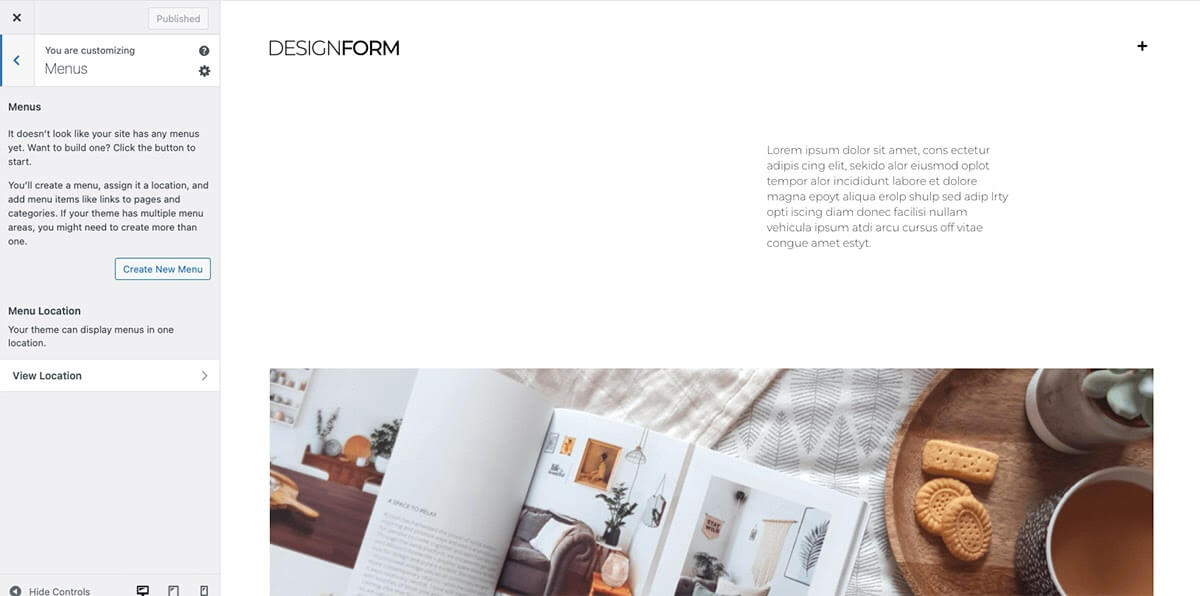
- Click Create New Menu.
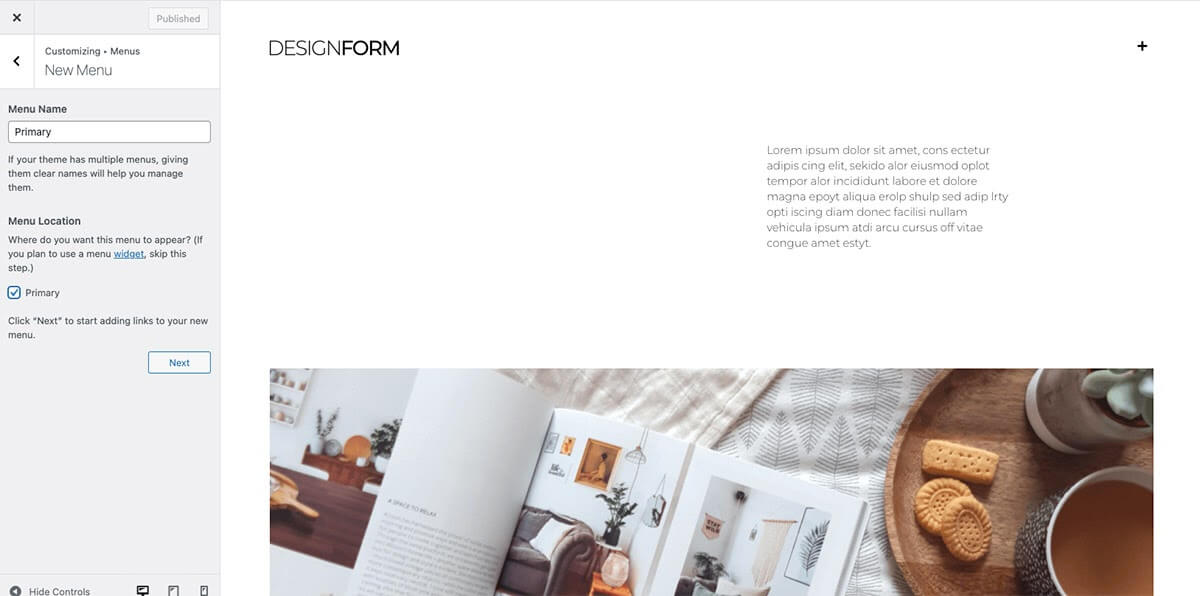
- Name your new menu (example: Primary) and toggle the menu location.
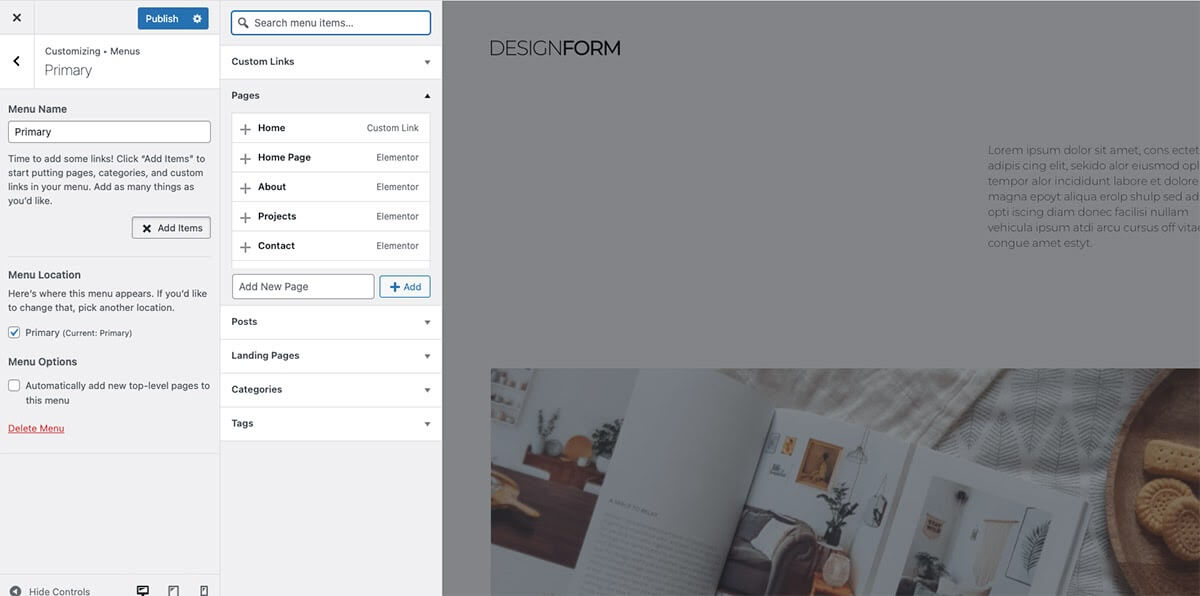
- Click the Add Items button. A panel will expand showing the available items to add to your menu. Add your newly imported Elementor Pages.
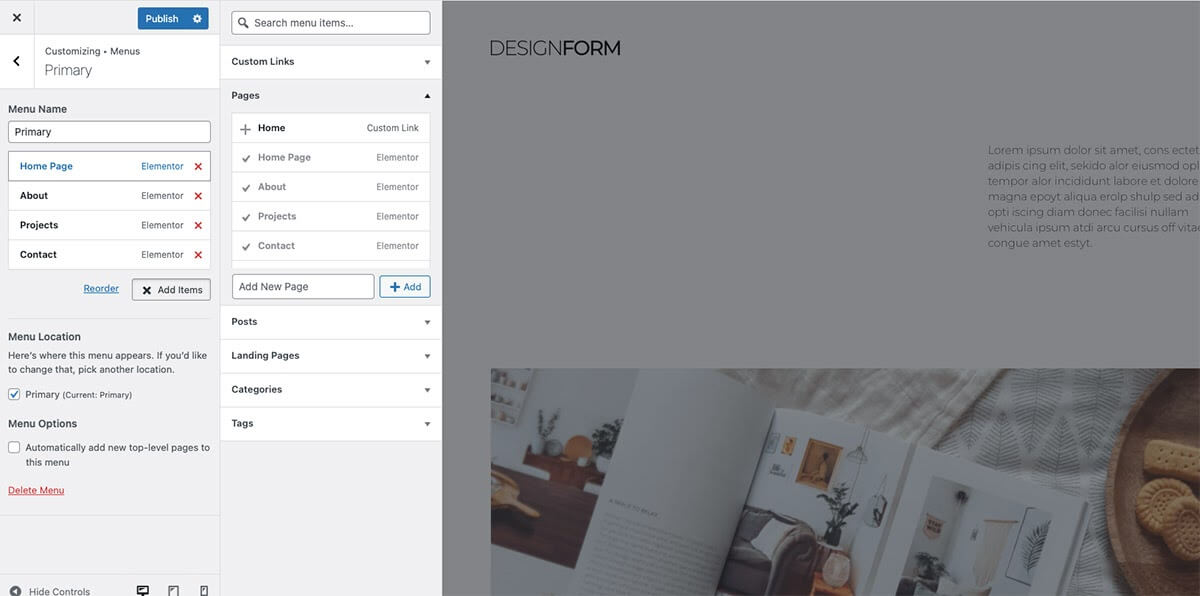
- You will now have these pages in your menu. You may click and drag to reorder them as desired.
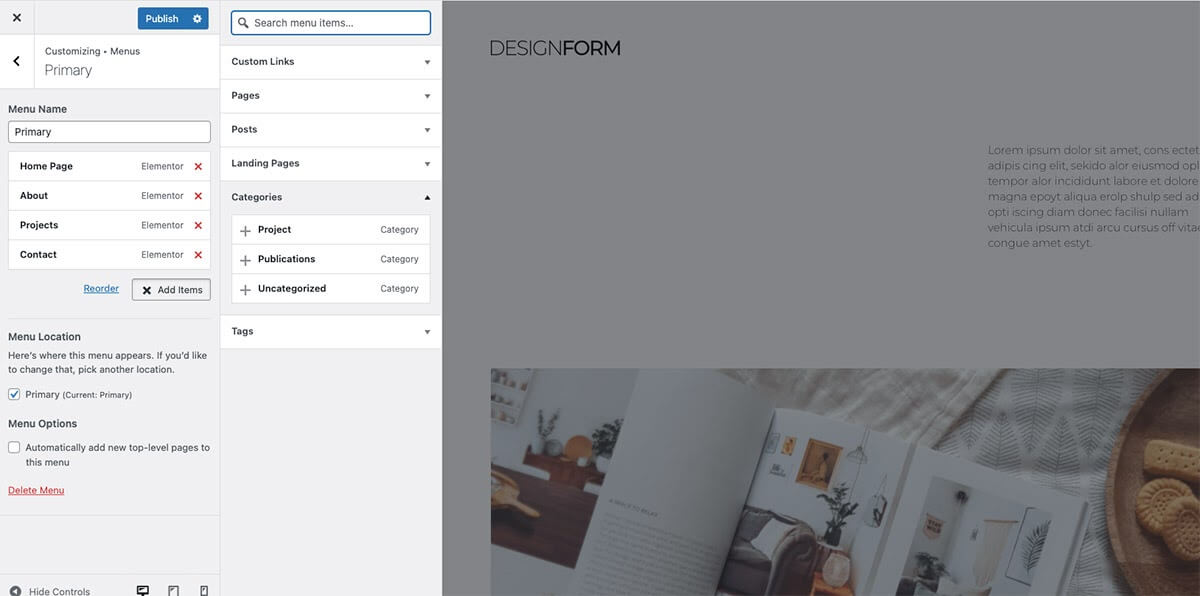
- You can also add Categories or other content related to your Kit by expanding the items.
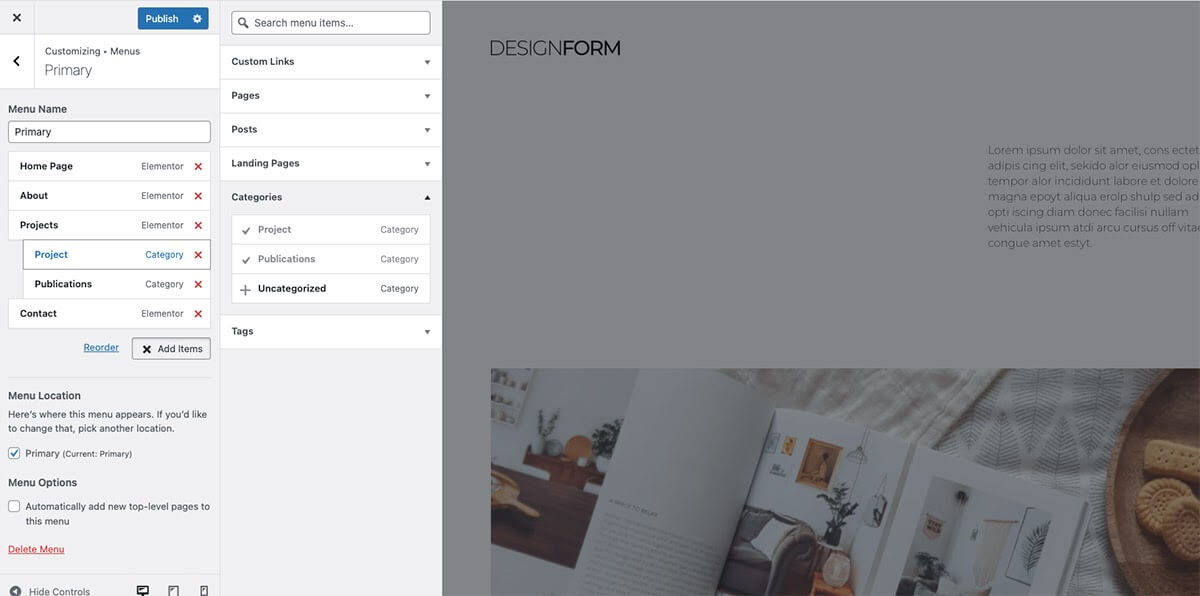
- Create Sub-Menus by dragging the items under a parent item so they are slightly indented.
- Set the Menu Location primary and publish your menu.
Assign Menu To The Nav Menu Widget
You may now also need to assign your new menu to the Nav Menu widget. To do this, edit your Header template in the Theme Builder. From the Menu selector field, choose your newly created menu to assign it to the widget.

Note: If your Footer template uses a Nav Menu widget, you may use the steps above to create and assign an additional menu(s)to be used.
Note: Learn more about the Navigation Widget here.