Settings is where you configure the Image Optimization tool and determine its default behavior.
Want to learn faster? Book a 1-on-1 expert session today.
To access Settings:
From WP Admin, click Elementor>Image Optimization>Settings. You see vital information on the top part of the dashboard and the Settings configuration below.
Control panel
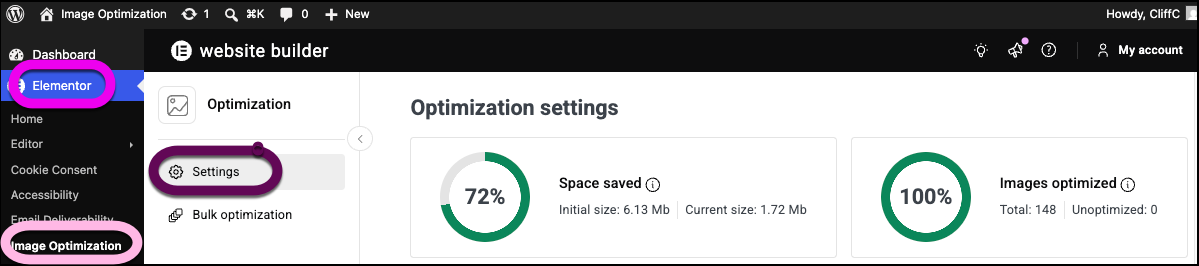
Dashboard Setting | What it looks like | What it does |
|---|---|---|
Space Saved |  | The space you’ll save by optimizing this image (or images). This percent saved will depend on a number of factors, including the settings you’ve chosen. See below for some examples of compression rates. |
Images optimized |  | Tracks the number of images in your site’s media library and how many of them have been optimized. Bulk optimize allows you to optimize a number of images at the same time. |
Images in your plan |  | Each Elementor Image Optimization plan has a limit on the number of images you can optimize. The control panel tracks how many images you’ve optimized, and how many are left on your plan. Click Upgrade in order to increase the number of images you can optimize or Renew plan if your subscription has run out. See the Image Optimization by Elementor page for more details.
Note
This part of the control panel is only accessible to the account owner. Other users who have access to the WordPress dashboard will not see this section.
|
Examples of compression rates
Original size | Optimization method | Savings |
|---|---|---|
1.16 MB | Default settings | 56% |
1.16 MB | Lossless compression | 52% |
1.16 MB | Lossy compression, Keep Exif metadata | 58% |
Settings
The Settings section is located below the Control Panel.
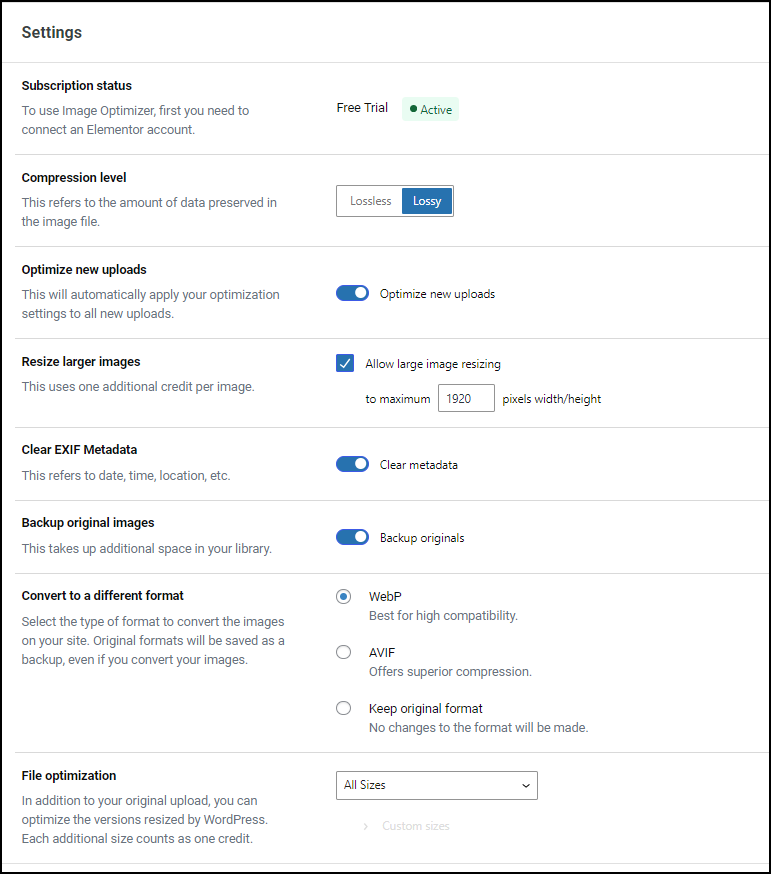
Setting | What it looks like | What it does |
|---|---|---|
Subscription status | Shows which plan the subscription owner has signed up for. See the Image Optimization by Elementor page for more details. | |
Compression level |  | Choose between three different levels of compression: |
Optimize new uploads |  | When toggled on, the Image Optimization automatically optimizes images uploaded to your Media Library. Active by default. |
Resize larger images |  | Determine the maximum size, in pixels, of images. When active, the Image Optimization will resize larger images down to the maximum size. This is active by default, allowing images a maximum height and width of 1920 pixels. |
Clear EXIF metadata |  | Images usually contain extra information about the image, such as when and where the image was created. This extra data increases the size of the image, making it slower to load. When toggled on, the Image Optimization strips away some of this data. Active by default. |
Backup Original Images |  | When toggled on, the Image Optimization saves a copy of the original image. This way you can use the original image instead of the compressed one. Saving the original image does not affect website performance, but takes up space on your server. Active by default. |
Convert to a different format | 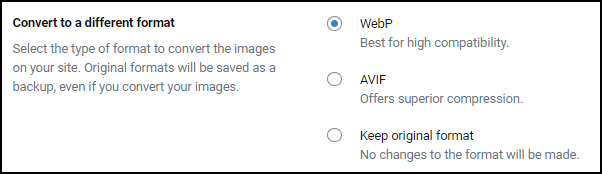 | When you compress your images, you can also convert them to a different format. These formats were designed to be suitable for compressed images: |
File optimization |  | When you upload an image to WordPress, it makes several copies of that image in different sizes: Thumbnail, Medium, Full Size. Use the dropdown menu to determine which sizes you want optimized. Remember, each size you optimize is considered a usage, therefore optimizing one image in all the available sizes is the same as optimizing four individual images. By default, all sizes are optimized. |
Advanced settings
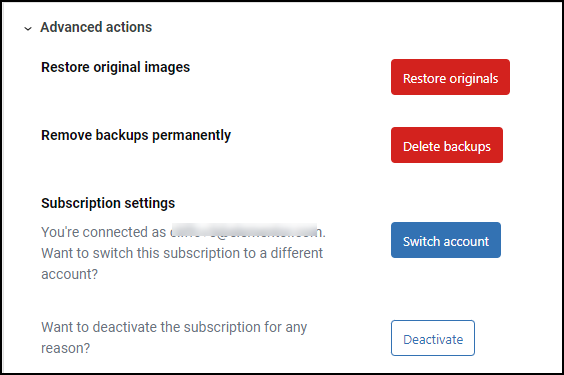
Expand the Advanced Actions section to access tools that may be of use to developers.
Setting | What it looks like | What it does |
|---|---|---|
Restore original images |  | Replace all the optimized images on your site with the original versions. Reverting to the original images may harm your website’s performance.
Warning
This is irreversible, so we recommend backing up your website first.
|
Remove backups permanently |  | By default the Image Optimization saves an original copy of the optimized image. While this does not affect your website performance, it does take up server space. This action allows you to delete these images to save server space.
Warning
Deleting backups is irreversible so we recommend backing up your website first.
|
Subscription settings |  | Here you can switch to another Elementor account, disconnect this site from an Elementor account, or check to confirm you are connected to an Elementor account. |
Want to deactivate the subscription for any reason? |  | The Image Optimization is linked to your subscription. Click Disconnect to unlink your account. |
Not seeing changes made to your subscription status? |  | If you change the terms of your subscription, for example if you upgrade your subscription, you may need to Refresh status to see the changes. |