The number of times a visitor clicks on a button on your web page helps you understand what people are interested in or doing on your site. Tracking tools like Meta Pixel, Google Analytics, or Google Tag Manager capture these events and allow you to gather valuable data and insights about user behavior, helping you make informed decisions to improve the user experience on your website.
Let’s see how to use the Button widget for tracking events.
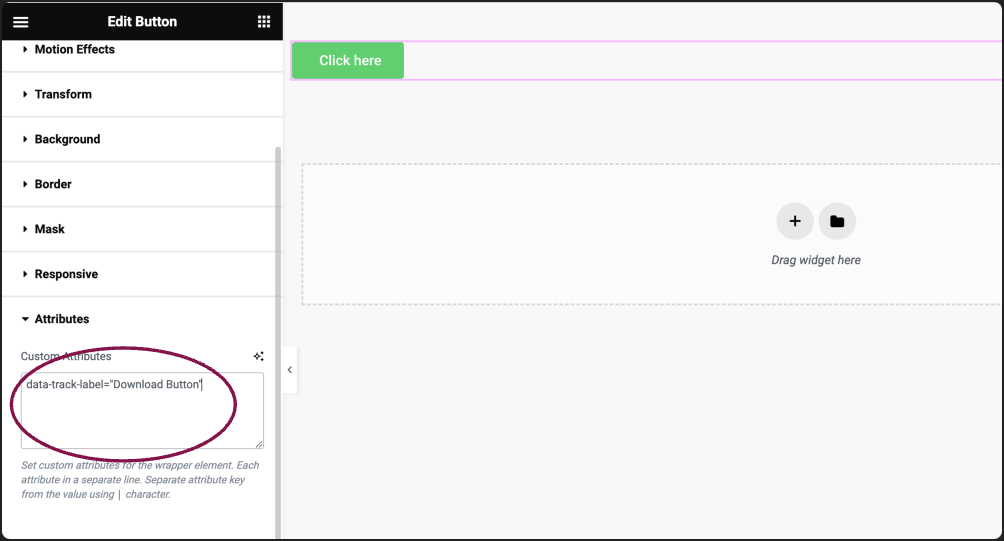
- On the canvas, click the button edit icon, then in the panel, go to the Advanced tab.

2. Scroll down to the Attributes section. Here, you’ll find a field named Custom Attributes.
3. Enter your custom attributes in the format of attribute=”value”. For example, for button tracking, you might add attributes like data-track-label=”Download Button”
4. After adding the custom attributes, update your page to save the changes.
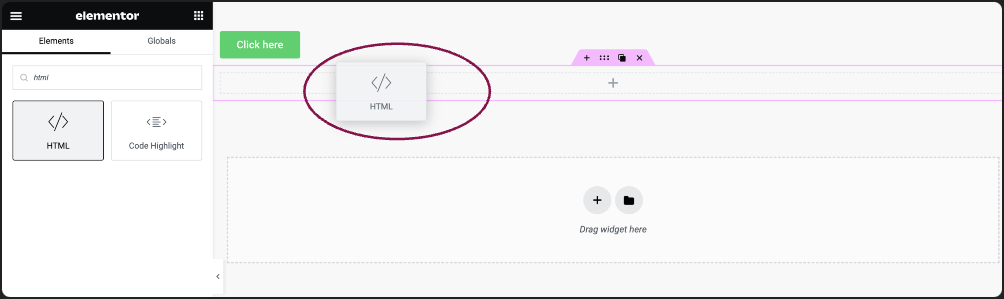
5. Add the HTML widget. You can add the widget anywhere on the page.
6. Paste the following code into the HTML Code field:
<script>
document.addEventListener("DOMContentLoaded", function(event) {
  jQuery('[data-track-label="Download Button"]').click(function(){
    // tracking code here
    // for example, Google Tag Manager:
    fbq('track', 'Download');
  });
});
</script>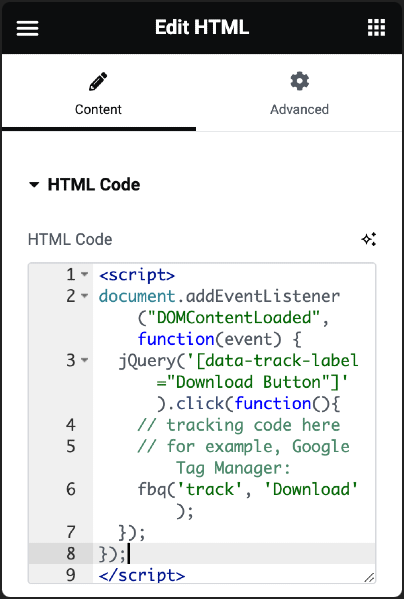
7. Add the provided CSS to your site’s custom CSS area to ensure proper functionality. This might be in your Theme Customizer, Site Settings, Custom Code, or Child Theme. This CSS is explicitly mentioned as a Button Fix for Tag Manager (For Click Id triggering).
/** Button Fix for Tag Manager (For Click Id triggering) **/
.elementor-button-content-wrapper {pointer-events: none;}
.elementor-button span { pointer-events:none}
8. Save the changes to your page.