The Cookie Consent dashboard provides a central hub to manage all aspects of your website’s cookie consent solution. From here, you can monitor compliance status, manage cookies and scripts, customize your banner’s appearance, and configure global settings.
Onboarding
When you first set up the Cookie Consent plugin, a guided wizard helps you get a compliant cookie banner live quickly. This process involves three steps:
- Select Consent Template: Choose between a GDPR (opt-in) or CCPA (opt-out) compliance model. This choice determines the default banner behavior, button configuration, and legal text.
- Opt-in (GDPR-style): Cookies and scripts are blocked until the user explicitly consents. Users can Accept, Reject, or Customize their preferences.
- Opt-out (CCPA-style): Cookies are enabled by default. Users can click “Do Not Sell” to restrict data sharing.
- Select Layout: Choose between a full-width banner or a compact box format for your consent prompt.
- Initial Website Scan: The system automatically crawls your website to detect existing cookies and scripts, categorizing them into Necessary, Functional, Analytics, and Advertisement. You can skip this step and scan later.
Upon completion, the banner is activated on your website, and you are redirected to the main dashboard.
For details, see Get started with Cookie Consent.
Overview
The Overview section provides a quick glance at your compliance status and consent performance.
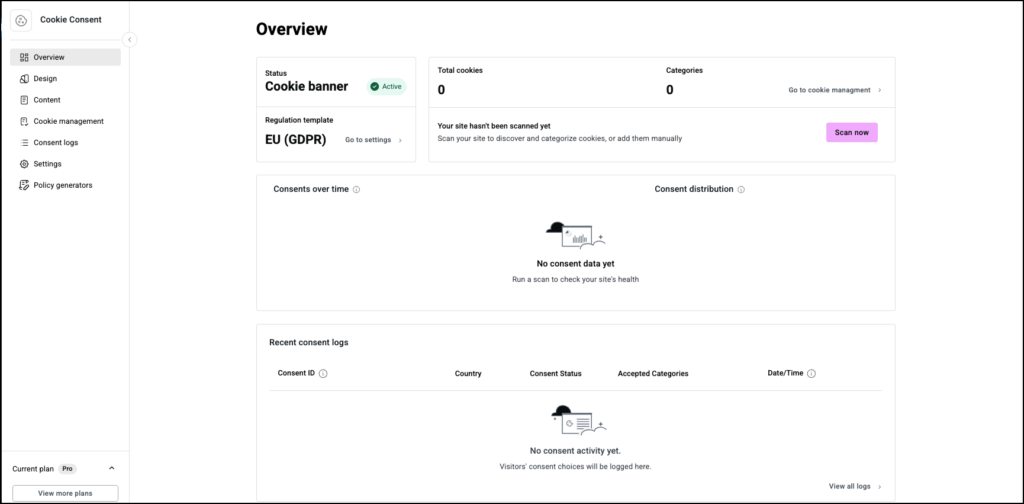
- Status: Displays whether the cookie banner is Active or Disabled.
- Regulation template: Shows which regulation template (GDPR/CCPA) is in use.
- Total cookies: Shows the total number of cookies detected and the number of cookie categories in use. Contains a link to the Cookie management section and a button to scan your site for cookies.
- Consents over time: Provides historical data on consent rates, tracking accepted, denied, and partial consent actions over time.
- Recent consent logs: Exposes the last 3 consent logs with a direct link to the full logs list.
Design (Layout & Style)
The Design section allows you to customize the appearance of your consent banner, preferences dialog, and revisit button to match your website’s brand.
Consent template: Shows which regulation template (GDPR/CCPA) is in use.
Design (or Manage) with Elementor: Use the Elementor Pro editor to design your Cookie Consent banner (For Elementor Pro users only).
- Banner Layout Configuration:
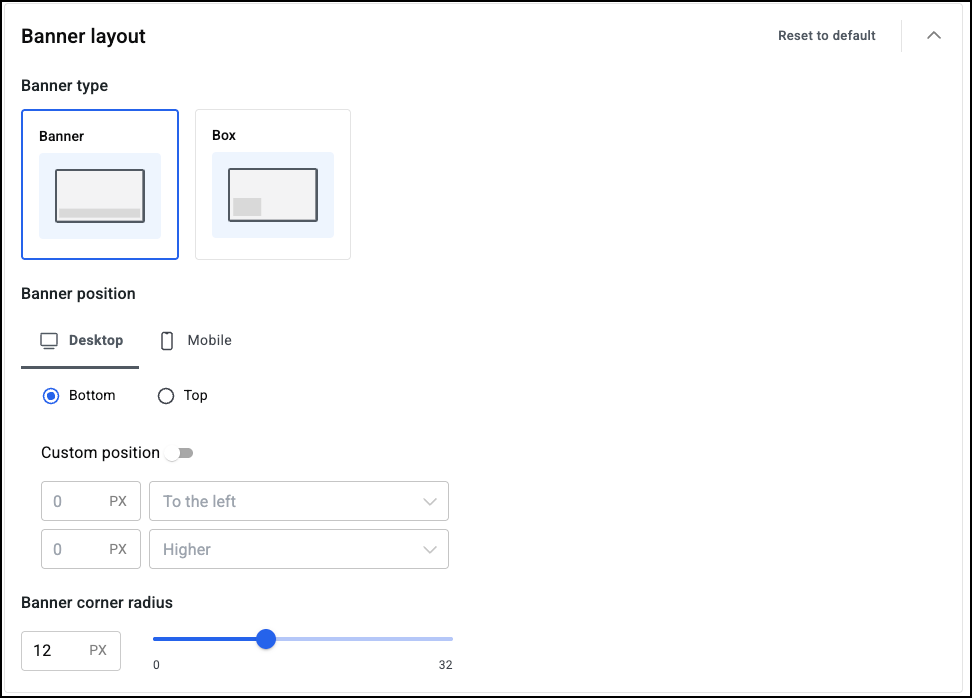
- Banner type: Choose between full-width or box.
- Position: Set the banner to appear at the top or bottom of the viewport.
- Desktop and mobile settings: Separate settings are available for different devices.
- Custom positioning offsets: Configure precise positioning.
- Border radius: Adjust the curvature of the banner’s corners.
- Banner & preferences style:
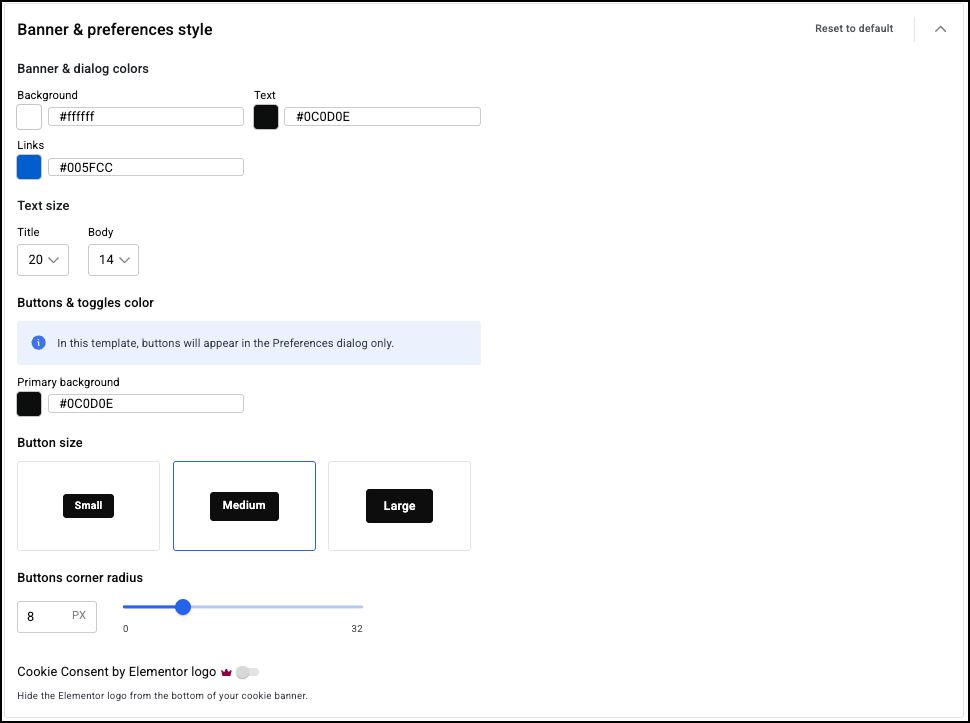
- Banner & dialog colors: Customize background, text, links, and button colors.
- Text size: Set typography sizes for title and body text.
- Button & toggles color: Configure the buttons’ color. For details, see Choose a color.
- Button size: Choose one of three button sizes for your cookie consent:
- Small
- Medium
- Large
- Buttons corner radius: Use the slider to round the corners of the button. For details, see Border radius tools.
- Cookie Consent by Elementor logo: Toggle the Elementor logo on and off. You must have a paid subscription to use this feature.
- Branding: Option to display or hide Elementor branding. This feature is available for Pro and One users.
- Revisit Consent Icon: This is a floating icon that allows users to re-open consent preferences. You can choose:
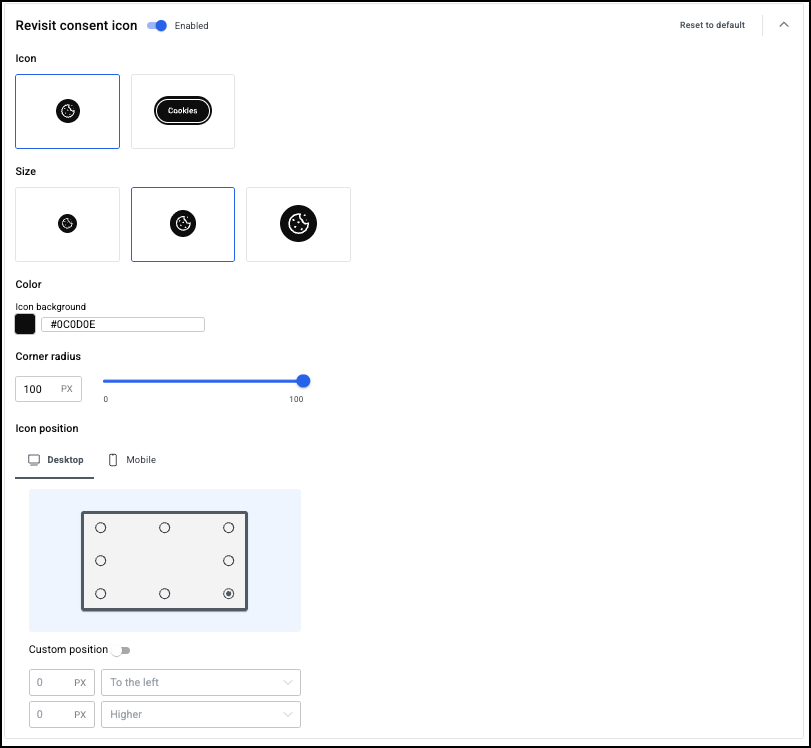
- Icon: Choose one of two styles of icon
- Size: Choose one of three icon sizes:
- Small
- Medium
- Large
- Color: Configure the buttons’ color. For details, see Choose a color.
- Corner radius: Use the slider to round the corners of the button. For details, see Border radius tools.
- Icon position
- Desktop and mobile positioning: Separate settings for different devices.
- Use the graphic to select an icon position.
- Custom position: Toggle on to fine tune the icon position by using the dropdown menus to adjust the horizontal and vertical position.
- Preview: Toggle on to show all changes in a real-time preview within the WordPress admin before publishing.
Content
The Content section provides full control over the text in the consent flow, supporting multi-language websites.
- Consent template: The consent template you chose for your site when you designed it.
- Multi-Language Support: Click to provide consent text in multiple languages.
- Add multiple languages for the consent interface.
- Set a default language.
- Each language maintains its own content translations.
- Supported languages include: English, Hebrew, Spanish, Estonian, Arabic, Danish, German, Dutch, Greek, French, Hindi, Italian, Polish, Portuguese, Swedish, Thai, Turkish, Ukrainian, Chinese, Korean, Russian, Japanese, Czech, Finnish, Croatian, Romanian, Slovak, Slovenian, Serbian, Uzbek, Vietnamese, Hungarian, Norwegian Bokmål, Norwegian Nynorsk, Catalan.
- Banner
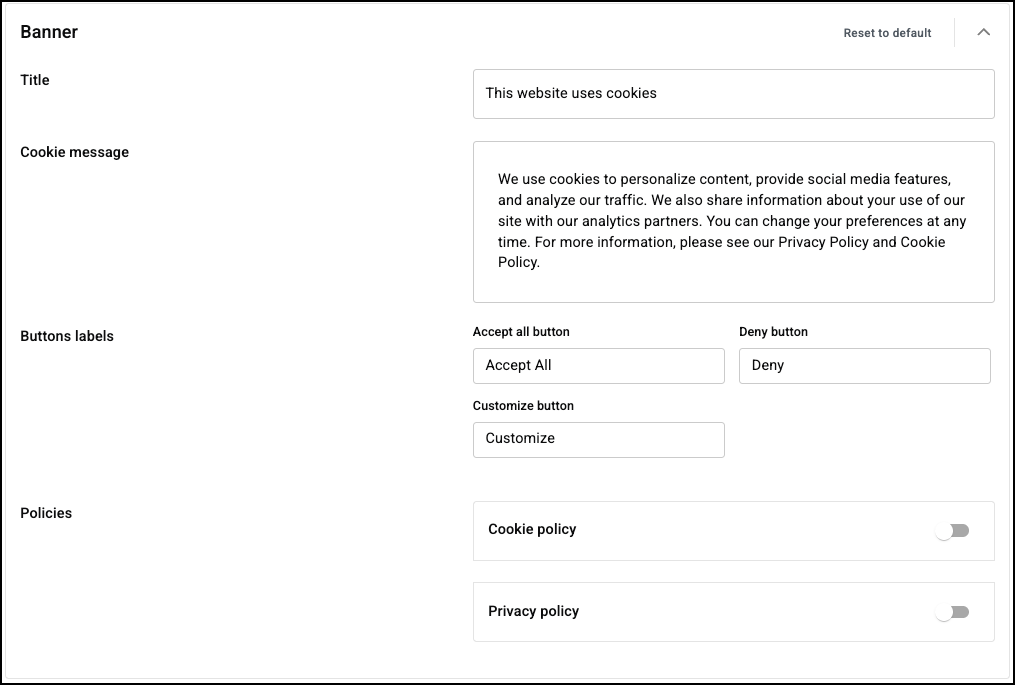
- Reset to default: Click to restore the default settings.
- Title
- Cookie message: Your message to visitors. This should encourage them to allow cookies.
- Button labels:
- Accept All
- Deny
- Customize
- Policies:
- Cookie Policy: Toggle on to add the URL where visitors can view your site’s cookie policies.
- Privacy Policy: Toggle on/off and set the URL.
- Cookie Categories: Contains the categories of cookies. For each category you can customize the category label and description:
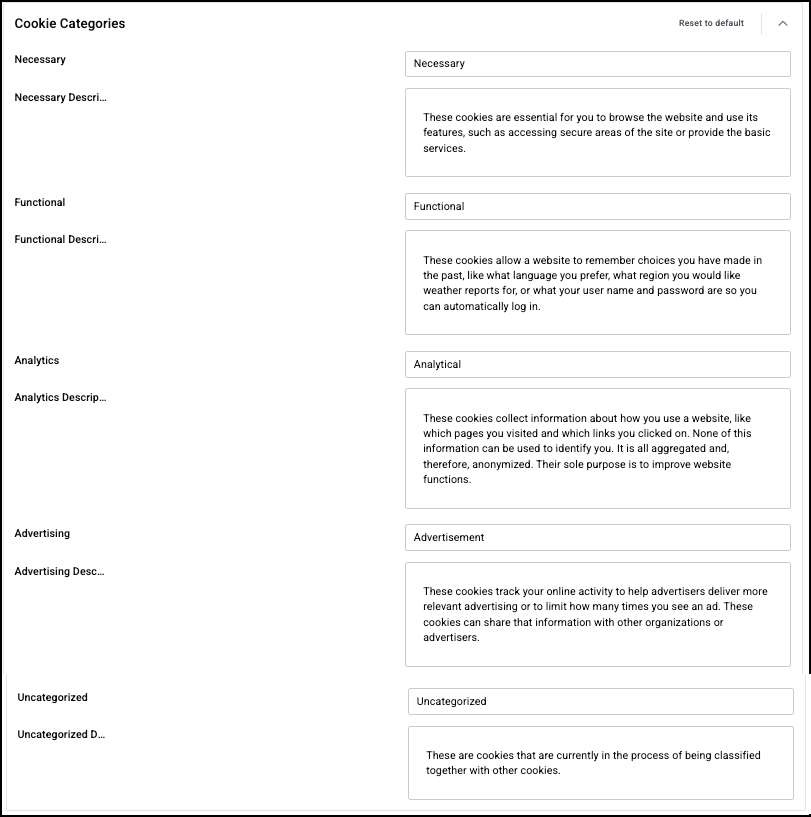
- Necessary
- Functional
- Analytics
- Advertizing
- Uncategorized
- Preferences dialogue: If visitors want to customize their cookie choices, they are taken to a Preferences dialogue that allows them to accept or deny types of cookies. This section allows you to customize:
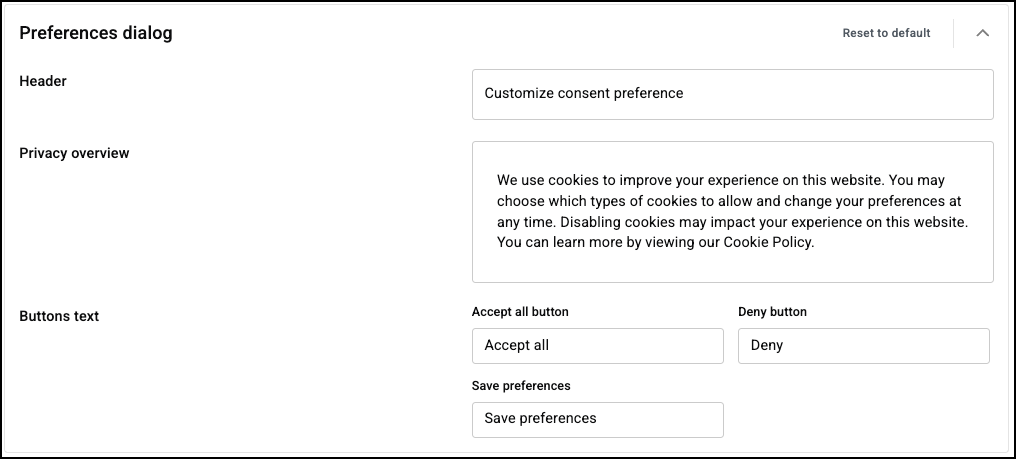
- Header: The section title.
- Privacy overview: A description of what the visitor is choosing.
- Button text: The words that will appear on the buttons:
- Accept all cookies
- Deny
- Save preferences
- Save changes: click to save any changes you may have made.
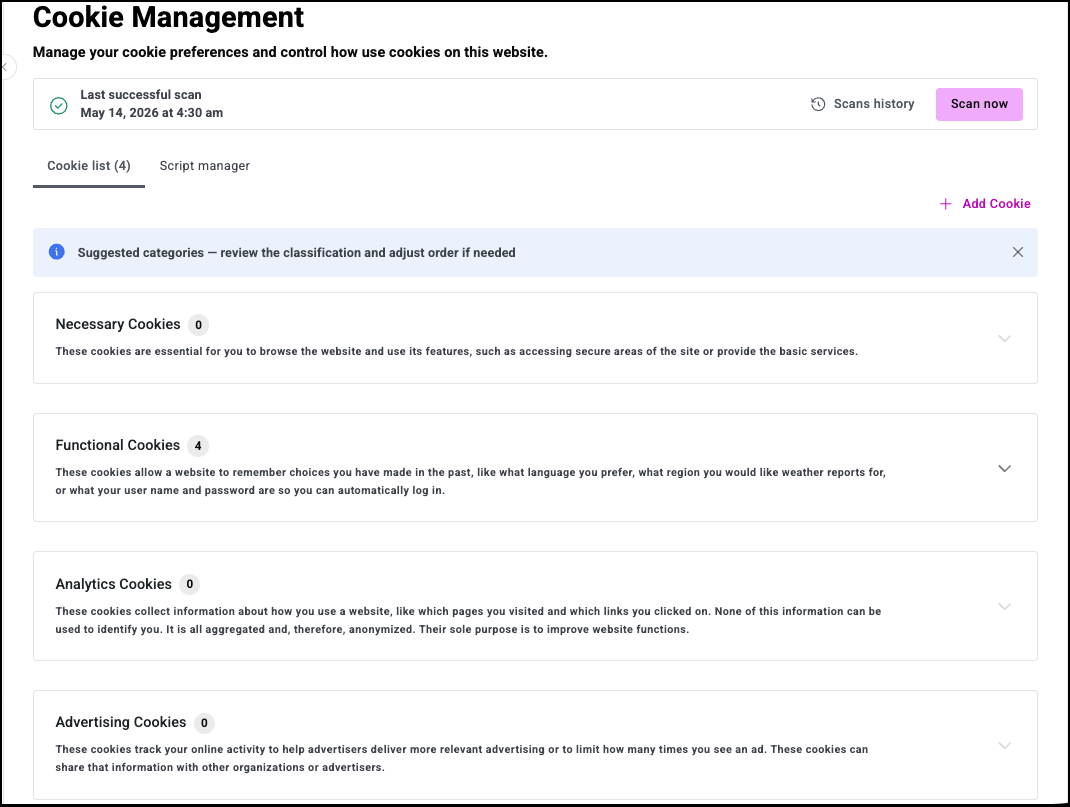
Cookie Management
The Cookie Management section helps you maintain an accurate inventory of all cookies and scripts on your site and control their behavior.
Cookie Scanning
Scan now: Begins the scanning process. You can customize the scan.
- Scan Types:
- Full Scan: Crawls the entire website automatically (page limit based on subscription plan).
- Custom Scan: You specify which URLs to scan.
- Scan Configuration: Advanced options to include or exclude specific URL patterns.
- Scan Process: Displays a progress indicator and allows you to stop a full scan mid-process. Credits are consumed based on pages scanned.
- Scan Results: Provides a summary including scan status (Success, Partial, Failed), number of pages scanned, credits consumed, cookies found per category, scripts detected, and any errors.
- Scan History: A log of all previous scans with date, status, pages scanned, and items found.
Cookie List
- Add Cookie: Click to manually add a cookie to the cookie list.
Cookies are listed according to categories:
- Necessary
- Functional
- Analytics
- Advertisement.
Script Manager
Controls the execution of third-party scripts based on user consent.
- Script Configuration: Define script name, URL pattern to match (e.g., google-analytics.com/analytics.js), assigned category, and description.
- Blocking Modes:
- Always Block: Script never executes.
- Block Until Consent: Script is blocked until the user consents to its category.
- Never Block: Script always executes (for essential scripts).
- Actions: Add new scripts, edit configuration, delete scripts, and change blocking mode inline.
The plugin dynamically adjusts script execution based on the selected consent model:
- Opt-in Model (GDPR style):
- Main Banner: Asks for explicit consent.
- Preferences Dialog: Allows toggling specific cookie categories. Necessary cookies are always loaded.
- Opt-out Model (CCPA/US style):
- Main Banner: Displays “Do Not Sell or Share My Personal Information” logic.
- Preferences Dialog: By default, opens the “Do Not Sell” interface. If the user chooses not to have “Do Not Sell” active, the Preferences Dialog is disabled/hidden.
Manual Script Management
You can override automated categorization through the Script Manager interface, providing granular control for specific third-party pixels or custom scripts.
- Global Control Options:
- Always Load: Script bypasses the consent engine.
- Block until Consent: Script is injected into the DOM only after affirmative consent for its category.
- Always Block: Script is deactivated globally.
Consent Logs
The Consent Logs section creates a complete, auditable record of every consent action for regulatory compliance.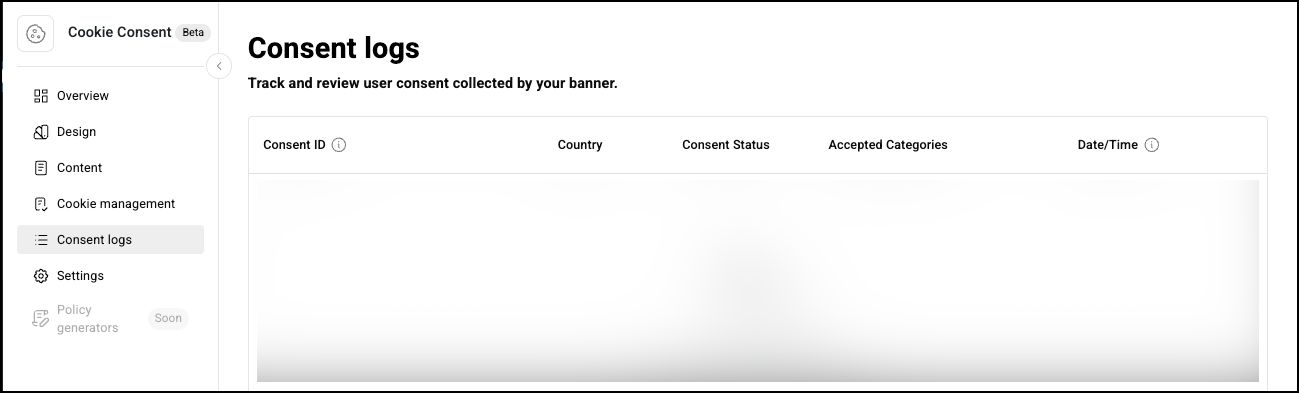
- Data Captured Per Consent:
- Unique anonymized Consent ID.
- User’s country (based on IP geolocation).
- Consent status: Accepted (all), Partial (some categories), “Preferences Changed” (Opt-in), or “Do not sell” (Opt-out).
- Categories consented to.
- Timestamp.
- Data Retention: Logs are retained based on your subscription plan, with a configurable retention period.
- Filtering: Search by Consent ID or country, filter by status (All, Accepted, Partial, Preferences Changed), and filter by date (All time, Last 7 days, Last 30 days, Custom date range).
- Sorting: Sort by any column: Consent ID, Country, Status, Date, in ascending or descending order.
- Export: Export filtered results to CSV for compliance audits and record-keeping.
Settings
The Settings section provides centralized control over all compliance rules and global behaviors.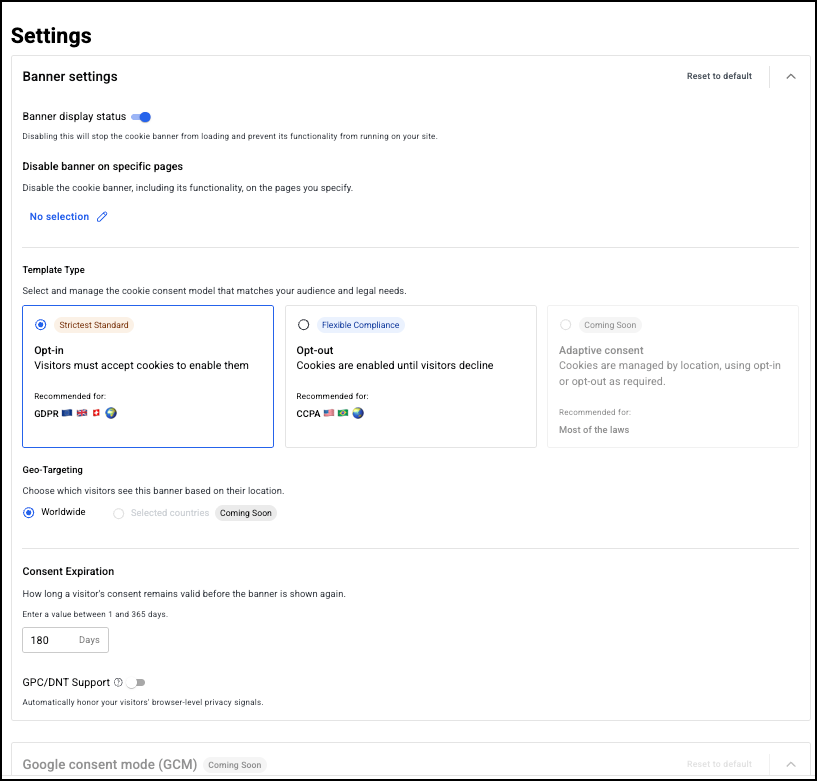
Banner Settings
- Banner display status: Toggle on/off to enable/disable the banner site-wide.
- Disable banner on specific pages: Disable the banner on specific pages (URL list).
Template type
- Available Templates:
- GDPR (EU): Opt-in model; no non-essential cookies until explicit consent.
- CCPA (US): Opt-out model; cookies allowed until the user opts out.
- (Coming soon) Both (Geo-targeted): Different behavior based on user location.
Note: Template Switching: Requires confirmation and warns about behavior changes.
Geo-Targeting:
- Worldwide: Show banner to all visitors.
- (Coming soon) Selected Countries: Show only to visitors from specific regions.
Consent Expiration
- Configure how long user consent is remembered before re-prompting. This can be from 0-365 days.
GPC/DNT Support: Toggle to respect Global Privacy Control (GPC) and Do Not Track (DNT) browser signals. When enabled, these signals are automatically treated as a denial of non-essential cookies.
(Coming soon) Google Consent Mode
Integrate with Google’s Consent Mode v2 for compliant Google tag behavior.
- Support GCM: Toggle to enable/disable Google Consent Mode.
- Allow Google tags to fire before consent: Toggle to allow firing the default consent state before the banner loads.
Save changes: click to save any changes you may have made.