The Elementor Atomic Loop feature (Elementor Pro) allows you to build dynamic, repeatable content layouts directly within the Atomic Editor. Display multiple posts, products, or custom content items using a single, customizable design template.
What is the Elementor Atomic Loop?
The Atomic Loop provides a flexible architecture to display dynamic content (like blog archives or WooCommerce products) while natively integrating with Elementor’s Classes and Variables.
An Atomic Loop consists of three structural elements:
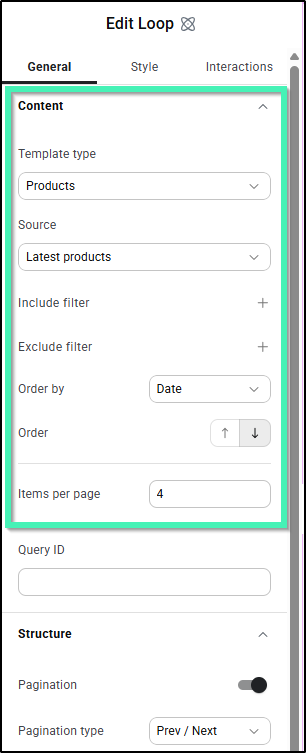
Loop (Outer Container): Holds the primary query settings, taxonomy filters, and custom empty state configurations. This is where you define the data source (e.g., Posts, Products), items per page, and sorting order.
- Loop Layout: Controls the spatial arrangement (e.g., grid, list) of the repeated items.
- Loop Item: The individual template that gets repeated. You can design a single main template or configure alternating layout variations across the sequence.
How to Create an Atomic Loop with Elementor AI (Angie)
Elementor AI (Angie) can automatically generate a complete Atomic Loop structure, map dynamic fields, and apply design system configurations from a single prompt.
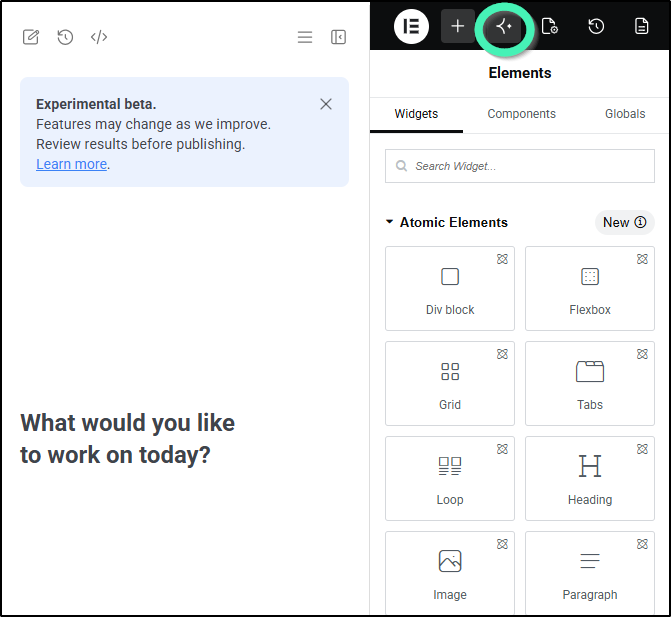
Click the Angie AI icon within the Elementor Editor.
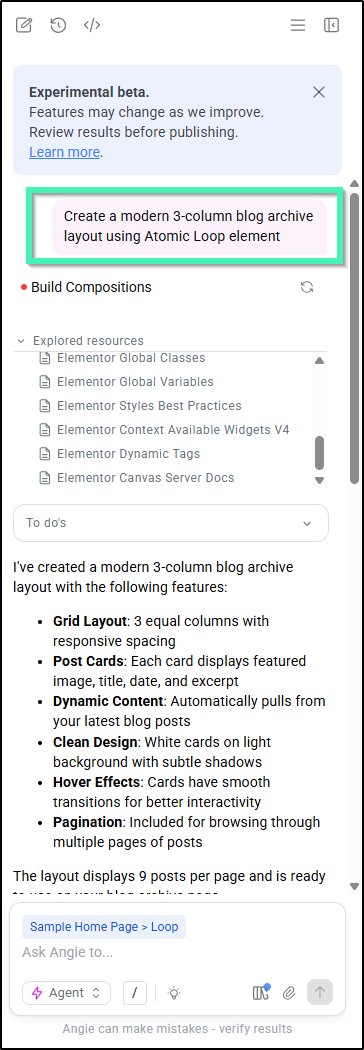
Enter a descriptive prompt (e.g., “Create a modern 3-column blog archive layout using Atomic Loop element” or “Generate a WooCommerce product grid”).
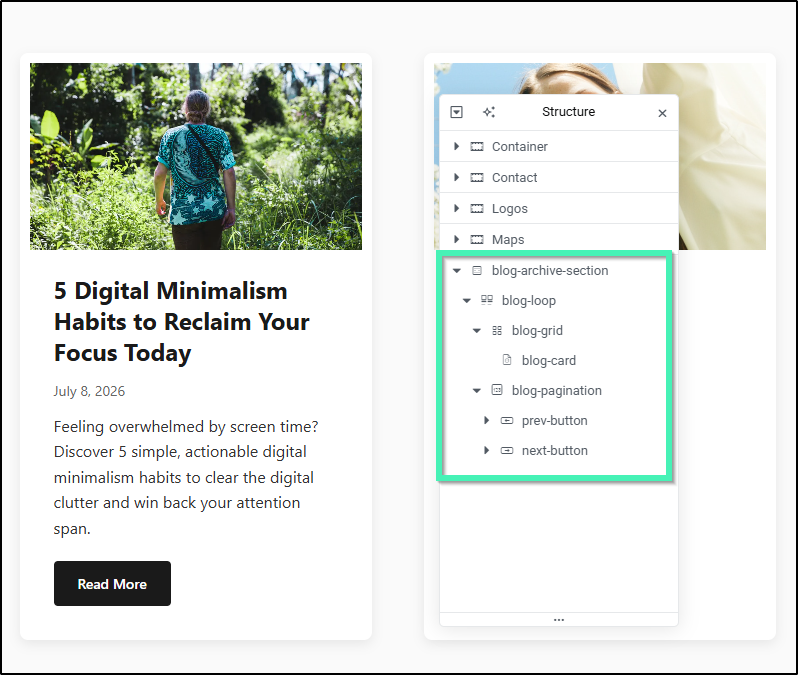
Review the generated layout on your canvas to ensure the Loop, Loop Layout, and Loop Item structures are correctly placed.
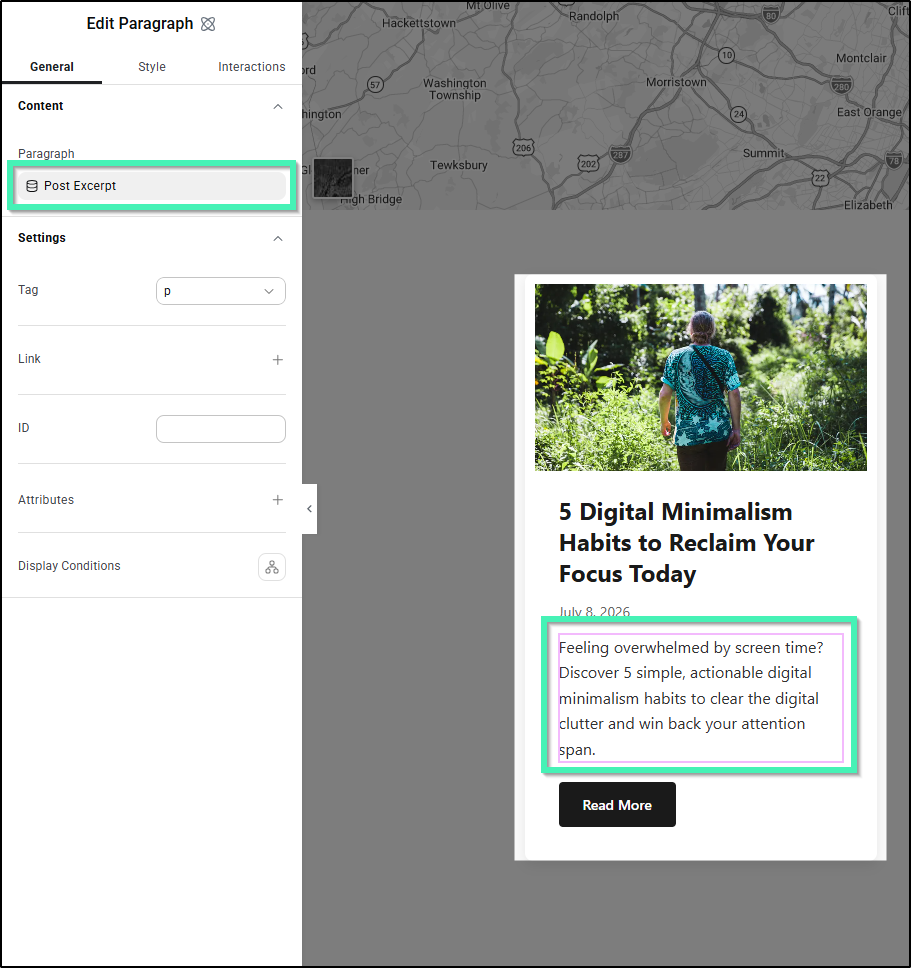
Verify that dynamic tags (such as Post Title, Featured Image, or Price) are correctly mapped.
To make visual adjustments, double-click the loop item or select it directly inside the Structure panel.
Save your changes and preview the live page to validate the layout.
TipAngie can also generate Reusable Components with Exposed Properties. If you ask Angie to create an item template, you can expose variables like headlines or backgrounds to customize individual instances later.
How to Build an Atomic Loop from Scratch
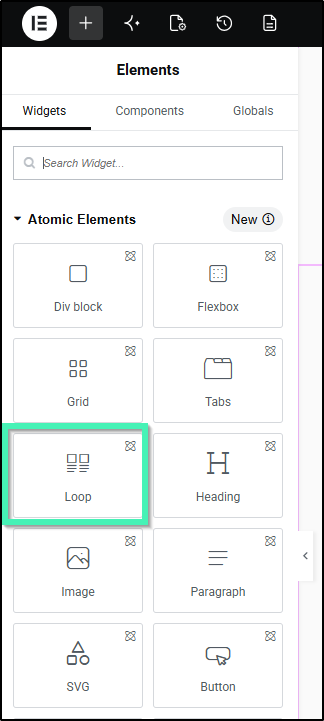
Drag the Loop element from the Elementor Panel onto your canvas.
Select the Loop element, navigate to the Content tab, and configure your Query parameters (Source, Item Count, and Sorting Order).
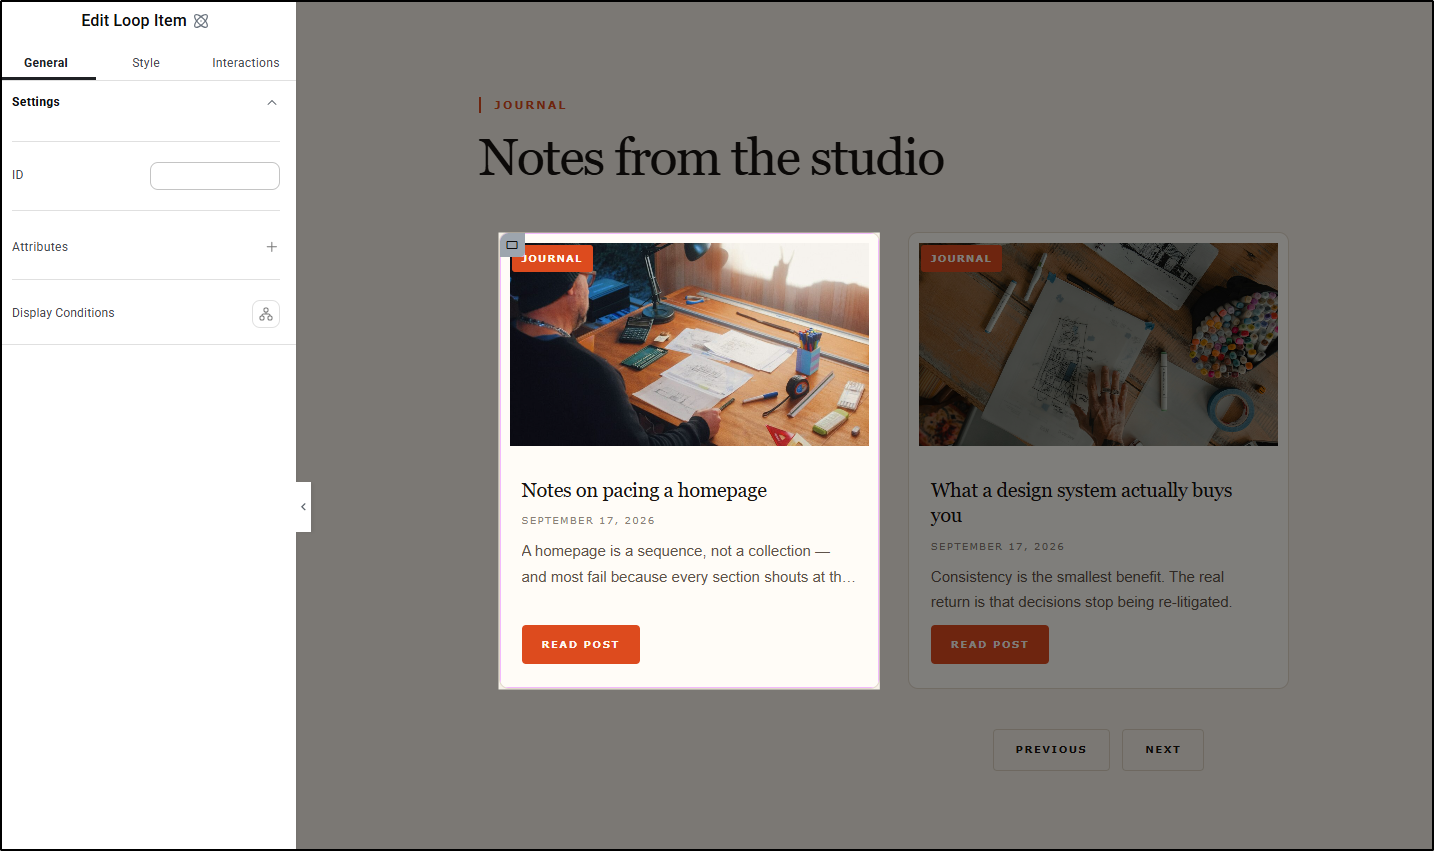
Double-click the loop element (or select it in the structure panel and click edit loop item) to enter in-canvas item edit mode. The surrounding canvas dims so you can focus directly on the template.
Drag widgets (e.g., Heading, Image) into the item template and map them to dynamic content using the Dynamic Tags icon. Changes render across all repeated loop instances on your canvas in real time.
Press ESC to exit item edit mode.
Select the parent Loop element to adjust spacing, columns, and gaps within the Layout panel.
(Optional) Right-click your finished Loop Item and select Save as Component to make it available across other loops on your site.
Advanced Capabilities & Configuration
Taxonomy Filtering
Display posts or products grouped by specific taxonomies directly:
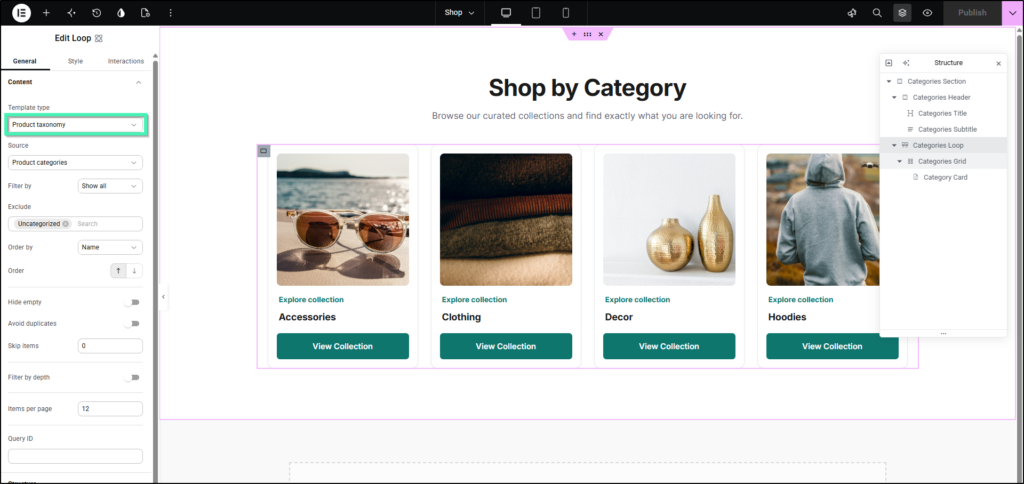
Taxonomy Query Setup: Select your Loop element, open General > Content, and set Template type to Post taxonomy or Product taxonomy.
Alternating Templates
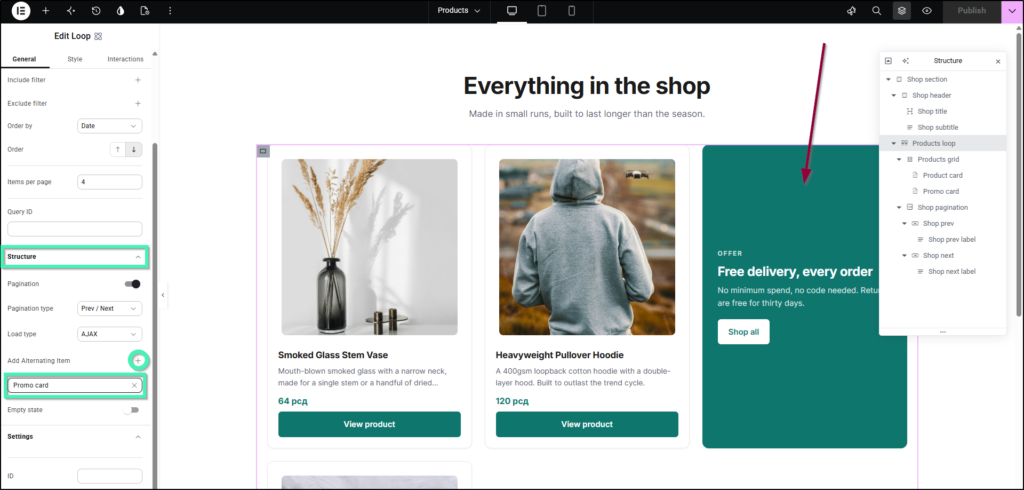
Display layout variations within the same loop sequence (e.g., featured post cards or highlighted products):
- Select the Loop element.
- Under the General tab, expand the Structure section.
- Click Add Alternating Item (+) to create and assign an alternate Loop Item template for specific positions in the sequence.
Custom Empty States
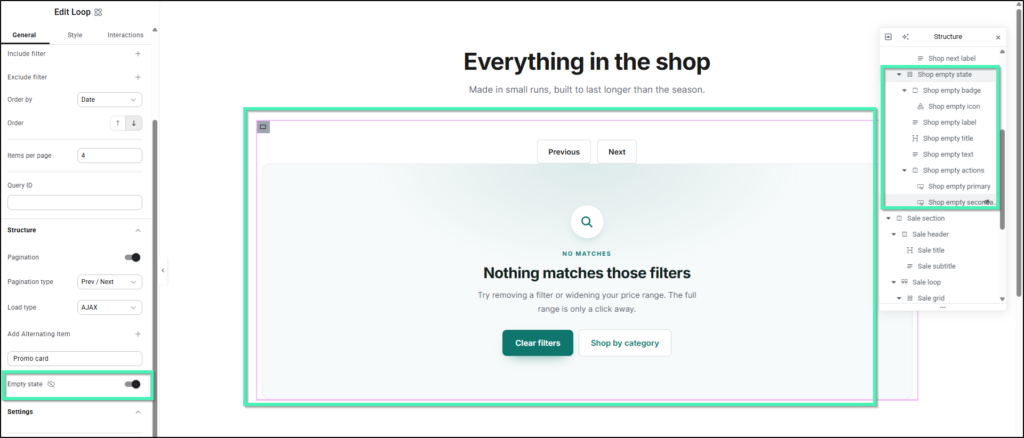
Control what visitors see when a query returns zero results:
- Select the Loop element.
- Under the General tab, expand the Structure section.
- Toggle Empty state to On.
- In the Structure panel, expand the new Empty state container and drag elements directly inside it (e.g., Heading, Paragraph, Button).
Pagination & State Styling
The Atomic Loop supports customizable, nestable Previous/Next pagination controls with two functional modes:
Standard Page Reload: Navigates pages via a traditional browser refresh.
Ajax-based Navigation: Seamlessly swaps content items in real-time without refreshing the entire page.
How to Configure Pagination & State Styling
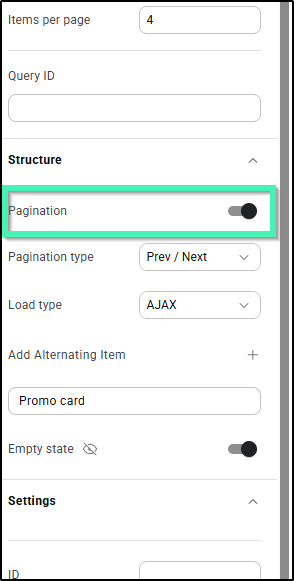
- Select the parent Loop element container on your canvas.
- In the left panel under General > Structure, toggle Pagination to On.
3. Adjust the style and layout of the Previous and Next button elements by configuring the Pagination element settings, then refine each element individually for further customization.
Fully Customizable & Nestable Controls
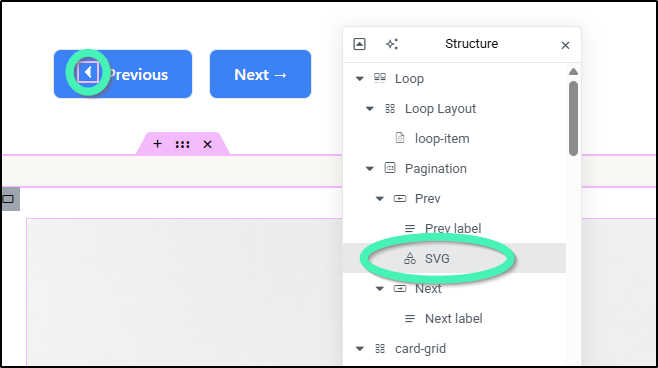
In the Atomic Editor, the Previous and Next pagination controls act as open containers.
You can drop any element directly inside them – like an SVG arrow, image, or heading – to design fully custom navigation controls.
Legacy Template Support
If you have existing V3 Loop Item templates, you can load them directly inside an Atomic Loop as a temporary migration bridge while you transition your site to the Atomic Editor architecture.
How to Use a Legacy Loop Item in an Atomic Loop:
- Open the page containing your existing Legacy Loop Grid
- Edit the Loop Item template and copy its content by right-clicking on the widgets you’d like to copy.
- Exit the template, then right-click and paste the copied content directly inside the Atomic Loop Item element.
⚠️ Important Caution: When exporting, importing, or copy-pasting loops between different websites, ensure your Loop Item template IDs match up correctly to prevent unexpected rendering errors on the destination site.
Frequently Asked Questions
Is the Atomic Loop feature available in Elementor Free?
No. The Atomic Loop architecture requires an active Elementor Pro license.
Can I use the Atomic Loop with WooCommerce?
Yes. Set the Template type under General > Content to Products or Product taxonomy.
What happens if I edit a Component used as a Loop Item?
Any visual or structural changes made to a master Component will automatically sync across all active Loop instances site-wide.