Introduction
In this article we will give our Elementor hosted website its proper name and logo. This article will help you in this step.
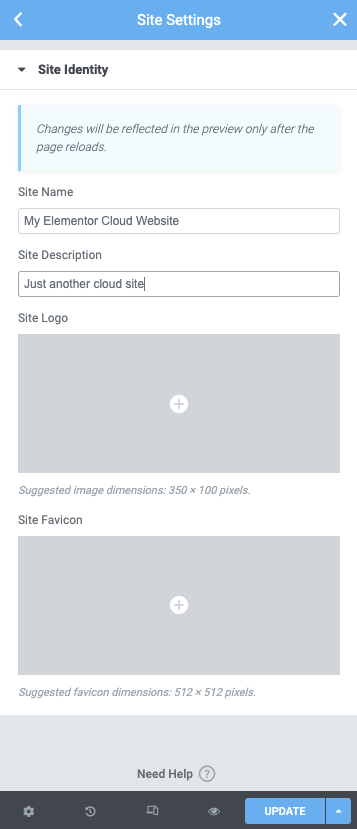
The Site Identity
Navigate to Site Settings > Site Identity. Here you can change the name of your site, the tagline, the logo, and the favicon.
Editing The Site Name And Tagline
- Site Name: Enter the name of your website in the field
- Site Description: Enter a tagline for your website in the field
Adding The Logo
To add a logo to your imported Kit, you may assign it by uploading your logo in the Site Identity settings. It will then be used for the header and footer of your website when the Site Logo Widget is used. You may use jpg, png, and gif file types.
- Site Logo: Use the media tool to choose an image from your media library or upload from your computer. This will be used by the Site Logo widget and other site functions
- Site Favicon: The favicon is used in the browser as the tiny icon located at the top of the tab. Use the media tool to choose an image from your media library or upload from your computer.
Note: SVGs may be used if previously uploaded to the media library. You must also define a size in the style tab of your Site Logo Widget.
Summary
What’s Next
You may assign the homepage of your website from the WordPress Dashboard or your theme’s customizer.
Have you created menus for your website from the dashboard, or your theme customizer?
Need to add content to your website?