The Elementor visual form builder is a powerful tool that helps you build complete and beautiful online forms in minutes without using any code.
Here, we’ll show you how to build a simple lead capture subscription form that will accomplish three goals:
- Allow visitors to sign up to a mailing list.
- Add the user to a 3rd party marketing automation tool such as MailChimp.
- Give the user a free gift such as a worksheet, ebook, or white paper for joining.
Drag And Drop A Form Widget
- Open the Elementor Editor.
- Drag the form widget to the canvas.
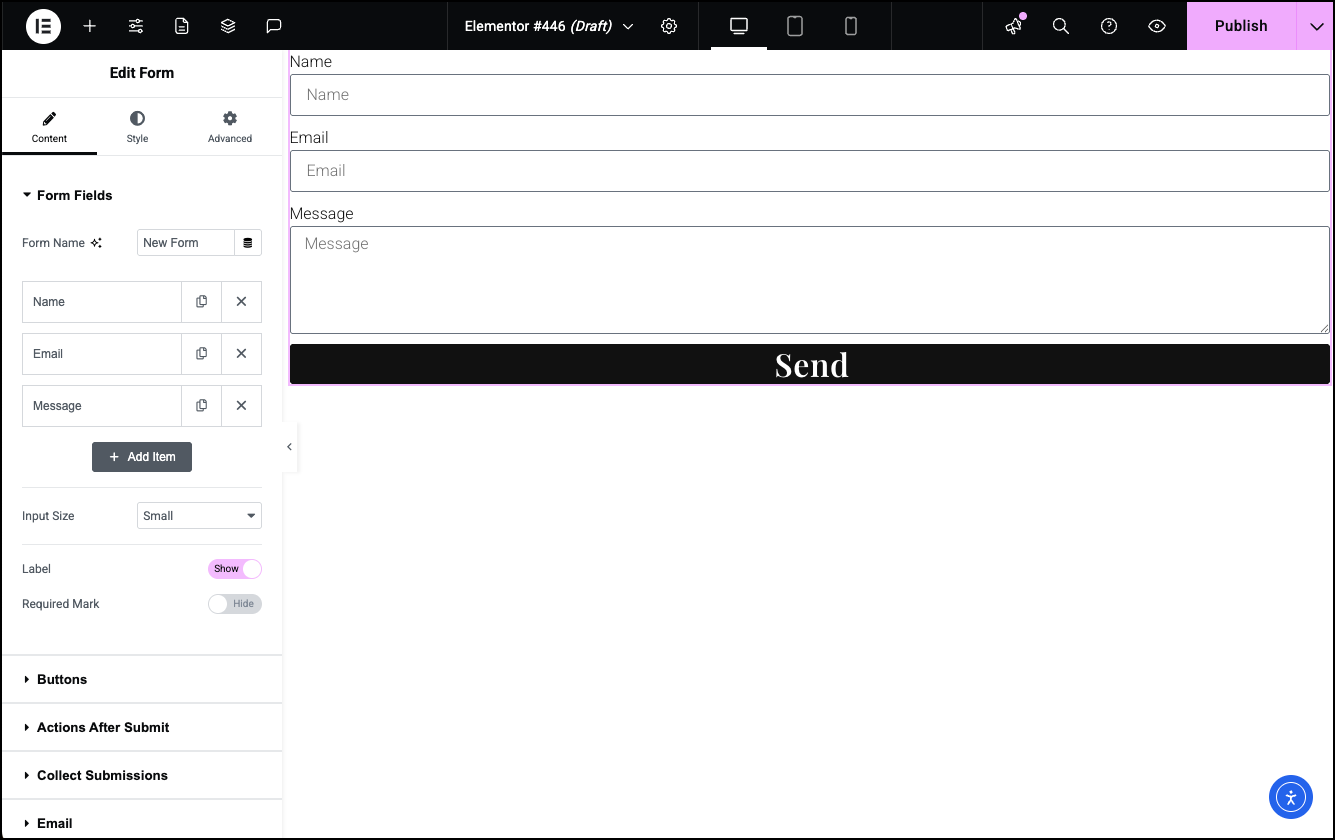
The Form widget immediately creates a basic form which already contains a name field, an email address field, a message textarea, and a submit button.
Content > Form Fields
- In the Form options panel, in the Form Fields section give the form a name.
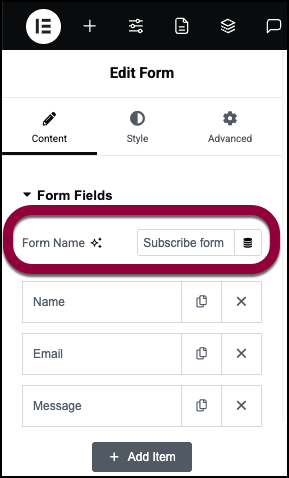
We’ll name this Subscribe form.
Three fields were automatically generated when the widget was inserted: Name, Email, and Message.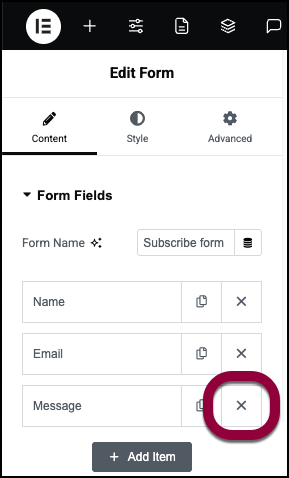
- For a typical lead generation form, there is no need for a message field, so delete it by clicking the X at the far right of the field option, leaving just the name and email fields.
If you want to add new fields, just click the Add Item button to do so, but we only need two fields for this particular example.
Now let’s take a closer look at the options available for each field.
A Field’s Content Tab
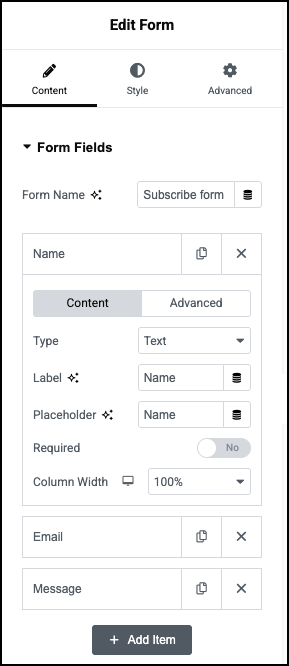
Type – Under the field’s Content tab, you can select the Type of field. The Name field, for example, is a Text field type, which simply allows a user to type any standard text into a one-line field. The Email field, on the other hand, has a type of Email, which only accepts text that is in the appropriate email format, containing both an @ and a dot.
Label – Next is the Label option. Although it is not required, we recommend you provide a Label, even if you decide to hide it for display purposes, because this text is displayed in the email you receive when someone submits the form.
Placeholder – Next is the Placeholder option. This is an optional bit of text that helps the visitor understand what to place in this field.
Required – Now, set the Required toggle to Yes if you want the field to be required, or No if not. For most subscription forms, both the Name and Email fields are usually necessary, so set both of these to Yes. At the bottom of the Form Fields section, you can choose to Show or Hide the Required Mark. Set it to Show if you want the typical red asterisk next to the field labels. Just above the Required Mark option is the option to show or hide the Labels themselves. Of course, if you hide the Labels, then the Required Marks will be hidden as well, since they are attached to the Labels.
Column Width – In many cases, a thin subscription form is desirable, so instead of taking up so much vertical space, place the name and email fields on the same line. To do this, click the Name field, which opens up the field’s options. Change the field’s Column Width from 100% to 50%. Now do the same for the Email field. Once both fields’ column widths are set to 50%, the two fields should be on one row, side by side.
A Field’s Advanced Tab
Now let’s quickly take a look at the fields’ Advanced tab. In most cases, you will not need to make any adjustments here.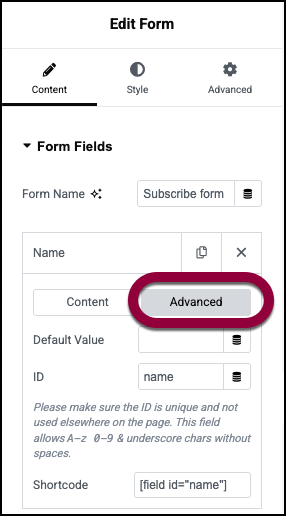
But one thing of importance to note is that the ID field here should never be blank. If, for some reason it is blank, type an ID name manually. Without an ID, the form won’t work properly. You’ll notice that the Shortcode contains the ID name within it. The Shortcode is the code you can copy/paste into the emails that get sent if you wish to have that particular field data sent out. By default, emails send all field data, by using the auto-generated shortcode [all-fields]. But in some situations, you may not wish to have every field’s data sent within the email. In that case, you would manually enter the shortcodes of the fields you do want included.
For a normal subscription form, you would leave these Advanced options as they are, assuming they each have an ID assigned.
See the Form Fields documentation for additional details on working with field data.
Content > Buttons
Now set the options for the form’s buttons. Most simple forms, such as this one, only have one button – the Submit button. If you are creating a multi-step form, however, you would also have a button for each step. 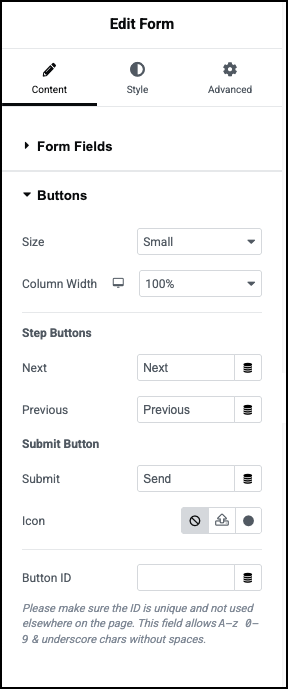
First, choose the Size of the form’s Submit button. This option gives you a few “preset” styles which set the buttons font size and paddings, primarily. You can adjust these later in the widget’s style tab, but if you are looking for a quick setting, this would be the place to make that choice.
Next, you’ll set the button’s Width. For small forms, the 20% option is usually a good choice, but use whichever width works best for your particular style.
Since this form isn’t a multi-step form, we can skip the Multi-step button options. In the Submit field, type the button’s text. Default is Send, but other popular choices might be Subscribe, Get Started, Sign Up, etc.
Next, choose an Icon to display next to the Submit text on the button if you like. If you choose to display an icon, two new options will appear. Icon Position allows you to choose whether to place the icon before or after the Submit text, and Icon Spacing lets you adjust the amount of space between the icon and the Submit text.
In some cases, you may want to add a unique Button ID, which can be used in custom code when needed. Normally, this is left blank, and you should leave it blank for this demonstration.
See the Submit Button documentation for additional details on all the button options.
Content > Actions After Submit
This section allows you to add actions that will be performed after a visitor submits the form. The primary, default action is to send an email with the form’s data to someone. Other typical actions might be to redirect the user to a particular page or connect to a 3rd-party marketing platform such as Mailchimp. For this example, we’ll do each of those actions.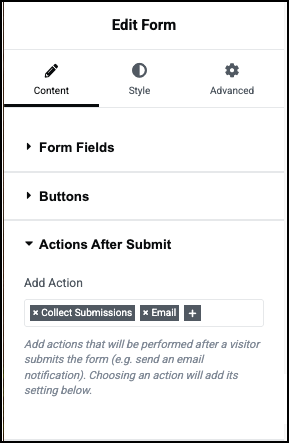
For details, see Define what happens after visitors submit a form.
Email Action
As mentioned, the Email action is already added for us by default. You can see it in the Add Action area. If you don’t want the form submission data to be emailed to anyone, you could delete this action by clicking the X next to Email. Of course, we normally want to email the data, so leave this action in place. Now notice that you have an Email tab under the Actions After Submit tab. Every action added will create its own options tab beneath this. 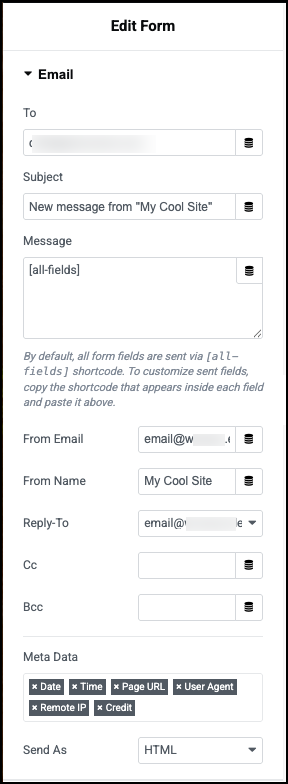
The Email tab has a number of options. See the Send Results Via Email to the Site Administrator(s) section of the Actions After Submit documentation for full details. By default, the settings here will send an email with the data from all form fields to the site administrator. You can adjust who the form goes to, what data is included, and more.
MailChimp Action
Once you’ve determined that these settings are as you want them to be, it’s time to add another action. This time, open the Actions After Submit tab again, and click in the field next to Email to open the dropdown selections to choose from. For purposes of this example, choose Mailchimp. This adds a new tab below the Email tab called MailChimp. Click that tab to open it.
Assuming you haven’t already set up your MailChimp integration, you’ll receive this message:
Set your MailChimp API Key in the Integrations Settings. You can also set a different MailChimp API Key by choosing “Custom”.
Just click the Integrations Settings link to open a new browser tab where you can enter your MailChimp API key.
Once the key is set there, you will be able to select an Audience list from the dropdown in the form’s MailChimp tab. Doing so will automatically add the user’s name and email address to your MailChimp list when they submit the form. If there are any problems with the integration, please see the integration document for the 3rd party platform you are using. In this example, you would read the MailChimp Integration document for tips on troubleshooting problems with this integration.
Redirect Action
Finally, let’s add one last Action After Submit. Open the Action After Submit tab, click the field and select Redirect from the dropdown. This adds a new Redirect tab beneath.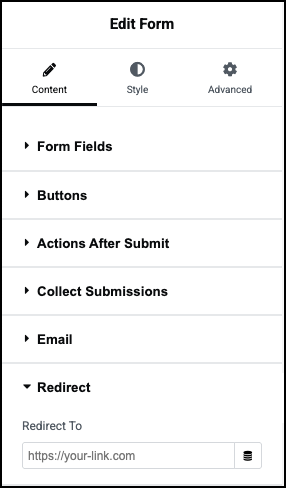
Click the Redirect tab to open its options and enter the URL of the page you want to redirect the user to once the form is submitted. This can be any page you have previously created for this purpose. For this example, it would be a page that thanks the user for signing up, and supplies the user with the freebie that you are offering or information on how to download it.
Content > Additional Options
Because this is not a multi-step form, skip the Steps Settings tab and open the Additional Options tab. The Form ID is optional, but if you need to target this form with an ID for some custom code, you can enter a unique ID here. Otherwise, leave it blank.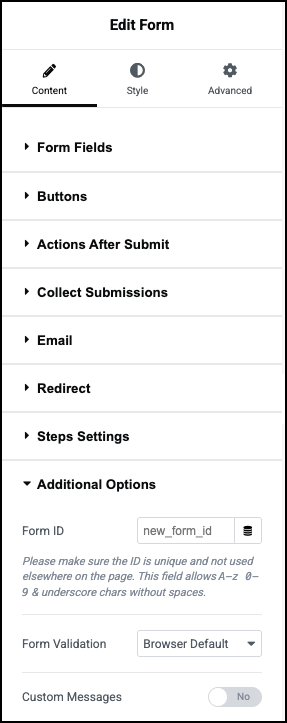
Set Custom Messages to Yes to be able to enter specific wording desired for each of the messages that might be given to a user. For example, you might want to change “An error has occurred” to read instead, “Sorry, but an error has occurred.” Please note that the Custom Messages are fallback messages when the browser does not display its own error. Very often, users will never see these specific messages.
See Additional Options documentation for full details.
Style
Now that you have your form in working order, it’s time to style it a bit. Click the widget’s Style tab.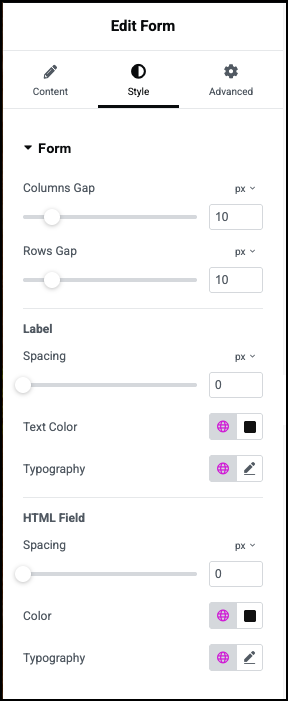
Each portion of the form can be styled, including the Form itself, the Form Fields, the Submit and Multi-Step Buttons, the Messages, and the Steps (if used).
See Form Style documentation for full details on styling each of these areas.
Test Your Form!
Once you’ve styled the form to your liking, you’re done. Publish or update the page, and fill out your form to make sure it works as expected. If you have any problems, check our form troubleshooting guide for help.
More Fun With Forms
If you want to learn how to do more fun things with Elementor Forms, read on:
Subscribe Form Popups
If you would like to create a Subscribe Form Popup, see this tutorial:
Multi-Step Forms
If you’d like to learn how to create a multi-step form, see the Multi-Step Forms documentation or watch this tutorial:
Contact Forms
If you are interested in creating a Contact Form, watch this tutorial:
Send Confirmation Email
If you would like to send a confirmation email to the user, you will use the Email 2 Action After Submit field for this purpose. Just follow this guide: