Want to learn faster? Book a 1-on-1 expert session today.
What is a Loop Grid?
Many websites contain a page or pages with a list of posts. These posts can be anything from product listings to news stories to blog posts. The Loop Grid lets you customize the appearance of these lists, allowing you to build a design tailored to your specifications.
Common use cases
Alex has a site that hosts a blog about worldwide travel. They want to create four pages – one with all posts about traveling to Europe, another about traveling to the US, another about traveling to South America and one more about traveling to Asia – all of which will update automatically when a new post fitting their subject is created. They want all these listings to be in alphabetical order, with each item featuring an icon associated with that geographical region.
Francis has a cooking site. They want their site to include pages of recipes grouped by chef and by main ingredient, with each recipe featuring a photo of the chef and they want these pages to automatically update whenever a new post is created fitting their criteria. In addition, there will be individual pages where each chef can feature their favorite recipes.
Additional use cases
- News sites that want to display stories by type, such as Politics, Sports, Local.
- Stores that want to display different product lines.
- Portfolio sites to display different types of artwork.
How Loop Grids work
The Loop Grid is a widget but acts a little differently from most widgets. In most cases, users drag the widget onto the canvas and then edit them in the panel. With the Loop Grid, however, after you drag the widget onto the canvas, you’ll be asked to create a template. That’s because when you build a loop, you’re creating a template that will be used to display a listing of various items in a uniform way.
You’ll then edit this template in the canvas using other widgets. Once you’re ready to design the loop’s layout, set its pagination and control its content – you can click the Loop grid widget on the canvas or by selecting the Loop Grid in the Structure window. This will open the editing panel.
You’re now ready to start building a loop.
Learn more about Loop Grids
To learn more about how Loop Grids work, check out these articles:
- Build a query with the loop grid.
- Customize the layout of a Loop Grid.
- Customize which items appearing your loop.
- Paginate your loop.
- Build a loop from an existing template.
- Add an alternate template in a loop grid.
- Taxonomy Filter widget.
Settings for the Loop Grid widget
You can customize your widgets using content, style, and other advanced parameters, offering you great flexibility in tailoring them to your needs. Click the tabs below to see all the settings available for this widget.
Content tab
Add, delete, and edit loop grid items and controls.
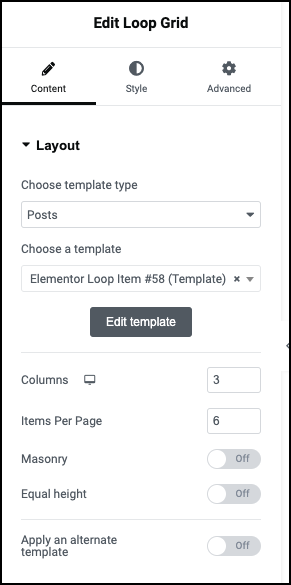
Layout
The Layout section determines the appearance of the items in the Loop Grid. This actual items that appear in the Loop Grid are determined in the Query section.
Each loop grid must contain a template. Use the Choose template type dropdown to select from these layout types:
- Posts: A Loop Grid displaying regular posts, pages, or products.
- Post Taxonomy: A Loop Grid displaying the different categories of posts.
- Products: A Loop Grid displaying WooCommerce products.
- Product Taxonomy: A Loop Grid displaying the different categories of products.
Use the Choose a template dropdown to select an exsiting template to use or click Edit template to create a new template. For more details, see Build a Loop Grid.
Edit template
Edit template has two functions:
- If you have selected a template, you can edit that template.
- If you have not selected a template, you create a new template.
Columns
In the text box, enter the number of columns you want in your loop grid.
Items Per Page
In the text box, enter the number of items to appear on each page of the loop grid.
Masonry
Toggle to On to automatically lay out the items in your loop.
Masonry refers to a dynamic layout grid system that automatically arranges the items in your loop so they are visually balanced and responsive.
Equal height
Toggle On if you want all the rows in the loop to have the same height.
Apply an alternate template
Toggle On if you want part of your loop to use a different template. For example, you can create a loop of store items where every third item is an advertisement for a special sale.
For more details, see Add an alternate template in a loop grid.
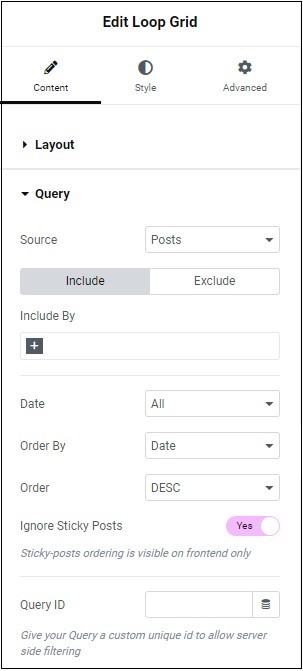
Query
Queries are used to determine what items appear in the loop. For example, a query that includes only shirts, will create a loop that only includes shirts. For more details, see Build a query with the loop grid.
Source
Your loop can include:
- Posts
- Pages
- Landing pages
- Manually selected pages
- The Current Query: Used when you build a template that will be applied for several categories and or tags. This way you won’t have to write a new query for each category or tag.
- Related items
Include
Click include to build a query defining the items you want in your Loop Grid.
Exclude
Click include to build a query defining the items you want in your Loop Grid.
Include By/Exclude By
Use the text box to enter the types of posts you want to include or exclude. For more details, see Build a query with the loop grid.
Date
Use the dropdown menu to include or exclude items according to when they were created.
Hide Empty
Toggle to Yes in order to hide categories, tags and types that contain not posts or products. Only appears for Loop Grids displaying taxonomies and types.
Filter by depth
Toggle to Yes in order to choose how far “down” you want categories to display. If you choose this option, a dropdown menu will allow to choose how far down the category or type tree your display will go. For instance, If you have a category tree that goes:
Mens clothing > Sportswear > Outdoors> Shirts
and you choose Filter by depth to 2, the Loop Grid will display Mens clothing and Sportswear but not Outdoors or Shirts.
This option is only available for Loop Grids displaying taxonomies with more than one level.
Order By
Use the dropdown menu to determine the criteria for arranging the loop items.
Order
Use the dropdown menu set whether the loop items will be arranged in:
- DESC: Descending order
- ASC: Ascending order
Ignore Sticky Posts
Sticky posts refer to blog posts that are designated to stay at the forefront of a blog’s homepage, even if newer posts are published.
When toggled to Yes, the query does not take into account a post being sticky when arranging the loop.
Query ID
Use the dropdown menu to include or exclude items according to when they were created.
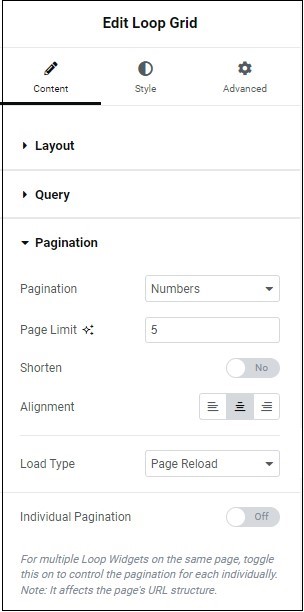
Pagination
If you loop has more than one screen’s worth of items, it will be broken up into pages. These pages can be listed as:
- Numbers
- Previous/Next
- Numbers + Previous/Next
- Load on Click
- Infinite Scroll
For more details, see Paginate your loop.
Page Limit
Use the text box to enter the maximum number of pages you want your loop to include.
Shorten
If you use page numbering, you can save page clutter by limiting the page numbers on the screen. For more details, see Paginate your loop.
Alignment
Set the pagination to the right, left or center of the loop.
Load type
When a website visitor reaches a new page in your loop, the loop needs to reload. There are two ways to do this:
- Page Reload – Reloads the entire webpage when the loop reloads.
- AJAX – Reloads only the loop grid widget.
Individual Pagination
By default, if you have more than one Loop Grid on a page, all the loops will refresh to the same page. For instance, if you have one loop containing news stories and another containing sports stories, when visitors move to page two of the politics loop, the sports loop will automatically refresh to page two.
- Toggle Individual Pagination to On to have all loop grids on a page refresh individually.
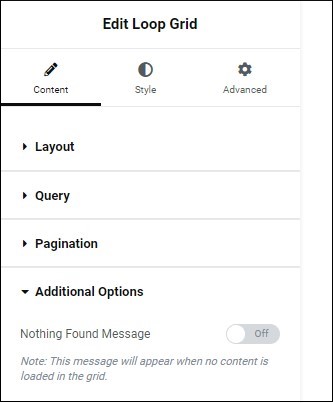
Nothing Found Message
In some cases, website visitors can filter loops and come up with no results. For example, in a loop of clothing items, a visitor could for filter for the categories “Blue” and “Pants”. If there are no blue pants in the loop, it will have no results.
Toggle to On to display a message when the loop has no results.
If you choose to display a message, you have the following options:
- Text box: Fill in the text you want to display to visitors.
- Alignment: Display your text on the right, center or left of the loop.
- HTML tag: Set the message[‘s HTML tag to H1- H6, Div, or Span. This can help search engines find and understand these messages.
Style tab
Determine the look and feel of menu items and controls.
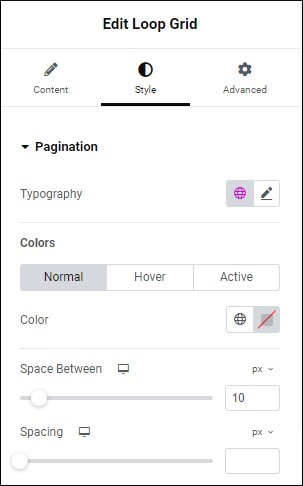
Typography
Set the size, type and color of the font used for the pagination. For more details, see Typography.
Colors
Determine the color of the numbers or text used for pagination.
- Normal: The default color of the numbers or text.
- Hover: The color when visitors mouseover the numbers or text.
- Active: The color of the numbers or text when the page being viewed by a visitor.
- Color: To choose a color, either use the color picker or a global color.
- Space Between: Use the slider to control the space between the page numbers or text.
- Spacing: Use the slider to control the how far the page numbers or text are from the edges of the loop.
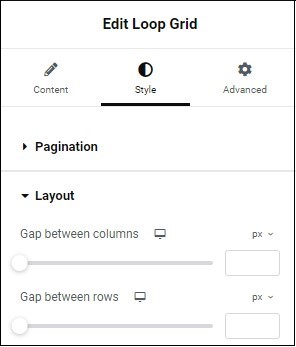
Layout
Control the look of your loop:
- Gap between columns: Use the slider to control the distance between the columns in the loop.
- Gap between rows: Use the slider to control the distance between the rows in the loop.
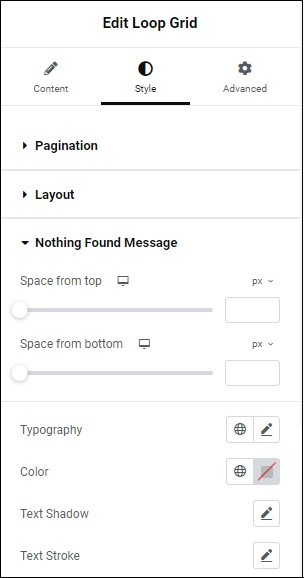
Nothing Found Message
Control the look of the Nothing Found Message:
- Space from top: Use the slider to determine how far the message will appear from the top of the loop.
- Space from bottom: Use the slider to determine how far the message will appear from the top of the loop.
- Typography: Control the color, size and type of font used in the message. For more details, see Typography.
- Color: Choose a color for the message. For more details, see Choose a color or Use global fonts and colors.
- Text Shadow: Click the pencil icon to add shadow to the text.
- Text Stroke: Click the pencil icon to color the outline of your text. Learn more about text stroke
Advanced tab
Control the placement of your widget, insert links, add custom code and more.
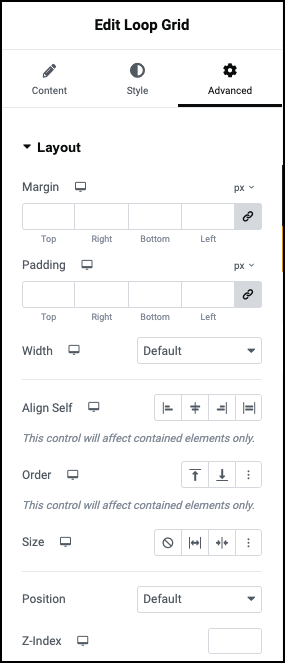
Advanced
Learn more about the Advanced tab settings.