Elementor Static Hosting has support for Contact Form 7 (CF7) built in. Below are the CF7 features supported by Elementor Static Hosting websites.
In this article, we will cover:
- What CF7 features does Elementor Static support?
- Track the page someone filled out a form on
- View form submissions in your WordPress Dashboard
- Redirect to another URL after submission
Supported features
- Basic fields
- File uploads
- Zapier integration
- View form submissions in your WordPress Dashboard
Note: Contact Form 7 add-ons, extension plugins, or integrations with platforms like Mailchimp and Salesforce that require interaction with the WordPress database are not supported yet. However, you may use our Zapier integration, to connect to another platform find out more.
Track which page a user was on when they filled out the form
If you have a contact form in the footer of every page of your website, you might want to know which page someone was on when they filled it out so you could send them a tailored response.
To do this with CF7:
1. Install and activate this plugin: https://wordpress.org/plugins/contact-form-7-dynamic-text-extension/
2. Add [dynamichidden page-url “CF7_URL”] to your form.
3. Click Save.
4. In the Mail tab, add [page-url] to your submission email, and click Save.
5. Test your form in WordPress.
6. Publish your site to Live or Preview using a Full publish.
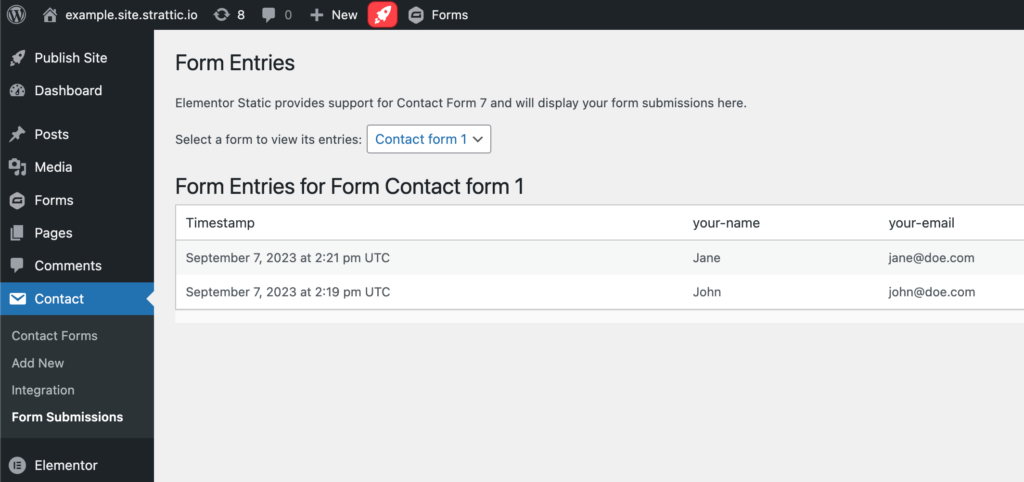
View form submissions in your WordPress Dashboard
1. In WordPress, navigate to Contact > Form Submissions.
2. From the drop down menu, select the one of your forms.
Redirect to another URL after submission
By default, Contact Form 7 redirects to the same URL as the form’s URL after submission. You can, however, make it redirect to another URL, such as a “thank you” page, after submission.
The simplest way is utilizing Contact Form 7’s custom DOM event to run JavaScript. The following is an example of script that redirects you to another URL when the wpcf7mailsent event occurs:
<script>
document.addEventListener( 'wpcf7mailsent', function( event ) {
  location = 'http://example.com/';
}, false );
</script>- Embed this snippet into your theme’s template file.
- Replace the http://example.com/ in the code to the URL you want to redirect to.
- After the code has been added, run a Full Publish to your live environment.

