If you have a WordPress Form plugin that isn’t supported by Elementor Static Hosting, don’t worry! You can use a free Hubspot CRM account to collect your form data.
Step 1 – Set Up Your HubSpot Account
Once you have signed up for a free HubSpot account, follow these instructions on how to setup your account:
- In your HubSpot account, in the main navigation bar, click the settings icon.
- In the left sidebar menu, navigate to Marketing > Forms.
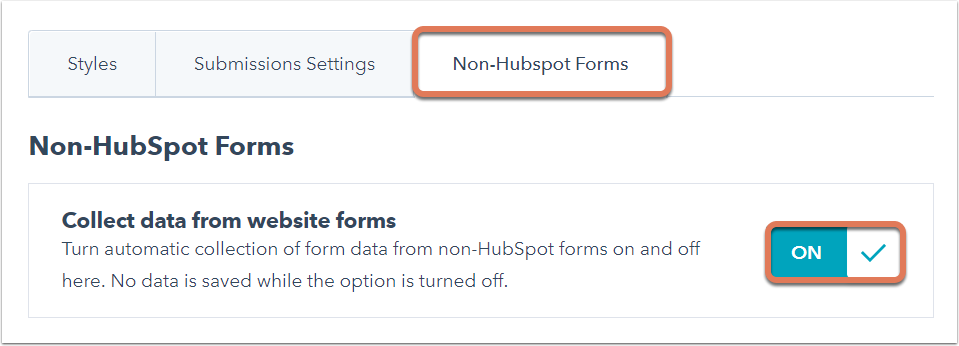
- Click the Non-HubSpot Forms tab.
- Toggle the Collect data from website forms to on to enable non-HubSpot forms.
Step 2 – Set Up WordPress
Now that you have your HubSpot account setup, follow these directions to connect it to your WordPress site:
- Install the HubSpot WordPress plugin (or add the HubSpot code snippet manually to your site).
- Go to the HubSpot plugin settings by navigating to Hubspot > Settings, and sign in to your HubSpot account
- Use a WordPress form plugin like Formidable, WPForms to add a form to your site.
- Publish to your preview static site for testing
- Fill out the form on your static preview site. (See Troubleshooting Tips below if your form does not submit correctly. HubSpot may have still captured the form submission).
Step 3 – Check for Form Submissions in HubSpot
In our final step, make sure the HubSpot integration is working. Login to your HubSpot account and go to Marketing > Forms.
- From the Form type filter, select Non-HubSpot Forms.
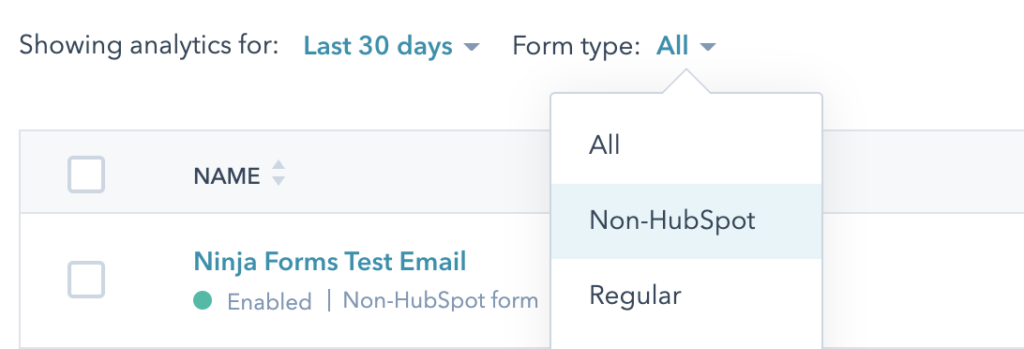
You should see the form you submitted on your WordPress site listed. It may appear by a name matching it’s CSS class. You can rename the form for clarity.
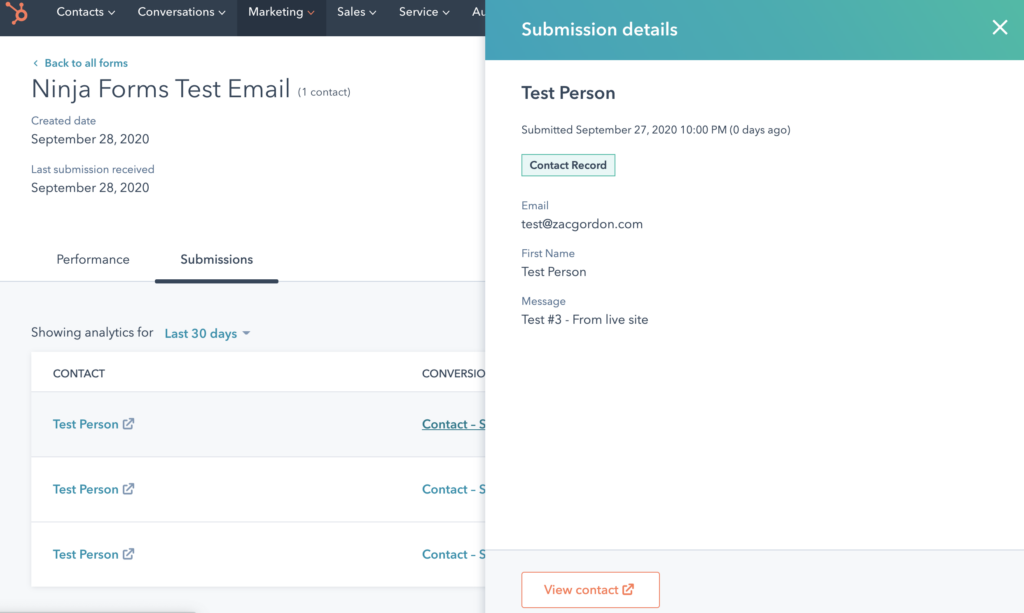
Click on the Form Submissions (it may show a 0 at first).

The submissions for that form in HubSpot is displayed.
You will receive an email when the form is submitted.
Connect Form Fields to HubSpot Properties
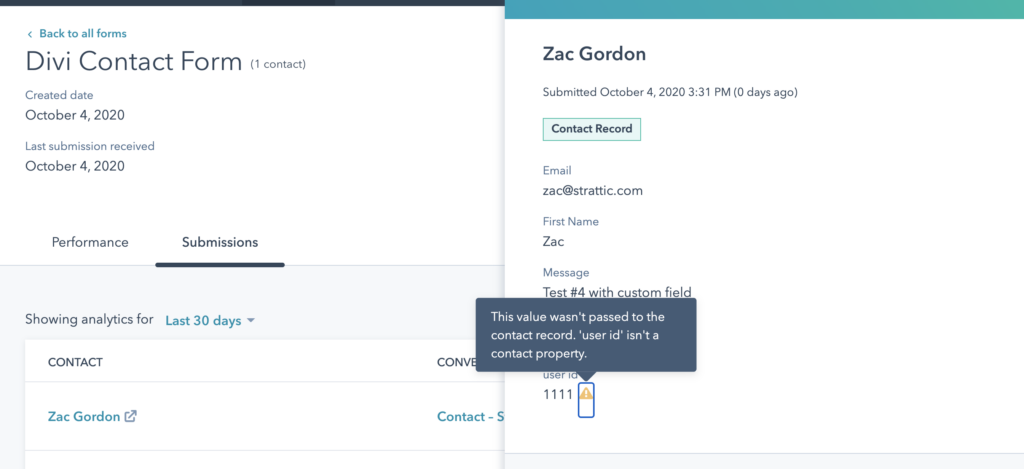
HubSpot automatically collects all of your form fields in the form submission area. However, there are some fields you may want to save to the visitor’s contact profile in HubSpot. For example, you may have a user enter in a custom User ID to a contact form that you want saved to their HubSpot profile.
Note in the form submission below there is a warning sign next to the user_id field. This means HubSpot is not saving this data to the contact profile.
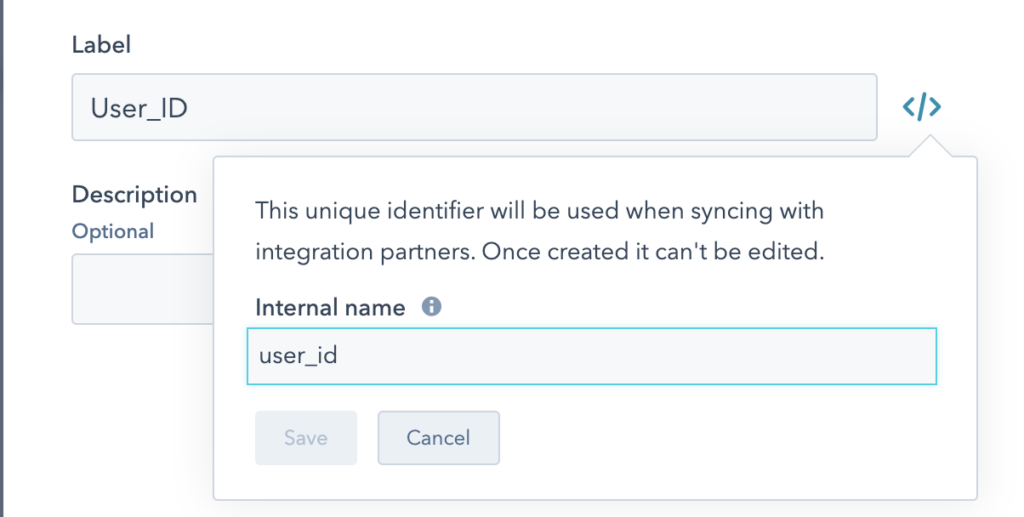
To fix this, first setup a custom profile property in HubSpot (here’s instructions on how to do this). Make special note of the Internal Name for the property you setup.
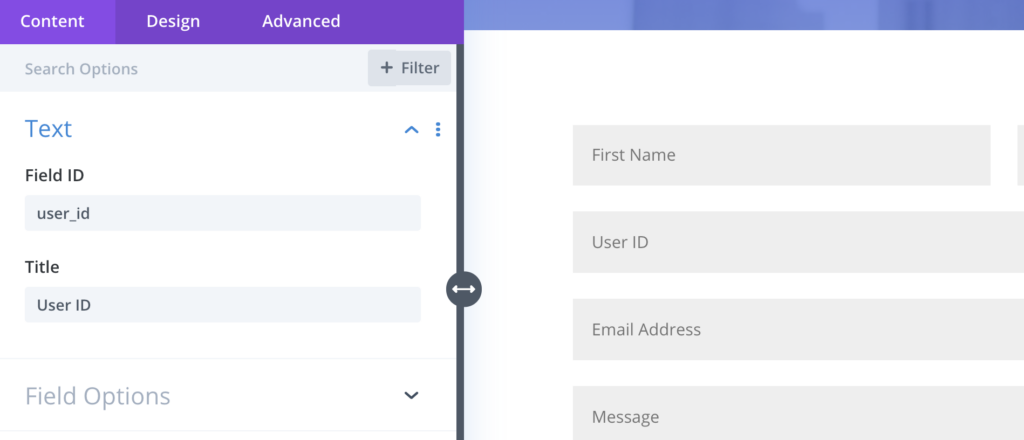
Then open up your form editor and modify the field identifier to match the value in HubSpot. In the example below we are using the Divi Form Builder.
Now when the form submission is saved, it will also save the data to the person’s HubSpot profile. Note there is no warning sign next to the User_ID value now, signifying it is saved to the HubSpot contact profile.
Troubleshooting Tips
Since many WordPress form plugins were not designed to work with static sites, you may experience some situations where HubSpot collects your form data, but the form does not look like it submits properly.
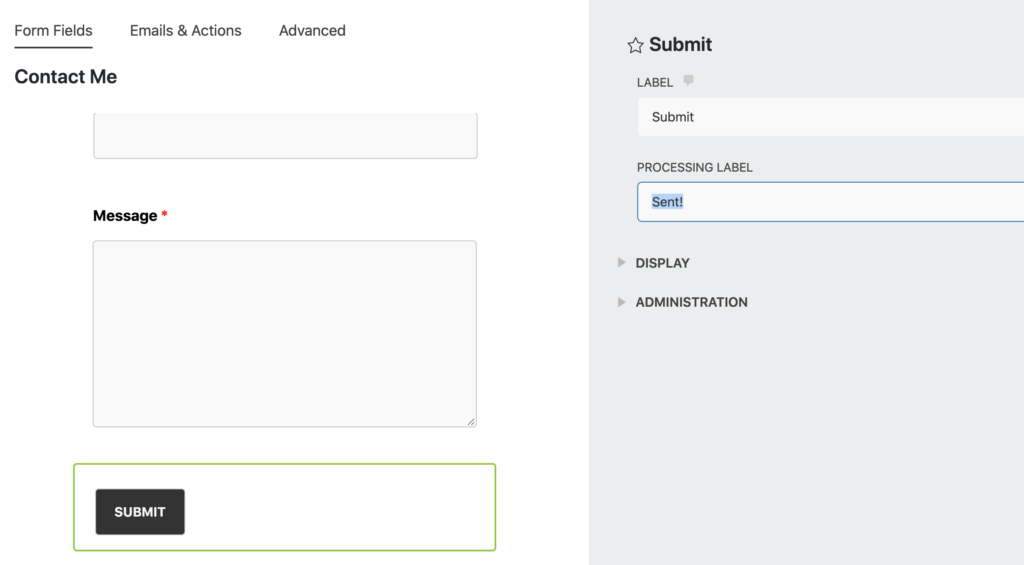
- Troubleshooting Ninja Forms – When submitted on a static site, a Ninja Form will continue to display the word Processing in the Submit button. To fix this, select the Submit button in the Ninja Forms editor and change the Processing Label to sent. This lets the user know the form has been submitted.