In addition to, or instead of, receiving form submissions to WP Admin, you can also choose to receive information by email.
If your form includes file uploads, you can have those emailed to you. This is a more secure way to handle document submissions. To learn more about how to have file uploads mailed to you, see Receive form file attachments by email.
Want to learn faster? Book a 1-on-1 expert session today.
Note
When a user submits a form, two email notifications are often sent: one to the user as confirmation and one to you or your team. However, these emails may end up in the spam folder, especially now that providers like Gmail are increasingly strict about email reputation and authentication. To address this, we recommend using a tool like Site Mailer. By routing all site emails through a dedicated external service rather than your hosting server, Site Mailer significantly improves deliverability and ensures your messages reach their intended destination.
Receive form submissions by email
To receive form submissions by email:
- Create a form. For more details, see Form widget.
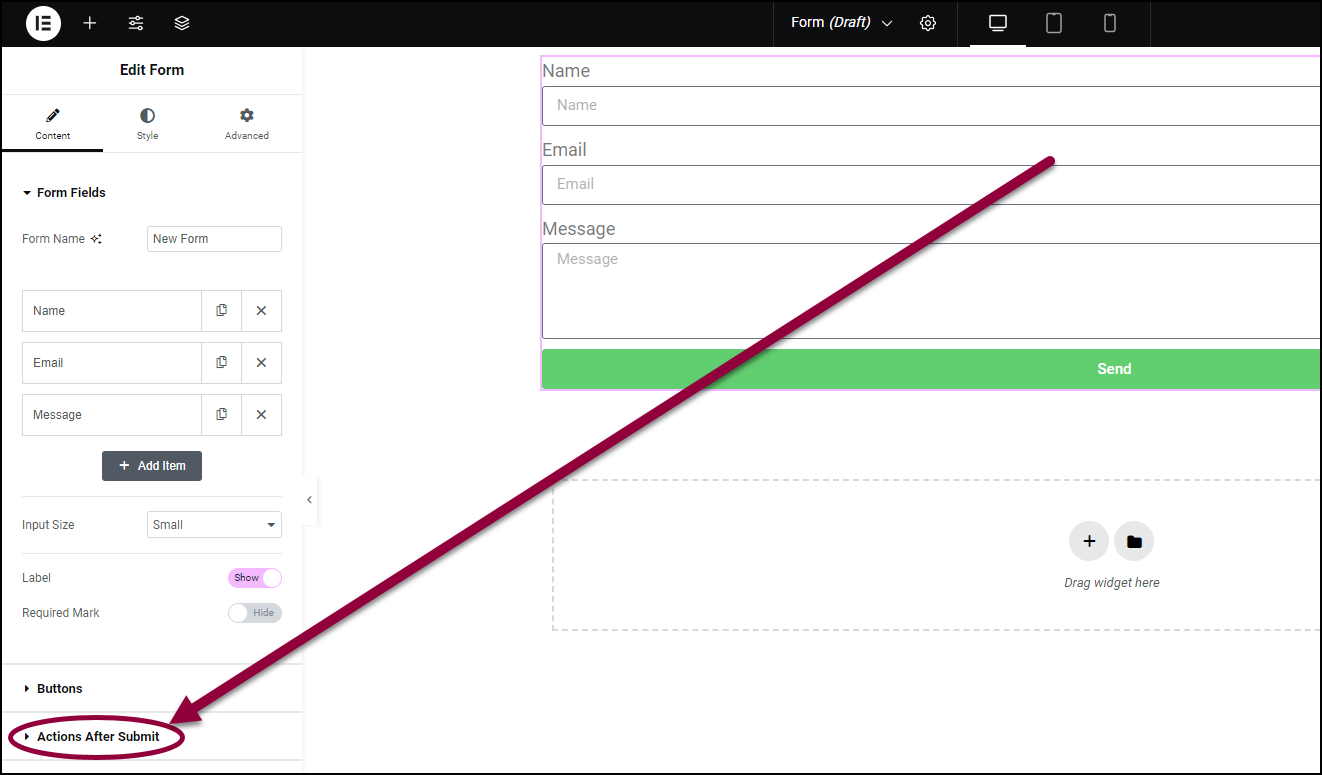
- In the panel, under the Content tab expand the Actions After Submit section.
- In the Actions after Submit field, make sure Email is listed.
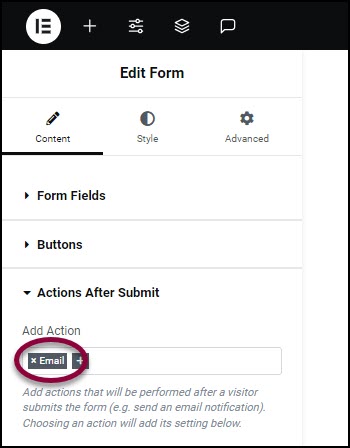
Email is active by default.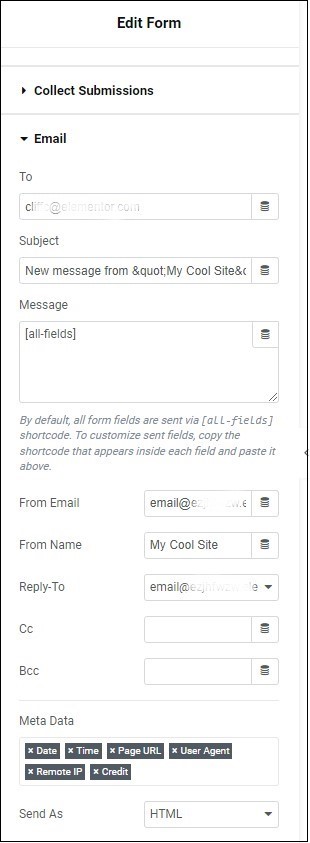
- In the panel, in the Content tab, open the Email field.
These fields are available for editing:
| Field Name | Description | Edit |
| To: | The address where the form information will be sent. By default, this will be the address of the subscription owner. | Use the text box to change the email address. |
| Subject: | The subject line of the email you receive with the visitor’s information. You can use this to help filter the messages you receive via the form from other emails. | Use the text box to change the subject line. |
| Message: | The body text of the email you receive when a form is submitted. By default, the message consists of the information submitted by the visitor. | See Edit the fields sent to your email. |
| From Email: | The email address where the form information will be sent from. By default, this is the website address. | Use the text box to change the email address. |
| From Name: | The name that appears as the sender of the email with the visitor information. | Use the text box to change the name that will appear as the sender. |
| Reply-To: | The address to which any replies to these emails will be sent. | Use the text box to change the email address. |
| Cc: | Fill this in if you want copies of these emails sent to a different address. | Use the text box to add an email address. |
| Bcc: | Fill this in if you want copies of these emails sent to a different address as a blind copy. | Use the text box to add an email address. |
| Meta Data: | By default, in addition to visitor information, you’ll receive other data about the sender. This includes:The Date the form was sent.The Time the form was sent.The URL of the page containing the form.User Agent information about the visitor’s browserThe Remote IP address of the visitorCredit letting you know the information came from an Elementor form | Click the x in to the left of the variable to delete it from the emails you receive. |
| Send As: | The format of the email you will receive. HTML emails will allow you more styling options. | Use the dropdown to choose between sending the email as Plain Text or HTML. |
Edit the fields sent to your email
If you choose to receive email submissions, all the form’s fields are sent to you by default. However, you can customize which fields are sent in the email.
To determine which fields are are sent by email:
- In the panel, open the Form Field section.
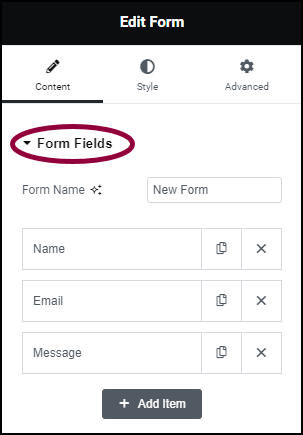
All the form’s fields appear. - Decide what field(s) you want included in the email.
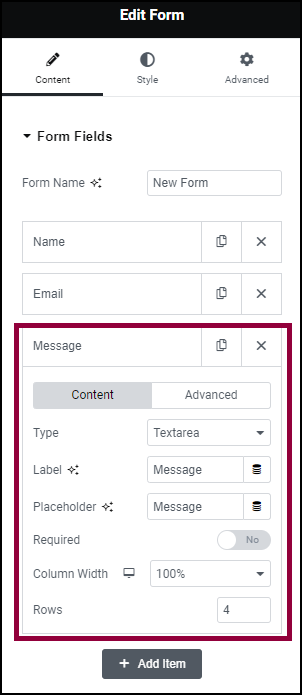
- Click a field you want to include in the email to open it.
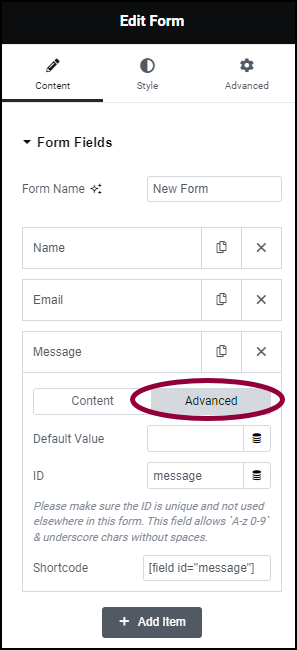
- Click the Advanced tab.
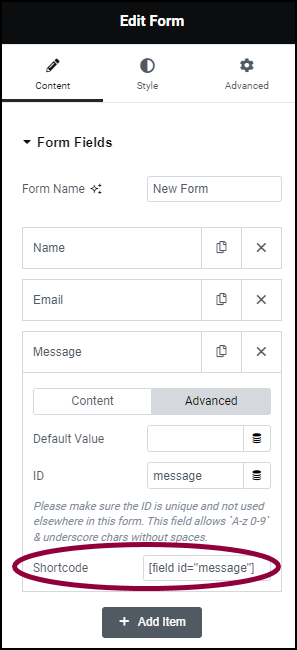
- Copy the shortcode.
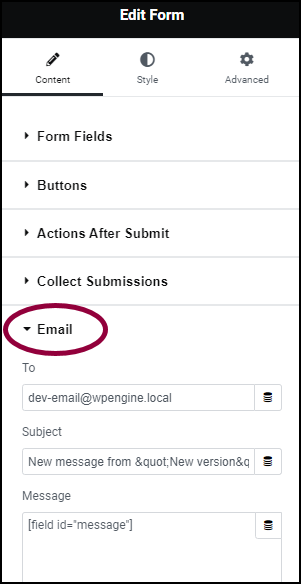
- Open the Email section.
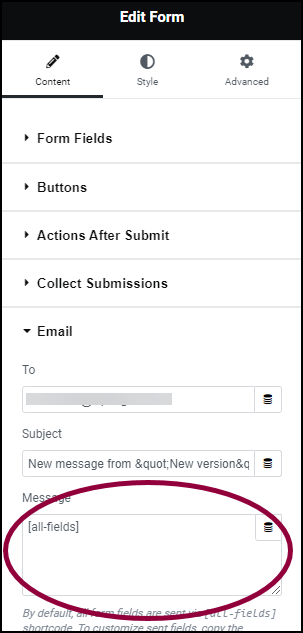
The Message field contains the shortcode [all-fields]. This means that all the form’s fields will be sent in the email. - To customize which fields will be emailed, delete the [all-fields] shortcode.NoteYou will still see the shortcode in the message box but that is just a placeholder.
- Open the Email section.
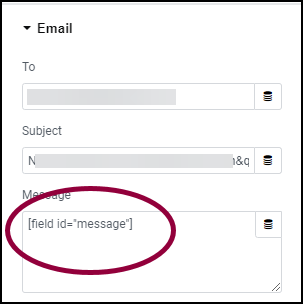
- In the Message field, paste the shortcode(s) of the fields you want included in the email.
Only this field(s) will be included in the email.
Warning
Only shortcodes located in the advanced tab of the form fields widget can be used. You cannot use shortcodes from anywhere else here. Adding other shortcodes from other plugins or elsewhere will cause a server error message. The shortcode needs to be written exactly as it appears in the form field’s advanced tab.