Caching is a way to decrease page load times. The Elementor live server stores the website’s HTML, meaning each request to view a page requires communication between the server and the visitor’s computer.
With caching, your site’s assets, such as images, and HTML, are stored on the global Cloudflare Content Distribution Network (CDN). With worldwide distribution, the CDN will be able to deliver pages to website visitors faster – decreasing bounce rates and increasing SEO scores.
Website speed measurement
You can use the following third-party tools to measure website speed:
- Pagespeed Insights (from Google Developers)
- GTmetrix
- Pingdom
- WebPageTest
- Yslow
Key features of caching
- Improved website performance: Significantly reduces Time to First Byte (TTFB) for faster loading times. Advanced caching provides you with total control over your website caching, and allows you to easily configure which pages you want to cache and which ones to not cache.
- Granular control: Configure caching for specific pages based on your needs (cache or exclude).
- WooCommerce compatibility: Fully functional with WooCommerce stores.
- Compatibility with other caching plugins: Our advanced caching is recommended, but existing plugins with additional functionalities (e.g., image compression) can be used alongside.
Disadvantage of caching
When you cache pages, you are storing a copy of the page on the CDN. This means any changes you make, or that are made dynamically, to the page, will not be seen by site visitors until the cache is cleared. This could be an issue for pages like an event schedule where you may be making last minute changes, while your visitors are viewing cached pages with outdated information.
Our system automatically clears cache for modified pages, ensuring visitors see the latest version. To further enhance content delivery, we recommend exploring these features:
- Exclude from Cache: Mark specific pages as static, preventing unnecessary cache clearing.
- Always Clear Cache: Utilize this for frequently updated content (e.g., schedules) to guarantee users always receive the most recent information.
- Manual Cache Clearing: Consider manually clearing the cache for critical updates or during high-traffic periods.
By strategically using these features, you can ensure optimal content delivery and user experience.
Access caching
To activate caching, follow these steps:
- Login to WP Admin.
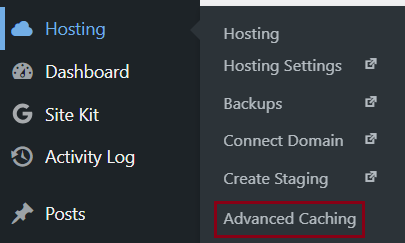
- Go to Hosting > Advance Caching.
Deactivate advance caching
Follow these steps:
- Login to WP Admin.
- Go to Hosting > Advanced Caching.
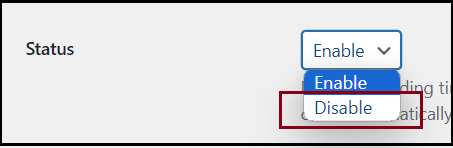
- From Status, choose Disable.
Notice the other options disappear as soon as you disable. - Click Save Changes.
Caching options
Cache timeout
When a visitor goes to a post for the first time, the assets and the HTML are loaded into the cache, where they can quickly be accessed by any visitor around the world.
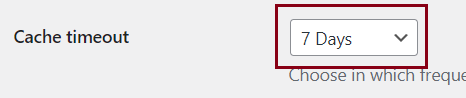
Cache timeout refers to the duration for which a post is stored in the cache.
- For websites that are updated often, a shorter cache duration is preferable to ensure content is current.
- For websites that are updated less frequently, it is beneficial to have a longer cache duration to reduce loading times.
To change the cache timeout, follow these steps:
- Login to WP Admin.
- Go to Hosting > Advance Caching.
- From Cache timeout, choose the desired duration.
- Click Save Changes.
Exclude from cache
Your site may include posts, or groups of posts that you do not want to cache. This may apply to the following types of posts:
- Specific URLs that feature content which is also available on other posts, such as course listings or unique product offerings.
- Posts that contain personalized information, like those that display different content depending on the user’s location.
The goal is to ensure that visitors always access the most up-to-date information.
To exclude posts from the cache, follow these steps:
- Login to WP Admin.
- Go to Hosting > Advance Caching.
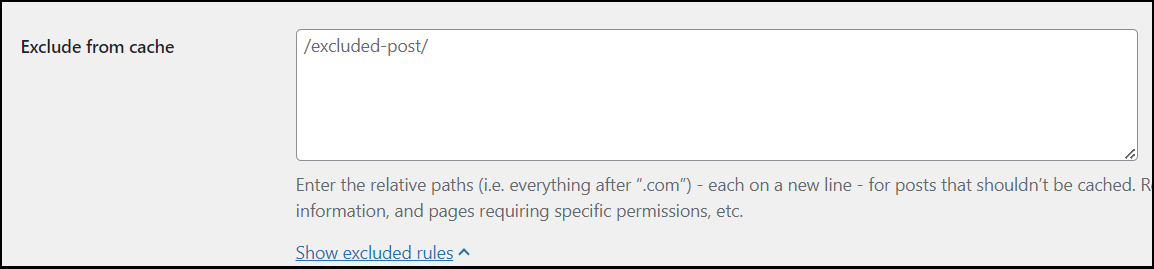
- In Exclude from cache, enter the relative paths (everything after “.com”).NoteEnter each path on a new line. Include the beginning and end slashes. The definitions can include wildcards (*).
Examples:- /* (This will include all the posts in a directory)
- /foo (This will include the post in the directory called “foo”)
- /*foo (This will include all posts in the directory that end with “foo”)
- /foo* (This will include all posts in the directory that begin with “foo”)
- /*foo* (This will include all posts in the directory that have “foo” in them)
- /bar*/ (This will include all posts in a directory that begins with with “bar”)
- /*bar/ (This will include all posts in a directory that ends with with “bar”)
- /*bar*/ (This will include all posts in a directory that has “bar” in it)
- /baz/faz (This will include the posts “faz” in the directory “baz”)
- /*baz/faz (This will include all the posts named “faz” in directories that begin with “baz”)
- /baz*/faz (This will include all the posts named “faz” in directories that end with “baz”
- /baz/*faz (This includes all the posts that end with “faz” in the directory “baz”)
- /baz/faz* (This includes all the posts that begin with “faz” in the directory “baz”)
- /*baz*/*faz* (This includes all posts with “faz” in them, located in any directory that has “baz” in it.)
- Click Save Changes.
To see built in excluded rules, expand Show excluded rules.

Always clear cache
For frequently updated content (for example, daily schedules), enable “Always clear cache.” This ensures the latest version is served upon each request, eliminating outdated information from cached versions.
Follow these steps, to mark posts as Always clear cache:
- Login to WP Admin.
- Go to Hosting > Advance Caching.
- In Always Clear from cache, enter the definition of the pages you do not want cached.
 NoteDefine these posts by relative path patterns. Include the beginning and end slashes. The definitions assume you are using a wildcard.
Following are the examples of acceptable definitions:- /foo (This will include all posts in the directory beginning with “foo”)
- /bar/ (This will include all the posts in the directory named “bar”
- /baz/faz (This will include all posts that begin with “faz” in the directory “baz”)
- Click Save Changes.
Clear cache items manually
If you need to refresh your site, you can manually clear all cached items.. There are two ways to manually clear the cache:
Follow these steps:
- Login to WP Admin.
- Go to Hosting > Advance Caching.
- You can clear cache by doing any of these:
- Click Clear All for Clear all cached items.

- From top toolbar, click Clear Posts Cache.

- Click Clear All for Clear all cached items.