To log into your Elementor account, select your preferred authentication method – such as email and password, passkey, social login, or Single Sign-On – on the sign-in page. To configure multi-factor authentication, generate backup recovery codes, or update credentials, navigate to your My Elementor Dashboard, click your profile icon in the top-right corner, and open the Security settings panel.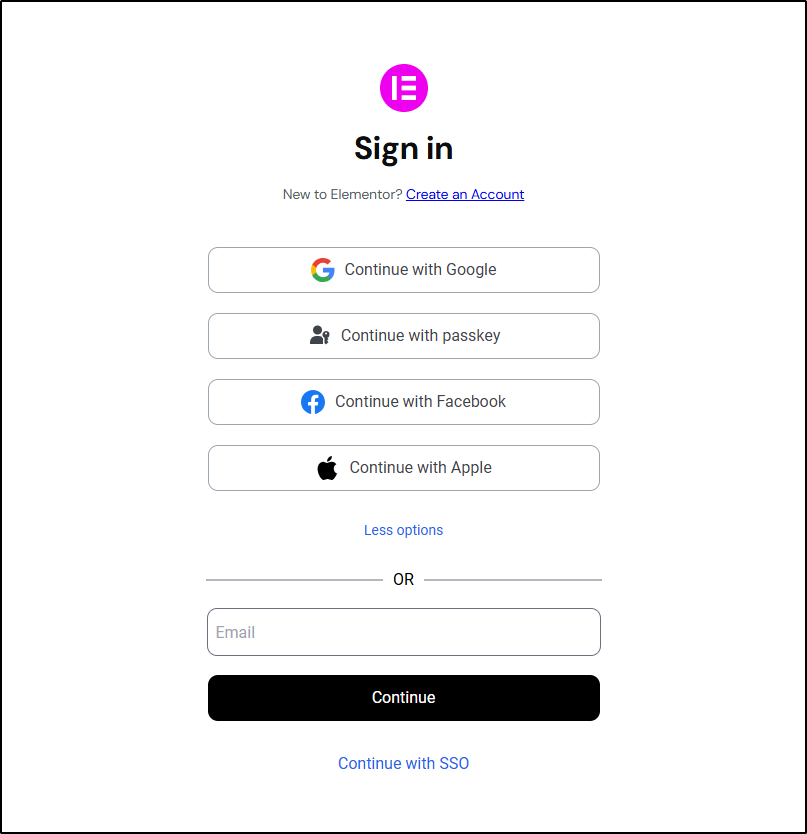
How Do You Log Into Your Elementor Account?
You can access your account using social logins, a passwordless passkey, Single Sign-On (SSO), or your email address:
- Go to the Elementor home page or your My Elementor Dashboard.
- Log into your Elementor account using the same method you created your account:
- Social Identity Logins: Click Continue with Google, Continue with Facebook, or Continue with Apple to sign in via your third-party account.
- Passwordless Passkey: Click Continue with passkey to sign in using biometric authentication (Touch ID, Face ID, or fingerprint) or your operating system PIN.
- Email & Password: Enter your registered email address in the Email field, click Continue, enter your password, and click Sign in.
- Enterprise Single Sign-On (SSO): Click Continue with SSO, enter your work email, and click Continue to authenticate through your organization’s identity provider (such as Okta, Microsoft Azure AD, or Google Workspace).
- Complete Email Verification: If logging in with email and password, retrieve the 5-minute security verification code sent to your inbox, enter the code on screen, and click Verify my account.
SSO authentication is available exclusively for accounts on an Enterprise plan. If your organization manages access through Okta, Azure AD, or Google Workspace, contact your system administrator to ensure your account has been provisioned.
If you sign in exclusively through Google, Facebook, or Apple, multi-factor authentication is handled directly by your social provider. Elementor will not prompt you for a secondary verification step unless you manually add a password to your account later.
How Do You Access Security Settings in My Elementor?
Follow these steps to configure multi-factor authentication, manage passkeys, or update your account password:
- Log into your My Elementor Dashboard using your administrator account.
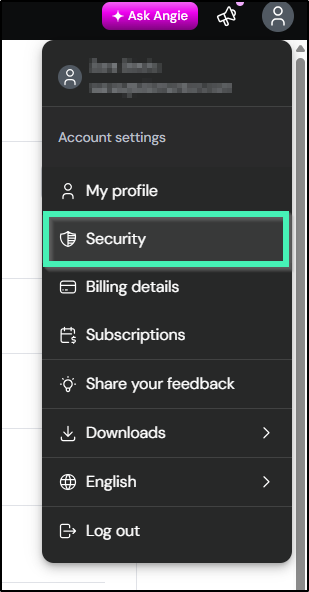
- Click your profile avatar in the upper-right corner.
- Select Security from the dropdown menu
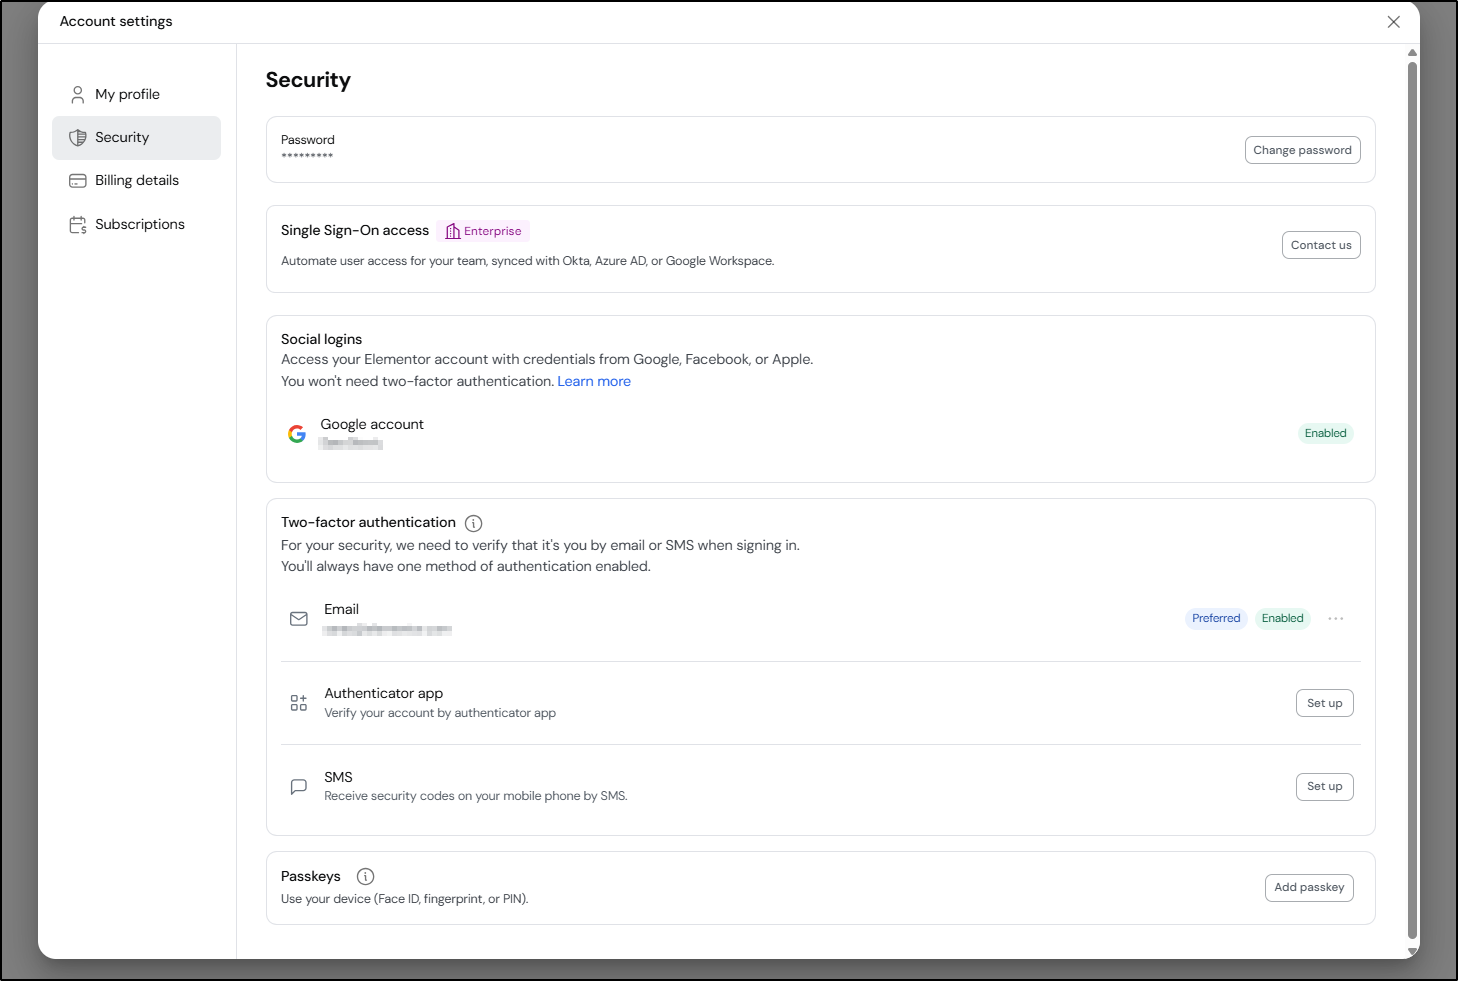
- In the Account settings window that opens, select Security from the left navigation panel to display your complete security controls.
How Do You Set Up Multi-Factor Authentication (MFA) and Passkeys?
Elementor enforces Multi-Factor Authentication (MFA) to safeguard your account and connected websites.
Your email address must be verified before you can enroll additional security methods. If unverified, click the confirmation link sent to your inbox during account creation.
How Do You Configure a Passkey for Passwordless Sign-In?
Passkeys allow fast, passwordless sign-in using your device’s native biometric hardware or security PIN.
- In Account settings > Security, scroll down to Passkeys and click Add a passkey.
- Confirm your identity when prompted by the security modal.
- Follow your device’s native prompts to link your Touch ID, Face ID, Windows Hello, or PIN credential to your Elementor account.
How Do You Set Up an Authenticator App (TOTP)?
Authenticator apps generate time-based 6-digit codes (TOTP) that refresh every 30 seconds and work offline without cellular reception.
- In Security, locate Authenticator app under Two-factor authentication and click Set up.
- Confirm your identity if prompted.
- Open your mobile authenticator app (such as Google Authenticator, Authy, Apple Passwords, or 1Password) and scan the QR code displayed on the screen. (If your camera is unavailable, click Enter code manually to copy the text key into your app.)
- Enter the active 6-digit code generated by your app to confirm setup.
- Save your single-use recovery backup codes immediately.
How Do You Enable SMS Verification?
SMS verification texts a 6-digit code to your mobile phone upon sign-in.
- Under Two-factor authentication, locate SMS and click Set up.
- Confirm your account identity if prompted.
- Enter your full mobile phone number, including the international country code.
- Input the 6-digit code delivered to your phone to finalize setup.
How Do You Manage Preferred Methods and Backup Recovery Codes?
- Save Recovery Backup Codes: Immediately after completing authenticator app setup, Elementor generates single-use backup recovery codes. Download (.txt or .pdf), copy, or print these emergency codes and store them in a secure password manager. To generate fresh codes later, go to Security > Authenticator app, click the ellipsis (…) menu, and select Regenerate backup codes.
- Set a Preferred Primary Method: When multiple MFA methods are enrolled, go to Security, click the ellipsis (…) menu next to your preferred method, and select Set as preferred.
- Switch Authentication Methods at Sign-In: If your primary device is unavailable when logging in, click Try another way beneath the verification prompt to authenticate using an alternate enrolled device or emergency backup code.
How Do You Remove an Authentication Method From Your Account?
- From the Security panel, locate the method you want to delete in your enrolled authentication list.
- Click the ellipsis (…) menu next to the method and select Remove.
- Confirm your identity when prompted and click Confirm.
Elementor requires at least one active verification method on your account. You cannot delete your final active method without first enrolling an alternative security option.
What happens when each method is removed
- Passkey – The credential stored on Elementor’s side is deleted, and you can enroll a new passkey from any device afterward. The passkey itself remains on your device until you delete it manually through your device’s settings (e.g., iCloud Keychain on Apple devices, Google Password Manager on Android, or your browser’s passkey manager).
- Authenticator app – Your authenticator setup is invalidated immediately. Any unused backup codes tied to that setup are also invalidated. If you set up an authenticator app again later, you’ll get a fresh set of backup codes.
- SMS verification – Your phone number is removed from your account and will no longer receive sign-in codes. To use SMS again, set it up from scratch with your current number.
How Do You Troubleshoot Common Sign-In and Verification Errors?
- “This code doesn’t match”: Time-based authenticator codes require an accurate device clock. Ensure your phone’s system settings are configured to Set Time Automatically.
- “This recovery code was already used”: Backup codes are permanently invalidated after one use. Select an unused code from your list, or sign in via an alternate method and regenerate fresh backup codes.
- Delayed or Missing SMS Codes: Wait 60 seconds and click Resend code. If cellular delays persist, click Try another way to authenticate via an authenticator app or backup code.
- “This device already has a passkey for your account”: A passkey already exists on your current device. Authenticate using your existing passkey, or remove the outdated entry from your operating system’s credential manager before creating a new one.
- “Too many sign-in attempts”: The account is temporarily locked for security after repeated failed attempts. Wait 15 minutes before trying again or requesting a password reset.
- Complete Loss of Access: If you lose access to all enrolled 2FA devices and have depleted your backup recovery codes, use the Contact Support without logging in option for account recovery.