The Stripe Button widget
With the new Stripe Button widget you can integrate your Elementor website with your Stripe account, enabling you to sell a single item or several items, and accept payments seamlessly, without creating an entire online store.
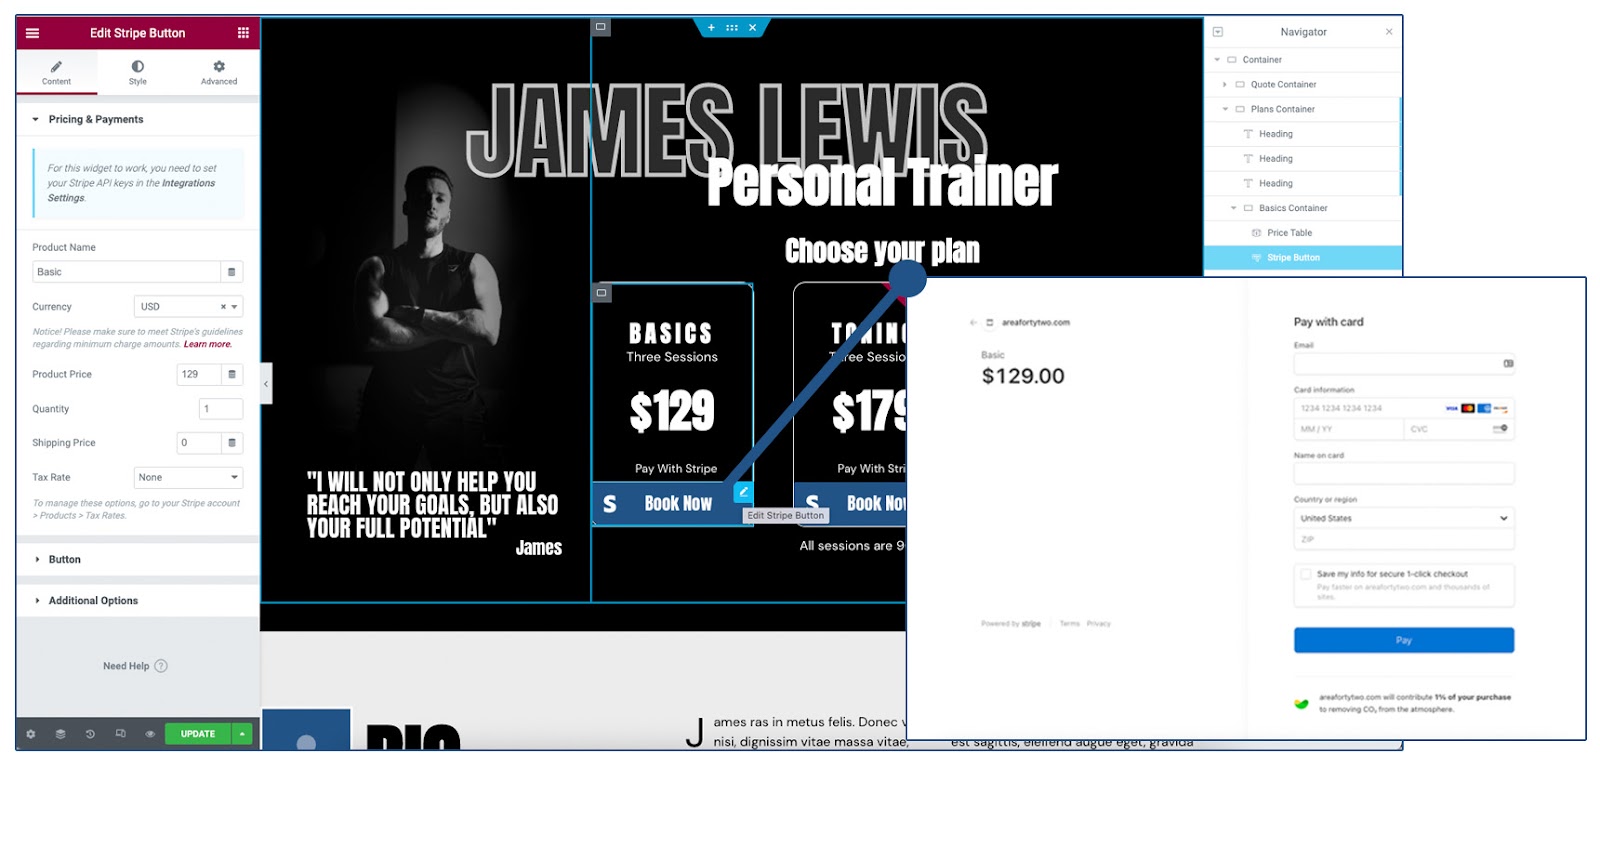
To encourage future sales and increase brand identity, you can also redirect your shoppers to a custom Thank You page, built in Elementor after a successful purchase.
Create and connect your API key
Creating an API Key
In order for your Stripe Button to function properly, you must first create API keys from your Stripe dashboard. For further documentation, click here.
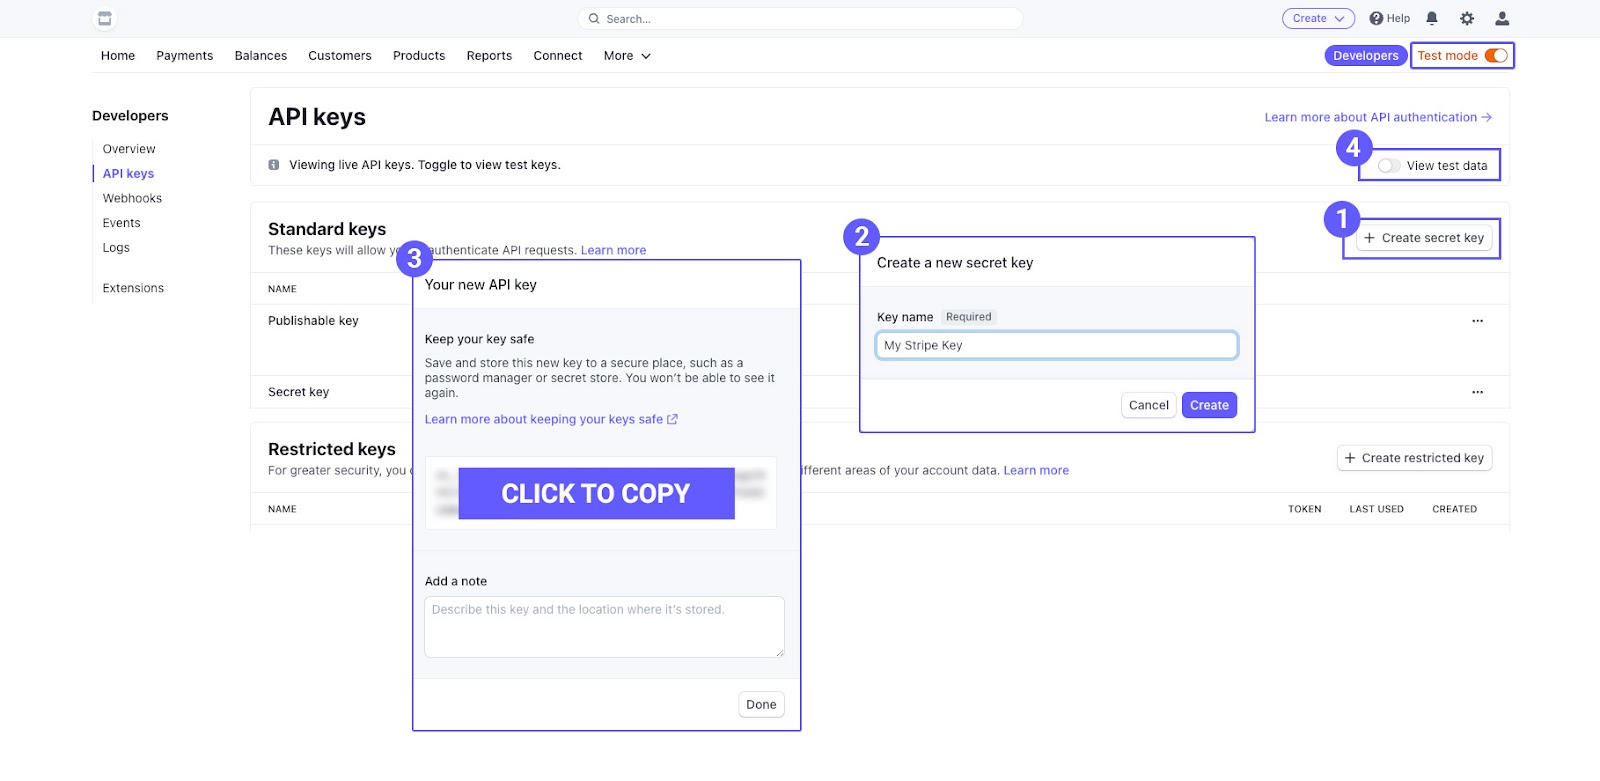
- Click the button to create a new Secret Key
- Give your key a unique name and click the create button
- Click on the region with the key code, it will automatically copy the code. This will be entered in your Live Secret Key field in the Elementor settings
- Repeat this process for a Test Key in order to use sandbox functions
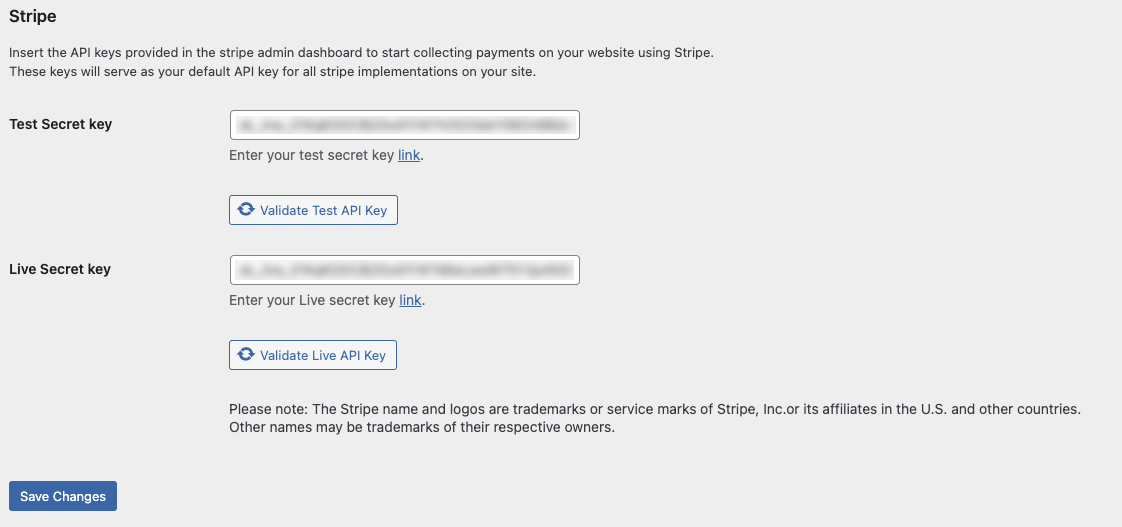
Add the API Keys to Elementor
You may then add these keys to the Elementor API integrations page. This may be found by navigating to Elementor > Settings > Integrations. After entering each, click the Validate button to make sure it connects properly. Once finished, click the blue Save Changes button.
Widget Settings
Payments and Pricing
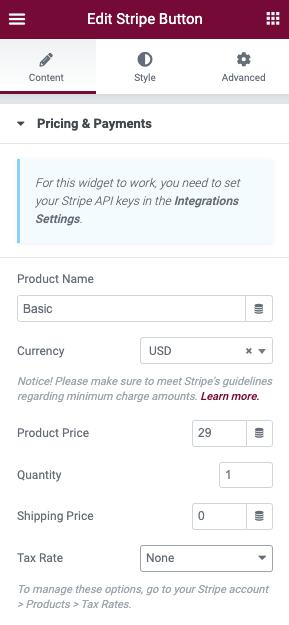
In this section, you will assign the name of your product or service, the currency, and its price options. Taxes and shipping charges may also be entered.
Setting a Tax Rate
Taxes must be first set up from your Stripe account dashboard in order to show up in the dropdown menu options.
- From your Stripe account navigate to -> Products -> Tax rates.
- Create a new tax rate – we recommend including a description too.
- Return to the editor, save your changes, and refresh the page.
- The Tax rates you created will appear under the Tax rate dropdown.
Button Settings
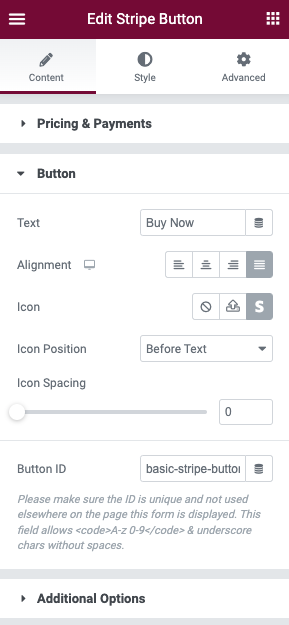
In the Button settings options, you may enter the text you wish to display by entering it in the field or use the dynamic tags option. The alignment of the button may be set to left, center, right or justified by clicking on the appropriate icon.
If you wish, an icon may be displayed before or after the text. You may upload an SVG icon or choose one from the font-awesome library. The spacing may be adjusted by using the icon spacing slider or entering a value in the field.
If you wish to assign the button an ID for CSS or tracking purposes, it may be entered into the field.
Note: Please make sure the ID is unique and not used elsewhere on the page this form is displayed. This field allows <code>A-z 0-9</code> & underscore chars without spaces.
Additional Options
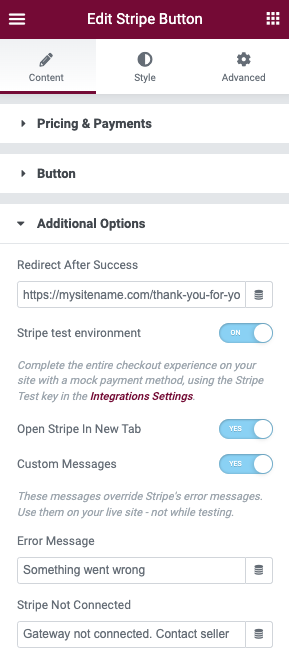
Redirect Options
To redirect to a dedicated page upon purchase completion, choose a page from the list, or insert the appropriate URL in the Stripe Button widget’s Additional Options
Note: When inserting a URL, you should include the http:// or https:// of the URL for the redirect to work.
Stripe Options
Using the toggle controls, you may choose to do the following:
- Enable test environment (allows you to test a button without actual charges occurring)
- Open the Stripe payment window in a new tab rather than a modal
- Allow custom error messages (see below)
Testing Your Settings
Test your Stripe Button’s set up by using Stripe test mode:
- Make sure you insert your Stripe Test Secret key in the Elementor Integrations area.
- Turn on the ‘Stripe test environment’ toggle under the Additional Settings section in the Content tab of the widget
- Please note that Tax Rates for Stripe Test mode is created separately and will appear only if a valid Test Secret key was inserted and the ‘Stripe test environment’ toggle is switched to “on”.
- Once all the checkout settings associated with the button have been set up, when clicking the Stripe button on the site’s preview mode, it should redirect to Stripe’s mock Checkout page. In this page, you can insert mock payment details, shipping and billing details. Then, upon success you will be redirected to the page you defined.
Note: Learn more about stripe testing methods here.
Error messages
In case of an error when shoppers try to make a purchase, you can customize the error message by switching on the Custom Error Message toggle, and inserting the message you’d like to display.
Widget Style Options
Button
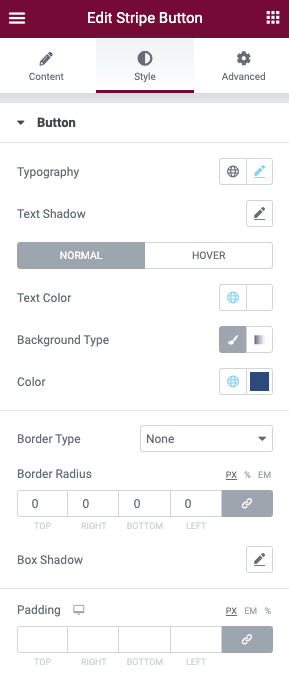
The Button may be styled using the standard Elementor options.
Fonts: You may choose your Typography settings using the pencil or using Global styles, and apply a text shadow if desired.
Colors: The buttons background and text colors may be set for both the normal and active states by using the color picker options or Global colors.
Border: You can set the border style, width, and color from the options located here. A box shadow may also be applied.
Padding: Control the padding around the text of your button by entering the desired values. If different values are needed (example 10px top/bottom and 15px left/right), you may unlink the values by clicking the icon.
Messages
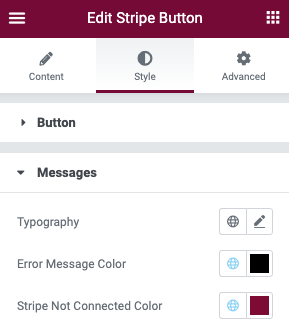
The error messages displayed may be styled using the options here.
Typography: You can use global font options or manually set by clicking the pencil.
Colors: The colors of the Error Messages can use Global Colors or set by the color picker.
Advanced Tab
This widget uses the standard Elementor controls. You may learn more about these in this document.
The PayPal Button widget
Elementor’s PayPal Button widget enables you to collect payments of any kind. Sell a single product like an E-book, create a fundraiser campaign, or sell a subscription-based service and seamlessly collect your fees.
Content
In addition to adding your content manually, many of the options of this widget also use Dynamic Tags. These tags allow you to retrieve WordPress data, or from plugin sources such as Advanced Custom Fields, or WooCommerce products. Items that have the ability to use dynamic data will have the “stack” icon beside the fields input.
Pricing & Payments
- Paypal Account: Fill in the details of your merchant account. Transactions made through your PayPal button will be registered under this account.
- Transaction Type: Choose between Checkout, Donation, and Subscription.
Checkout Type
- Item Name: Enter your item name (that will appear when the user is redirected to Paypal).
- SKU: Enter your item’s SKU.
- Price: Set your price.
- Currency: Choose between multiple currencies.
- Quantity: Set your quantity.
- Shipping Price: Set your shipping price.
- Tax: Choose between None or Percentage
- Tax Percentage: Set your tax percentage.
Donation Type
- Item Name: Enter your item name (that will appear when the user is redirected to Paypal).
- SKU: Enter your item’s SKU.
- Donation Amount: Choose between Fixed and Any Amount.
– If Fixed is selected set your Amount and Currency.
– If Any Amount is selected set your Currency.
Subscription Type
- Item Name: Enter your item name (that will appear when the user is redirected to Paypal).
- SKU: Enter your item’s SKU.
- Price: Set your price.
- Currency: Choose between multiple currencies.
- Billing Cycle: Choose between Daily, Weekly, Monthly, or Yearly.
- Auto Renewal: Switch On/Off to enable auto renewal for the subscription.
Button
- Text: Type your button’s text.
- Alignment: Align the button to the left, center, right, and justified.
- Icon: Choose between not display an icon, upload SVG, or add an icon from the icon library.
- Icon Position: Display the icon Before or After the text.
- Icon Spacing: Set the space between the icon and the text.
- Button ID: Add an ID to the button.
Additional Options
- Redirect After Submit: Enter a URL to redirect after submit.
- Sandbox: Test out the functionality on a sandbox to ensure everything works properly. Switch On/Off. Click to learn more about setting up a Paypal sandbox
- Sandbox Email Account: This is the address given to you by PayPal when you set up a sandbox with your developer account.
- Open Paypal In New Tab: Switch to Yes to open Paypal in a new tab.
- Custom Messages: Switch to Yes to type your own custom error message and Paypal not connected error message.