To add a custom domain name to Email Deliverability, you need to add DNS records to your domain name provider.
Warning
NameCheap is a third-party domain name provider. We cannot guarantee that they have not changed their process and do not offer support for their system.
To add a custom domain:
- Log into your WP Admin dashboard.
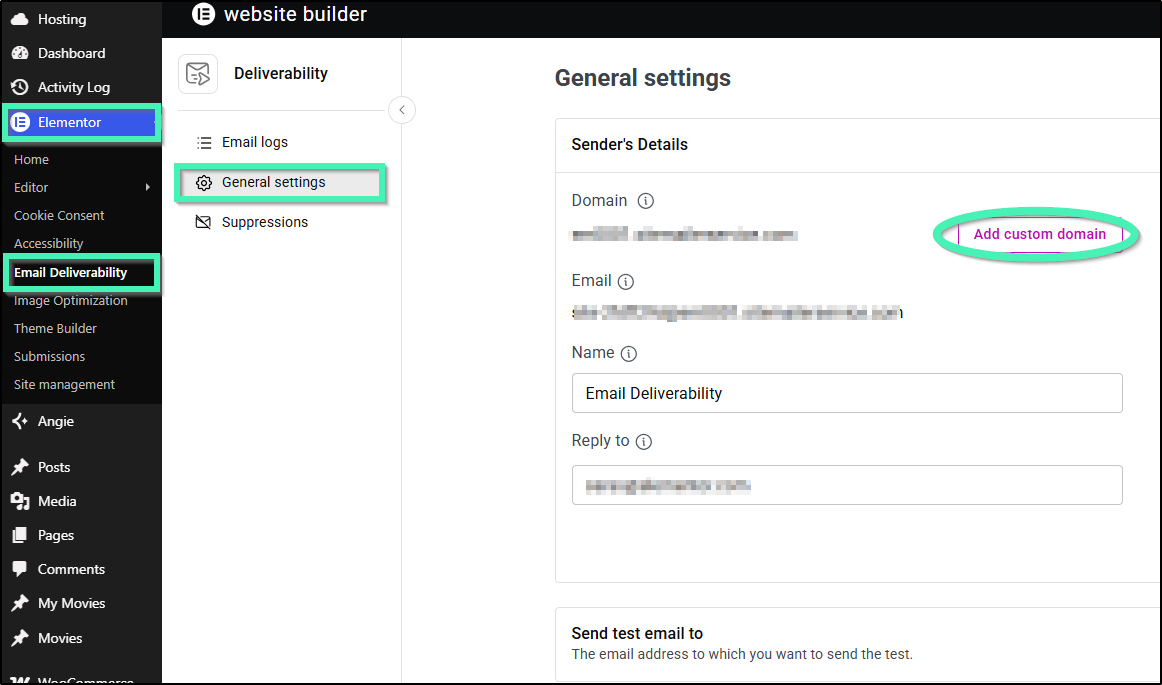
- Navigate to Elementor > Email Deliverability.
- Under the Sender’s Details section, locate Domain and click Add custom domain.
 NoteTo add a custom domain, you’ll need to access your DNS records. These records are stored with your domain name provider – the company you purchased the domain name from. Before beginning this process, make sure you have your login information ready, so you can access their system.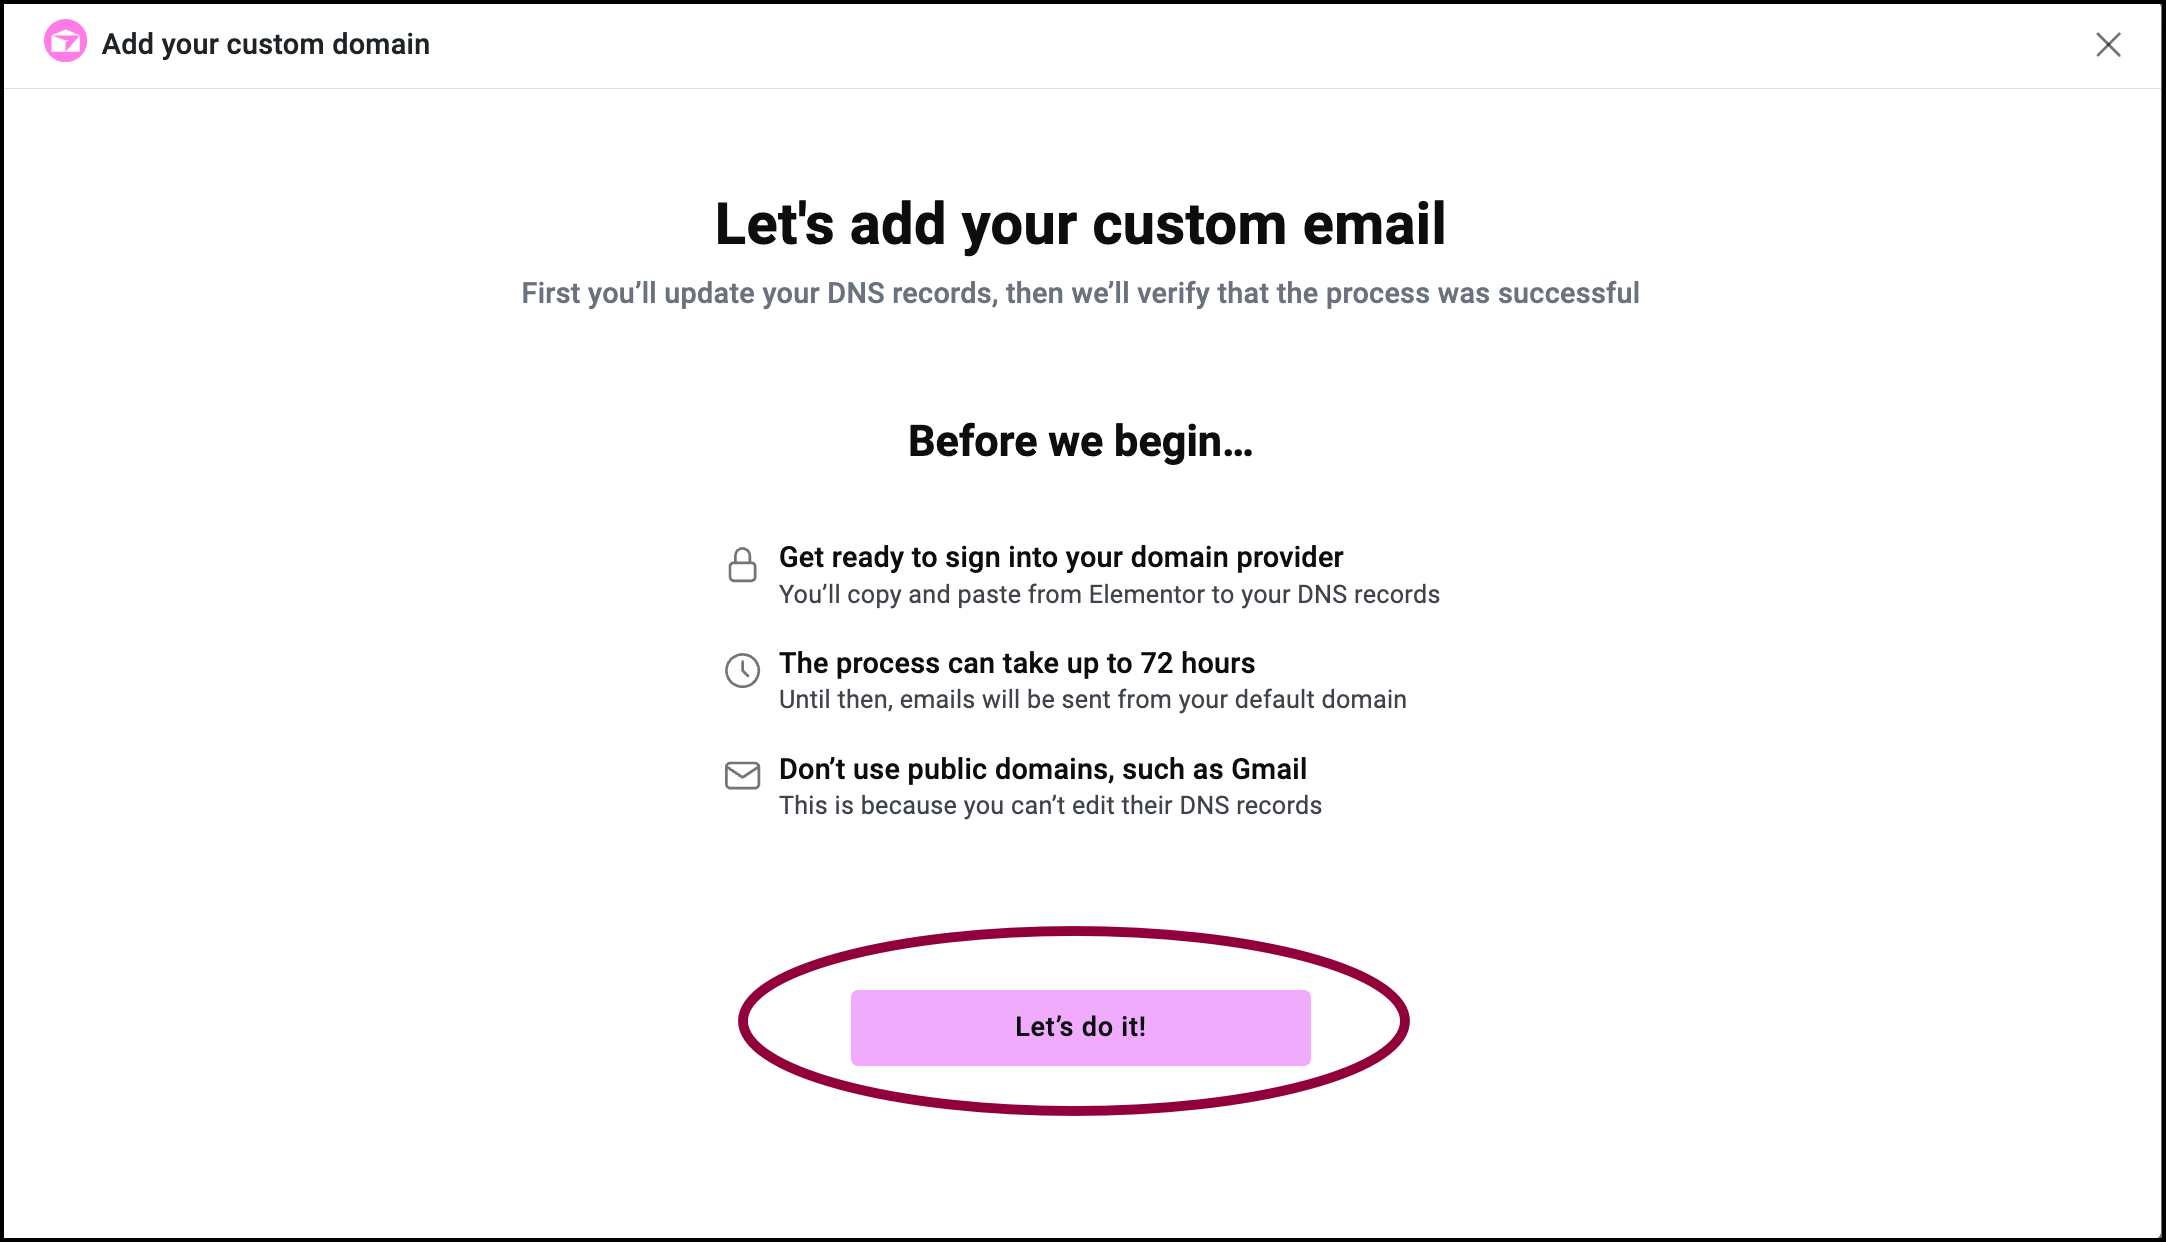
- Read the notes in the popup window and click Let’s do it!
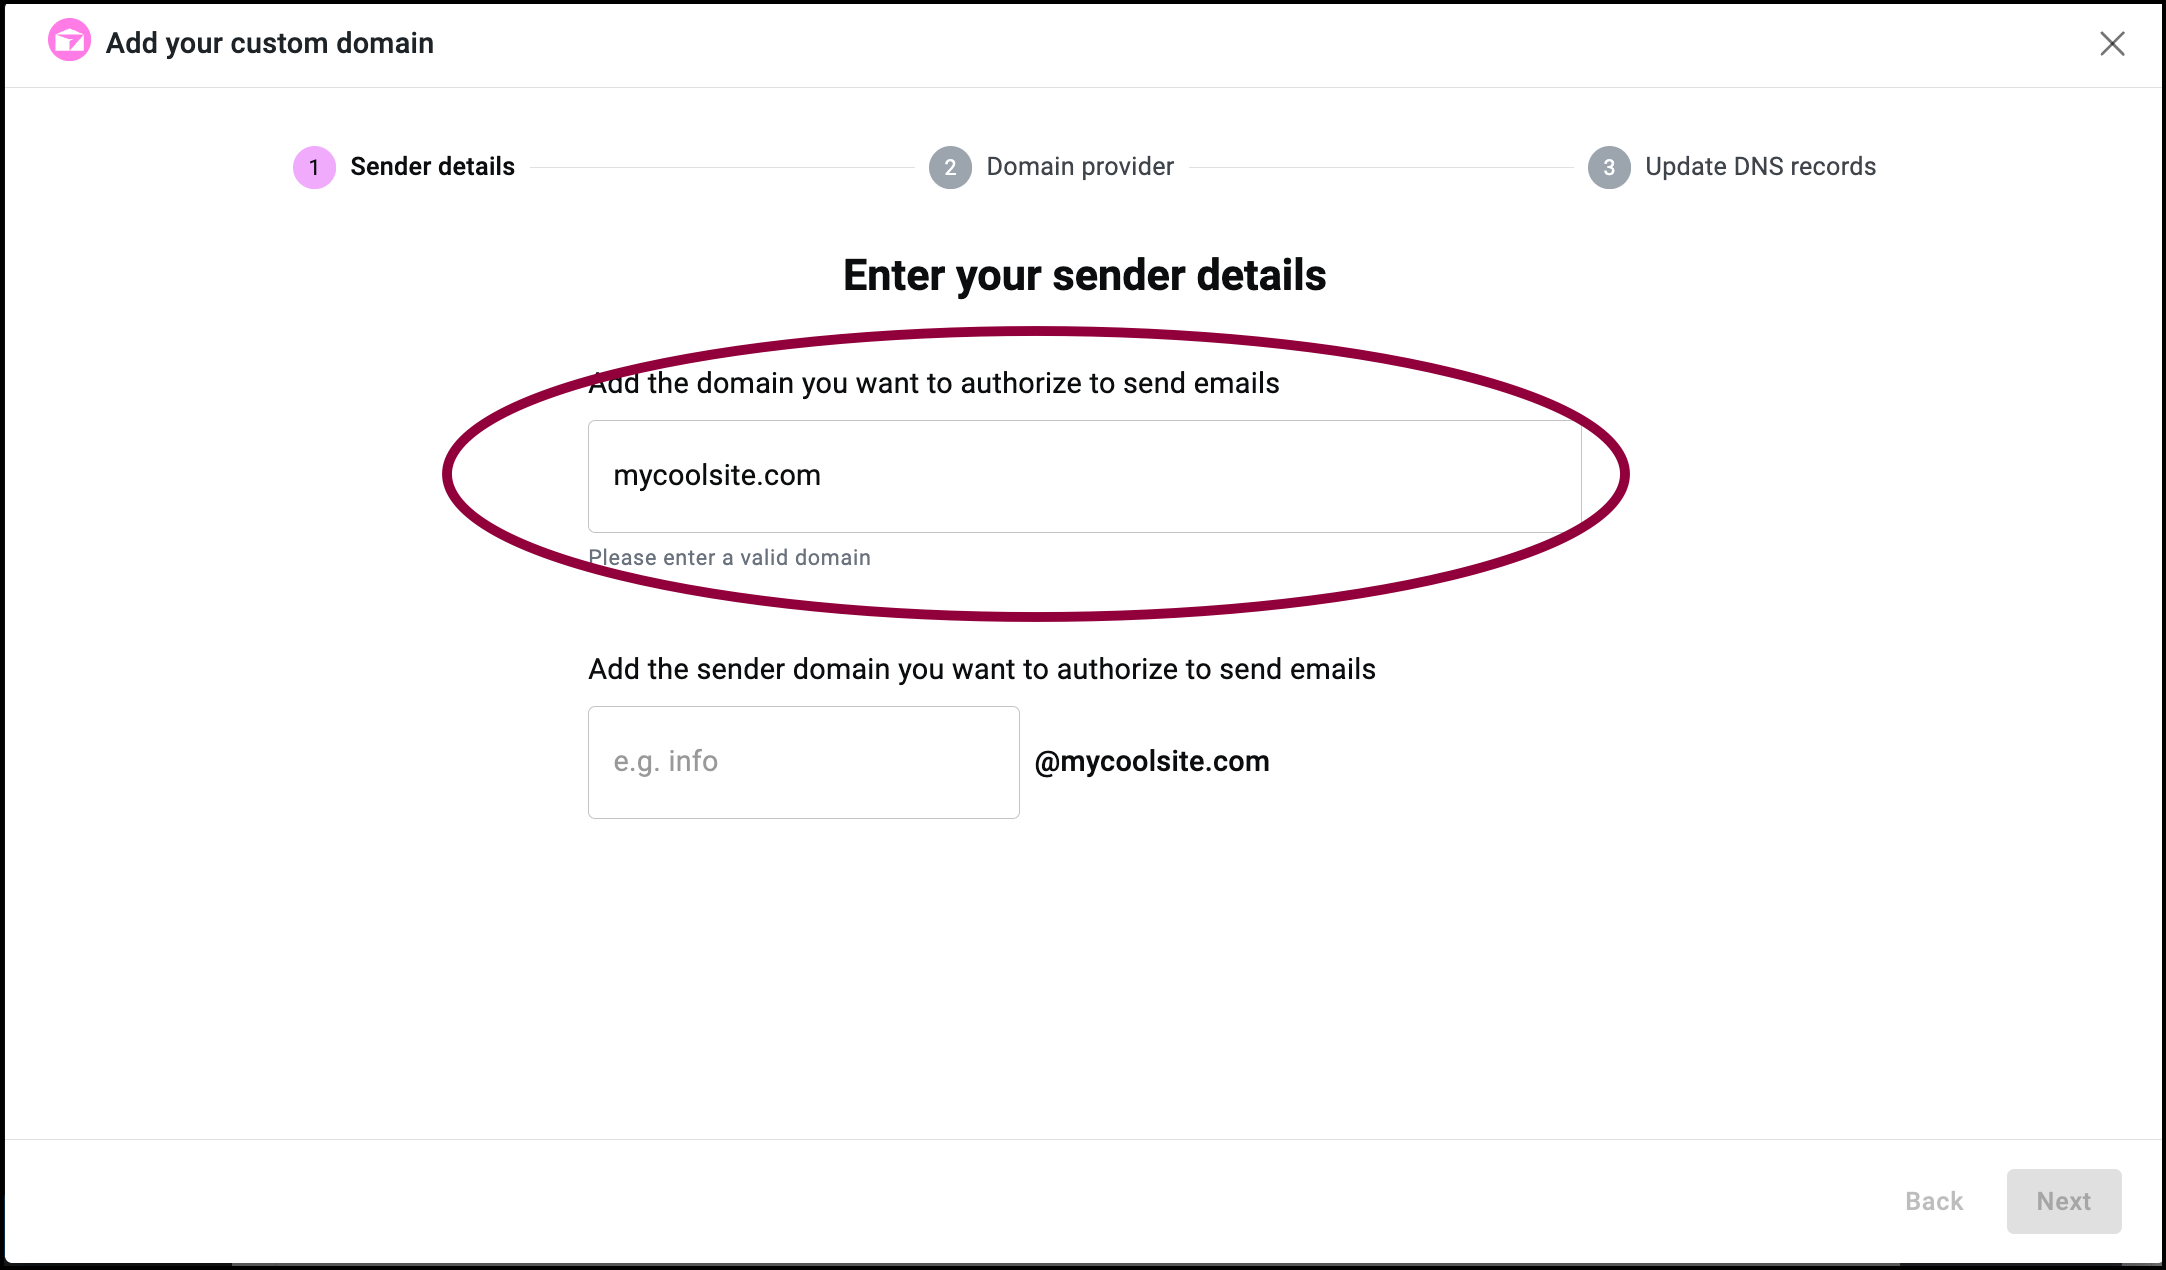
- Enter your domain name (for example, mycoolsite.com) in the domain name text box.
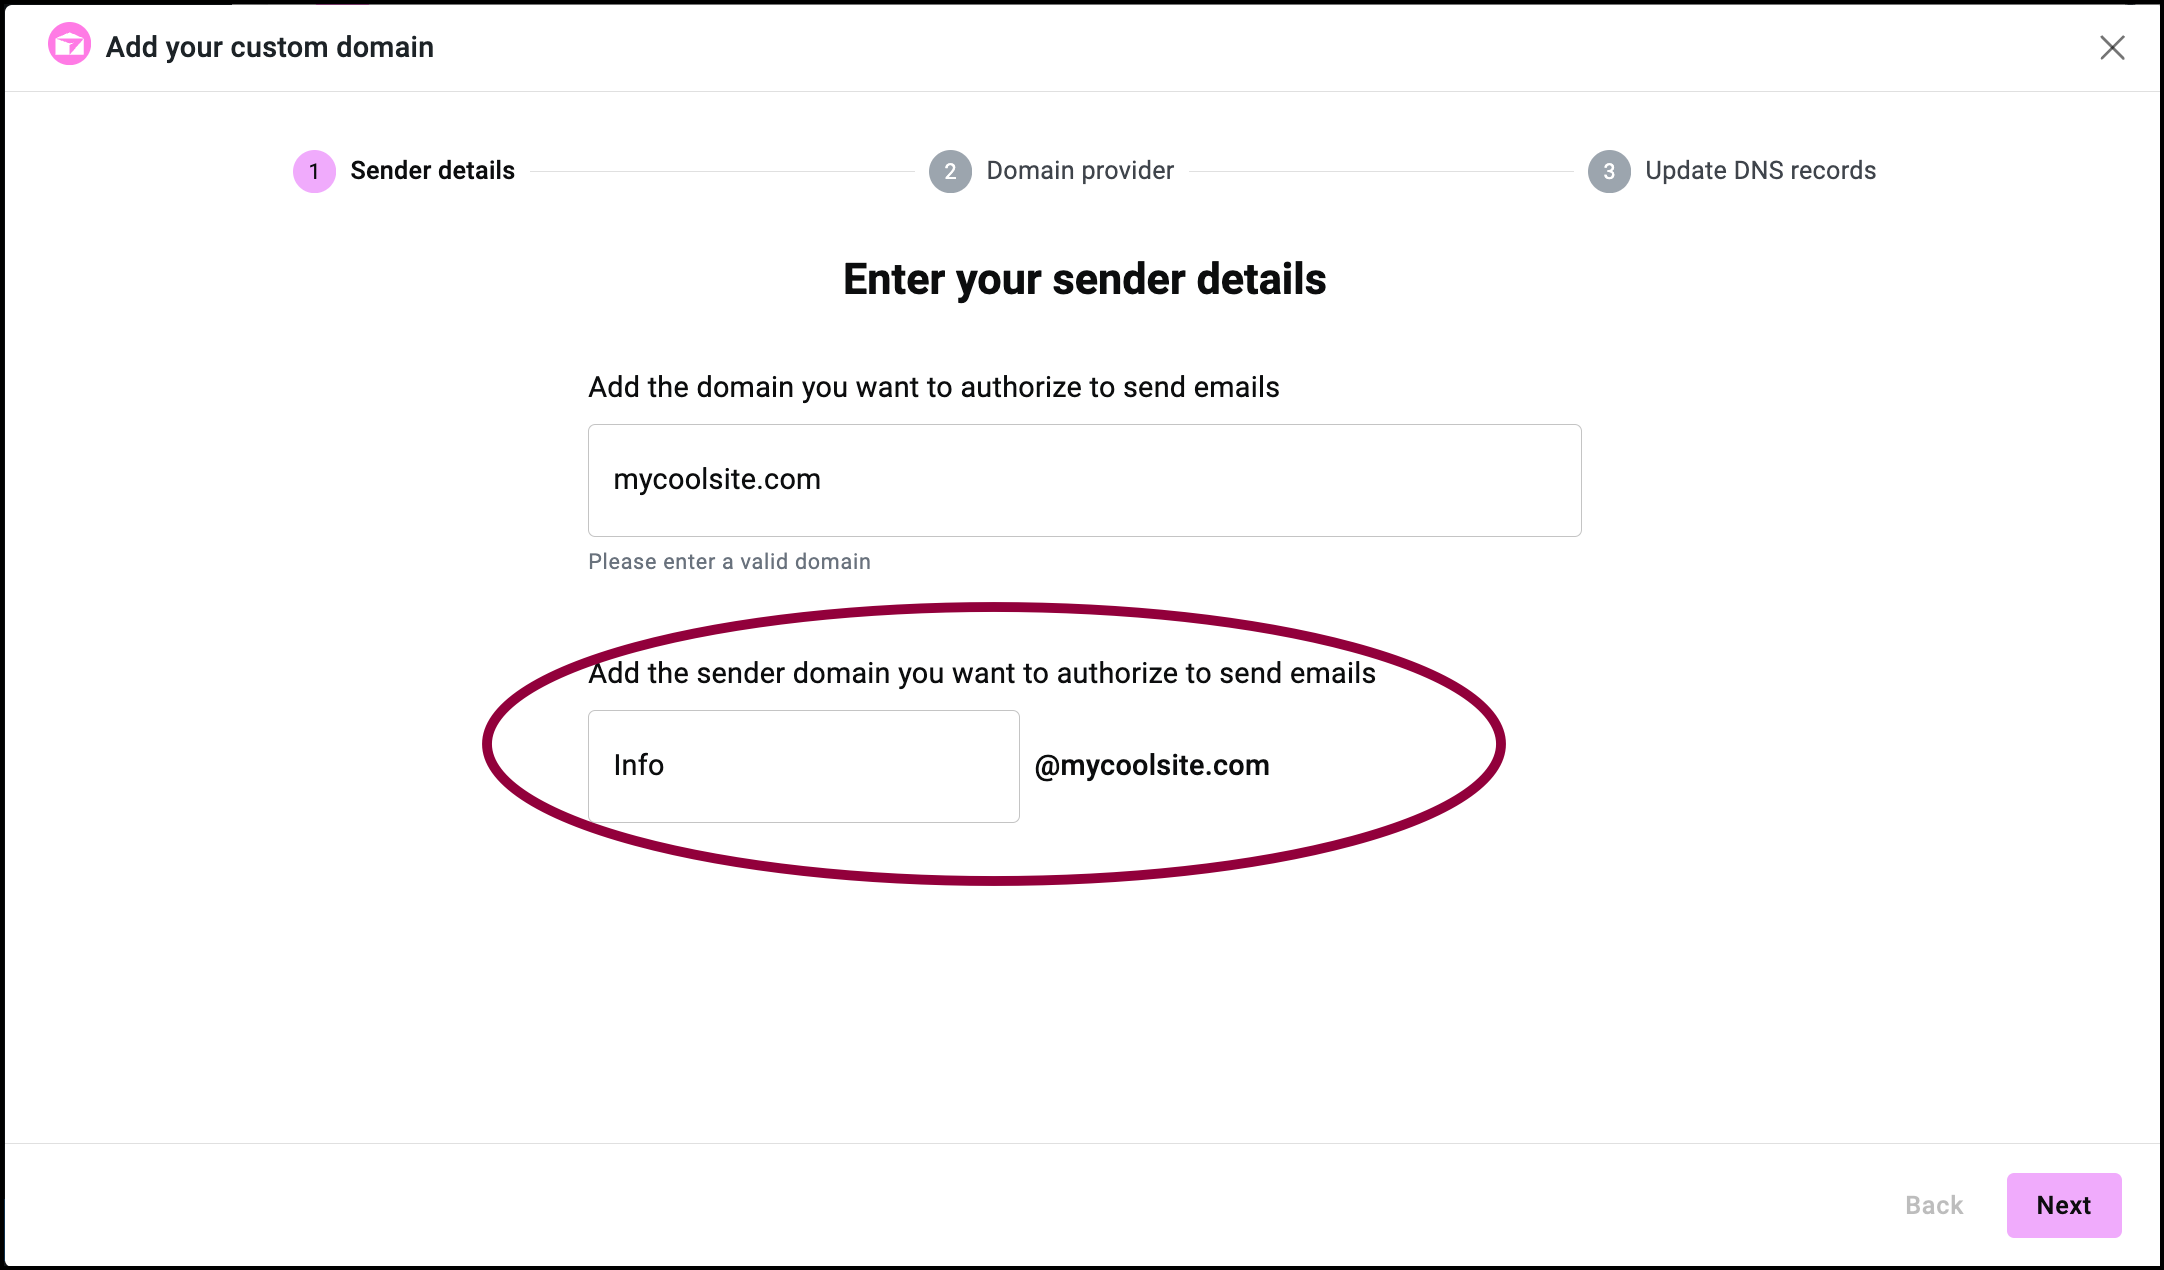
- (Optional) enter a sender name for emails sent by Email Deliverability using the custom domain. (for example, Info@mysite.com).
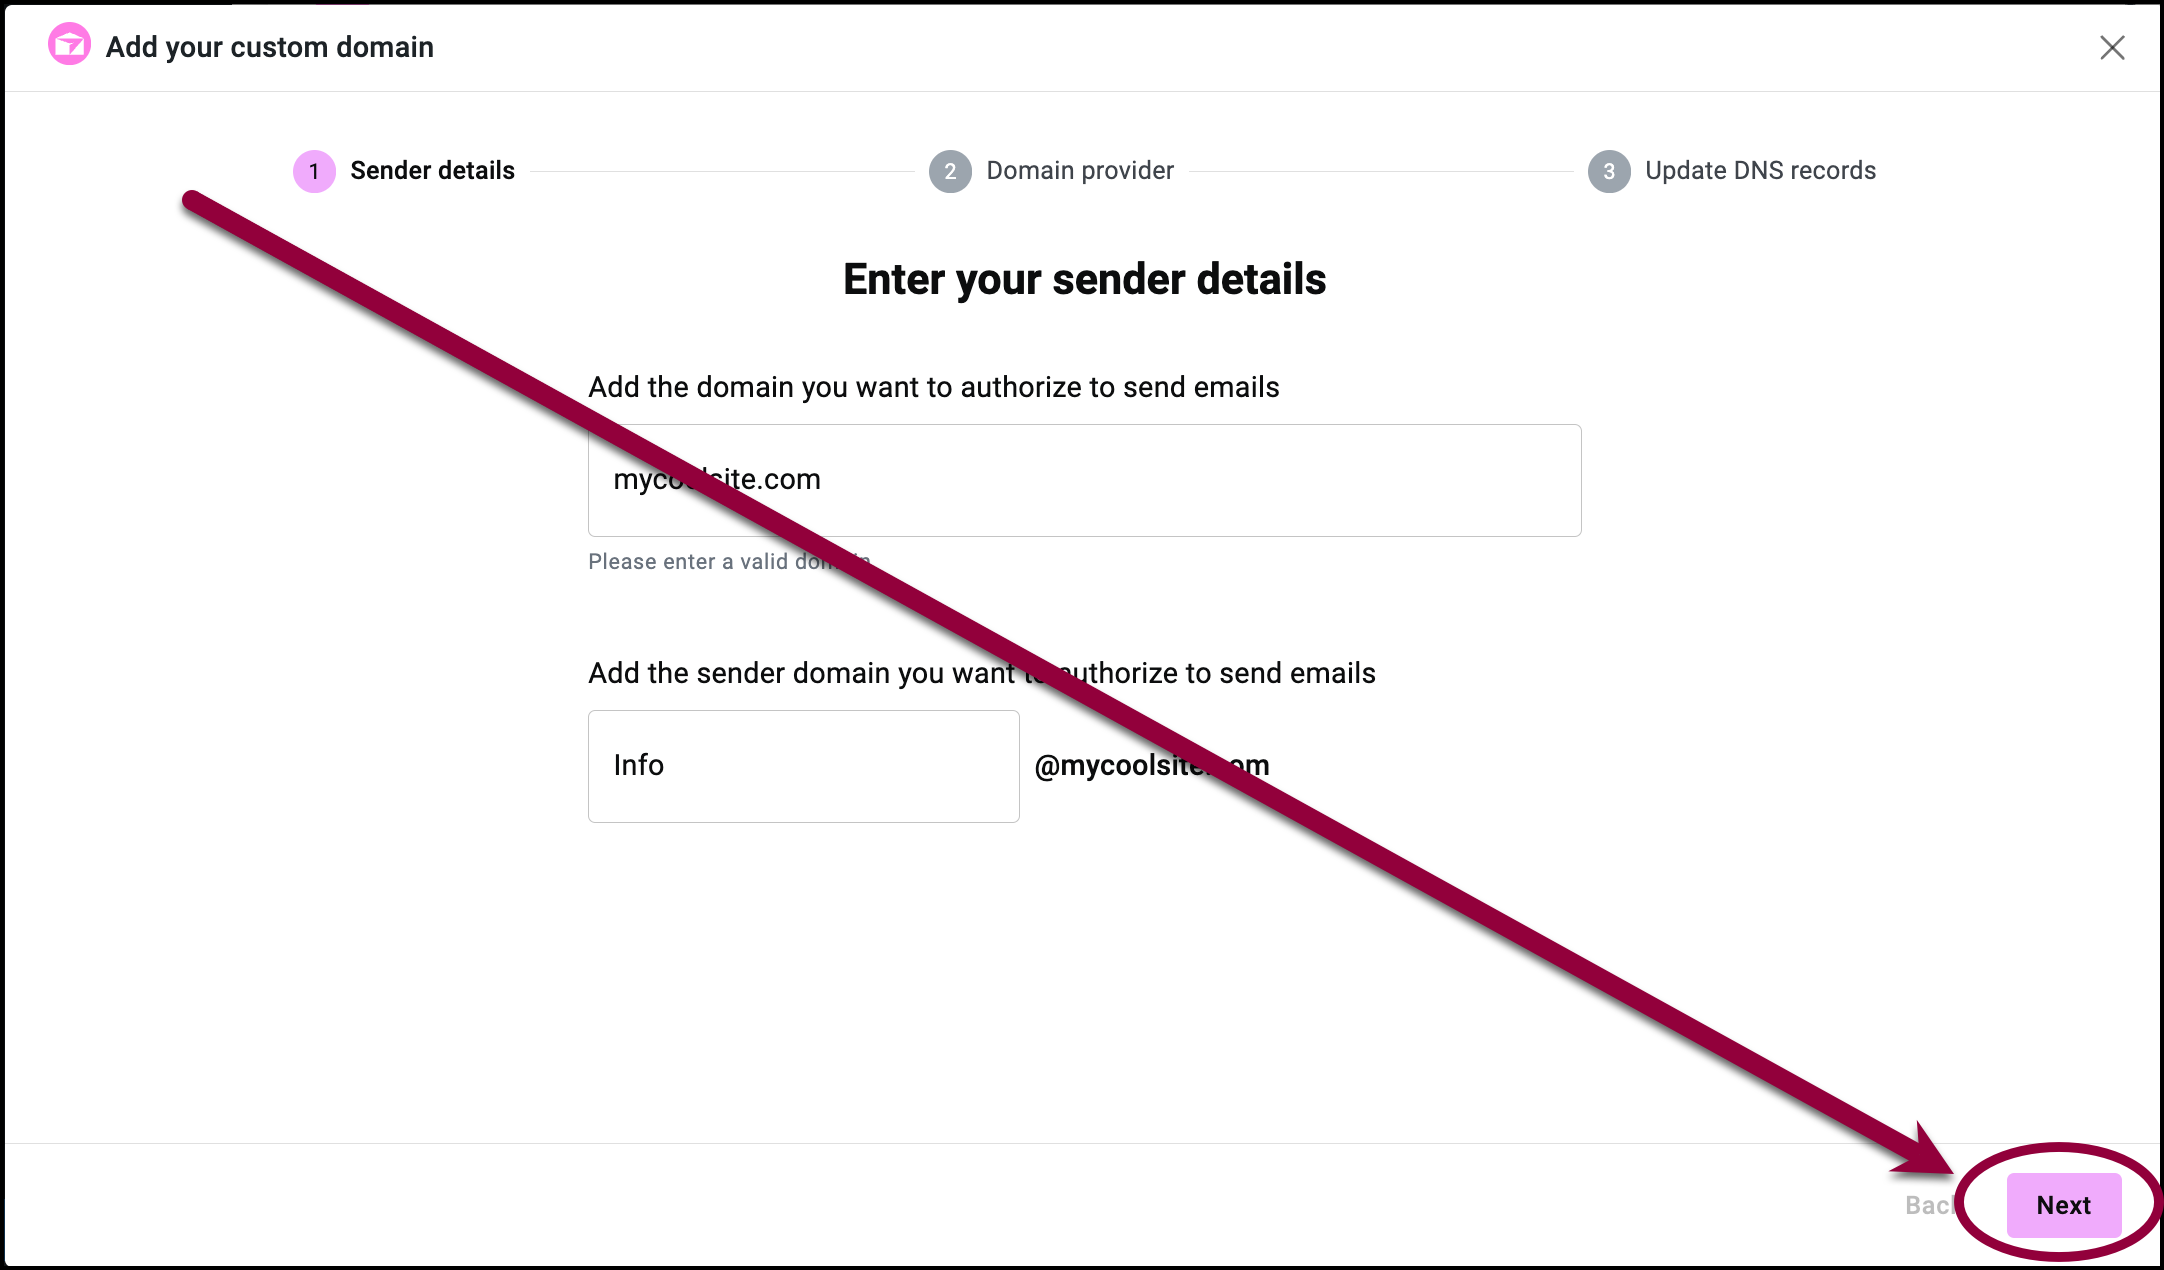
- Click Next.
- If you haven’t done so already, sign in to your NameCheap account in a separate browser tab.
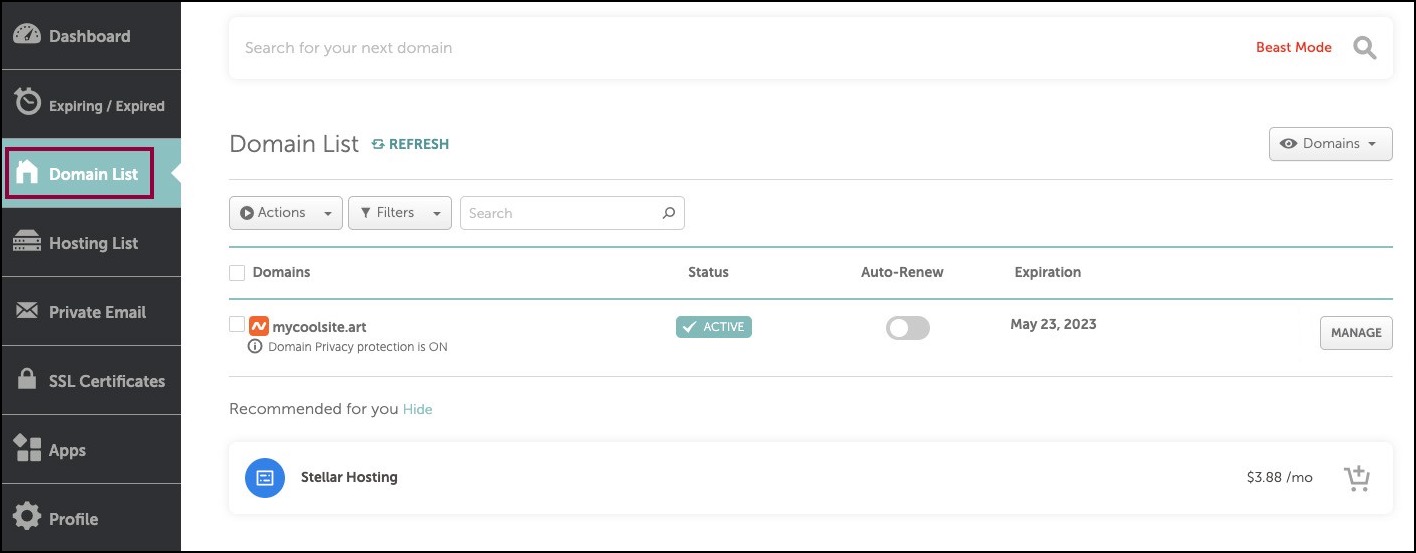
- In the left panel, click Domain List.
- Navigate to the domain you want to connect to Email Deliverability.
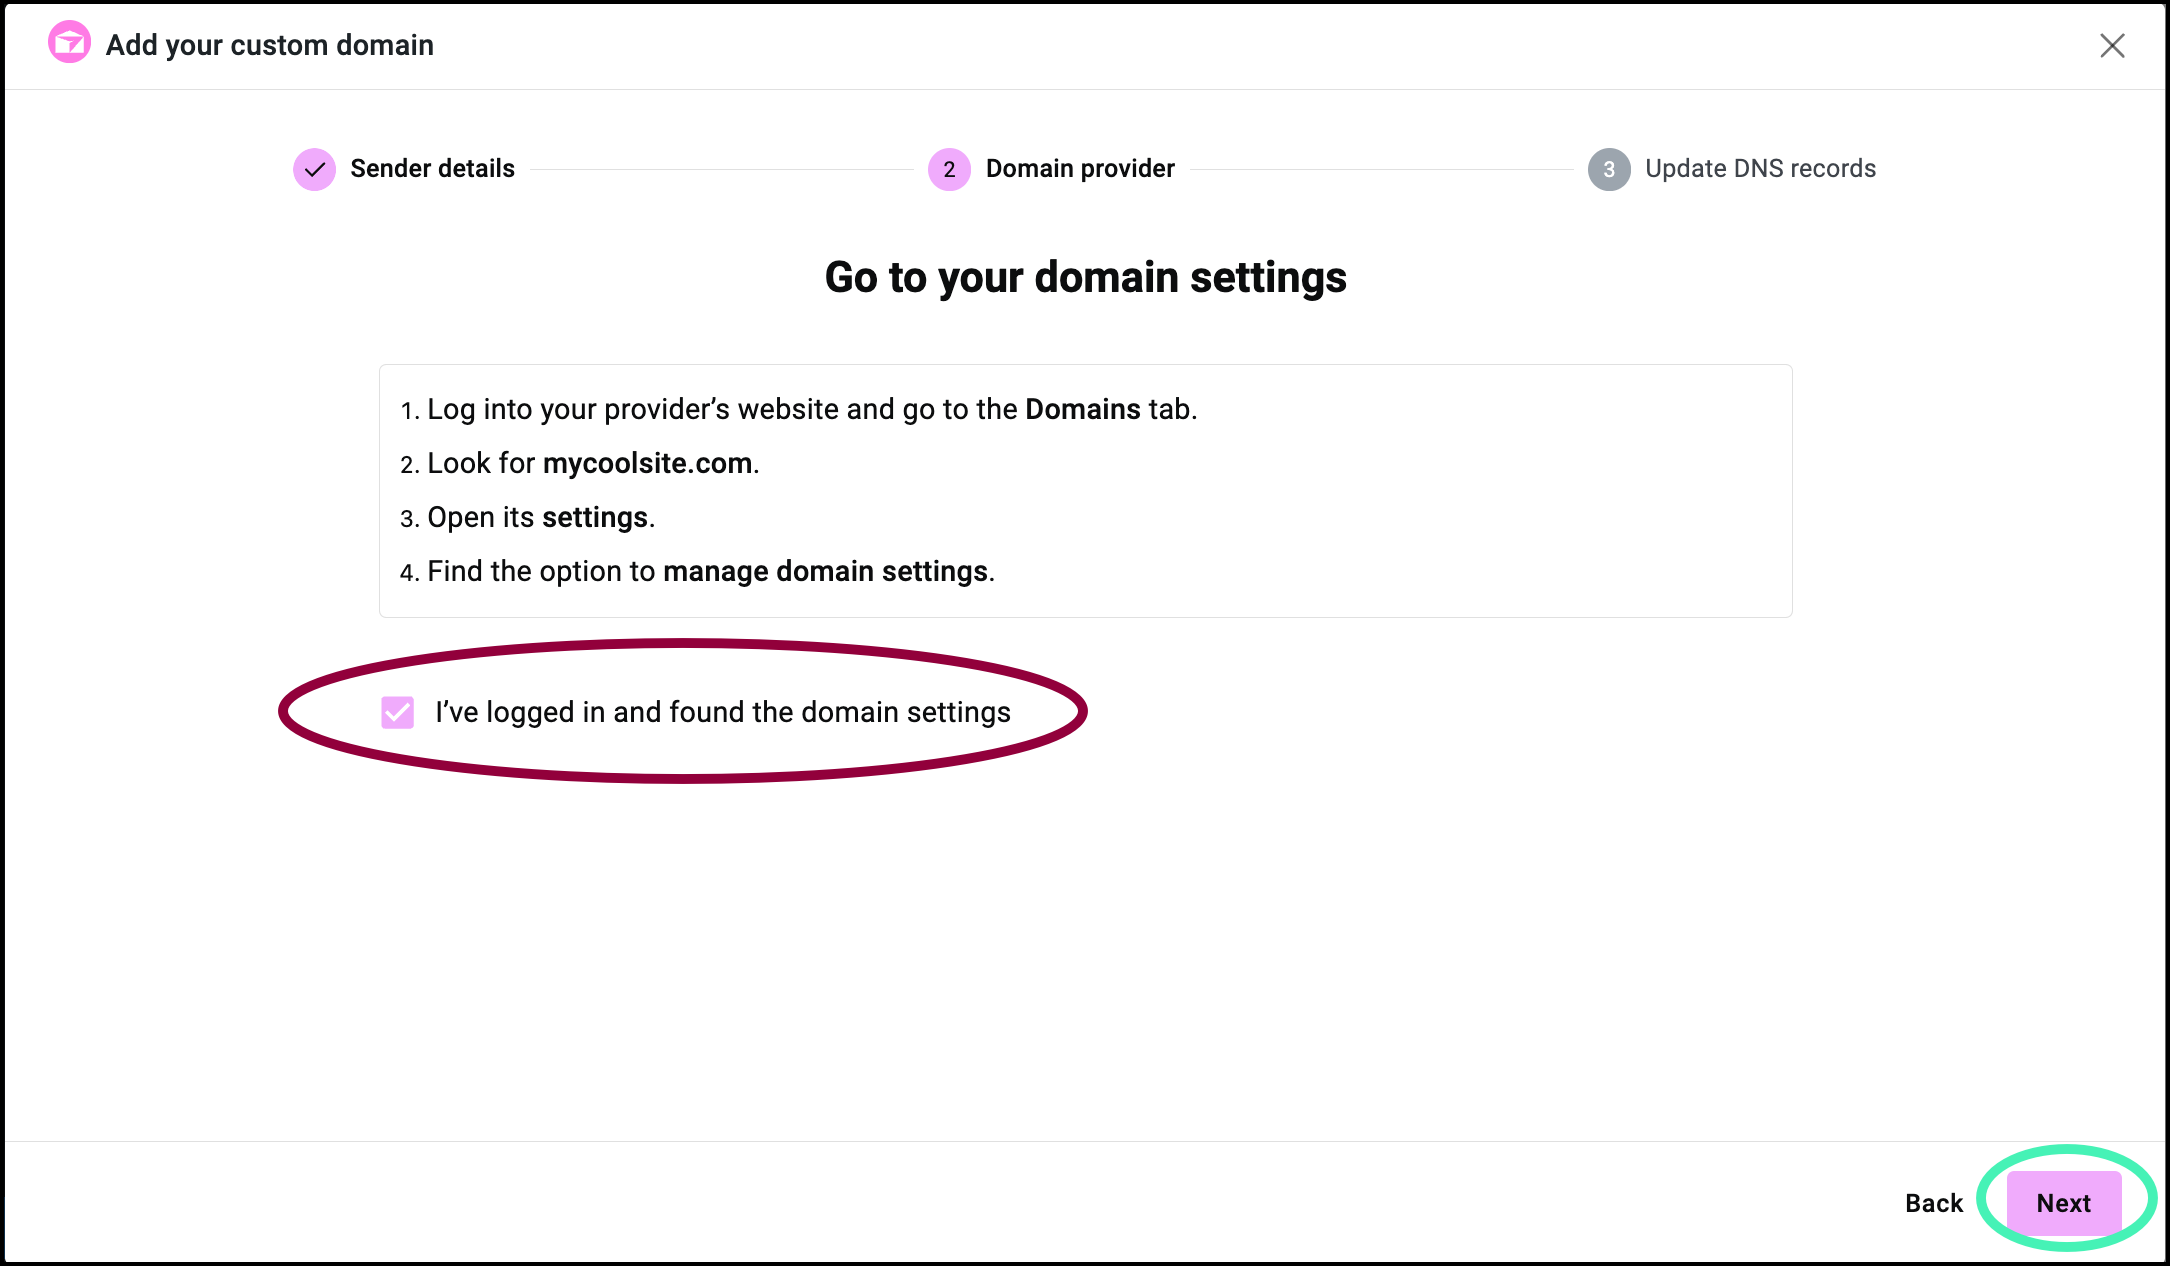
- Return to the Email Deliverability tab and check I’ve logged in and found the domain settings and click Next.
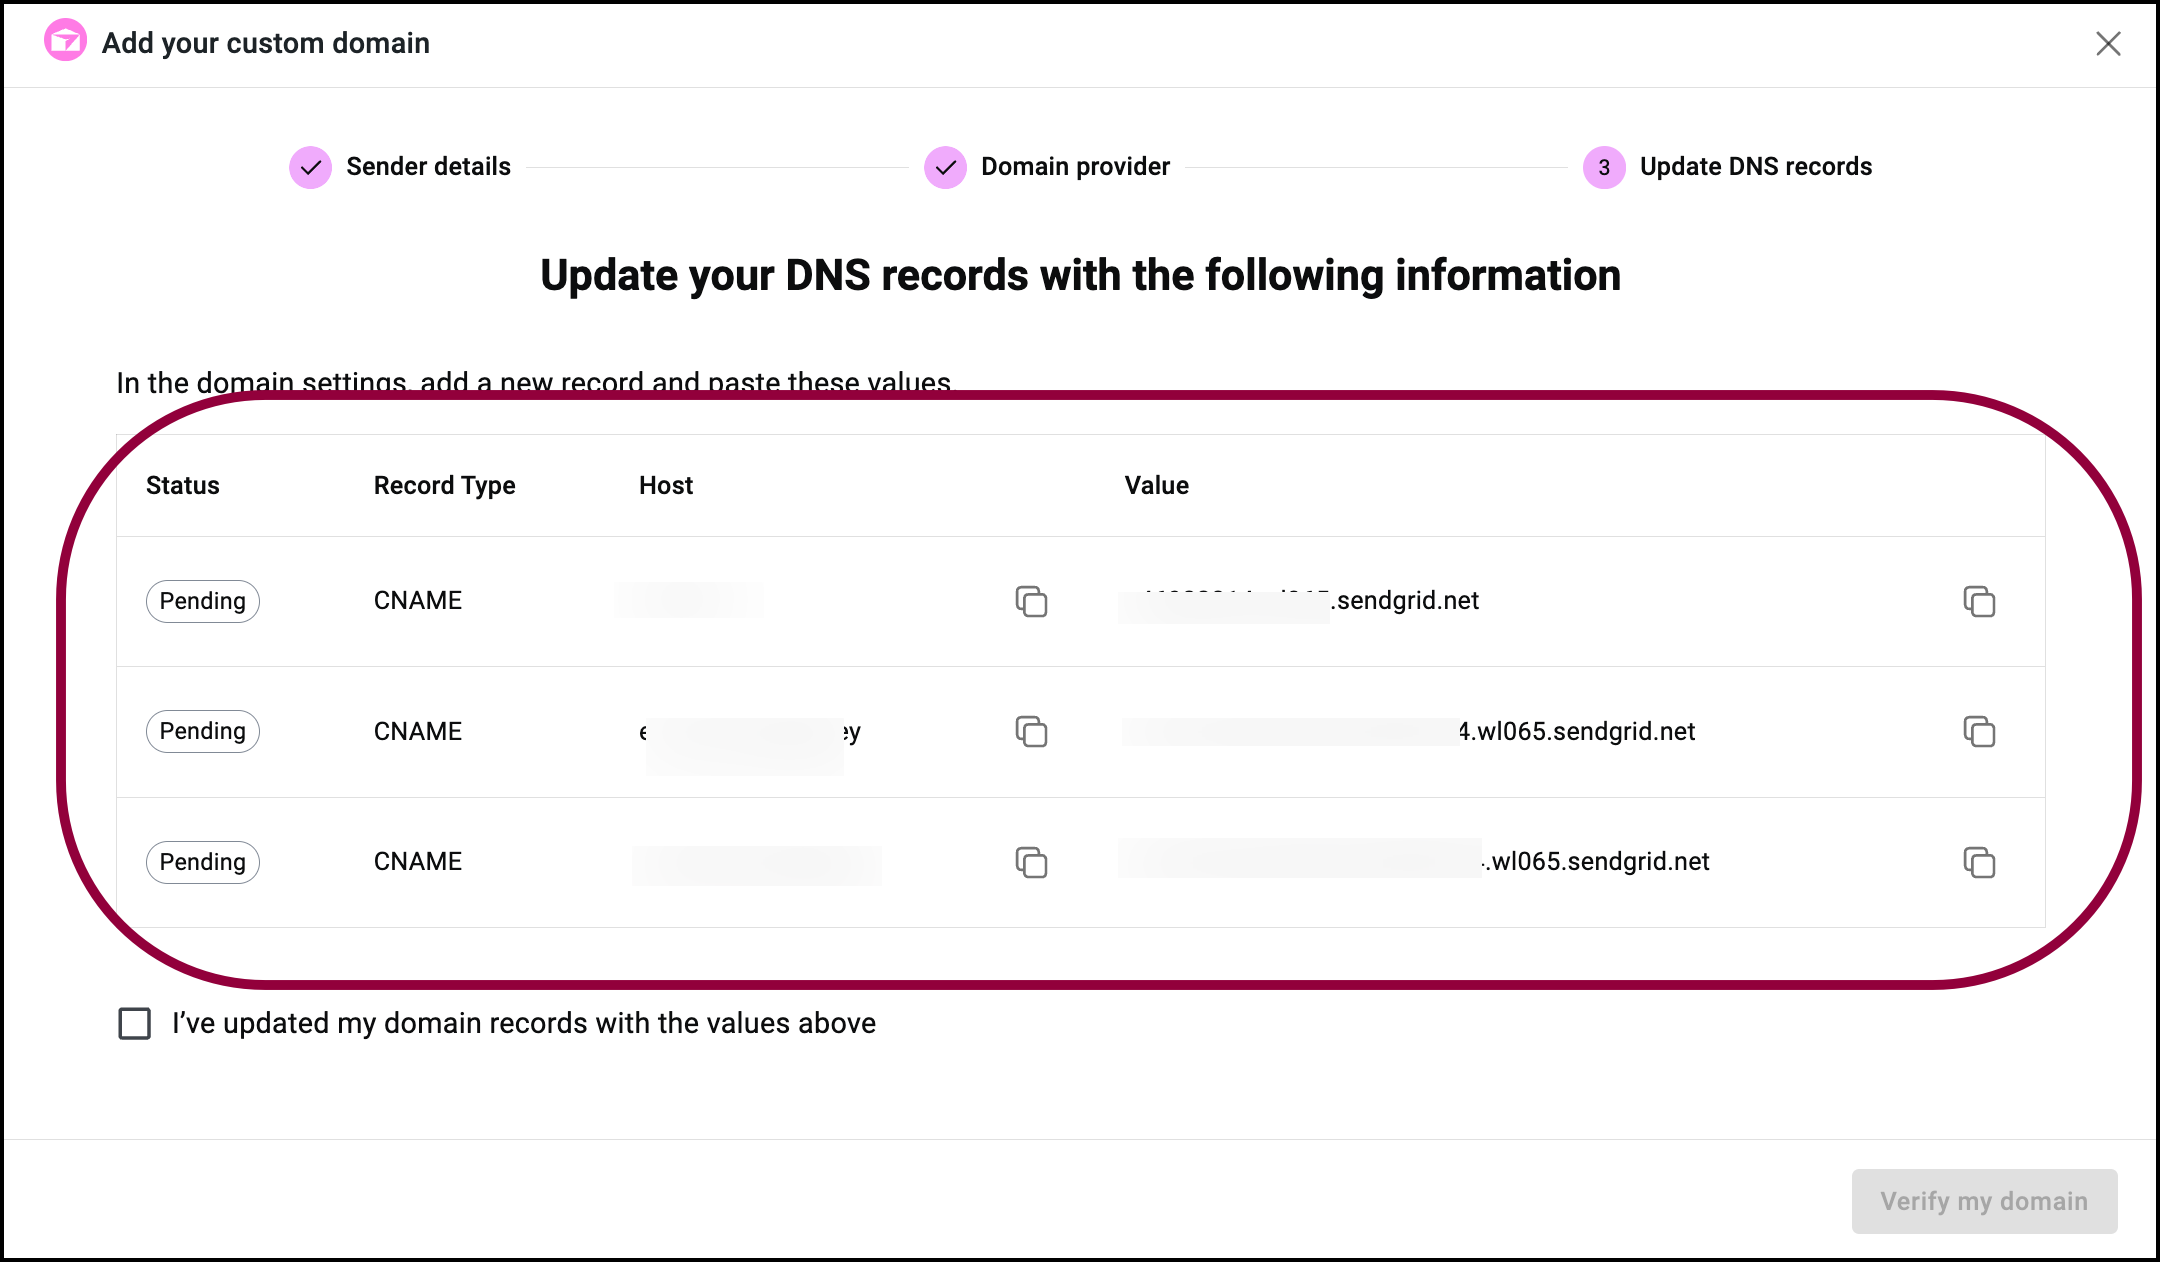
A list of addresses appears. - Go back to the NameCheap tab.
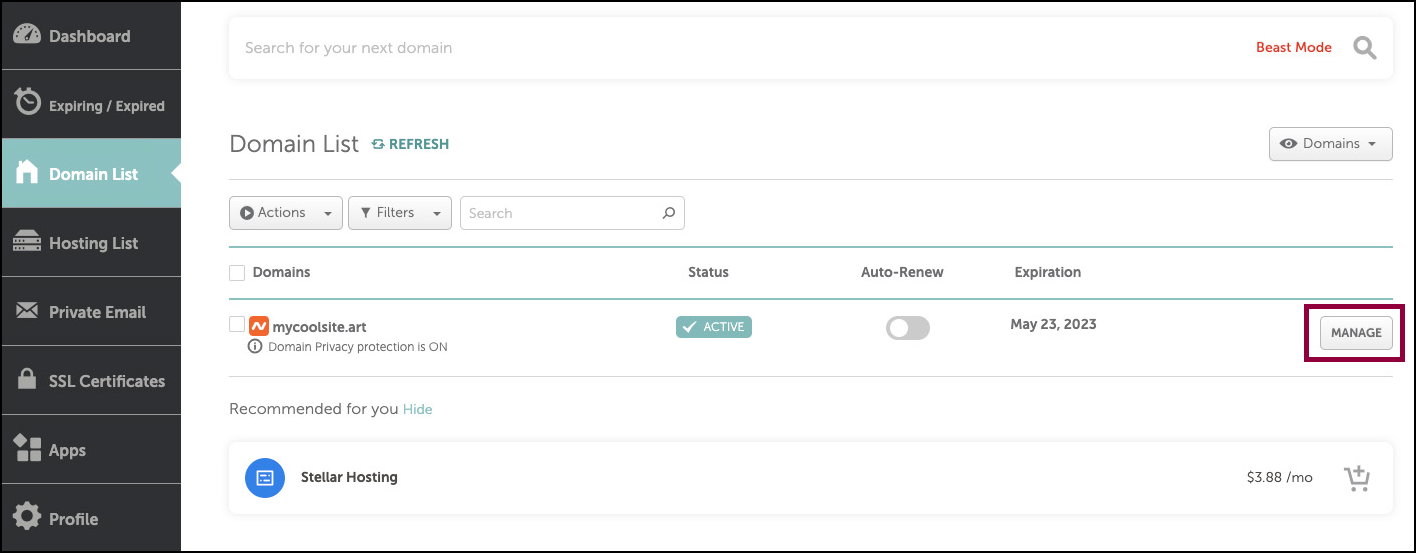
- Click Manage.
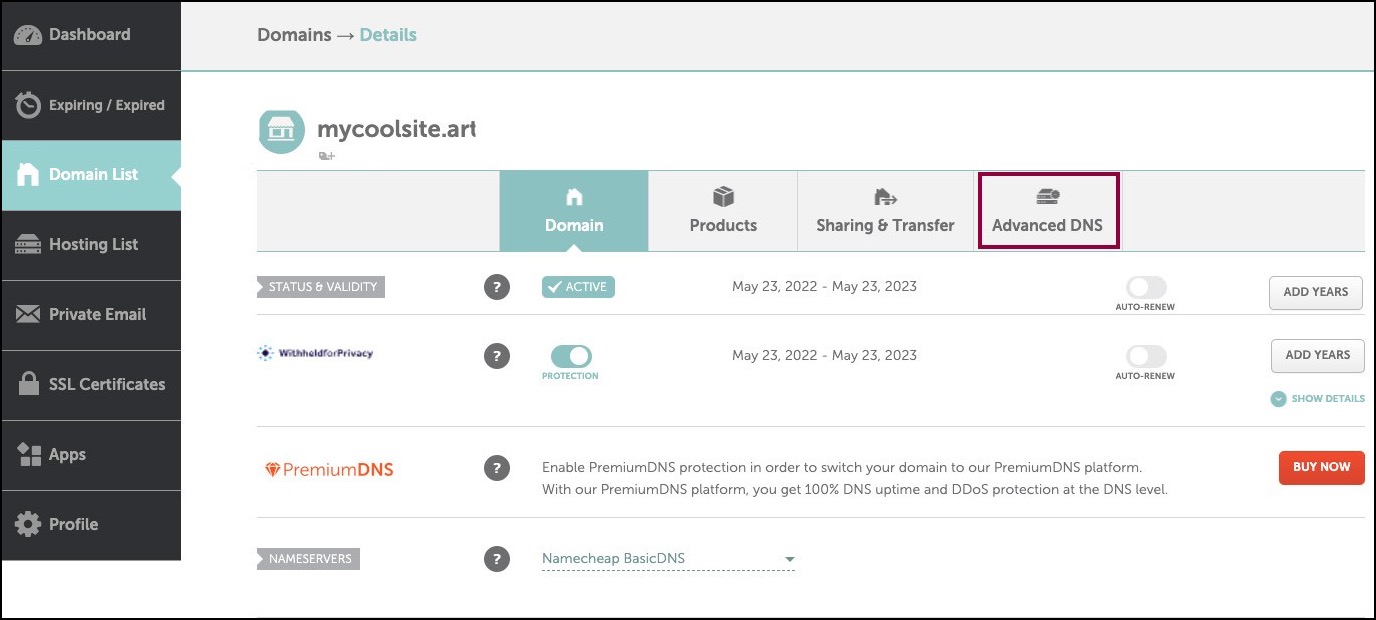
- In the DNS records section, click Advanced DNS.
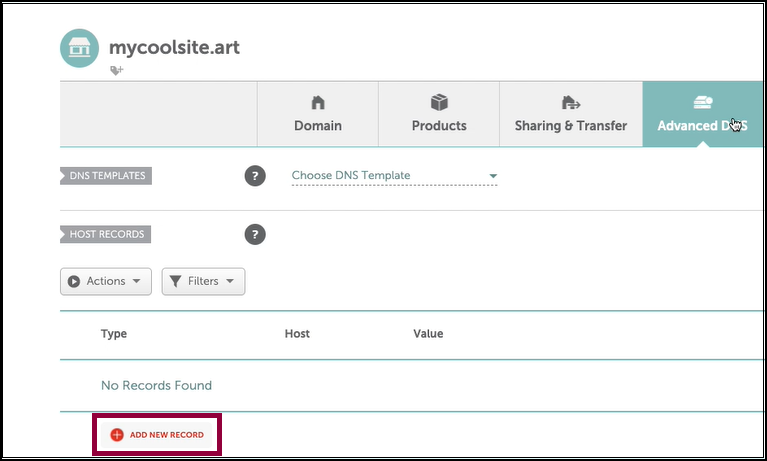
- Click Add New Record.
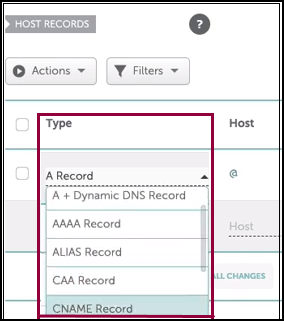
- Navigate to the Type dropdown menu and select CNAME Record.
- Switch back to the tab containing Email Deliverability.
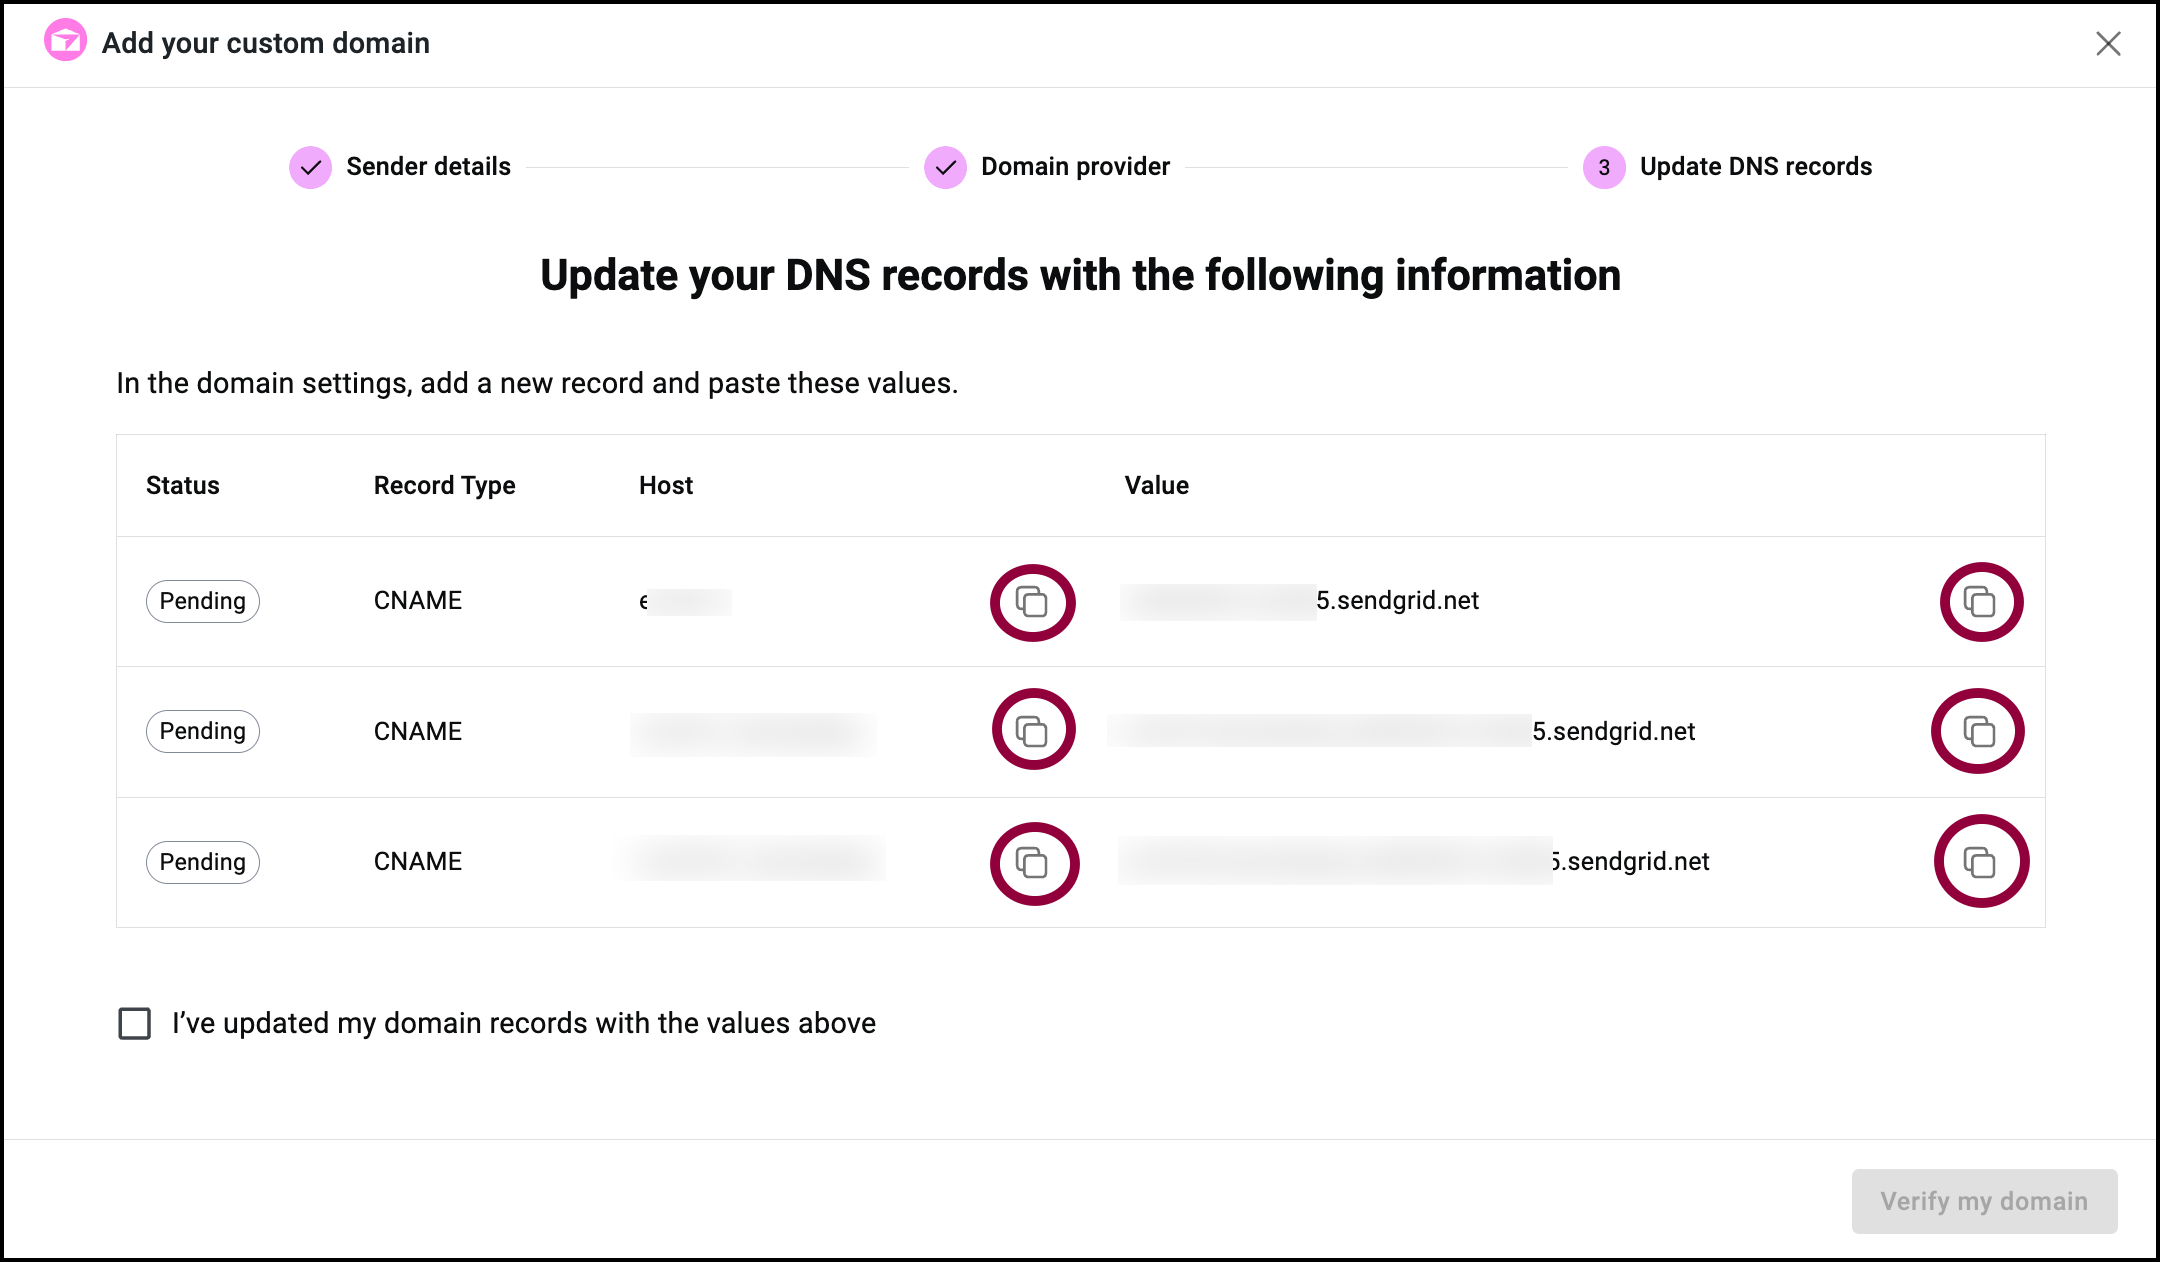
- Use the copy icon
 to copy the Host information.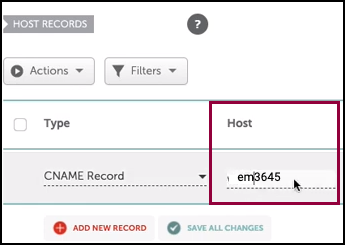
- Return to the NameCheap tab and paste the Host information into the Host field.
- Return to the Email Deliverability tab and use the copy icon to copy the Value.
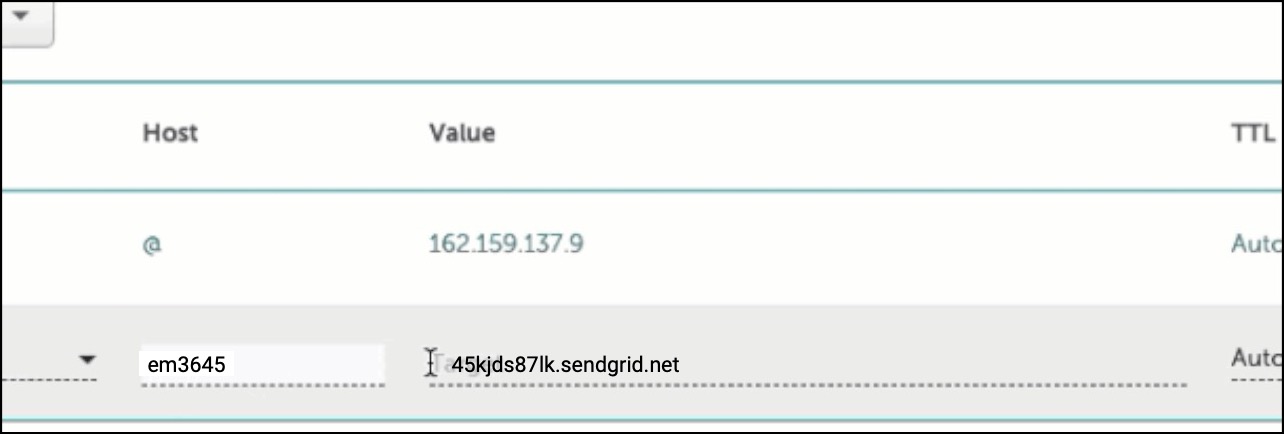
- Return to the NameCheap tab and paste the Value in the Value field.
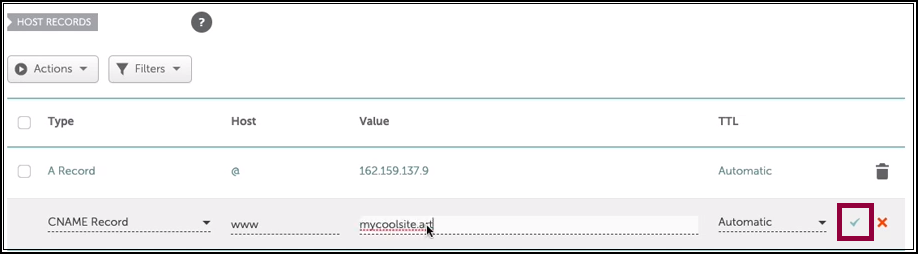
- In the TTL field, use the checkmark to mark it as Automatic.
- Repeat this until you’ve copied all the Host and Value information over to NameCheap.
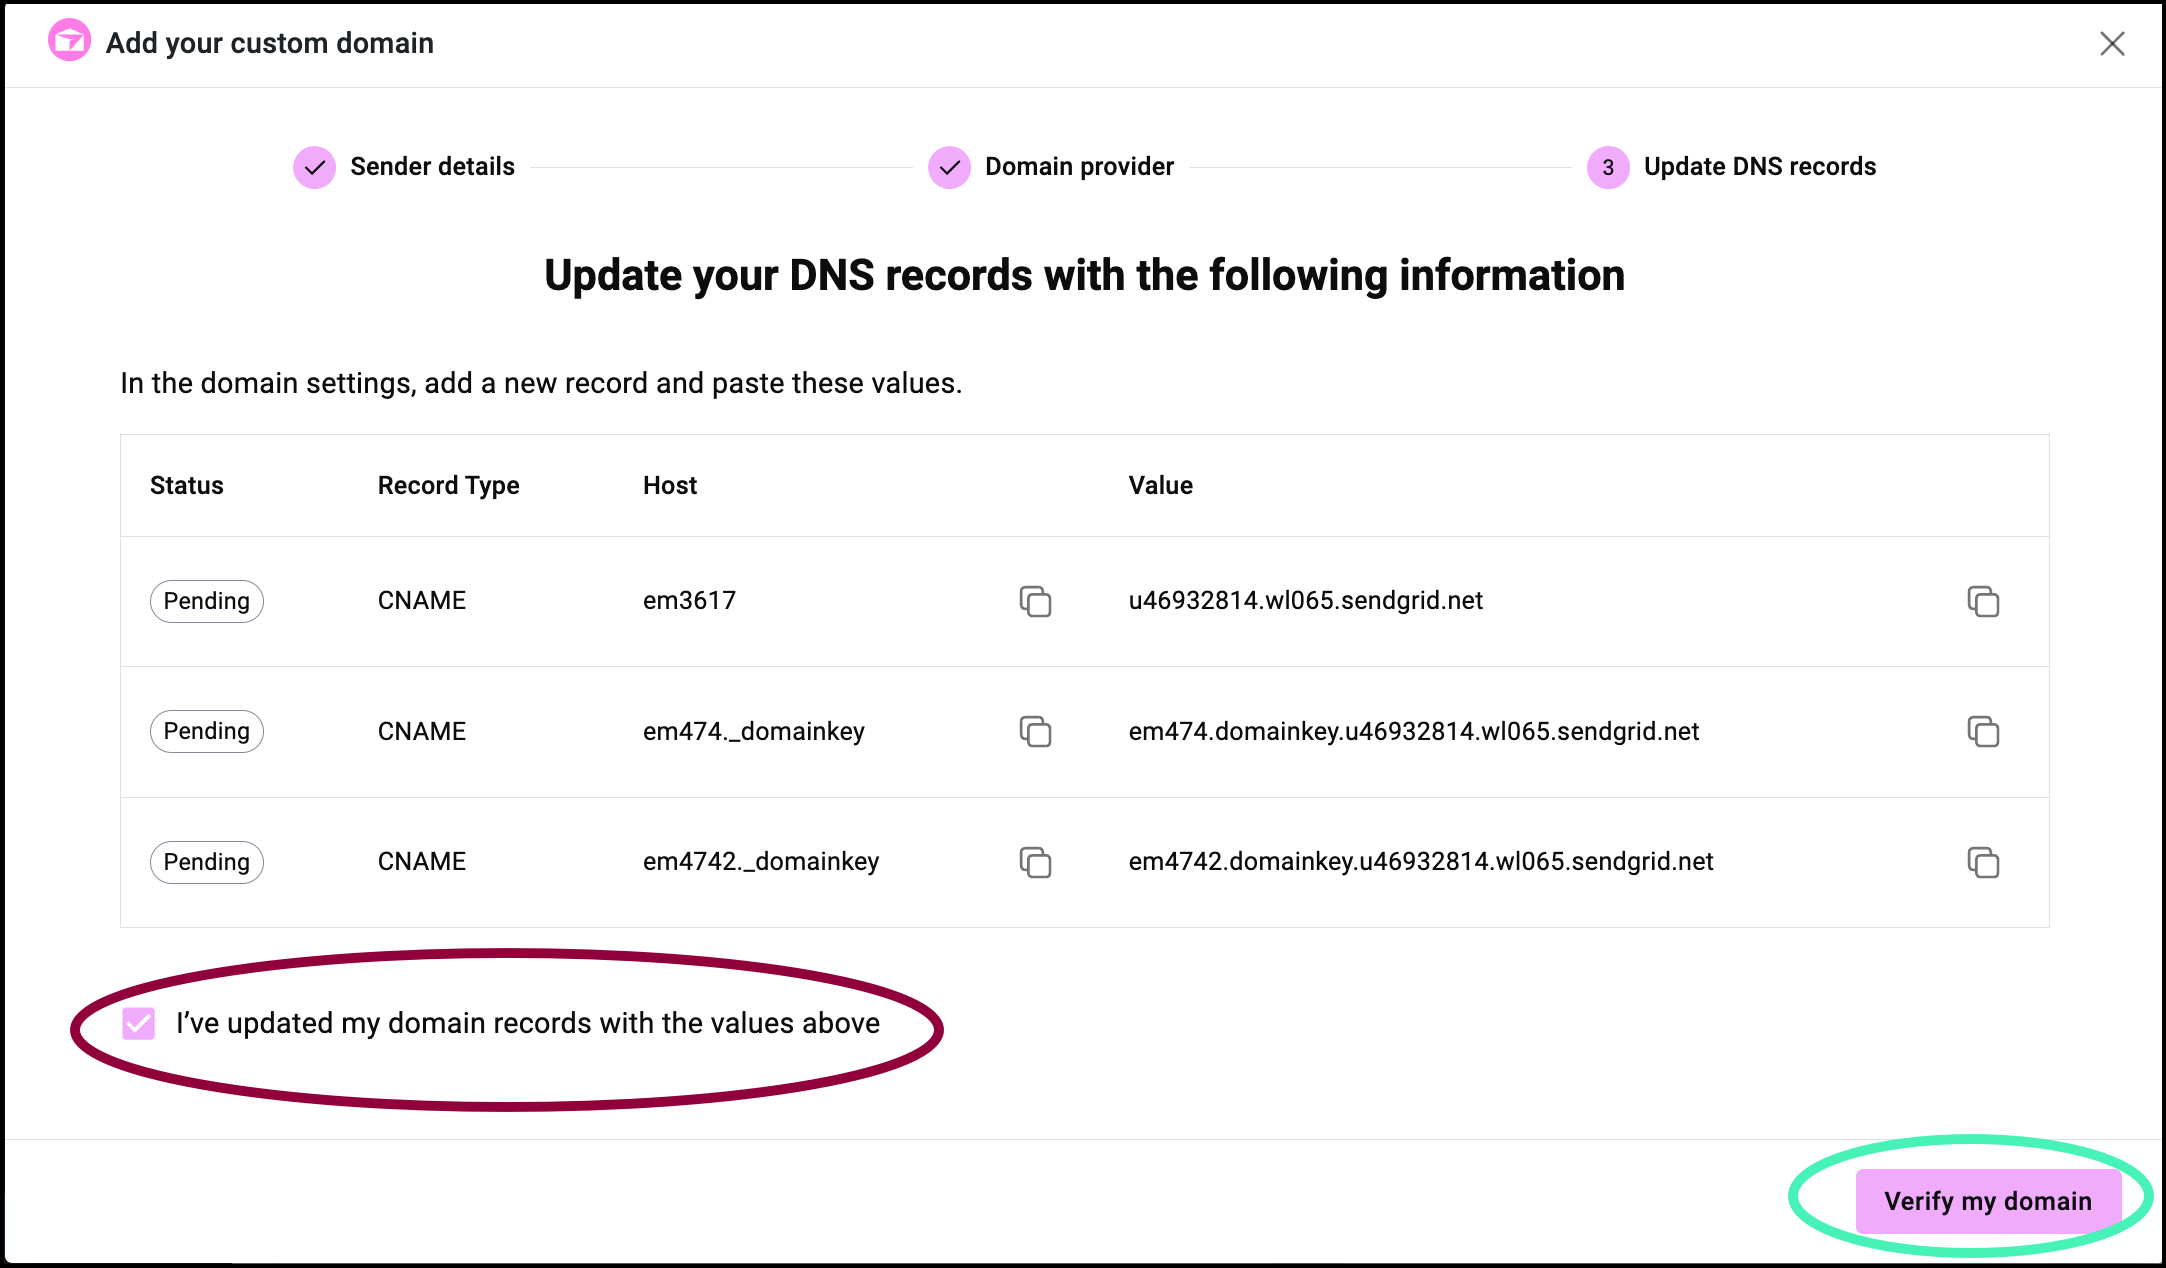
- When finished, check I’ve verified my domain records with the values above and click Verify my domain.NoteIt may take up to 72 hours for the process to finish.
After verification, your Email Deliverability emails will now use your custom domain as their address.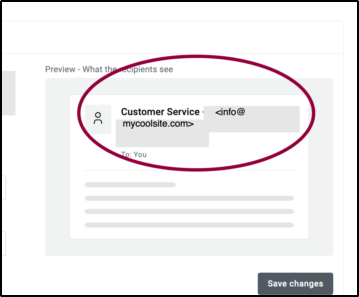
You can confirm this by checking the domain section of Sender Details in General Settings.
Verification failure
If verification fails, you will receive an error message.

You can choose to:
- Try again using the same information by clicking Verify.
- Start over by clicking Cancel Process.