What Are Post Types?
Post Types are “types of content”, grouped together in a structured way within WordPress.
Dynamic content automatically pulls data from your WordPress site or current post/page and inserts it into your Elementor layouts.
Unlike static text or images that stay fixed until manually edited, dynamic content updates automatically whenever the underlying site data or post changes.
The Default WordPress Post Types
Currently, there are eight default WordPress post types.
- Post
- Page
- Attachment
- Revision
- Navigation Menu
- Custom CSS
- Changesets
- User Data Request
Most users are familiar with the two most common post types: Posts and Pages. Although similar, Posts are time-based listings while Pages are hierarchical in structure, with Parent > Child relationships. In addition, Posts make use of taxonomies such as Categories and Tags, while Pages do not, and Pages use Page Templates for display, while Posts do not.
What Are Custom Post Types
WordPress allows users to create their own Custom Post Types, often referred to as CPTs.
Some of the more common Custom Post Types you’ve probably come across include:
- Movies
- Testimonials
- Reviews
- Products
- Events
- Portfolios
Each of these defines a “type of content”.
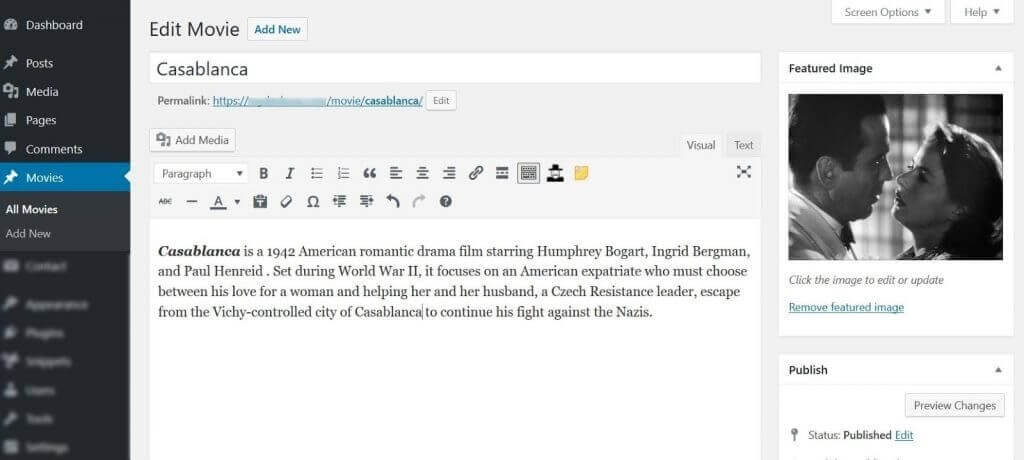
The editing screen will look very similar to the default Post and Page editors, as shown in this example of a Movie Custom Post Type.
When might you need a custom post type?
A common use of a CPT is an e-commerce website. Products are a specific type of content that don’t fit into the Posts or Pages default post types. Products need to include many extra pieces of information, such as Price, Size, and Color.
Custom Taxonomies
Just as the Post Type uses Categories and Tags taxonomies to help organize posts, a Custom Post Type can use its own custom taxonomies. A movie review CPT, for example, might use Genre as a custom taxonomy, to categorize movies into groups such as SciFi, Romance, etc.
Because CPTs are separate from Posts and Pages, they can be displayed separately, organized by their own taxonomy categorizations, and filters
Creating Custom Post Types
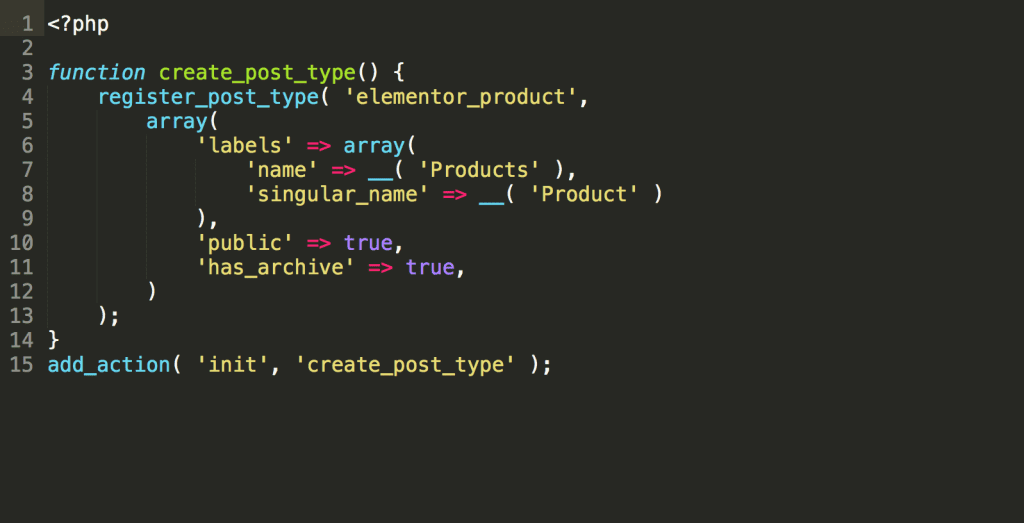
To create custom post types in WordPress, you can write the code manually in your functions.php file (Example shown below).
Or, you can use one of the popular plugins designed to make creating Custom Post Types much easier such as:
Custom Post Type UI
By navigating to Elementor > Theme Builder in WP Admin, you can create Single Post and Archive templates for your Custom Post Types and set their display conditions.
True so Elementor can apply Archive Templates to them.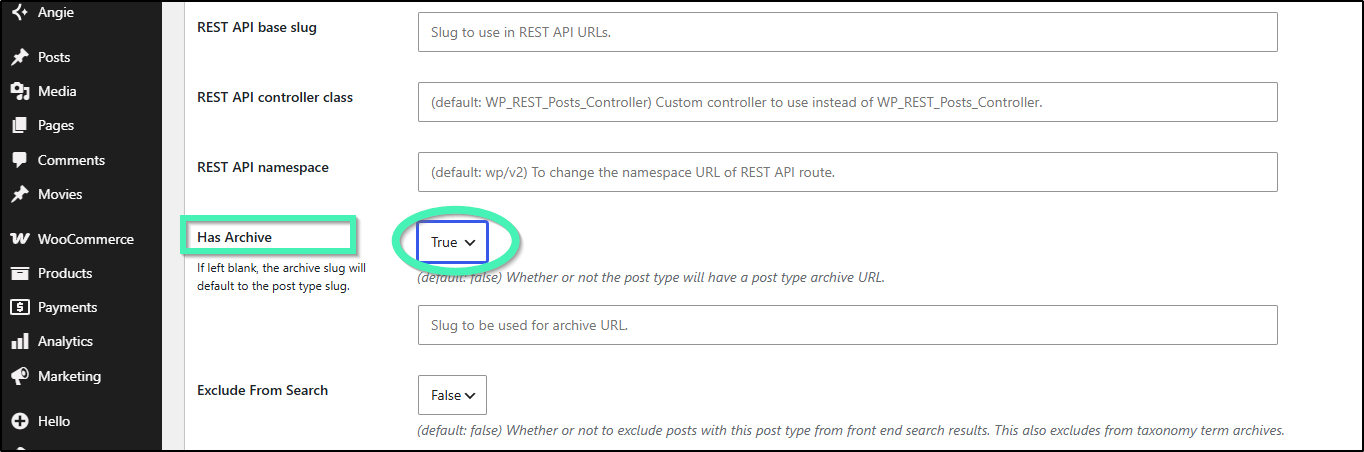
Creating Custom Fields
Custom fields store extra information about the content. Just as a blog post has an Author field, and an Excerpt field, a Post or Custom Post Type might have several custom fields assigned to it.
With Elementor and custom fields you can create dynamic pages without the use of code. You can use one of the following most popular plugins designed to make the process much easier:
Advanced Custom Fields
Toolset Types
Pods
Elementor integrates directly with each of these plugins. Read more about each in the following articles:
Elementor and ACF
Elementor and Toolset
Elementor and PODS
You can easily select your custom fields from any Dynamic Content list to display them anywhere you wish.
Note: If the Single Post template is not being loaded for your CPT, and it looks as though the Display Conditions are set up properly, check the template you are using for your CPT posts. Make sure the posts are using the Default template. If they aren’t, change them to Default and you may find that this solves the problem, allowing the Single Post Template to load properly for your CPT posts.
How to Connect Custom Fields to Elementor Widgets
Once you’ve created your Custom Post Type and custom fields, you can display that dynamic data across your Elementor templates (like Single Post or Archive templates) and pages:
- Select a Widget: Click on any widget in the Editor that supports dynamic content (e.g., Heading, Text Editor, Image, or Button).
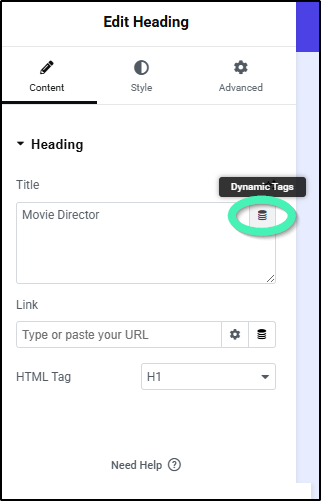
- Click Dynamic Tags: Hover over an input field in the panel and click the Dynamic Tags icon in the top-right corner.
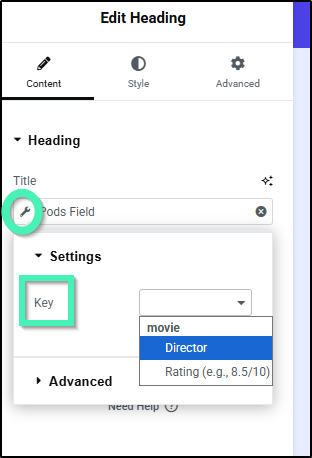
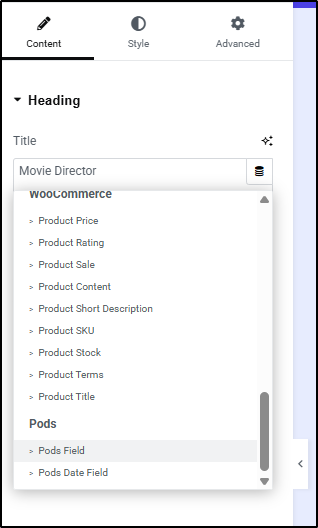
- Select Your Source: Under Post or Custom Fields, select your plugin source (e.g., ACF Field, Pods Field, or Post Custom Field)
- Choose your field key: