Table of Contents
Web design is a beautiful profession — full of creativity and uniqueness. It not only makes a website look nicer, but it also has the power to influence opinions and emotions. It is therefore in high demand and if you’ve ever wanted to learn web design, now is the time!
But, web design includes many theories, rules, best practices, and other nuances that you should know, and within this sea of knowledge, one can easily get lost.
That’s why we’ve created a comprehensive guide on web design for beginners. Here, you will find everything you need to know to start your web design career. Let’s get started.
Table Of Contents
What Is Web Design?
Web design is the process of creating the visual interface of a website. In other words, web designers create everything we see online. Web design doesn’t just include aesthetics, it also refers to the usability of a website or mobile app, as well as the overall structure and layout.
Web design is different from web development, which refers to the actual coding that makes a website function. Web designers focus on the front-end and visual aspects of a site, which influences its usability and overall UX.
There are two main goals in web design:
- To make the website look good.
- To help visitors easily accomplish their goals on the site.
Common Web Design Terms
This is where understanding some commonly used web design terms come in handy:
User interface (UI) | What visitors see when they enter a website: the layout, navigation, images, color, typography, etc. |
User experience (UX) | How visitors feel when they move through and interact with the interface of a website. |
Usability | How easy it is for visitors to accomplish basic tasks. When there’s friction in design (from poorly chosen graphics to complicated menus), this disrupts the overall UX. |
Web designer | The person who designs the visual and interactive interface of a website. |
The person who writes the code that turns the visual design into a working website. |
As a beginner, you’ll want to get a good handle on UI and UX basics. Down the road, if you decide you’re interested in focusing on one of these areas, you can pursue a career as a design specialist and level up your salary, too.
For now, let’s focus on nailing the basics.
What Are the Web Design Principles?

Web design principles pretty much set the rules for the game, so this should be your baseline. One of the problems with jumping into any new career is the overwhelming amount of stuff to learn. So, where do you start?
Every website you work on should adhere to the following:
Aesthetic Usability Effect: People assume that a beautifully designed website is easier to use than one that’s unattractive or outdated.
Jakob’s Law: Familiarity breeds trust. If there’s consistency in how an element is handled from website to website, don’t deviate from the norm.
Fitt’s Law: Increase interaction and design touch targets so that:
- They’re large enough to find.
- They’re large enough to click without error.
- They’re placed in an area that’s within easy reach.
- There’s ample space between multiple touch targets in a single space.
Hick’s Law: Reduce overwhelm and minimize the number of steps visitors take with:
- Fewer choices.
- Simplification of complex tasks into smaller, more manageable steps.
- Recommendations for the best/most popular/greatest value choice.
Law of Prägnanz: Use recognizable shapes and elements to keep visitors from becoming confused or frustrated when they encounter something too complex to comprehend.
Miller’s Law: Minimize visual overload by organizing content into groups (with five to nine items).
Gestalt Design Laws: The human brain takes what it sees and tries to make sense of it based on logic and order, so your design should cater to the following structure and pattern rules:
- Similarity
- Continuation
- Closure
- Proximity
- Figure/ground
- Symmetry & order
Serial Position Effect: Place the most critical parts at the very top or bottom of a web page. These are the most memorable and interacted-with spots.
Peak-End Rule: The first and last impressions of a website are what visitors remember the most. While the entire experience should be top-notch, that homepage entry and conversion endpoint should be flawless.
Want to explore more web design best practices?
What Are Web Standards?
Web standards set the rules for the web as a whole. Generally, they revolve around the technical aspects of building a website, with the primary goal of making the web a place that everyone can equally access and enjoy.
Unlike web design principles that often stem from psychological studies and laws, web standards are actually established and regulated by a number of governing bodies.
At the forefront of web standards is an organization called the World Wide Web Consortium (W3C), which is led by Tim Berners-Lee (the guy who invented the Web).
These are the main aims of the W3C:
- Web for All — Achieved by creating accessible and global-friendly websites.
- Web on Everything — This refers to responsive web design: total cross-browser and -device compatibility for every website.
- Web for Rich Interaction — Guidelines for which programming languages and techniques should be used.
- Web of Data and Services — Pertains to data management within and between websites.
- Web of Trust — The prioritization of security and privacy across the web.
There’s a lot of guidance here on what you should and should not do when creating websites.
That said, it’s a good idea to put your exploration of this topic on hold until you’ve mastered everything else you need to know about web design for beginners. It’s not that this is less important than the rest. It’s just that there’s a lot having to do with the technical management of a site, which is a skill you won’t develop until later.
What Are the Most Important Skills To Master?

Speaking of the skills you need to become a web designer, let’s set some priorities. We’re going to split them up into two categories: hard and soft skills.
Hard Skills Web Designers Need
Hard skills refer to technical knowledge and technique. These are the most important ones to master:
- UI design: Create an attractive and modern interface.
- UX design: Create a website journey and make it frictionless.
- Composition: Lay out a website so that it’s attractive and easy-to-follow.
- Typography: Select and pair fonts to set a mood and create a readable interface.
- Color theory: Develop a color palette that brings the right emotion and vibe to a website without throwing things out of balance.
- Responsive web design: Design a website that not only looks good on all devices and browsers but provides a consistent experience from one platform to another.
- Image editing and optimization: Manage the aesthetics, size, and weight of imagery for improved usability.
- SEO: Improve a website’s rank with technical enhancements, like image compression, optimized search metadata, and responsive design.
- HTML & CSS: Code with the basic programming languages: HTML to manipulate text and CSS to change the style of the web page.
- JavaScript: Add interactivity to a web page with JavaScript.
- Web design tools: Create wireframes, mockups, and prototypes for a website with professional design software.
- Content management systems: Use a website builder that enables you to consistently build high-performing websites for clients.
Soft Skills Web Designers Need
Soft skills refer to personality traits that enable you to succeed as a web designer. These are the most important ones to focus on:
- Project management: Plan website jobs and keep them on track with a well-documented process and project management platform.
- Discipline: Commit 100% to your job, to each project, to every client, and to all the web design principles and standards that have paved the way for you.
- Resourcefulness: Know how to work your way out of a jam and make things happen even when it seems like obstacles are everywhere.
- Attention to detail: Dot every “i” and cross every “t” so that clients never have a reason to be unhappy with you.
- Empathy: Don’t make assumptions about your client or their audience; take the time to get to know who they serve so you can build the best website you can.
- Communication: Learn how to communicate with clients in a language that they understand and that builds trust.
- Customer service: Provide a superior client experience by taking charge on Day 1 and be prepared to answer their questions and put their minds at ease along the way.
By mastering these hard and soft web design skills, you’ll produce better work and, as a result, attract clients that really value the quality of work you do.
What Does the Web Design Process Involve?
Web designers generally follow a similar process from project to project. The length of each phase may differ as can the intensity of what’s involved, but the steps remain the same.
Here’s what your web design process will include:
Step 1: Flesh Out the Project Specs
This is the stage where you take the company’s business and needs and determine what kind of site they need (e.g. blog, website, e-commerce, etc.) and what exactly you need to build out in terms of pages and features. For instance:
- An educational five-page website for a non-profit organization.
- A portfolio website for a professional photographer that enables customers to book sessions with them.
- A large enterprise website for a software company that provides customers with info on product features, pricing, FAQs, and more.
There are other details to flesh out, too. In this guide to writing the perfect website brief, you’ll get tips on how to lay this out before the project begins.
Step 2: Schedule out the Project
Once you know what you’re designing, you’ll create a timeline for it. Not only does this allow you to more effectively balance multiple website projects at once, but this information is super helpful for clients who have tangible milestones they can look forward to.
As far as creating the schedule, it really depends on the scope of the job as well as your availability. Generally, though, each step of the project takes longer than the one before it.
In order to determine the right amount of time to allot to each, use a time-tracking tool whenever you design a new website (even if it’s your own or a free one you’re doing for a friend or relative). This will help you gauge how much time you need to schedule for each phase. Just don’t forget that on projects for clients, you also have to leave time for feedback.
Step 3: Do Your Research
The onboarding process is a critical one for web designers. Fail to ask the right questions up front and you could find yourself doing a lot of revisions later (which can lead to not just a missed deadline, but also to scope creep and loss of profit).
Before you begin your research, first you must create a website design questionnaire in order to gather all the essential information, files, and logins from your client. This will form the basis for your research.
During this stage, you’ll want to look into:
- The client and their brand (if it has a history)
- The audience they’re targeting
- The competition
- The industry as a whole
Once you have an idea of what your client is up against, you can formulate a plan for the website’s design and approach.
Step 4: Create a Style Guide
The brand style guide is where you’ll document the visual strategy for a brand and its website.
There are a number of reasons why a style guide is useful:
- It enables you to establish a clear vision for the website early on.
- It allows you to collaborate with other designers and not have to worry about producing consistent work.
- It’s something you can give to your client to ensure that they (or their future designer) maintain the visual identity you’ve created for them.
To create a style guide, you’ll need to put together rules for the key visual elements on the site (like typography, logo usage, colors, and so on).
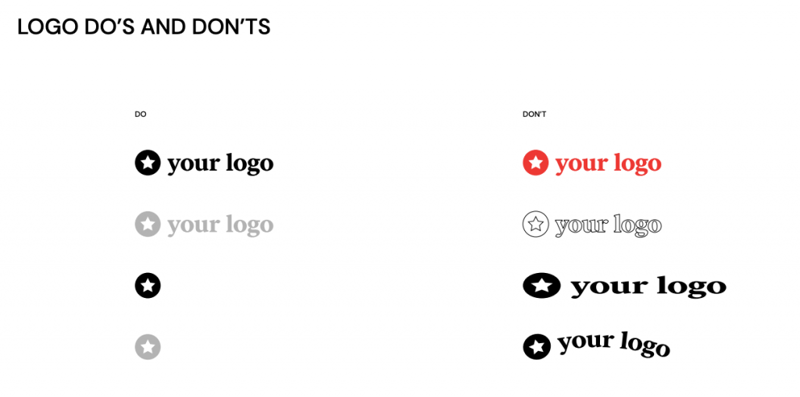
Rather than try to build this on your own, discover how to create a complete web style guide for your design project.
Step 5: Create the Sitemap
Whatever you want to call it — information architecture, sitemap, navigation, or menu — this is the first major component you’re going to lay down for the website.
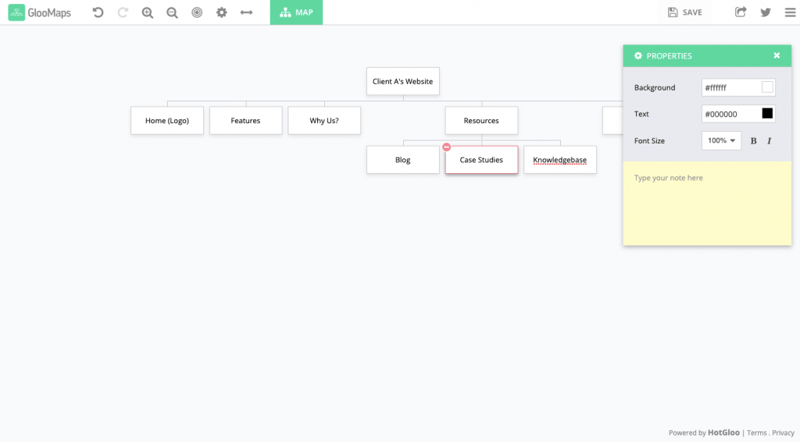
The sitemap isn’t just a list of pages to include on the website. It establishes the hierarchy and relationships between pages. This is important as the way you connect pages to one another can improve or erode the usability of your website.
Step 6: Create Wireframes, Mockups, and Prototypes for Your Site
This is actually a three-step phase that enables you to incrementally build a website from the ground up.

Wireframes
Wireframes are skeletons of your pages. You sketch out the composition, use placeholders to show where content goes, and determine how to position and size each block and element.

You can create wireframes with good ol’ fashioned pen and paper, use a wireframing tool, or build it right inside of WordPress with Elementor.
Note: If you choose to use WordPress during this stage and the next, it’s best to do so on a staging site instead of on the client’s live domain. Here’s how to set up a staging site for these purposes.
Mockups
Mockups are static design files. They look just like a web page would, except they’re not interactive.
By designing mockups, you get the chance to iron out any kinks in the design, layout, elements, and so on before committing it all to a working prototype.

You should design your mockups using a similar tool (if not the same) as what you used to create your wireframe. For instance, if your wireframe is in WordPress, it makes a lot of sense to create your mockup there as well.
Prototypes
Prototypes are the interactive version of mockups. In prototyping, you create connections between the pages and animate other interactive elements on the page.
This gives both you and your client the chance to see your designs in action.

Again, the tool you use for your wireframes and mockups should be used here (if possible).
Learn more about how to take your ideas from wireframe to prototype here.
Step 7: Build the Website
If you design your wireframes, mockups, and prototypes in WordPress, you won’t need an actual web development stage since you’ve already done it.
However, if you designed everything with web design software and other tools, here’s what you’ll need to do to convert your prototype into a WordPress website.
Step 8: QA the Site
Throughout the web design process, you’ll want to check in with the client when you hit key milestones. By gathering feedback and approval throughout the job, you’ll cut down on the need for excessive revisions at this stage.
Once the site is in WordPress and ready for review, you’ll need to bounce it over to two parties for testing:
- Your internal quality assurance team (or team member). They will do a complete review and make sure there are no issues, from broken links to slow-loading pages and everything in between. If you work solo, you can perform this yourself.
- Your client. They must give the final approval on the website before launch. This stage enables them to do that with a working website and not just designs that are in-progress.
Step 9: Launch
With all the necessary approvals in hand, it’s time to launch. Here’s how to push your WordPress website from staging to the client’s live web hosting server.
What’s the Best Web Design Software for Beginners?
Every web designer should take the time to create a toolbox of their own. In terms of the essential web design tools you need to include, here are the ones to start with:
WordPress
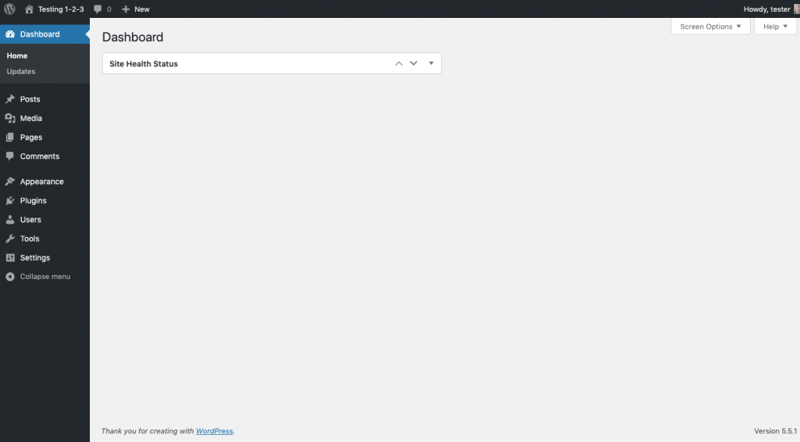
That said, WordPress does take some getting used to. But the payoff is worth it since you can build far more powerful, larger, and feature-rich websites for clients.
WordPress Themes
A WordPress theme is a pre-designed website template. Every website is required to have one, even if you decide to use a builder like Elementor to design with.
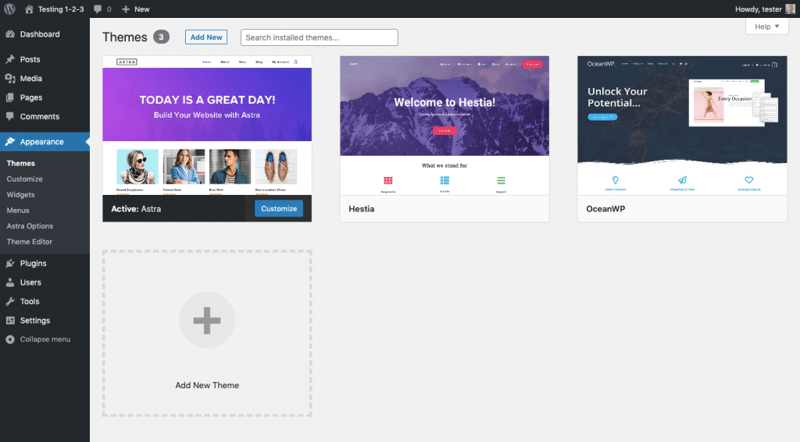
When installed in WordPress, a theme not only “skins” the website with the premade design, but it adds placeholder pages and content. This is a great way for beginner designers to save time building out the baseline elements of a site.
As a web designer, you’ll want to find a handful of themes you’re really comfortable with and that work well for your niche. That way, you won’t have to worry about learning your way around a theme with every new project and can spend even more time customizing the design.
Learn more about how to choose a WordPress theme and how to design with one here.
Elementor
There are a number of reasons to use a page builder plugin like Elementor on top of your WordPress theme:
- It’s a drag-and-drop visual editor that enables you to design in real-time.
- It turns the unfriendly WordPress editor into a client-friendly block editor.
- You have the flexibility of using design presets or coding your own custom styles.
- You can design a web page from scratch, or use section or full-page WordPress templates to create them.
- The builder also comes with template kits, which work similarly to a theme and are fully compatible with Elementor.
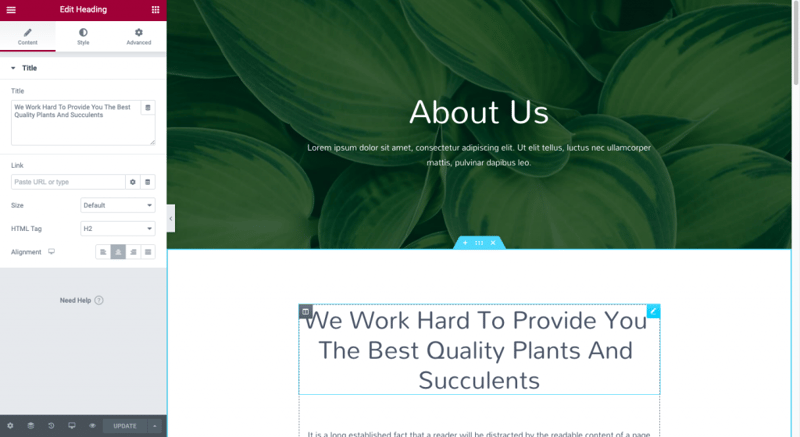
The Elementor page builder plugin adapts to you and your preferred way of working as a web designer, which makes it a web design tool you can grow with.
WordPress Plugins
WordPress plugins are extensions that build out the features and functionality of a website. Plugins can help you do things like:
- Add security features.
- Design and schedule pop-ups for different pages.
- Connect Google Analytics tracking to the site.
- Implement caching and other speed optimizations.
- Compress your images.
- And much, much more.
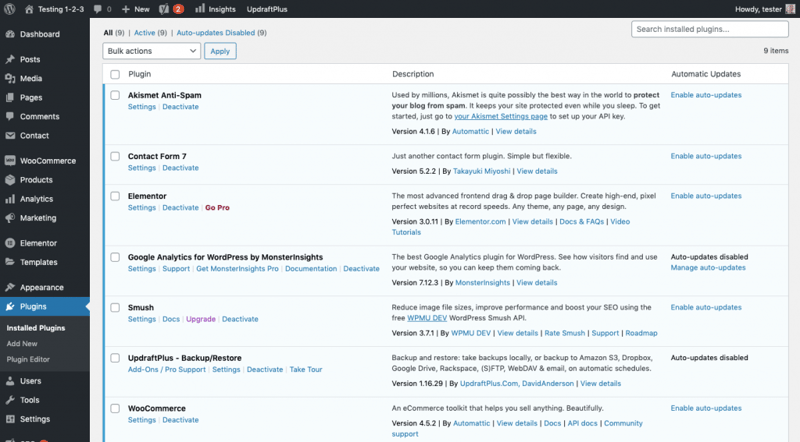
As a beginner web designer (heck, even as a pro), WordPress plugins spare you the hassle of having to code every inch of a website.
Just keep in mind that plugins can take up space on your server and introduce vulnerabilities to your website, so choose wisely. Here are some of the best free WordPress plugins..
Note: If you decide to do the initial planning and design work outside of WordPress, you’re going to need additional web design software for your toolbox. Starting here:
GlooMaps/Slickplan
Before you do any design work, you’ll want to sort out the navigation for your website. You can use a tool like GlooMaps or Slickplan to develop your visual sitemaps.
This tool is useful for planning out the information architecture of your website: which websites to include in the navigation as well as how they relate to one another.
Sketch/Photoshop
While it’s certainly easier to design wireframes, mockups, and prototypes right from within WordPress, you can also use professional design software like Sketch and Photoshop.
These design tools can be used for multiple purposes throughout the lifecycle of a job:
- Graphic design
- Photo editing
- Website design and planning
So, even if you primarily use WordPress to build your websites, you might still find a use for them.
Atom/Visual Studio Code
While you might not need an integrated development environment (IDE) when you first start designing websites, you might find Atom or Visual Studio Code useful down the road.
IDEs are code writing and editing platforms. Not only do they make it easier to write code in an isolated environment, but you can run and debug your code here as well.
Local by Flywheel/MAMP
There are a number of ways to create a local or staging environment for your WordPress projects.
You can use your web hosting account to create a staging server. You can also use a local WordPress development tool like Local by Flywheel or MAMP.
Either way, the goal is to build a WordPress website away from the prying eyes of your client while also keeping it away from prospective visitors and Google’s indexing bots while it’s in progress.
That said, if you’re really trying to keep your process relegated to WordPress, you can always use WordPress maintenance mode to let visitors and Google know the site isn’t ready to be visited just yet.
Where Can You Learn Web Design?
One of the most common questions we hear in the web design community is: “Do I need a degree to become a web designer?”
The answer to that is no, but it won’t hurt you either.
The truth is, when it comes to how to learn web design, the choice is yours. If you feel like you need a regimented university program to become a masterful designer, then have at it. However, if you prefer the self-taught route, there are tons of resources you can use.
Just keep in mind that it’s going to take time and practice either way.
For those of you who prefer the DIY approach or simply want to strengthen the design skills you’ve already acquired, the following resources are the way to go.
Books for Web Designers
To get a truly comprehensive education on beginner web design topics, start with these books on web design and development. They cover the full gamut of topics, including:
- Web design basics
- Introduction to coding with HTML and CSS
- Programming tutorials for JavaScript and PHP
- Designing with WordPress
- User experience design and strategy tips
- Design systems
- And more
As a bonus, some of these resources come with workbooks and playgrounds so you can test out what you’ve learned as you go along.
Online Courses for Web Designers
You’ll find plenty of online courses that teach the essentials of web design for beginners.
If you want access to a wealth of educational resources — across a variety of subject matter — a membership course site is a good option. There’s a great mix of free and paid content there and this post will point you to some of the best online courses for web designers.
Keep in mind that their video content doesn’t just come from subject matter experts. Some of these sites host courses from some of the top universities around the world. So, you can actually complete a formal training program — you’ll just do it from the comfort of your home, office, or a coffee shop instead of a lecture hall.
YouTube Channels for Web Designers
While books and online courses are great for giving you an end-to-end education in a specific subject (like how to code with HTML or the basics of color theory), YouTube videos are best for learning new skills on the fly as well as staying up on the latest web design trends.
When choosing a YouTube channel to follow, make sure the teacher is a web design expert and that they publish content frequently, and have done so recently. You want lessons that will help you design websites today, not two years ago.
Here are some channels that regularly produce up-to-the-minute tutorials on web design, WordPress, and more:
- NNgroup: Quick tips and tutorials on user experience design.
- Chris Coyier: CSS design tutorials as well as tips on how to manage the technical behind-the-scenes of a website.
- Jesse Showalter: Live walk-throughs that demonstrate how to design mockups, prototypes, and responsive websites.
- Elementor Website Builder for WordPress: Guidance on how to get the most from Elementor.
- Flux: Tips for the business and client management side of being a web designer.
Blogs for Web Designers
For those of you who like to get your training from written tutorials and guides, blogs are a great option. They’re a never-ending source of information on web design for beginners, seasoned experts, and everyone in between.
Here are some of the best web design blogs to start with:
- Webdesigner Depot: Get quick insights into what’s happening in the world of design along with a brief, but useful design and coding tutorials.
- Smashing Magazine: This blog publishes actionable guides for web designers and developers, often introducing readers to new and innovative approaches and trends.
- WPBeginner: Anything you could ever want to do to a WordPress website has been covered by this blog in clear and exhaustive detail.
- Elementor Blog: Learn how to get started as a web designer, use WordPress to the fullest and maximize results with the Elementor website builder.
- Awwwards Blog: While you can learn about UX design, the main reason to follow this blog is for the eye-catching website examples and inspiration contained within each post.
Podcasts for Web Designers
When you’re crunched for time, podcasts allow you to take your web design lessons wherever you go. What’s more, podcasts teach you about web design in a different way than blogs, videos or courses can. Often, you’re learning from real designers’ personal experiences.
Here are some podcasts that are geared more towards beginner web designers:
- Presentable: Learn why web design principles and web standards really are crucial for a positive user experience.
- The Boagworld UX Show: Each season is dedicated to a different theme: the web design process, essential design skills, UX best practices, and more.
- Kitchen Sink WP: This show is a hodgepodge of content, ranging from tips on how to develop business processes to manage the backend of a website.
- Honest Designers: Get helpful tips and tricks on how to start out strong in your early days as a web designer.
- Hallway Chats: Members of the WordPress community share the struggles and successes they’ve experienced while trying to work in this space.
Take the First Steps to Becoming a Great Web Designer
When it comes to web design for beginners, there’s a lot to cover. Obviously. But once you have a firm understanding of what makes for good web design and, more importantly, why, you can set your sights on getting your first client and building your first website.
When you’re ready to take that leap, this guide will teach you everything you need to know to start your web design business.
Looking for fresh content?
By entering your email, you agree to receive Elementor emails, including marketing emails,
and agree to our Terms & Conditions and Privacy Policy.
