Table of Contents
Going from a WordPress staging site to a live site has never been easier!
Staging is imperative to the upkeep and maintenance of website, removing the risks of testing new plugins, updates, trying out graphic and animated content, things that could harm, crash, and potential kick our site offline.
In our previous Monday Masterclass we saw how simple it was to set up a staging site, but that’s only part of the staging process. Pushing our staged site, taking our updated website with all it’s changes and tweaks, and placing it in place of our live (or production) site is just as important, if not more so.
For the purpose of staging, we need to establish two types of WordPress websites or if you like two groups of Elementor users, each defined by the type of content used on the site:
- Owner Generated Content – Websites that rely solely on the content that we, the site moderators, provide. Also known as Moderator Generated Content, or Brand Content.
- User Generated Content – Websites that rely, completely or to a certain degree, on user data. This includes data such as information from forms or orders placed by users, as well as uploaded files, images, comments, etc.
The reason we need to make this distinction is that we need to know whether or not we should be concerned about data that was added to our live website, — while we’re working on the backup-version of our site, — in the isolated staging environment.
Pushing From Staging to Live Site: Owner Generated Content
* Note: This process will overwrite any user generated data not appearing on the Staging site, from the Live site (including comments, orders etc.).
If we’re the only people inputting data to our site, we can avoid adding any data while we’re working on updates and changes, and push the updated version of our updated site in much the same way that we would a brand new site.
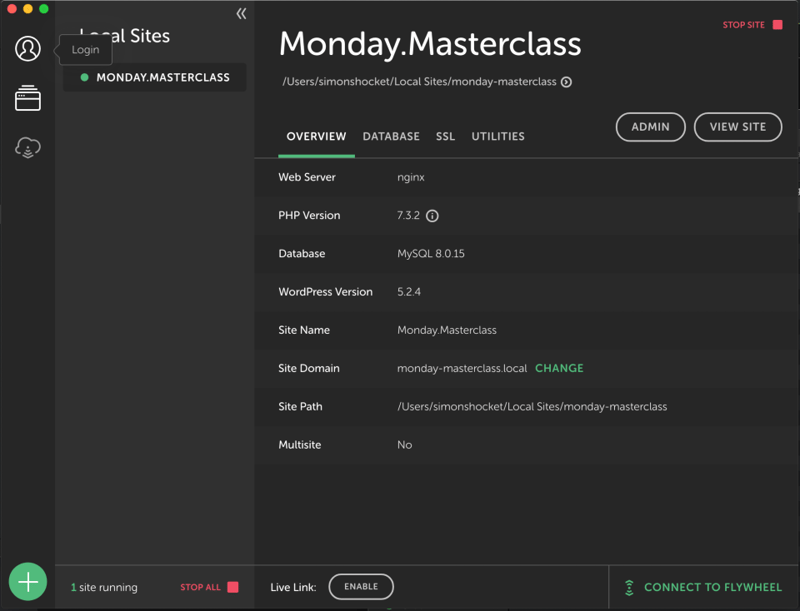
If this screen looks familiar, it should, because it’s exactly where we left off in our last Masterclass.
As you may recall, we created our local staging environment by uploading a full backup of our live WordPress site, into an environment that we had created on our own computer, using Flywheel’s Local app. There are other ways to do this using Bitnami, or XAMPP, but we found this was to be the simplest and therefore most efficient.
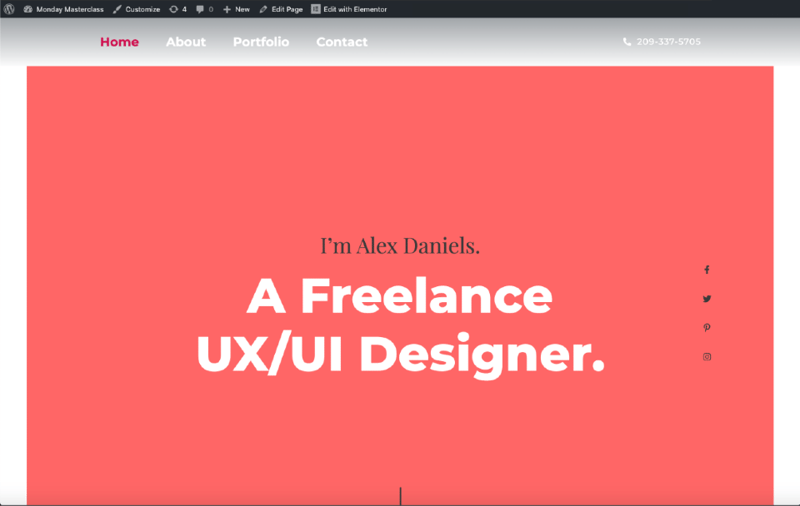
For the purpose of this masterclass, we added a menu and a header to help make a practical distinction between the appearance and functionality of the new (staged) version of the site, and the older (live) version.
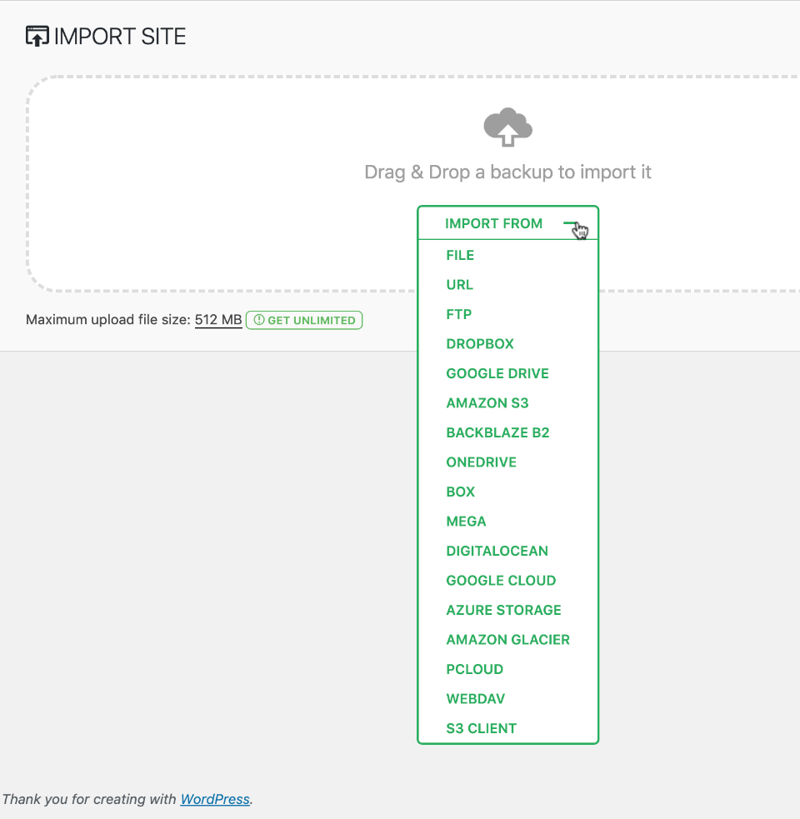
Once we’ve finished updating and testing our site, we’ll want to upload our new version from the local environment to the live site. The simplest way to do this by using a migration plugin.
We prefer to use the most popular among them, the All-in-One WP Migration plugin, and install it on both our WordPress.
Step 1: Install All-in-One WP Migration on both Local, and Live WordPress environments
Install the All-in-One plugin on our WordPress installation the same way as we would any other plugin.
Go to the WordPress dashboard of our Local Staging site, and in the Plugin tab, click ‘Add New’.
In the search-box search for All-in-One WP Migration, download it then install and activate it.
Once the plugin has been activated, the ‘All-in-One WP Migration’ tab will appear on the left menu bar of the WordPress dashboard.
Repeat this process to install All-in-One WP Migration on the WordPress dashboard of your Live site.
Step 2: Creating an Export File From the Local Version of Our Site
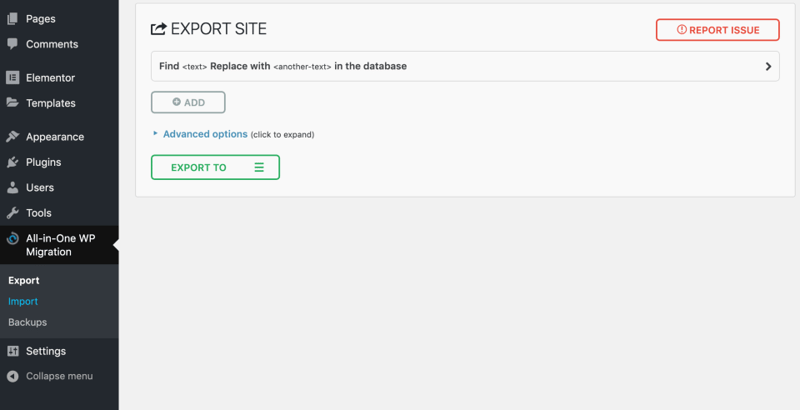
On the WordPress dashboard’s left menu bar, under the All-in-One WP Migration’ tab click on the tab and select ‘Export’.
In the Export window you will find that the Advanced settings allow you to export certain data rather than the whole site.
We suggest exporting the whole site. To do this, click on the Export button and select the File option from the dropdown menu.
When the plugin has completed preparing the export file, a window will appear with the option to download it. Click to download the backup file to your computer.
Step 3: Pushing the Backup to Live Site
With the backup of our Staging site downloaded, we’ll go to our Live site’s WordPress dashboard. In the left menu bar, we’ll click on ‘All-in-One WP Migration’, but this time we’ll select ‘Import’, and in the Import window, we’ll click on Import, and from the dropdown menu, we’ll select File.
We’ll locate our exported file and click on ‘open’. The file will upload to WordPress.
Once the upload has completed, a warning will appear to remind us that continuing with this process will overwrite everything on our live site (including comments, orders etc.)
As we are only following this process for websites that rely solely on owner generated content, we’ll click on ‘Proceed’.
The plugin will now install our new site, overwriting the older version. Depending on the size of our site, this may take a few minutes or much longer.
Bonus: Only Pushing UPDATES From Staging to Live Site (Similar to Git)
When it comes to our other category of WordPress and Elementor users, those who rely on data that comes from an external source, there are two ways of pushing updated site from the staging environment to the live site without risking the loss of any data.
As aforementioned, our main concern with data that comes in the form of users subscriptions, purchase orders, even comments etc., is that they will have continued to register on our live website, while we were busy working on the isolated staging version.
One method is a complex procedure that involves messing around with individual files and folders through an FTP or SFTP interface, using tools such as C-Panel. As such we felt that we would risk readers misunderstanding the tedious steps and accidentally steamrolling their live site.
That said, it is extremely important to back up your Live site and data before you do anything else, regardless of whatever way you choose to push your site. Remember that it’s always better safe than sorry.
Pushing site changes and updates from a staging environment is a lot safer than working directly on the live site.
How to Backup the Data
To do this, you can use the Duplicator plugin, or Migrate DB, even All-in-One WP Migration.
Once our live site is backed up, the second method, the safest and easiest way to push our site is through our website’s hosting service.
There are plenty of WordPress Web Hosting services that also offer staging services, whereby a completely independent environment is created on the hosting server, for us to run all of our tests, and try out new ideas.
These include hosts such as Bluehost, SiteGround, Kinsta and even FlyWheel’s premium hosting package includes this option, and of course we’ll be posting links to all of these and more in the show notes below.
BlueHost is the more popular, because they offer their staging service for free.
Then again, you may prefer SiteGround because of their superior quality of service.
This is something that we must decide for ourselves, based on the size of our site, and the volume of traffic. But we also need to consider the revenue that we’ll need to achieve in order to cover our costs, and whether our choice will help or harm our business goals.

When we crunch the numbers, we need to aim for maximum income while keeping our overhead low.
This is where we need to be honest with ourselves, because if our website is also our livelihood, then hosting is not one of those places where we want to cut corners, or scrimp and save. If our site receives so much traffic that an hour or two of downtime would jeopardize it, we really need to invest in hosting companies.
Local WordPress Staging
Local Staging, a staging environment on our own computer, has many benefits, chief among them is speed. Working locally we’ll see test results and responses far quicker, making it the perfect environment for huge overhauls and possibly initial builds too.
While host staging is not as fast as local staging, it can still handle changes to graphics and written content, updates, and tests quite nicely, so long as their not too big. It’s ideal for routine testing and updating, especially if the server also provides an option to push your new version to the live site. The drawback is the price tag, as several hosting services charge extra fees for staging. However, this fee includes support which could save a lot of time and money in the long run.
Staging Services
Host sites that offer staging services have similar features that allow us to push the new version of our site from Staging to our Live sites, with minimum effort and zero worry.
On SiteGround, for example, all staging options can be found on the Staging management page, that can be accessed via SiteGround’s version of cPanel. Here users are given the ‘Easy Push’ option to push the entire new site over the old live site, virtually steamrolling it and deleting everything that was there. Alternatively, users can ‘Advanced Push’ which compares the differences between the old and new files, then allows you to select which files to keep and which to overwrite. This solution effectively preserves the data that we’re worried about losing while working on staging sites.

WordPress Staging to Live Site: Conclusion
Looking back over this two-part edition of Monday Masterclass, we’re glad that we decided to tackle the subject of Staging.
It gave us not only the chance to help users who had been asking for advice about staging, but thanks to the wonderful comments and dialogue that the first episode generated, we decided to take this second episode further than planned and clarify some of the issues and interesting points that you raised.
We’ve reviewed several practical ways, used by professional web-builders the world over, to push two different types of WordPress websites from the Local staging or Host staging site to our Live or Production website. Moreover, we discussed why the reasons as to why we should choose one method over the other.
At the end of the day, it is our choice as owners or moderators of our website, as to where and on what we should invest our time and money, a choice that will affect our traffic, engagement and inevitably our revenue.
How do you push from staging to live site? Let us know in the comments if you have alternative methods.
Looking for fresh content?
By entering your email, you agree to receive Elementor emails, including marketing emails,
and agree to our Terms & Conditions and Privacy Policy.


