Table of Contents
The process of translating your design prototype into a WP website just got a whole lot easier. Whether you prefer to create your website prototype in Photoshop or Sketch, once it’s done and you’ve got your client’s approval, you still have to transfer your designs to the actual site.
In this blog, learn the best practices for transferring your designs in PSD, Sketch, and any other tool, to WordPress and Elementor in the most efficient way.
What was once built using design platforms can now be done more directly using Elementor’s functionality. Instead of the laborious process of cutting HTML pieces and pasting them into your site, now, what you see is what you get.
What is the process?
Your design prototype functions as a reference, used side by side with Elementor, with many of the details (Min Height, font, etc.) readily available to be set up in Elementor. The more experience you gain using this process, the more you design in Sketch or Photoshop with Elementor in mind. You take into consideration the boxed grid of Elementor, the weight of your images, CTA button widgets, and other widgets you plan to use.
This way, you often end up adapting the site to what you designed in Sketch or another design tool. In Elementor, there is no conversion process; your design platform seamlessly pastes into WordPress.
Let’s take a look at the main benefits.
Table of Contents
Why You Should Recreate Your Prototype Using Elementor
- When building in Elementor in reference to Sketch, you’ll get the same spatial relations, as you can copy-paste the specific amounts (Min Height, etc.).
- Less work in your design platform, since you can use Elementor’s functionality instead, such as filters and shape dividers.
- Our Navigator’s layers are familiar to Photoshop veterans, as they are similar to the layers in Photoshop.
- The Sketch environment is similar to the web environment, so the live version will allow you to move things around freely, you will get web colors, and the transition between your Sketch layout and the Elementor WP site is seamless.
- At the stage of client feedback, there’s increased flexibility to implement changes.
- Easier to price projects more accurately, as you can manage your time better.
What’s more, clients and designers can gradually agree upon the phases of the project, as they can view the staging together before nailing down the live site.
You can make custom-designed websites and ask for premium prices; accomplish the process in record time (depending on your skillset). The design language of the theme does not constrain you. And you can produce highly customized websites with amazing interactions and animations, meaning you can ask for higher compensation.
In sum, you no longer need to prepare many elements for your layout inside your design platform. Instead, you can save time by using Elementor’s design functionality. And after converting your design, you can play around with your design once it is live.

Although there is no magic button to press to convert from one tool to WordPress, Elementor is so user-friendly, you’ll see how easy it is to recreate your design in no time. This is the process our designers use to create Elementor templates. First, they design it in Sketch, then recreate it in Elementor.
There are lots of tools out there that claim to be capable of translating your design in PSD to HTML or CSS perfectly. Perhaps they can, but we aren’t aware of any. They help, sure. But they fall short when it comes to things like responsive adaptation, and using columns, etc. Otherwise, we would be reviewing them right now.
Our designers prefer to use Sketch to work out their design, before translating it into WordPress using Elementor.
Many of our users are still debating the pros and cons of using Photoshop, Sketch, or even Adobe XD for prototyping their website designs. As interesting a discussion this is, we’ll focus on tips and tricks that will help speed up the process of translating your design to WordPress.
This is a process that is the same for everyone, no matter your software of preference. That said, knowing the limitations of your medium is essential to this and every other creative process.
When building your prototype, our designers already had Elementor’s widgets in mind.
Knowing what widgets you have available, knowing the flexibility of the available widgets, what animations and motion effects you could be adding is vital to your workflow. As you’re drafting, think of various ways you can build the elements you’re designing later in Elementor, using widgets and sections to create each element.
Be sure to watch the video for specific settings and more details.

How to Convert Your Design Prototype to WordPress
Step 1: Preparation
First off, prepare your materials. If you’re working with Photoshop, you can use the Save for Web and Devices option. This helps keep the file size low and speeds up the page’s loading time.
Under File, go to Save for Web and Devices, and in the dialog window, select the 2-Up option to see your image alongside the original, so that you can appreciate the differences in file size and download storage.
We prefer to use PNG 24 because they tend to preserve better image quality when reduced to smaller-sized files. The other advantage is, of course, their ability to handle transparency.
Regarding the quality level, our preference is always to stick to the middle values, between 40 and 60. You may find that a very high quality leaves you with images that are too heavy.
When it comes to icons and logos, we tend to prefer SVG files, especially since the latest version of Elementor allows you to upload them.
If you need to change the size of the images, you have the parameters in the video.
And all that’s left to do is save your settings. Then allocate a name and destination of your web-ready image, and click save.
We recommend that you create folders for your images to keep everything in order and create a preset.
If you’re looking to do this as a batch action and save you even more time, Adobe actually recommends you do so using their Image Processor Pro. Though some suggest using Photoshop’s action recording to create a batch process.
Prepare all the visual assets – images and icons.
Then after you’ve created a new page, edit it in Elementor. In the page settings, name the page and set your page layout to Elementor Canvas. Keep the navigator open to make life easier.
For those of you who prefer to preset your colors and fonts, do this right away by clicking on the menu icon, or hamburger, and select the Color Picker. Select each color, dial-in or paste the new color code from your Photoshop or Sketch file or and click ‘apply’. The same goes for the fonts.
For this particular page, we used Google fonts, but you can just as easily upload a custom font.

Step 2: Translate the Design to Elementor
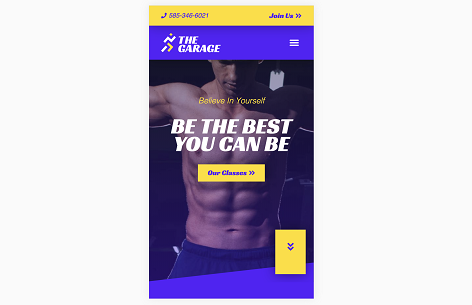
For this step, we’ve added our first section — a single column section — and named it ‘Hero’. In the style settings, we added the image, which was resized beforehand. We edited other parameters like the position, the attachment, the scrolling effects, and the background overlay. We’ve also added a button and edited it’s text and setting to fit our needs.
Step 3: Corrections for Responsive Views
The importance of responsive views and how to adapt your web designs to fit the screens on various devices is something we’ve spoken about in a previous Masterclass. And just as we emphasized then, the most efficient practice is to adapt our design for responsive views after each section, rather than after a full page.
By playing around with margins and padding at both the section and column level, you can get great results. We’ve managed to translate our entire Hero section across three different views. We haven’t used an ounce of code. We haven’t had to change anything in our original design, and even if we did, we can make those changes on the fly and see the results instantly in front of us.
Many of you might be getting that itching need to ask why we don’t create these prototypes or drafts directly in Elementor? The truth is that you can. You can design your page, build elements, even print it all to PDF and send drafts to your client. However, the vast majority of designers prefer to concentrate all of their trial and error in a safe zone. Tools like Sketch, Adobe XD, and Photoshop, are environments that designers are well acquainted with. They rely on them because of the flexibility they offer designers when they play around with ideas and need to see everything, all the assets across the entire site.
Elementor was created by designers who not only understand the need for this safe zone; they relied on it themselves. This is precisely the reason why it was designed to combine the flexibility of the safety zones with the ability to see what the results would look like, on various devices in real-time.

Step 4: Repeating the Process
From here on out, the process only gets faster. You can duplicate sections, save widgets as global widgets; save entire pages as templates. Use them as a foundation for the rest of the pages on your website — all this to avoid having to recreate elements from scratch.
Learn in the video how to apply Padding, Margins, Box shadow, and blur to get the desired effect. You can see how to use the Style tab and a shape divider to create all sorts of effects such as the bottom border at an angle. You can experiment with creative ways of using spacing, width, color, typography, pixels.
This would be the perfect time to review what you’ve done in responsive mode, and make the necessary corrections, exactly like we saw earlier. Again, adjusting designs, across the various responsive views, section by section, saves us time and headaches.
Conclusion
This week we saw how fast and simple it is to take your designs from Sketch, Photoshop, or your preferred tool; recreate it using Elementor for your WordPress website. To date, anyone who has tried using Elementor for this process has continued to work this way and never looked back.
Getting into the groove of a design process can take some time. By following the steps we outlined in this blog and the video, you should be quickly on your way to converting your design prototypes into stunning WP site using Elementor. Implement your websites sketches or designs lighting fast and with pixel pixel-perfect detail.
Looking for fresh content?
By entering your email, you agree to receive Elementor emails, including marketing emails,
and agree to our Terms & Conditions and Privacy Policy.


