Table of Contents
And here’s the kicker: the web design landscape is constantly evolving. What worked last year might already need to be updated. You’re probably wondering, “How am I supposed to keep up with all this tech jargon and ever-changing best practices?”
But here’s the good news: creating a stunning, functional website in 2026 doesn’t have to be a nightmare. With the right tools and guidance, bringing your digital vision to life can be an exciting journey. Imagine having a step-by-step roadmap that takes you from complete novice to proud website owner—without the headaches and costly mistakes.
That’s exactly what this guide is all about. We’ll break down the entire process into manageable chunks using the latest techniques and tools available in 2026. By the end of this article, you’ll have the knowledge and confidence to create a website that not only looks professional but also performs like a champ.
So, are you ready to turn your website dreams into reality? Let’s dive in!
Planning Your Website
Before we jump into the technical stuff, let’s lay the groundwork for your website’s success. Think of this as creating a blueprint for your digital home. Without a solid plan, you might end up with a cluttered, ineffective site that fails to connect with your audience.
Defining Your Website Goals
First things first: what do you want your website to achieve? Are you looking to:
- Sell products online?
- Showcase your portfolio.
- Share information about your business.
- Build a community around your blog.
Your goals will shape every decision you make. For example, an e-commerce site will need features that are different from those of a simple blog.
Pro Tip: Write down your top 3 website goals. This will help you stay focused throughout the creation process.
Identifying Your Target Audience
Who are you creating this website for? Understanding your audience is crucial for crafting content and design that resonates. Consider factors like:
- Age range
- Interests
- Pain points your website can solve
- Device preferences (mobile vs. desktop)
Creating user personas can be incredibly helpful here. These are fictional representations of your ideal visitors, complete with names, backgrounds, and motivations.
Creating a Content Strategy
Content is king in the digital world. But what kind of content will best serve your goals and audience? This might include:
- Product descriptions
- Blog posts
- Videos
- Podcasts
- Infographics
Remember, quality trumps quantity. It’s better to have a few pieces of stellar content than a ton of mediocre fluff.
Content Planning Tool: Consider using a content calendar to plan and organize your content creation efforts. Tools like Trello or Asana can be great for this.
Mapping Out Your Site Structure
Now, let’s organize your content into a logical structure. This step is crucial for user experience and SEO. A well-structured site helps visitors find what they need, and search engines understand your content.
Start by listing all the pages you’ll need, then group them into categories. A basic structure might look like this:
- Home
- About
- Services/Products
- Service 1
- Service 2
- Product Category 1
- Blog
- Contact
Visualization Tip: Use a tool like Gloomaps or Octopus.do to create a visual sitemap. This will give you a bird’s-eye view of your website structure.
By taking the time to plan thoroughly, you’re setting yourself up for success. A well-thought-out website is more likely to engage visitors, rank well in search engines, and achieve your goals. In the next section, we’ll discuss choosing and registering your domain name—the address where your digital masterpiece will live.
Choosing and Registering a Domain Name
Alright, now that we’ve got our plan in place, it’s time to give your website an address. Your domain name is like your digital real estate – it’s where people will find you online. Choosing the right one is crucial for your brand identity and online success.
Domain Name Best Practices
When brainstorming domain names, keep these golden rules in mind:
- Keep it short and memorable: Aim for something catchy that rolls off the tongue.
- Make it relevant: Your domain should give a hint about what your site offers.
- Avoid numbers and hyphens: These can be confusing when spoken aloud.
- Think long-term: Choose a name that will still make sense as your business grows.
- Check for trademark issues: Make sure you’re not accidentally stepping on someone else’s brand toes.
Brainstorming Tip: If you’re stuck, use a domain name generator like Nameboy or Shopify’s Business Name Generator for inspiration.
Tips for Selecting the Right Domain
Here’s how to make your final decision:
- Check availability: Use the registrar’s search function to see if your desired name is up for grabs.
- Consider alternatives: If your first choice is taken, don’t despair. Try different top-level domains (TLDs) like .net .org or even niche ones like .tech or .design.
- Future-proof your choice: Avoid trends or current events that might date your domain quickly.
- Say it out loud: Make sure it’s easy to pronounce and spell.
- Buy variants: Consider purchasing common misspellings or alternative TLDs to protect your brand.
Security Note: Once you’ve registered your domain, enable two-factor authentication on your registrar account. This adds an extra layer of security to prevent unauthorized changes to your domain.
Choosing the right domain name is a big step in your website journey. It’s the first impression many people will have of your brand, so take your time and choose wisely. With your digital address secured, we’re ready to move on to the next exciting step: selecting the right web hosting for your shiny new website. Let’s dive into that in the next section!
Selecting the Right Web Hosting
Now that you’ve sorted out your domain name, it’s time to find a home for your website. Think of web hosting as renting space on a powerful computer (a server) that’s always connected to the Internet. This is where your website’s files will live, ready to be served to visitors 24/7.
Types of Web Hosting
There are several types of hosting to choose from, each with its pros and cons:
- Shared Hosting:
- Best for: Small websites and beginners
- Pros: Affordable, easy to set up
- Cons: Limited resources, potential performance issues
- Virtual Private Server (VPS) Hosting:
- Best for: Growing websites with moderate traffic
- Pros: More resources and control than shared hosting
- Cons: Requires more technical know-how
- Dedicated Hosting:
- Best for: Large, high-traffic websites
- Pros: Full control and resources of an entire server
- Cons: It is the most expensive option, requires technical expertise
- Cloud Hosting:
- Best for: Websites with fluctuating traffic
- Pros: Scalable, pay for what you use
- Cons: Can be complex to set up and manage
- Managed WordPress Hosting:
- Best for: WordPress websites (obviously!)
- Pros: Optimized for WordPress, often includes security and performance features
- Cons: Usually more expensive than regular shared hosting
Key Factors to Consider
When choosing a host, keep these factors in mind:
- Uptime: Look for hosts that guarantee at least 99.9% uptime.
- Speed: Faster load times improve user experience and SEO.
- Storage and Bandwidth: Ensure you have enough for your needs.
- Scalability: Can the host grow with your website?
- Security Features: Look for SSL certificates, malware scanning, and regular backups.
- Customer Support: 24/7 support can be a lifesaver when issues arise.
- Price: Balance cost with features – the cheapest isn’t always the best.
Elementor Hosting: A Comprehensive Solution
For those looking to create a WordPress website with maximum ease and efficiency, Elementor Hosting offers a unique and powerful solution. Here’s why it stands out:
- Optimized for WordPress and Elementor: The servers are fine-tuned to deliver lightning-fast performance for WordPress sites built with Elementor.
- One-Click WordPress Installation: Get your site up and running in minutes.
- Built-in Security Features: Includes SSL certificates, daily backups, and malware protection.
- Scalability: Cloud-based infrastructure that grows with your site.
- Elementor Pro Included: Get access to Elementor’s powerful page builder tools as part of your hosting package.
- 24/7 Expert Support: Get help from a team that knows WordPress and Elementor inside out.
While there are many great hosting options out there, Elementor Hosting offers a particularly seamless experience for those planning to build their site with WordPress and Elementor. It eliminates many of the technical hurdles typically associated with setting up a new website, allowing you to focus on creating great content and design.
Pro Tip: Whichever host you choose, start with a plan that meets your current needs but offers room to grow. It’s usually easier to upgrade than to migrate to a new host later on.
With your hosting sorted, you’re one step closer to bringing your website to life. In the next section, we’ll explore how to choose the right platform to build your site – a decision that can significantly impact your website’s functionality and ease of use. Stay tuned!
Choosing a Website Builder or CMS
Now that we’ve sorted out our domain and hosting, it’s time to choose the tools we’ll use to build our website. In 2026, we’re spoiled for choice when it comes to website builders and Content Management Systems (CMS).
WordPress: The Most Versatile CMS
WordPress deserves special attention. It powers over 43% of all websites on the internet, and for good reason:
- Flexibility: Can be used for blogs, business sites, e-commerce, and more
- Open-source: Free to use and constantly improved by a global community
- Huge ecosystem: Thousands of themes and plugins to extend functionality
- SEO-friendly: Built with clean code and good practices for search engines
- Scalable: Can grow from a simple blog to a complex, high-traffic site
WordPress.com vs WordPress.org: Make sure to distinguish these two! WordPress.com is a hosted service, while WordPress.org is the self-hosted version we’re talking about here. The .org version gives you full control and ownership of your site.
Elementor: Revolutionizing WordPress Website Building
While WordPress itself is powerful, it can be challenging for beginners to design a site without coding knowledge. This is where Elementor comes in, revolutionizing the WordPress website-building experience:
- Visual Drag-and-Drop Editor: Design your pages visually, seeing changes in real-time
- Responsive Design Controls: Ensure your site looks great on all devices
- Pre-designed Templates: Start with professional layouts and customize them to your needs
- Widget-based System: Add complex features to your site with just a few clicks
- Theme Builder: Design your entire site structure, including headers, footers, and archives
- Dynamic Content: Automatically populate your designs with content from your WordPress database
- WooCommerce Builder: Create beautiful, conversion-optimized online stores
Elementor bridges the gap between WordPress’s power and the user-friendly nature of website builders like Wix or Squarespace. It gives you the best of both worlds: the flexibility and ownership of WordPress with the ease of use of a drag-and-drop builder.
Elementor Free vs Pro: While the free version of Elementor is powerful, Elementor Pro unlocks advanced features like the Theme Builder, custom CSS controls, and premium widgets. It’s well worth considering for those who want to take their site to the next level.
Pro Tip: If you’re new to website building, start with the free version of Elementor to get a feel for it. You can always upgrade to Pro later as your needs grow.
Choosing the right platform is crucial for your website’s success. While there are many great options out there, the combination of WordPress and Elementor offers an unparalleled blend of power, flexibility, and ease of use. It’s a fantastic choice for beginners and experts alike, allowing you to start simply and scale up as your skills and needs grow.
In the next section, we’ll dive into the exciting world of web design. Get ready to bring your website to life visually!
Designing Your Website
Alright, we’ve got our foundation set with our domain, hosting, and CMS. Now comes the fun part – designing your website! This is where your vision starts to come to life. In 2026, web design is all about creating beautiful, functional, and user-friendly experiences. Let’s dive into how to make that happen.
Understanding Web Design Principles
Before we jump into the tools, let’s cover some key design principles:
- Simplicity: Don’t overwhelm your visitors. Clean, uncluttered designs are usually more effective.
- Hierarchy: Guide your users’ eyes to the most important elements first.
- Consistency: Use consistent colors, fonts, and layouts throughout your site.
- Accessibility: Ensure your site is usable by people with different abilities.
Certainly! I’ll continue from where I left off in the Web Design Principles section:
- White Space: Don’t be afraid of space – it helps focus attention and improves readability.
- Responsiveness: Your site should look great on all devices, from phones to desktops.
- Loading Speed: Fast-loading pages are crucial for user experience and SEO.
Remember, good design isn’t just about looking pretty – it’s about creating an intuitive, enjoyable experience for your visitors.
Choosing a Theme or Template
If you’re using WordPress, your theme forms the base of your design. Here’s how to choose wisely:
- Consider your niche: Look for themes designed for your type of website (e.g., portfolio, e-commerce, blog).
- Check for responsiveness: Ensure the theme looks good on all devices.
- Look for customization options: The more you can tweak, the better.
- Read reviews: See what other users say about performance and support.
- Check update frequency: Regularly updated themes are more secure and compatible.
Pro Tip: The Hello theme by Elementor is a great starting point. It’s lightweight, flexible, and designed to work seamlessly with Elementor.
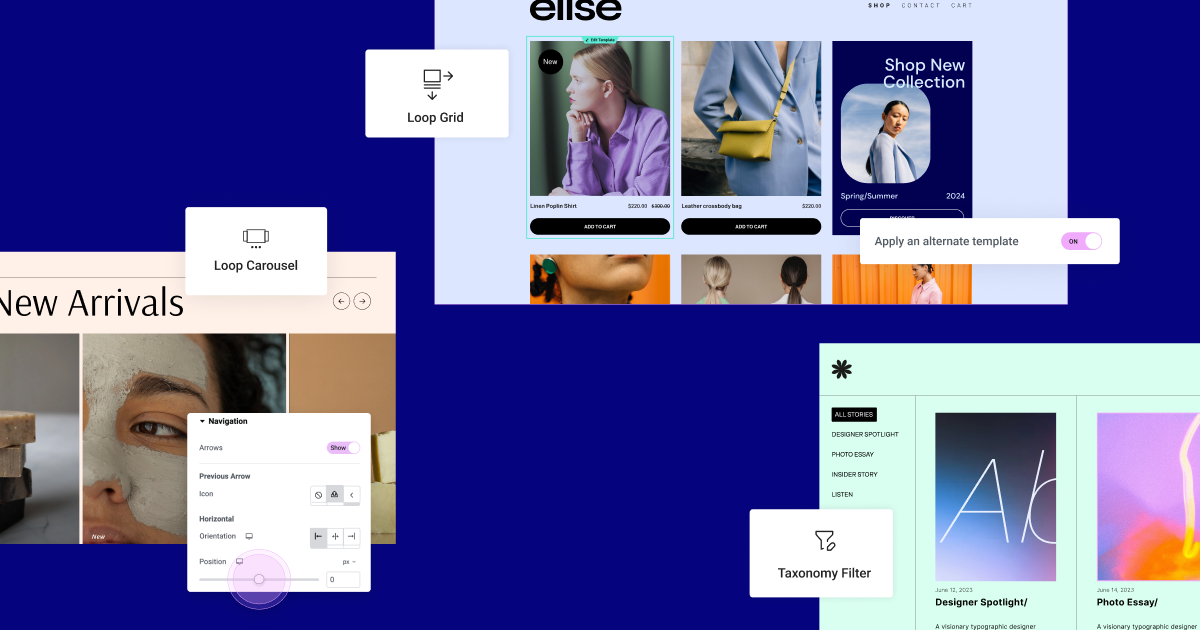
Customizing Your Design with Elementor
Here’s where Elementor really shines. Let’s explore how to use it effectively:
- Start with a template: Elementor offers hundreds of pre-designed templates to jumpstart your design.
- Customize with widgets: You can drag and drop widgets such as text, images, buttons, and more onto your page.
- Use sections and columns: Structure your content for better organization and responsiveness.
- Style with the panel: Easily change colors, fonts, sizes, and more from the left-hand panel.
- Leverage global styles: Set site-wide styles for consistency and easy updates.
Elementor Pro Feature: The Theme Builder allows you to design your entire site structure, including headers, footers, and dynamic content areas.
Responsive Design for Mobile Devices
With over 50% of web traffic coming from mobile devices, responsive design isn’t optional – it’s essential. Here’s how to ensure your site looks great on all screens:
- Use flexible layouts: Elementor’s column and section structures automatically adjust for different screen sizes.
- Set responsive breakpoints: Customize how your design changes for tablet and mobile views.
- Optimize images: Use responsive image sizes to ensure fast loading on mobile devices.
- Consider touch targets: Make buttons and links large enough for easy tapping on small screens.
- Test, test, test: Use Elementor’s responsive mode to preview and adjust your design for all devices.
Typography and Color Schemes
Your font and color choices can make or break your design. Here’s how to get it right:
Typography Tips:
- Choose readable fonts (Sans-serif fonts often work well for body text)
- Use no more than 2-3 font families throughout your site
- Ensure sufficient contrast between text and background
- Set appropriate line height and spacing for easy reading
Color Scheme Tips:
- Start with your brand colors
- Use a color wheel tool to find complementary colors
- Follow the 60-30-10 rule: 60% dominant color, 30% secondary color, 10% accent color
- Ensure sufficient contrast for readability
- Consider color psychology in your choices
Elementor Pro Tip: Use Global Colors and Fonts to maintain consistency across your site easily. Update these global settings once, and the changes apply everywhere.
Designing your website is where your vision truly comes to life. With Elementor, you have the power to create stunning, professional designs without needing to code. Remember, great design is about balancing aesthetics with functionality – always keep your users’ needs in mind as you create.
In the next section, we’ll dive into creating the essential pages and content for your website. Get ready to give your beautifully designed site some substance!
Creating Essential Pages and Content
Now that we’ve got our design in place, it’s time to fill it with compelling content. Your website’s content will inform, engage, and convert your visitors. Let’s look at how to create the essential pages every website needs and tips for crafting effective content.
Homepage Design Best Practices
Your homepage is often the first impression visitors get of your site. Here’s how to make it count:
- Clear Value Proposition: Immediately tell visitors what you offer and why they should care.
- Strong Call-to-Action (CTA): Guide visitors to the next step you want them to take.
- Social Proof: Include testimonials, client logos, or trust badges to build credibility.
- Visual Hierarchy: Use design elements to guide visitors’ eyes to the most important information.
- Concise Content: Keep it brief and impactful. Save the details for the inner pages.
Elementor Tip: Use the Hero section widget to create an attention-grabbing header area with a clear CTA.
About Page
Your About page is where you build a connection with your audience. Here’s what to include:
- Your Story: Share your brand’s journey and values.
- Team Bios: If relevant, introduce the faces behind your business.
- Mission Statement: Clearly state what drives your business.
- Unique Selling Proposition: Explain what sets you apart from competitors.
- Visual Elements: Include high-quality images or videos to engage visitors.
Pro Tip: Use Elementor’s Flip Box widget to create interactive team bios that reveal more info when clicked.
Services or Products Pages
These pages are crucial for converting visitors into customers. Here’s how to optimize them:
- Clear Descriptions: Explain your offerings in simple, benefit-focused language.
- High-Quality Images: Show your products or services in the best light.
- Pricing Information: Be transparent about costs or explain how to get a quote.
- FAQs: Address common questions to remove barriers to purchase.
- Call-to-Action: Make it easy for visitors to take the next step (buy, book, contact).
Elementor Pro Feature: Use the WooCommerce Builder to create custom, conversion-optimized product pages for online stores.
Contact Page
Make it easy for visitors to reach you. Your contact page should include:
- Contact Form: Use Elementor’s Form widget to create an easy-to-use contact form.
- Contact Information: Include phone, email, and physical address if applicable.
- Map: Embed a Google Map if you have a physical location.
- Social Media Links: Connect visitors with your social profiles.
- Office Hours: Let people know when they can expect a response.
Tip: Use Elementor’s Custom CSS to style your contact form to match your brand perfectly.
Blog Setup and Management
A blog can drive traffic, establish authority, and engage your audience. Here’s how to set it up:
- Choose a Layout: Decide on a grid, list, or masonry layout for your blog archive.
- Set Up Categories: Organize your content for easy navigation.
- Create a Content Calendar: Plan your posts to ensure regular, consistent content.
- Optimize for SEO: Use categories, tags, and SEO-friendly URLs.
- Encourage Engagement: Enable comments and social sharing.
Elementor Pro Tip: Use the Posts widget to display your blog posts in various layouts and the Single Post template to design a custom layout for individual blog posts.
Creating compelling content is an ongoing process. Remember to:
- Know Your Audience: Create content that addresses their needs and interests.
- Use Visuals: Break up text with images, infographics, or videos.
- Be Consistent: Maintain a regular posting schedule to keep visitors coming back.
- Optimize for Search: Use relevant keywords naturally in your content.
- Call to Action: Always guide readers on what to do next (read more, sign up, buy).
With these essential pages in place and a plan for ongoing content creation, your website is really starting to take shape. In the next section, we’ll look at how to add functionality to your site, turning it from a simple brochure into a powerful tool for your business or personal brand. Stay tuned!
Adding Functionality to Your Website
Great content and design are essential, but to truly make your website work for you, you need to add functionality. This is where your site transforms from a simple online brochure into a powerful tool for engaging visitors, generating leads, or selling products. Let’s explore how to enhance your website’s capabilities.
Essential WordPress Plugins
Plugins extend the functionality of your WordPress site. Here are some must-haves:
- Elementor: Of course! For easy, visual page building.
- Yoast SEO: Helps optimize your content for search engines.
- Wordfence Security: Protects your site from malware and hacking attempts.
- WP Rocket: Improves your site’s loading speed.
- UpdraftPlus: Automates backups of your website.
Pro Tip: While plugins are powerful, stay moderate. Too many can slow down your site. Stick to essential, well-maintained plugins.
Forms and Contact Management
Forms are crucial for lead generation and user interaction. Here’s how to implement them effectively:
- Contact Forms: Use Elementor’s Form widget to create custom forms.
- Lead Generation Forms: Create pop-ups or embedded forms to capture email addresses.
- Surveys and Polls: Gather user feedback to improve your offerings.
- Booking Forms: If you offer services, allow users to schedule appointments.
Elementor Pro Feature: Connect your forms to popular email marketing services like Mailchimp or CRM tools for seamless lead management.
E-commerce Integration
If you’re selling products or services online, you’ll need robust e-commerce functionality:
- WooCommerce: The most popular e-commerce plugin for WordPress.
- Payment Gateways: Integrate payment options like PayPal, Stripe, or Square.
- Product Displays: Use Elementor’s WooCommerce widgets to create attractive product layouts.
- Shopping Cart: Ensure a smooth checkout process.
- Order Management: Set up systems to track and fulfill orders.
Elementor Pro Tip: Use the WooCommerce Builder to create custom product pages, cart pages, and checkout processes that perfectly match your brand.
Social Media Integration
Connect your website with your social media presence:
- Social Share Buttons: Make it easy for visitors to share your content.
- Social Feed Displays: Show your latest social media posts on your website.
- Social Login: Allow users to log in using their social media accounts.
- Instagram Gallery: Display your Instagram feed for a visual punch.
Elementor Widget: Use the Social Icons widget to add clickable social media profile links to your site.
Analytics and Tracking
To improve your website, you need to understand how people are using it:
- Google Analytics: Set up GA4 to track visitor behavior, traffic sources, and more.
- Google Search Console: Monitor your site’s performance in Google search results.
- Heatmaps: Use tools like Hotjar to see where visitors click and scroll.
- Conversion Tracking: Set up goals in Google Analytics to track important actions.
Elementor Integration: Use Elementor’s custom attribute feature to add tracking to specific elements without editing code.
Adding functionality to your website is where you can really make it work for your specific needs. Whether you’re looking to generate leads, sell products, or simply engage with your audience, there’s a solution out there. The key is to start with the essentials and gradually add features as your needs grow.
Remember, with great power comes great responsibility. Each new feature you add should serve a purpose and enhance the user experience. Regularly review your site’s performance to ensure that the added functionality is keeping things on track and maintaining the user journey.
In our next section, we’ll dive into one of the most crucial aspects of any website: Search Engine Optimization (SEO). Get ready to learn how to make your site more visible in search results and attract more organic traffic!
Optimizing Your Website for Search Engines (SEO)
You’ve built a beautiful, functional website – now it’s time to make sure people can find it! Search Engine Optimization (SEO) is the practice of optimizing your website to rank higher in search engine results pages (SERPs). Let’s break down the key components of SEO and how to implement them effectively.
On-Page SEO Basics
On-page SEO refers to optimizing individual web pages to rank higher and earn more relevant traffic. Here are the essentials:
- Keyword Research: Use tools like Google Keyword Planner or SEMrush to find relevant keywords for your content.
- Title Tags: Include your primary keyword in your page title. Keep it under 60 characters.
- Meta Descriptions: Write compelling meta descriptions that include your keyword and encourage clicks. Aim for 150-160 characters.
- Header Tags: Use H1, H2, and H3 tags to structure your content logically. Include keywords where natural.
- Content Optimization: Create high-quality, original content that includes your target keywords naturally.
- Image Alt Text: Describe your images using alt text, including relevant keywords where appropriate.
Elementor Tip: Use the Yoast SEO integration in Elementor to edit your pages’ title tags and meta descriptions easily.
Technical SEO Considerations
Technical SEO ensures that search engines can crawl, understand, and index your website effectively:
- Site Speed: Use tools like Google PageSpeed Insights to identify and fix speed issues.
- Mobile Responsiveness: Ensure your site looks and functions well on all devices.
- SSL Certificate: Use HTTPS to secure your site and boost SEO.
- XML Sitemap: Create and submit a sitemap to search engines to help them crawl your site.
- Robots.txt: Use this file to guide search engines on which parts of your site to crawl.
- Structured Data: Implement schema markup to help search engines understand your content better.
Pro Tip: Elementor automatically generates clean, SEO-friendly code, giving you a head start on technical SEO.
Content Optimization Strategies
Content is king in SEO. Here’s how to create content that ranks:
- Long-Form Content: Aim for comprehensive, in-depth articles (1500+ words) on your core topics.
- Keyword Clustering: Group related keywords and create content that covers a topic thoroughly.
- Internal Linking: Link between related pages on your site to distribute link equity and help users navigate.
- Fresh Content: Regularly update your site with new, relevant content.
- Multimedia: Include images, videos, and infographics to enhance user engagement and earn more backlinks.
Elementor Feature: Use the Elementor Pop-up Builder to create content upgrades and grow your email list, indirectly boosting your SEO through increased engagement.
Local SEO Tips
If you have a local business, these strategies can help you appear in local search results:
- Google My Business: Claim and optimize your Google My Business listing.
- Local Keywords: Include location-based keywords in your content and meta tags.
- NAP Consistency: Ensure your Name, Address, and Phone number are consistent across the web.
- Local Citations: Get listed in local directories and review sites.
- Customer Reviews: Encourage satisfied customers to leave reviews on Google and other platforms.
Elementor Widget: Use the Google Maps widget to embed a map on your contact page, helping with local SEO.
Remember, SEO is a long-term game. It takes time for your efforts to pay off, but the organic traffic you’ll gain is well worth the investment. Here are some final SEO tips:
- Monitor Your Progress: Use tools like Google Search Console and Google Analytics to track your rankings and traffic.
- Stay Updated: SEO best practices evolve. Follow reputable SEO blogs to stay informed.
- Focus on User Experience: Ultimately, what’s good for users is good for SEO. Create a fast, easy-to-use site with valuable content.
- Build Quality Backlinks: Earn links from reputable sites in your industry through great content and outreach.
Implementing these SEO strategies will set your website up for long-term success. You’ll attract more organic traffic, establish authority in your niche, and ultimately achieve your website goals more effectively.
In our next section, we’ll cover an equally crucial aspect of your website: ensuring its security and optimizing its performance. Stay tuned to learn how to keep your site safe and lightning-fast!
Ensuring Website Security and Performance
In today’s digital landscape, having a secure and fast-loading website isn’t just nice to have – it’s essential. Security breaches can damage your reputation and lead to lost data or revenue, while slow performance can frustrate users and hurt your search engine rankings.
SSL Certificate Installation
An SSL (Secure Sockets Layer) certificate is crucial for encrypting data transferred between your website and its visitors. Here’s why it’s important and how to implement it:
- Builds Trust: The padlock icon in the browser bar reassures visitors that their data is secure.
- SEO Boost: Google gives a slight ranking boost to HTTPS sites.
- Required for E-commerce: Essential if you’re handling sensitive data like credit card information.
How to Implement:
- Many hosting providers offer free SSL certificates through Let’s Encrypt.
- If not included with your hosting, you can purchase an SSL certificate from providers like DigiCert or Comodo.
- Once obtained, install the certificate on your server or contact your hosting provider for assistance.
Elementor Tip: After installing SSL, use Elementor’s Find & Replace tool to update any hard-coded HTTP links to HTTPS quickly.
Regular Backups and Updates
Keeping your site backed up and updated is your safety net against data loss and security vulnerabilities:
- Automated Backups: Set up daily or weekly backups of your entire site.
- Off-site Storage: Store backups in a separate location from your hosting server.
- Regular Updates: Keep WordPress core, themes, and plugins up to date.
- Update Testing: Always test updates on a staging site before applying them to your live site.
Pro Tip: Elementor Hosting includes daily automated backups and one-click restore options, taking the hassle out of this crucial task.
Speed Optimization Techniques
A fast-loading website improves user experience, conversion rates, and SEO. Here’s how to speed things up:
- Optimize Images: Compress images and use appropriate file formats (JPEG for photos, PNG for graphics with transparency).
- Minify Code: Reduce the size of your HTML, CSS, and JavaScript files.
- Use a CDN: Content Delivery Networks distribute your site’s static files across servers worldwide for faster loading.
- Enable Caching: Use caching plugins to serve static versions of your pages.
- Reduce HTTP Requests: Minimize the number of elements that need to load on each page.
Elementor Performance: Elementor is built with performance in mind, generating clean, efficient code. The Elementor experiments panel also includes options for further performance enhancements.
Security Best Practices
Protecting your site from threats is an ongoing process. Here are some key security measures:
- Strong Passwords: Use complex, unique passwords for all accounts.
- Two-Factor Authentication: Enable 2FA for an extra layer of security.
- Limit Login Attempts: Use plugins to block repeated failed login attempts.
- Regular Malware Scans: Use security plugins or services to scan for and remove malware.
- File Permissions: Set proper file permissions to prevent unauthorized access.
- Keep Sensitive Data Secure: Use secure forms to collect sensitive information.
Elementor Security: Elementor regularly undergoes security audits and quickly addresses any vulnerabilities. Always keep Elementor and its add-ons up to date for the latest security patches.
Remember, website security and performance aren’t one-time tasks – they require ongoing attention. Regularly monitor your site’s speed using tools like Google PageSpeed Insights or GTmetrix, and stay vigilant about security by keeping software updated and monitoring for unusual activity.
By prioritizing security and performance, you’re not just protecting your site – you’re providing a better experience for your visitors, which can lead to improved engagement, conversions, and search engine rankings.
In our final section, we’ll cover the exciting step of launching your website and discuss how to maintain and grow it over time. Get ready to take your site live and start making an impact online!
Launching and Maintaining Your Website
Congratulations! You’ve put in the hard work of planning, designing, and building your website. Now it’s time for the exciting (and maybe a little nerve-wracking) part – launching your site to the world. But remember, a successful website is never truly “finished.” Let’s walk through the launch process and discuss how to keep your site fresh and effective over time.
Pre-Launch Checklist
Before you hit that publish button, run through this checklist to ensure everything is in order:
- Cross-Browser Testing: Check your site in different browsers (Chrome, Firefox, Safari, Edge) to ensure consistency.
- Mobile Responsiveness: Verify that your site looks and functions well on various devices and screen sizes.
- Content Review: Proofread all your content for errors and ensure all links are working.
- Forms and Functionality: Test all forms, e-commerce functions, and interactive elements.
- SEO Elements: Confirm that all pages have appropriate titles, meta descriptions, and header tags.
- Analytics Setup: Ensure Google Analytics (or your chosen analytics tool) is properly installed.
- Backup: Create a full backup of your site before launch.
- Legal Compliance: Make sure you have the necessary legal pages (Privacy Policy, Terms of Service) in place.
Elementor Tip: Use Elementor’s Responsive Mode to quickly check how your site looks on different devices right in the editor.
Ongoing Maintenance Tasks
Once your site is live, regular maintenance is key to keeping it secure, up-to-date, and effective:
- Regular Updates: Keep WordPress, Elementor, themes, and plugins updated.
- Content Updates: Regularly add new content and update existing pages to keep your site fresh.
- Backup Schedule: Maintain a regular backup schedule (daily or weekly, depending on how often your site changes).
- Security Scans: Perform regular security scans and monitor for unusual activity.
- Performance Checks: Regularly test your site’s speed and optimize as needed.
- Broken Link Checks: Use tools to identify and fix any broken links.
Pro Tip: Consider setting up a staging site for testing updates and changes before applying them to your live site.
Monitoring and Improving Performance
Continuous improvement should be your goal. Here’s how to monitor and enhance your site’s performance:
- Analytics Review: Regularly review your Google Analytics data to understand user behavior and identify areas for improvement.
- User Feedback: Encourage and pay attention to user feedback through comments, surveys, or direct communication..
- Heat Mapping: Use heat mapping tools to see how users interact with your pages.
- Page Speed Optimization: Continuously work on improving your site’s loading speed.
Elementor Feature: Use Elementor’s built-in Revision History to easily revert changes if needed, making it safer to experiment with your design.
As you maintain and improve your site, keep these best practices in mind:
- Stay Inspired: Keep an eye on web design trends and competitor sites for fresh ideas.
- Focus on User Experience: Always prioritize making your site easy and enjoyable for visitors to use.
- Adapt to Changes: Be ready to adapt your site as your business grows or pivots.
- Learn and Evolve: Use resources like Elementor’s blog and community forums to continue learning and improving your skills.
Launching and maintaining a website is an ongoing journey. With the right tools and mindset, it can be an exciting and rewarding process. Remember, your website is often the first impression people have of your brand – keep it fresh, secure, and user-friendly, and it will serve you well for years to come.
Conclusion
Creating a website in 2026 is an achievable goal, even for beginners. By following this guide, you’ve learned the key steps:
- Planning your website
- Choosing a domain and hosting
- Selecting the right website builder or CMS
- Designing your site
- Creating essential pages and content
- Adding functionality
- Optimizing for search engines
- Ensuring security and performance
- Launching and maintaining your site
Tools like WordPress and Elementor have revolutionized web development, making it possible to build professional, feature-rich sites without coding expertise. Elementor’s drag-and-drop interface and powerful features, such as Theme Builder and WooCommerce Builder, are particularly useful for both novices and experienced developers.
Remember, a great website is never truly finished. It requires ongoing learning, improvement, and adaptation to meet your audience’s needs and keep up with the evolving digital landscape. Whether you’re creating a personal blog, a business site, or an online store, the skills you’ve gained here will serve as a solid foundation.
Ready to bring your web presence to life? Consider giving Elementor a try. With its user-friendly interface and robust features, you’ll be amazed at what you can create. Visit Elementor.com to start your website journey today!
Looking for fresh content?
By entering your email, you agree to receive Elementor emails, including marketing emails,
and agree to our Terms & Conditions and Privacy Policy.


