Table of Contents
Website redesign is an overlooked process that can provide benefits to your website. It is similar to redesigning an apartment where you can add new furniture, do a new paint job, add or remove unnecessary features to make more space, and make it aesthetically more pleasing and functional.
Just like that, you can add new features and functions to your website or remove them entirely; you could change the colors, the layout, or the typography of your website and make it look better, more modern, and in line with current web design trends.
There are quite a few reasons for doing it. You may have a website with outdated design practices that provide a bad user experience. There could be persistent technical issues that need to be fixed, new features added or irrelevant ones removed. Or, you may simply want to redesign it for the holidays or another special occasion. Whatever your reasons are, redesigning your website can have great benefits.
This guide will help you understand website redesign, know when to use it, and provide you with the methods of doing it correctly.
Table of Contents
- What Is a Website Redesign?
- How To Prepare for a Website Redesign
- 1. Understand the Reason for the Redesign
- 2. Get Your Users To Weigh In
- 3. Perform a Website Audit
- 4. Create Your Redesign Roadmap
- 5. Determine Your KPIs and Set Measurable Goals
- How To Perform a Website Redesign
- Step 1: Create the Website Redesign Proposal
- Step 2: Schedule It Out
- Step 3: Research, Plan, and Organize
- Step 4: Back up the Website
- Step 5: Update the Style Guide
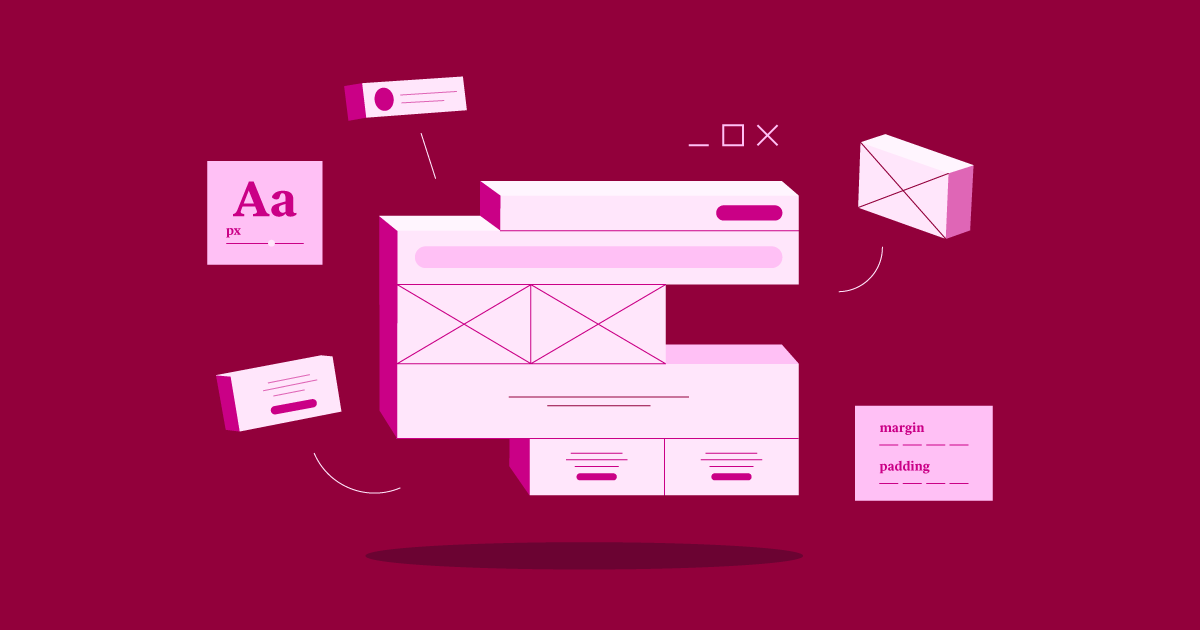
- Step 6: Wireframe Any Pages That Will Be Redesigned
- Step 7: Create Your Mockups and/or Prototypes
- Step 8: QA the Redesign and Get Client Sign-Off
- Step 9: Push the New Design Live
- Step 10: Carefully Monitor the Site for the Next Month
- Website Redesign FAQs
What Is a Website Redesign?
A website redesign is the process of modernizing, fixing, or repositioning a website in order to increase traffic, engagement, revenue, and more.
Redesigns aren’t always centered around superficial changes to the frontend design. In some cases, the technical backend is updated or repaired in order to improve the site’s performance.
Designers can redesign any facet of a website, including:
- Branding
- Navigation; design or structure
- Typography
- Iconography
- Photography
- Colors
- Page layouts
- CTA buttons
- Contact elements
- User journeys
- Checkout processes
- Copy
- And more
Don’t mistake a website redesign for a website refresh. A website redesign refers to a major overhaul of the design and/or features of a website, while a website refresh is about preserving the bulk of the design while implementing minor changes site-wide.
Why Do We Need To Redesign Websites?
Web design trends change. Businesses evolve. Consumers grow pickier. These are just some of the ways in which external sources dictate that a redesign is in order.
In some cases, it’s the website itself that prompts the change. Or, rather, it’s the data that lets us know there’s something not quite right and suggests that a redesign may help fix it.
Regardless of why the website needs to be redesigned, the goal of your project is the same: provide a better on-site user experience and, consequently, make the website a more successful source of leads, revenue, users, readers, and so on for the business.
How To Prepare for a Website Redesign
A website redesign can’t just be something you throw together. It should be a data-driven, user-first approach that fixes the inadequacies of the site, no matter how big or small they may be.
So, you need to approach this with the same amount of care and planning that you put into building websites from scratch.
Here’s what you should do to prepare for the redesign:
1. Understand the Reason for the Redesign
Usually, something triggers the discussion around a redesign. If you can pinpoint its origin, it’ll help you choose the best approach.
It could be that your client (or you yourself) commented on the age of the website, the current SEO ranking, bad popups, a badly designed funnel, problems with getting leads, etc.
By understanding what it was that triggered the desire for a redesign, you can start planning the right approach (do need to change the layout, the colors, the size of the text, add buttons, remove them, etc.)
2. Get Your Users To Weigh In
There’s a lot of data at your disposal and this can give you great insight into what’s working, what’s not, and where you need to focus your redesign efforts.
Here are some tools that can help you with your endeavor:
Google Analytics
Google Analytics is a valuable resource when redesigning a website. Any suspicion you or your client had about the inadequacy of the design of the site or its content can be backed up with a look at the numbers.
The first thing to look at is your Audience data:
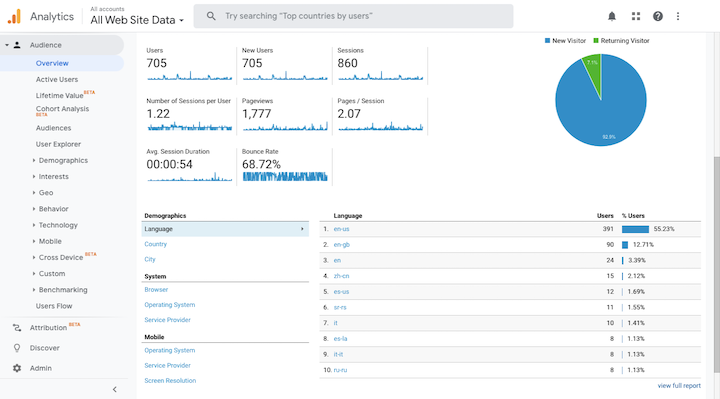
Who is visiting the website? And is it the user persona the website was initially designed for?
If yes, then what’s holding them up from doing what they’re supposed to do? (The Users Flow will help you visualize this.)
If no, then is the problem that the website is designed for the wrong user? Imagine how key performance metrics like bounce rate, time on site, and conversions would look if you redesigned it for that user.
The next thing to look at is individual page performance. You can find this information under Behavior:
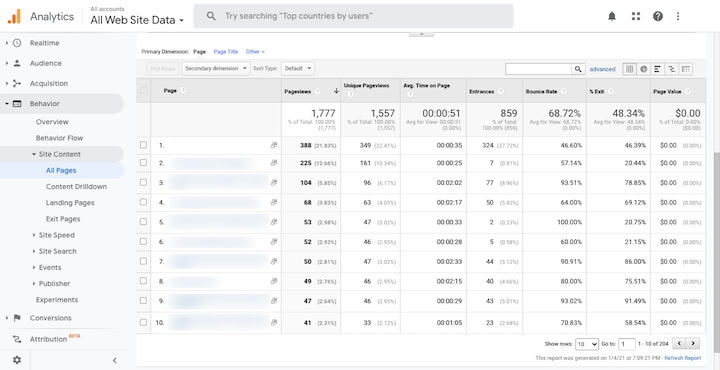
Overall, how happy are you with the performance of the site? You’ll find that information in the very top row.
If the site as a whole is seriously underperforming, you’ll have to use other sources to try to sniff out the issues.
If the issue is relegated to certain pages or parts of your site, this data will be useful. For instance, which pages are performing the best in terms of:
- Pageviews?
- Average time-on-page?
- Bounce rate?
- Page value?
Are there any critical pages missing from the action or seriously underperforming? What do you suspect is causing this issue? Etc.
Try to figure out why your seemingly most valuable pages aren’t getting the traffic and engagement you need them to. The Behavior Flow tool will also help with this.
Website Surveys and Feedback
Your existing Google Analytics data will shed a lot of light on what’s going on with your website and where it needs a redesign. But don’t rely solely on your data-based assumptions. You should go directly to the source.
One way to do this is by adding a survey or feedback widget to your website. This way, visitors who feel strongly (either way) about the design of your website can give you direct input.
Usability Tests
Another way to get direct input from your visitors and customers is by setting up usability tests on your website.
With tools like heatmaps and session recorders, you’ll actually see what’s going wrong as they move around your website. It’s a great way to understand where your design or user journey is tripping people up.
Some of the most useful tools for conducting usability tests are Aurora Heatmap, Hotjar and Crazy Egg. You can read more about them here.
Most of these tools will have the following useful functions:
- Heatmaps — which show you the most heavily viewed parts of your pages as well as those that people ignore.
- Recordings — so you can record visitors’ sessions and see if they move around your site and engage with the elements how you wanted them to.
- Surveys — so you can create custom feedback widgets to place along the side or in the corner of your site.
Usability testing is really only effective if you have a good-sized sample of visitor feedback and input to work with — and this tool allows for that if you pay for the business plan. So, keep that in mind when budgeting for your website redesign project.
3. Perform a Website Audit
Next, it’s time for you to take a hands-on approach to evaluate your website’s design and usability. There are a number of things you’ll do to complete this audit:
Compare the Design Against Current Trends
Web design trends can appear out of nowhere and there’s no guarantee they’re going to stick around for very long. So, it’s easy for websites to look out of date even if they were built within the last year or two.
The first thing to check is if your site is holding onto any outdated design trends or features. Or if a previously acceptable design choice is now out of fashion.
You should also look at how well the site adheres to web design best practices, like color theory and font pairing rules. There’s nothing wrong with making unique design choices for your site, so long as they don’t stand in contrast to what works best for the user experience.
Do a Walk-Through of Your Website’s Primary Tasks
Come up with a list of five to seven primary tasks you want people to complete on your website. For instance:
- Read through the homepage and fill out the consultation form at the bottom.
- Visit the Pricing page and choose a plan.
- Complete the checkout process within two minutes.
- Watch the video at the top of the Solutions page to learn more.
- Know how to copy the coupon code from the notification bar and add it at checkout.
Then, go to your website as a visitor and try to complete each task one by one. Be as objective as possible if and when you encounter friction along the way.
Typically, if there’s an issue with task completion, it’s due to not following web design principles. These principles teach us how factors like placement, spacing, size, and so on, impact the usability of a website.
Do a Competitive Analysis
Visit a couple of your top-performing competitor websites and do a side-by-side comparison with your own.
What kinds of signals do their design choices send compared to yours? For instance, does a dark theme make their website seem more youthful and modern?
How efficient are the user journeys compared to yours? For instance, does the sticky menu and search bar provide a faster shopping experience for visitors?
What about features that their site has that yours doesn’t? For instance, is their colorful notification bar less disruptive than your promotional pop-up?
If you’re serving the same users, there’s a lot you can learn about how and why your design is failing its visitors.
Review Your Technologies
One last thing you should look at is your technology. Because it’s not just design choices that can lead to negative user experiences — poor infrastructure can as well.
You should evaluate the:
- Web hosting plan
- Content management system
- Theme
- Page builder
- Plugins
- Third-party integrations
Also look at your site’s optimization processes, like caching, image compression, and SEO.
If any of your technologies cause performance issues, you’ll want to switch to a better alternative during the redesign.
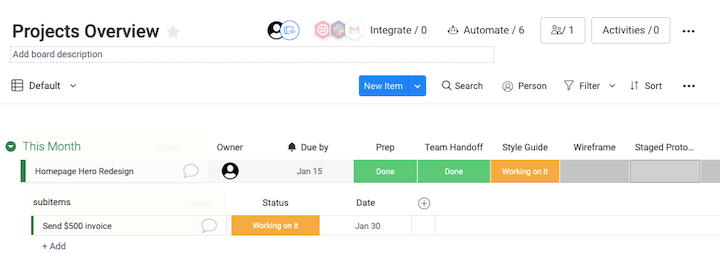
4. Create Your Redesign Roadmap
A roadmap isn’t about doing any redesign work. This is just about determining the scope of the project and then creating a timeline and deliverables for it.
Now, unlike a web design project, you have to account for the fact that the website is currently live and the company is using it to conduct business (even if it’s not getting them the best results).
Knowing this, you can’t schedule a redesign project the way you would a from-scratch site. There are many project management tools that can help you with this task including Monday, Asana, Trello and others.
5. Determine Your KPIs and Set Measurable Goals
Now you need a way to monitor your site’s performance post-implementation.
The best way to do this is to choose a few key performance indicators (KPIs) that will clue you into whether the redesign was a success or not.
For instance, let’s say the first redesign task on your list is to rework the homepage hero image. A KPI like conversion rate might be too broad of a metric to tell if the redesign improved anything. Instead, you’ll want to focus on what the specific redesign will change.
How about CTA button clicks?
Just as you’ve broken down the steps in your redesign roadmap, each should have an individual set of KPIs (or just one major one) to monitor.
In addition, you’ll want to set a measurable goal in relation to the KPI.
Let’s say you’re changing the image, copy, and button in the hero image. You know you want to see an increase in clicks. But how much of an increase would indicate that the redesign was successful? 5%? 25%?
Look at the legacy data of the site, establish some benchmarks, and then set your goals based on that.
How To Perform a Website Redesign
Now that you know what’s at stake with a website redesign, it’s time to talk about how to perform one. Here are the 10 steps you’ll take to ensure that your redesign is a successful one:
Step 1: Create the Website Redesign Proposal
Even if you know what the game plan is, the client needs to be on board with what you’re about to do.
Create a website redesign proposal that spells out the:
- Scope of the job
- Project estimates and payment due dates
- Timeline and milestones
- List of deliverables
- Terms of your relationship

Once you get their signature and approval, you can get to work.
Step 2: Schedule It Out
Using the steps laid out here, as well as the individual tasks you’ll do within each, set up your redesign job within your project management system.
Don’t be afraid to spell everything out, like when and how much to invoice your client for when milestones are hit. Once you’ve laid down all the tasks and given them due dates, start assigning tasks to stakeholders so they can see what’s coming down the line for them.
It’s not a bad idea to have a kickoff call with your client and team and to talk them through the schedule in real-time either.
Step 3: Research, Plan, and Organize
Everything under “How To Prepare for a Website Redesign” above will be done at this stage of the job.
Make sure you save everything in a dedicated place so you have a quick set of references to guide you, your team, and your client through the project.
Step 4: Back up the Website
Although you’ll be doing the design and development work on a staging server or subdomain, you still should back up your website. There are many WordPress plugins that can help you with this task.
Step 5: Update the Style Guide
If the website to be redesigned doesn’t yet have a style guide, now is the time to create one for it. If there is one, you’ll want to review what’s in there and ensure that any changes are documented.
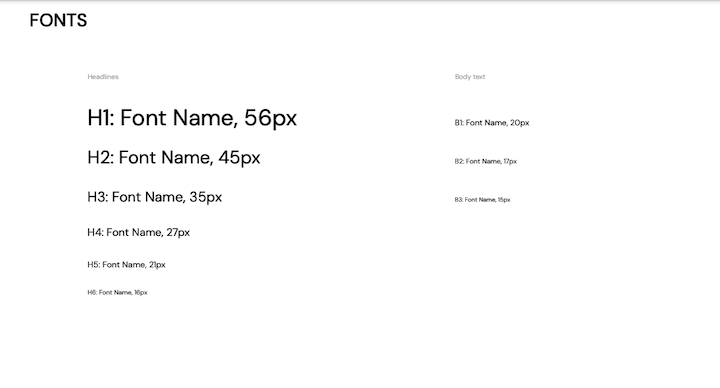
You never know how many times or how frequently you’ll update this website (or who will do it), so it’s always a good idea to review and update it before you do anything new.
Step 6: Wireframe Any Pages That Will Be Redesigned
Unless you’re only making superficial changes to the UI or brand elements, the layout of your pages and the flow of your site’s structure is likely to change.
Spend some time creating wireframes for any pages or parts of your site that will be affected by the redesign.
If you were the original designer for this website and you have the original wireframes, don’t be afraid to repurpose them. They’ll save you time having to build them from scratch.
Or, if you prefer, you can use Elementor as your wireframing tool.
All you have to do is make a copy of your current website on your staging server. Then, create a new page or template and start wireframing your new pages or components.
You can even use Elementor’s block templates to simplify the process:
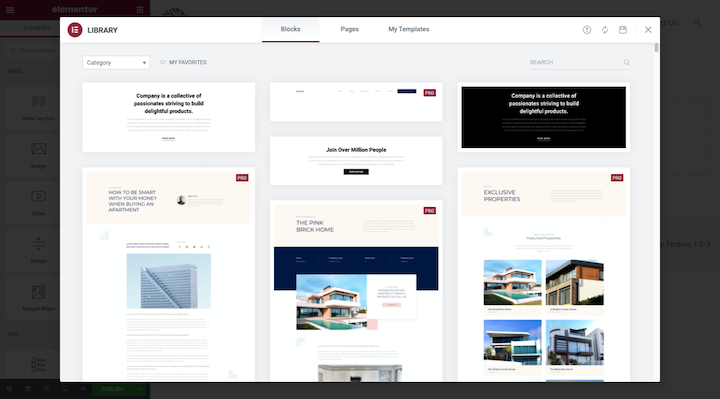
While there are dozens of fully designed blocks, there are many block templates that would work well as basic placeholders.
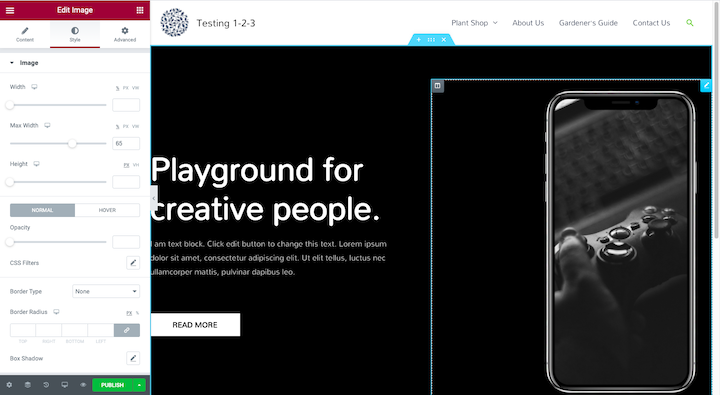
Step 7: Create Your Mockups and/or Prototypes
What’s great about doing your wireframes in Elementor is that you can skip right over the mockup phase and go straight to building your working prototypes.
If you prefer to do your mockups with Photoshop or Sketch, that’s fine, too. You can use this guide to effortlessly move your designs over to WordPress where you’ll turn them into prototypes.
Step 8: QA the Redesign and Get Client Sign-Off
Once your prototypes are built out and the redesign and/or rewrite is complete, it’s time to QA the website.
If you’re going to handle it on your own, that’s fine, too. Just give yourself some distance between the work of designing and developing the prototype and the quality assurance review.
When you’re 100% satisfied with what’s there, pass it over to your client and get their feedback on it.
Step 9: Push the New Design Live
With your client’s approval in hand and your pre-launch checklist completed, you can move your staged prototype over to the live site.
Step 10: Carefully Monitor the Site for the Next Month
You’ll want to keep a close eye on Google Analytics as well as your usability tests (if you still have heatmaps and session recordings in place) after launch.
The whole point of this website redesign is to help your website perform better. If your data doesn’t reflect that, then you may want to roll back any changes you’ve made or implement an alternative strategy.
One of the nice things about using WordPress to build your website is that it automatically saves previous versions of your pages.
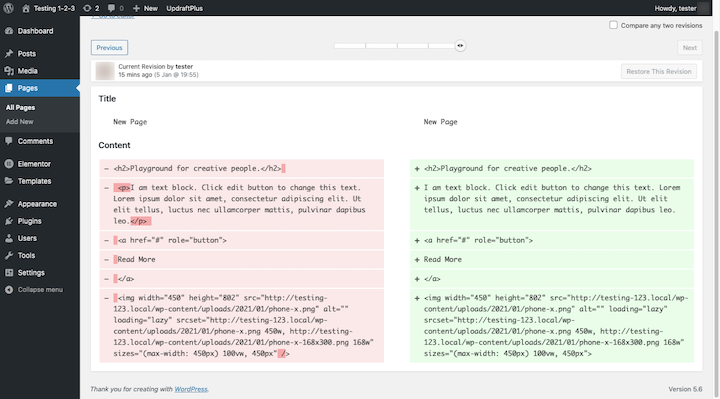
If your content is causing more problems, just go to your page’s Revisions and roll it back. If your design is causing the issue, you can restore the old backup.
Of course, if your redesign is successful, it’s time to get paid for completing this portion of the redesign job and get started on the next one!
Website Redesign FAQs
Here are some remaining questions you might have about taking on a website redesign project:
1. Will a Website Redesign Impact SEO?
The short answer is “Yes”. And it can go either way.
If you successfully redesign your website and it improves the user experience, the increase in traffic, engagement, and conversions will give your website a boost in search.
On the other hand, if you make some mistakes during the redesign and it falls flat with visitors, the website’s ranking could plummet as a result and put you in a worse position than before.
There’s another thing to consider when it comes to SEO.
When you make massive changes to the content and metadata of the page, it can negatively impact your ranking. But that’s not always a bad thing.
For instance, if you’re retargeting some of your pages around better keywords, you can expect that it’ll take some time to grow your visibility in search again.
It only becomes a problem when you change something like the URL.
If you simply save the redesigned page to the new URL, anyone who gets ahold of that old URL (from search, from social, or from other sites) will end up on a 404 error page.
So, if you make big changes to the site structure, you have to remember to use 301 redirects in order to keep visitors on live pages and preserve the original page’s link juice in search.
2. How Much Does a Website Redesign Cost?
Freelance web designers charge anywhere from $500 to $5000+ for a brand new website. Pricing is pretty straight-forward since you know how much time and resources it takes to build a certain type of website as well as the value your client will get from it.
Pricing a website redesign isn’t as simple though. Realistically, it could cost anywhere from $500 (for a simple branding refresh) to upwards of $10,000 (for a complete overhaul).
Really, it depends on the scope of the job.
Here are some things to think about before you pitch any pricing to the client:
- Will your client give you time and the opportunity to run usability tests and gather the data needed to create the proper strategy?
- How much of the site needs to be redesigned?
- How complex are the changes?
- Will you need to hire a specialist to do design, coding, or writing?
- Are you going to spend time switching any of the technologies?
- How quickly does the redesign need to be turned around?
If you can estimate the total time you’ll spend on the project as well as the cost for additional resources, your project proposal and costs will be much more accurate.
3. How Long Does a Website Redesign Project Take?
Again, it all depends on the scope of the job. Plus, if you take an incremental approach to implementing changes, that’ll stretch out the length of the job as well.
But let’s say you’re working on a light refresh of the UI. If you factor in all the time you spend gathering and analyzing data and setting goals, it’ll probably take between a month or two to get everything done.
Something larger or more complex, on the other hand, can go on for months and months.
And while your client might not be excited to hear that, remind them why the website needs to be redesigned in the first place: It’s not working as well as it should (if at all).
Then, explain to them the value of taking a methodical approach to redesign.
By prioritizing the parts of the site causing the biggest issues, they’ll start to see progress before the job is done.
This means they won’t have to spend a huge sum of money on a redesign project before they ever hope to see a return on their investment. They’ll pay for each leg of the project and slowly but surely see their website start to generate more and more revenue along the way.
Redesign Your Website With Elementor To Give It New Life and Yield Better Results
Redesigning a website could be a wonderful thing if it’s used appropriately and done correctly. It can breathe new life into your website, improve user experience, conversions, and SEO and it will make sure that you stay tuned to the latest web design trends and don’t fall behind your competition.
The actual process involves a lot of research pre and post redesign. You will need to make sure that you redesign only the things that impact your website negatively and keep those that have a positive effect on your website. Additionally, proper research is a sure way to target your weak spots and make sure that your website redesign is done correctly and to your users’ needs and expectations.
Certainly, depending on the scope of your redesign, you may have to pay a hefty sum, but it shouldn’t deter you as the end results and the long-term benefits are far more important.
Luckily, Elementor can help you greatly with this endeavor. So make sure that you learn about all the benefits that Elementor can provide you with, including easy redesign, numerous user-centric features, and a proper cost forecast, and get your website redesign started.
Looking for fresh content?
By entering your email, you agree to receive Elementor emails, including marketing emails,
and agree to our Terms & Conditions and Privacy Policy.


