
Table of Contents
If you want to create successful WordPress websites for yourself or your clients, learning how to speed up your WordPress site is essential.
While many people rightfully focus on the design and content of a website, how quickly that website loads is just as important, if not more. Load times will affect your site’s user experience, SEO rankings, conversion rates, bounce rates, and more.
However, understanding all the ins and outs of WordPress performance can be complicated, which is why we’ve created this huge guide on how to speed up your WordPress site.
In this post, we’ll cover everything that you need to know. We’ll start by explaining what slows down WordPress sites, why speed is important, and how to test your site’s current performance.
Then, we’ll share a full list of actionable tactics you can use to improve your WordPress site’s performance today.
Table of Contents
Why Is Your WordPress Site Slow?
There are two broad categories of issues that could be slowing your WordPress site down:
- Backend performance – in broad terms, this is how long it takes your server to deliver files.
- Frontend performance – this is how optimized your WordPress site is itself.
Backend performance problems generally come from your hosting. For example, using slow hosting is one of the biggest culprits of poor backend performance. You can also speed up backend performance by making your server more efficient with tactics such as page caching, using the latest version of PHP, optimizing your database, and more.
Frontend performance problems depend a lot more on the choices you make when building your WordPress site. Some of the common issues here include:
- Using too many poorly-optimized WordPress plugins
- Using a heavy WordPress theme
- Loading large, unoptimized images
- Having unoptimized JavaScript or CSS
- Loading too many third-party scripts
If you want to maximize your site’s performance, you need to optimize both types of performance. For example, even a site with perfect frontend optimization might still load slowly if it’s on really slow hosting (and vice versa).
Our tips below will cover fixing both types of issues.
Why Is WordPress Site Speed Important?
If you’ve ever used a slow-loading website, you intuitively know how frustrating dealing with a slow website can be. It’s annoying, and your visitors will be annoyed if they have to wait around for your content to load (especially on mobile devices).
So at a basic level, one big problem with a slow WordPress website is that it creates a really poor user experience for your visitors, which is something you should always aim to avoid.
However, there are also lots of specific downsides to having a slow website:
SEO rankings – Google uses site speed as a ranking factor in both its desktop and mobile results. It will also start using Core Web Vitals metrics soon, which include a speed metric. Site speed can be especially important in competitive niches with lots of strong sites, where it’s a differentiator between two equally-strong sites. Here’s Google’s take.
Conversion rates – slower load times lead to lower conversion rates. Even just a 100-millisecond delay can hurt conversion rates by 7%, according to Akamai. Deloitte also found that just a 100-millisecond improvement in site speed led to shoppers spending 10% more.
Bounce rate – slower load times lead to higher bounce rates. For example, Pingdom found that the time-related bounce rate for a page that loads in two seconds is 6% but that jumps to 38% for a page that loads in five seconds. On mobile, Google found that the probability of someone bouncing jumps from 32% at 1-3 seconds to 90% at 1-5 seconds.
Site speed is also especially important on mobile, where 53% of mobile visitors will leave a page that takes longer than three seconds to load.
How To Measure WordPress Site Speed
The easiest way to test your WordPress site’s performance is to use a speed test tool. With such a tool, all you need to do is enter the URL of the page that you want to test and the tool will give you a bunch of data to assess its performance.
Some of the best free speed test tools are:
- WebPageTest – offers a lot of testing variables to collect more useful data.
- Pingdom Tools – Enter a URL to test the page load time, analyze it, and find bottlenecks.
- GTmetrix – quite flexible if you register for a free account.
- Google PageSpeed Insights – provides real-world speed data from Google, along with testing from Lighthouse.
If you want accurate data, there are a few test variables you need to pay attention to:
- Device – try to test both desktop and mobile devices.
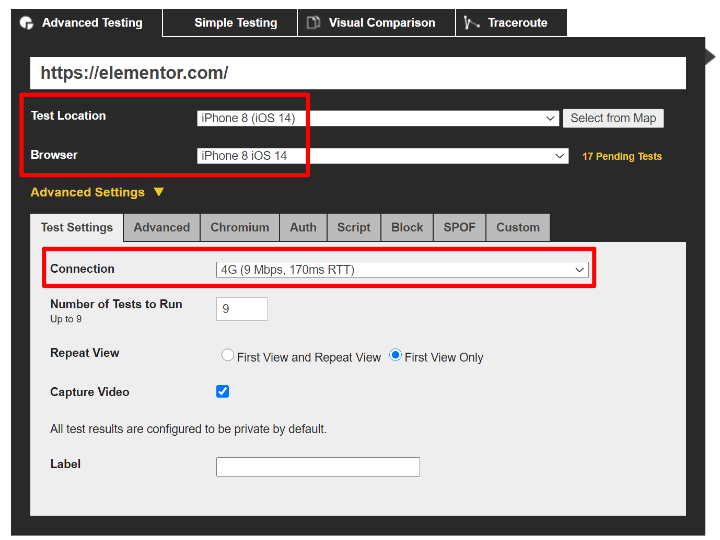
- Test location – ideally, you should test from the location that’s nearest to your target audience. If your audience is all over the world, you should test from multiple locations.
- Connection speed – the speed of your visitors’ Internet connections will affect how quickly your site loads. However, some speed test tools use an ultra-fast connection to test, which makes your site look faster than it will be to real users. Ideally, you want to choose a connection speed that matches your users’ real-world situations.
For example, here’s a test configuration to test your site’s speeds for mobile visitors on a 4G connection:
What Do the Test Results Mean? What About "Scores"?
Once you run a speed test, you’ll get a lot of different numbers (the exact numbers depend on the tool you use).
In general, you should focus on actual load times, not “scores”. While scores can provide useful guidance to help you optimize your site, your visitors only care about how long it actually takes your site to load.
In terms of actual load times, you’ll see different numbers. In general, you’ll want to pay attention to both fully loaded time times (how long it takes your entire site to load) and “user experience” metrics such as Largest Contentful Paint (LCP), which measures how long it takes your site’s “main content” to become visible (even if your site is still loading below-the-fold content and scripts).

What's a Good Website Load Time?
In general, a good website load time is under two to three seconds. For mobile users, Google recommends under three seconds. And for eCommerce stores, you should aim for under two seconds.
However, remember that your site’s fully loaded time isn’t the only important metric. You’ll also want to focus on your site’s “perceived” load time, which is how fast your visitors “feel” like your site is. In Google’s words:
“Largest Contentful Paint (LCP) is an important, user-centric metric for measuring perceived load speed because it marks the point in the page load timeline when the page’s main content has likely loaded—a fast LCP helps reassure the user that the page is useful.”
Google recommends that your LCP time is under 2.5 seconds and will start using this criterion as an SEO ranking factor in 2021.
How To Optimize WordPress Site Speed
Now, let’s get into some actionable tactics you can implement to speed up your WordPress site…
1. Use Fast WordPress Hosting
Choosing performance-optimized WordPress hosting is one of the biggest things you can do to improve your site’s backend performance.
Put simply, if your hosting is slow, there’s a high chance that your website is going to be slow, even if you do a really good job at front-end optimization.
For the absolute best performance, you should consider managed WordPress hosting options such as Kinsta, WP Engine, or Flywheel. If that’s out of your budget, cheaper options such as SiteGround and A2 Hosting can still help you achieve fast load times.
For more options, check out our list of recommended WordPress hosts. We also have a guide on how to choose WordPress hosting to help you with your decision.
When choosing a host, you should also pay attention to the available server locations. The physical location of your server will have an effect on your page load times because physical distance affects download speeds.
Ideally, you’ll want to choose a host that offers a server located in the same location as your primary target audience.
Another important consideration is to look for modern technologies, such as HTTP/2, which can improve HTTPS performance and also is better at handling lots of small HTTP requests.
2. Use Page Caching
Implementing page caching is one of the biggest things that you can do for your WordPress site’s performance, especially if you’re starting from cheap shared hosting. If you’re on cheap shared hosting, you might even see your load times cut in half just by activating caching.
Normally, your WordPress site’s server needs to assemble each page from scratch whenever someone visits your site. This involves executing PHP to “build” the page and querying your site’s database to get the content for the page. Once it does this, your server delivers the finished HTML to a visitor’s browser.
This process takes time and also uses resources, which has two negative effects on your site’s performance:
- It makes individual visits take longer.
- It uses more resources for each visit, which means your site will slow down even more during high-traffic periods.
Page caching eliminates this problem by storing the finished HTML product of a page in a cache. Then, for future visits, your server can just deliver that HTML without doing the behind-the-scenes work.
Many WordPress hosts now implement page caching for you automatically, including most of the options we recommended above.
If your host doesn’t, you can still implement page caching using one of the many quality caching plugins. Here are some good options:
3. Use a Content Delivery Network (CDN)
A content delivery network (CDN) speeds up your site’s global load times by caching your static content on a huge network of “edge” servers all around the world. Then, when someone visits your site, that person is able to download content from the nearest edge location rather than from your main server. Because the physical distance is shorter, the files download faster and your site loads quicker.
Some good CDNs for WordPress users include:
- KeyCDN
- Stackpath (formerly MaxCDN)
- BunnyCDN
- Cloudflare
Many managed WordPress hosts also offer their own built-in CDN services at no extra cost.
Excluding Cloudflare (which has its own setup process), you can set up a CDN as follows:
- Sign up for the CDN service and add your site.
- Use a plugin such as CDN Enabler to configure your WordPress site to load certain content from the CDN.
4. Optimize Your Images
On average, images make up around half of the file size of the average website, according to the HTTP Archive. This presents a huge opportunity to reduce your site’s size and speed it up by optimizing your images.
With Image Optimizer, you can easily handle the two key aspects of image optimization:
Resizing Dimensions: Automatically resize your images based on their use. For example, if an image is displayed in an 800 px wide area, Image Optimizer ensures it’s sized appropriately (or up to 2x for Retina screens).
Compression: After resizing, Image Optimizer compresses your images for even smaller file sizes. It offers lossy compression to significantly reduce file size without noticeable loss of quality, or lossless compression if you need to retain perfect image quality.
Why Choose Image Optimizer?
Automatic Optimization: Image Optimizer automatically resizes and compresses images as you upload them to WordPress, saving you time and effort.
Bulk Optimization: Already have images on your site? Image Optimizer can bulk optimize them with a single click, ensuring all your media is as lightweight as possible.
Advanced Format Support: Convert your images to modern formats like AVIF or WebP for faster load times and better SEO performance.
There’s no need to manually optimize images before uploading or rely on multiple tools—Image Optimizer does it all for you directly within WordPress, making it the perfect solution to speed up your site effortlessly.
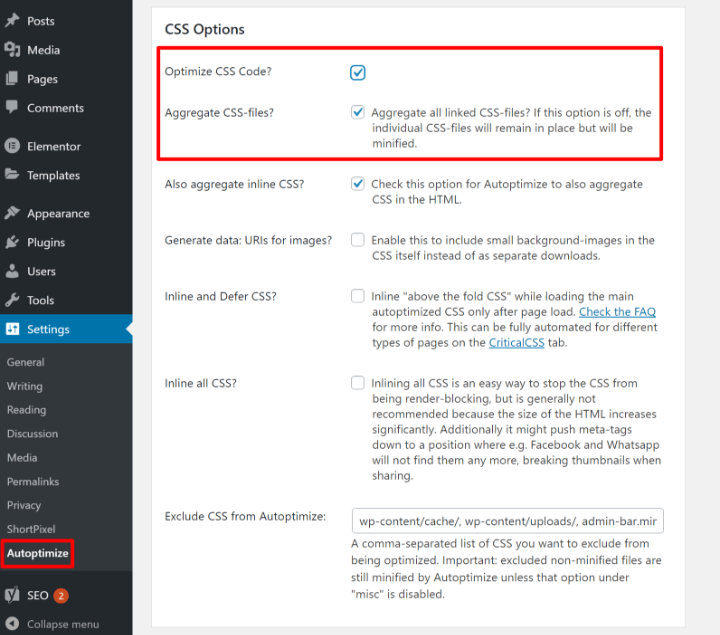
5. Optimize CSS
Your site’s CSS code provides another opportunity for front-end optimization.
Two baseline strategies to optimize CSS are:
- Minify CSS code to reduce the file size by eliminating whitespace and redundant characters.
- Combine separate CSS files to reduce HTTP requests. Generally, one large HTTP request is more efficient than multiple small HTTP requests (though the difference isn’t as large if your host uses HTTP/2).
To improve user experience performance metrics such as Largest Contentful Paint, a more advanced optimization tactic is to inline critical CSS in thesection and defer loading the rest of your CSS until later.
The Autoptimize plugin is a popular free option that lets you perform these optimizations. Or, many performance plugins offer these features, including WP Rocket.
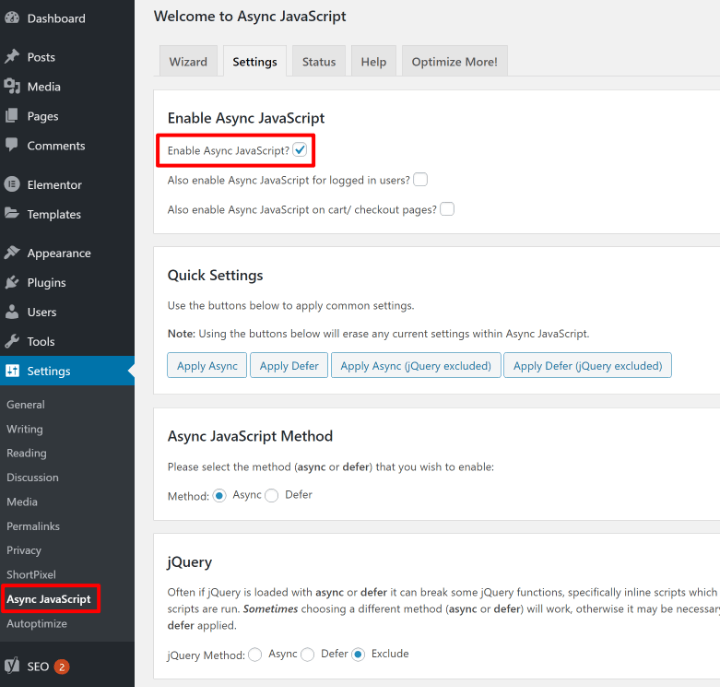
6. Optimize JavaScript
Just as with CSS, you should minify and combine your JavaScript as much as possible. However, you might need to exclude certain JavaScript files from combination to avoid causing issues.
You can achieve both optimizations with the Autoptimize plugin or WP Rocket:
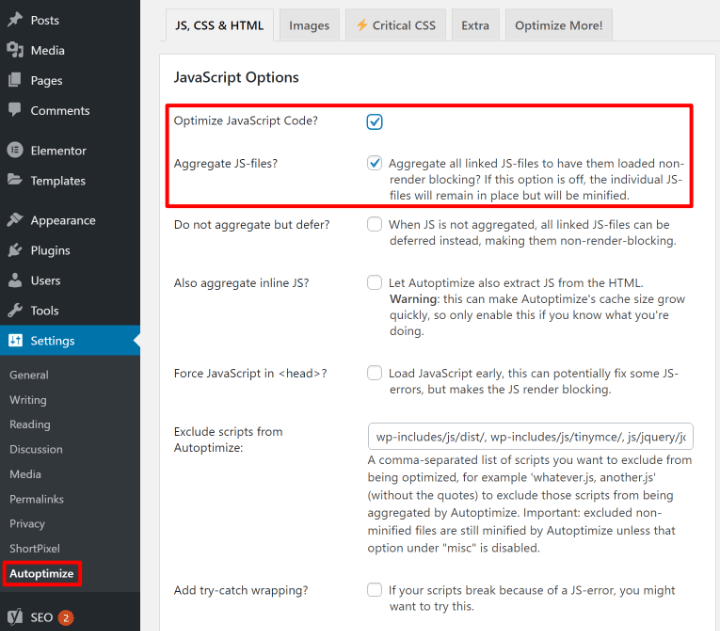
Beyond that, you should defer loading JavaScript as much as possible to avoid blocking loading above-the-fold content. You can do this with the Async JavaScript plugin from the same developer or WP Rocket.
7. Use a Fast Theme
As the foundation of your site’s front-end content, your theme plays a big role in your site’s front-end optimization.
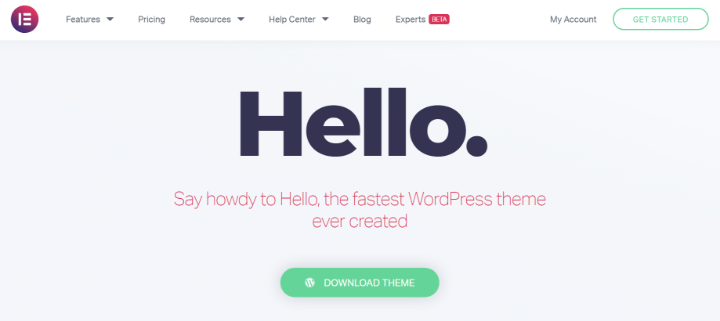
If you’re planning to use Elementor Theme Builder to build your WordPress site, we recommend the free Hello theme, which is the fastest theme for Elementor because it eliminates all unnecessary features. Put simply, you won’t find a more performance-friendly foundation for your Elementor designs:
Other quality lightweight themes include the following:
All three themes include deep Elementor integrations and starter sites.
8. Use Fast Plugins and Limit Plugin Usage
While there are lots of great plugins out there, you need to pay attention to your plugin usage if you want to speed up your site. In general, every plugin that you install adds its own weight in the form of database queries, HTTP requests, and file size.
For that reason, a good general rule of thumb is that the more plugins you install, the slower your site will be.
However, it’s not just the quantity of plugins, but it’s also the quality. Even just a single slow plugin can have a huge negative effect on your site’s load times.
Here are some basic principles to follow when it comes to plugins:
- Try to limit how many plugins you use. If a feature isn’t necessary to the functioning of your site, consider leaving it off. This also limits the chance for compatibility issues, which can further affect load times.
- Only use plugins from reputable developers with good code quality.
One easy way to eliminate the need to install excess plugins is to use Elementor and/or Elementor Pro.
Because Elementor includes built-in widgets for a number of important actions, you can use it to avoid installing more plugins and speed up your site. For example, you can use Elementor for contact forms, social share icons, sliders, galleries, and more. These are all features you’d normally need a separate plugin for.
9. Optimize Your Database
Your WordPress site’s database is what contains all of your site’s content and settings (including your Elementor designs).
When someone visits your WordPress site, your server needs to query the database to get all of the information that it needs to render the page (though, as we covered above, page caching can eliminate this process for most visitors).
In general, the larger and more complicated your database is, the longer these queries will take, which will hurt your site’s performance and also waste your server’s resources.
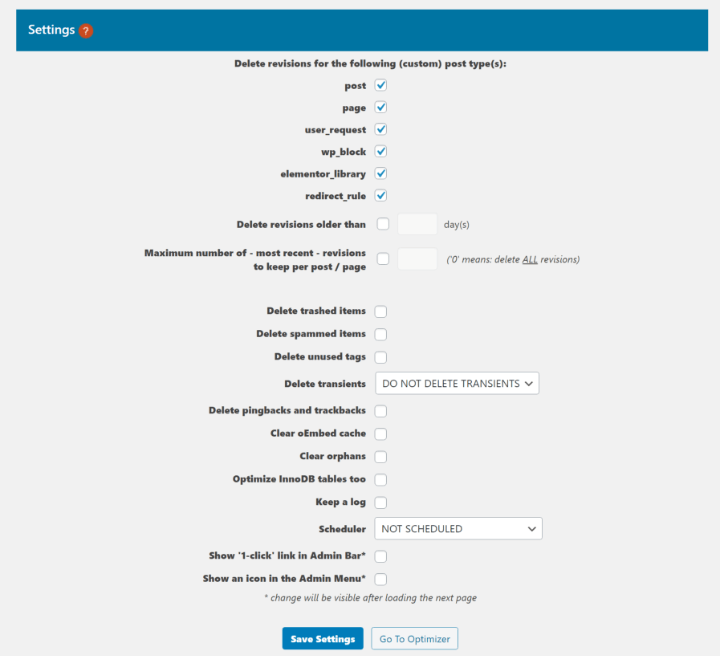
For that reason, you should make a regular habit of cleaning your site’s database. Here are some plugins that can help:
- Optimize Database after Deleting Revisions (pictured below)
- WP Rocket
- WP-Optimize
10. Limit or Disable Revisions
One big cause of clutter in your database is post revisions. By default, WordPress stores unlimited revisions every time you hit the Save Draft button while working on a piece of content.
To prevent this clutter, you should disable, or at least limit, post revisions.
You can do this with the free WP Revisions Control plugin. Or, you can add one of these code snippets to your site’s wp-config.php file:
Limit (store two revisions):
define(‘WP_POST_REVISIONS’, 2);
Disable:
define(‘WP_POST_REVISIONS’, false);
11. Optimize Your Comments
If your site has a busy comments section, it can be a surprising drag on your site’s performance. By default, every single comment adds an external HTTP request to Gravatar to load the user image. Comments also add weight to your database and extra database queries to load comments.
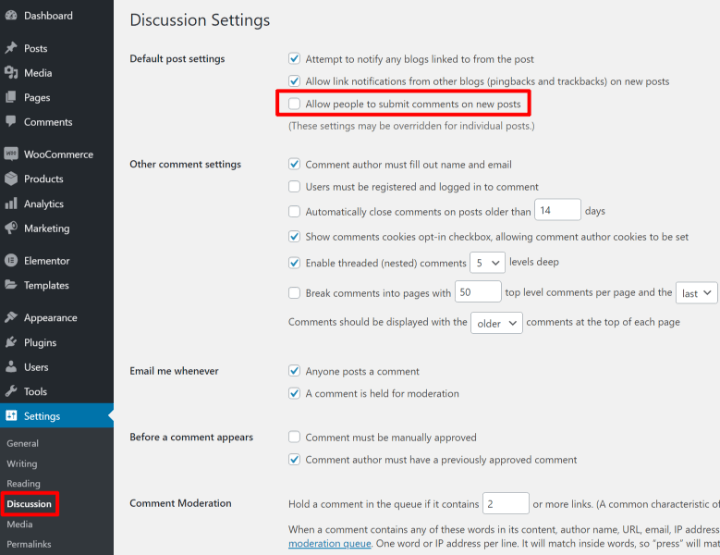
If you don’t find value in comments, one option is to disable comments completely:
- Go to Settings → Discussion
- Uncheck the box to allow people to submit comments
However, comments sections are important to many sites, so you might not want to get rid of them completely. Here are some tips to optimize them:
- Lazy load the native WordPress comments section with the free Lazy Load for Comments plugin.
- Disable avatar images to reduce HTTP requests (Settings → Discussion and uncheck Show Avatars).
Use a third-party comments system like Disqus or Facebook Comments and then lazy load it using the free Disqus Conditional Load or Lazy Social Comments plugins.
12. Offload Media Files
If you use a lot of media files (e.g. images), that can be a big drain on your server because your server needs to store and serve up all those images.
One way to reduce this strain is with a CDN. The CDN will “pull” the images from your server into the CDN cache and then serve images from the cache. However, this still uses resources because the CDN needs to query your server to pull those images in the first place.
To fix this, you can consider offloading your media files to external storage such as Amazon S3, DigitalOcean Spaces, Google Cloud Storage, etc. You can still use your CDN, but your CDN will now “pull” its media files from the cloud storage instead of your site’s server.
To set this up on WordPress, you can use the WP Offload Media plugin from Delicious Brains.
13. Use Gzip Compression
Gzip is a technology that lets you compress data at the server level, which can result in a 70%+ reduction in your site’s file size.
Most WordPress performance plugins can enable Gzip compression for you, including WP Rocket. Or, you can use the standalone Enable Gzip Compression plugin.
If you’d prefer not to use a plugin, you can also enable Gzip compression by adding this code snippet to your site’s .htaccess file:
<IfModule mod_deflate.c>
  # Compress HTML, CSS, JavaScript, Text, XML and fonts
  AddOutputFilterByType DEFLATE application/javascript
  AddOutputFilterByType DEFLATE application/rss+xml
  AddOutputFilterByType DEFLATE application/vnd.ms-fontobject
  AddOutputFilterByType DEFLATE application/x-font
  AddOutputFilterByType DEFLATE application/x-font-opentype
  AddOutputFilterByType DEFLATE application/x-font-otf
  AddOutputFilterByType DEFLATE application/x-font-truetype
  AddOutputFilterByType DEFLATE application/x-font-ttf
  AddOutputFilterByType DEFLATE application/x-javascript
  AddOutputFilterByType DEFLATE application/xhtml+xml
  AddOutputFilterByType DEFLATE application/xml
  AddOutputFilterByType DEFLATE font/opentype
  AddOutputFilterByType DEFLATE font/otf
  AddOutputFilterByType DEFLATE font/ttf
  AddOutputFilterByType DEFLATE image/svg+xml
  AddOutputFilterByType DEFLATE image/x-icon
  AddOutputFilterByType DEFLATE text/css
  AddOutputFilterByType DEFLATE text/html
  AddOutputFilterByType DEFLATE text/javascript
  AddOutputFilterByType DEFLATE text/plain
  AddOutputFilterByType DEFLATE text/xml

  # Remove browser bugs (only needed for ancient browsers)
  BrowserMatch ^Mozilla/4 gzip-only-text/html
  BrowserMatch ^Mozilla/4\.0[678] no-gzip
  BrowserMatch \bMSIE !no-gzip !gzip-only-text/html
  Header append Vary User-Agent
</IfModule>
To test if it’s working, you can use this Gzip compression test.
14. Use Browser Caching (Cache-Control and Expires Headers)
Browsing caching lets you tell a visitor’s browser to store static assets on a visitor’s local computer. For subsequent visits, the visitor’s browser will load those files from the local cache, rather than your server, which speeds up load times.
To control browser caching behavior, you can use two tactics:
- Cache-control
- Expires headers
These let you tell visitors’ browsers how long to store certain types of files in the browser cache. For example, “store PNG images for 30 days before re-downloading them”.
Both achieve the same effect, but cache-control is the newer and more flexible option. You can use both – just make sure the storage lengths match.
There are two ways to add cache-control or expires headers:
- Plugin
- Code
Many WordPress performance plugins already include features to implement browser caching for you including WP Rocket. Or, you could use the standalone Add Expires Headers plugin.
If you feel comfortable working with code, you can also set this up by editing your site’s .htaccess file (if using Apache) or Nginx config file (if using Nginx).
Here are the code snippets that you’ll need:
Apache cache-control (.htaccess):
<filesMatch ".(ico|pdf|flv|jpg|jpeg|png|gif|svg|js|css|swf)$">
        Header set Cache-Control "max-age=84600, public"
</filesMatch>
Apache expires headers (.htaccess):
## START ADD EXPIRES HEADERS ##
<IfModule mod_expires.c>
ExpiresActive On
ExpiresByType image/jpg "access 1 year"
ExpiresByType image/jpeg "access 1 year"
ExpiresByType image/gif "access 1 year"
ExpiresByType image/png "access 1 year"
ExpiresByType image/svg "access 1 year"
ExpiresByType text/css "access 1 month"
ExpiresByType application/pdf "access 1 month"
ExpiresByType application/javascript "access 1 month"
ExpiresByType application/x-javascript "access 1 month"
ExpiresByType application/x-shockwave-flash "access 1 month"
ExpiresByType image/x-icon "access 1 year"
ExpiresDefault "access 2 days"
</IfModule>
## END ADD EXPIRES HEADERS ##
Nginx cache-control:
location ~* \.(js|css|png|jpg|jpeg|gif|svg|ico)$ {
 expires 30d;
 add_header Cache-Control "public, no-transform";
}
Nginx expires headers:
location ~*  \.(jpg|jpeg|gif|png|svg)$ {
        expires 365d;
    }

    location ~*  \.(pdf|css|html|js|swf)$ {
        expires 2d;
    }
To test your headers, you can use this free browser caching checker tool.
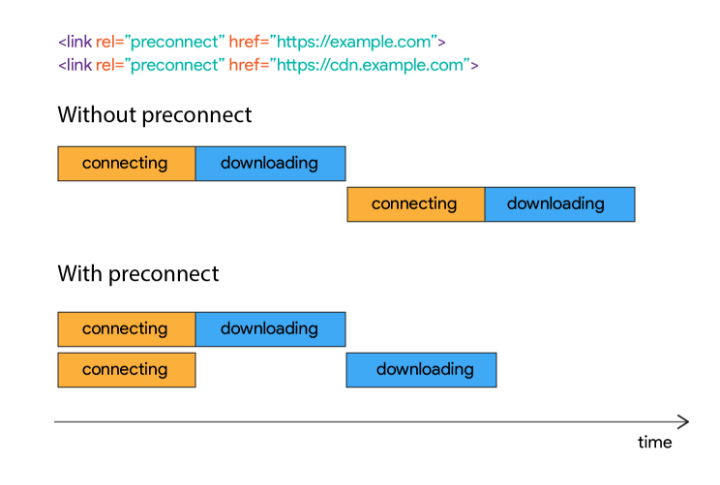
15. Use Preconnect and Prefetch for Important Resources
Preconnect and prefetch are two tactics to speed up DNS resolution time for third-party resources, which can speed up resource download times. For example, you could tell browsers to preconnect to your CDN or the Google Fonts CDN.
You can learn more in this post from WP Rocket.
16. Manage Your Scripts To Avoid Sitewide Loading
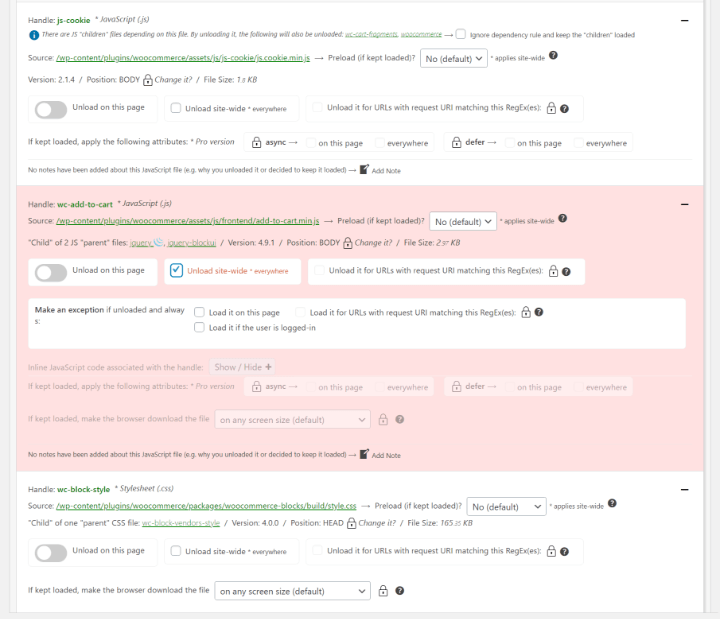
Many WordPress plugins load their scripts on your entire site even if you only use the plugin on certain pages. This can cause an unnecessary performance hit on pages where you aren’t using that plugin.
For example, let’s say you’re using WooCommerce as the payment processing system for your online course. Even though you’re not creating a full eCommerce store, WooCommerce will still load its scripts on every single page as if you’re running a WooCommerce store.
To fix this, you can use a plugin that lets you conditionally control script usage on a page-by-page basis. Two good options are:
- Asset CleanUp – free (pictured below)
- Perfmatters – paid
The goal is to only load each script on content where it’s absolutely needed and disable it everywhere else:
17. Beware Autoloaded Data From Plugins
Just as some plugins load their scripts sitewide, some plugins also use a similar tactic in your database via autoloaded data in the wp_options table. Even worse, many plugins don’t clean their data even if you delete the plugin. This can slow down database query times, especially on older sites.
You can check out this guide to learn how to clear autoloaded data.
18. Limit Third-Party Script Usage
Third-party scripts are items such as:
- Tracking scripts – Google Analytics, Hotjar, etc.
- Social Media – Facebook Pixel, “like” buttons, etc.
- Third-party ads – Google AdSense, Media.net, etc.
- Some A/B testing tools – Google Optimize, VWO, etc.
- Etc.
Using third-party scripts can be especially tough on website performance because you have a lot less control over optimizing those scripts. For example, you can’t control their browser caching behavior and each third-party script also adds additional DNS resolution time.
For that reason, you want to limit your use of third-party scripts as much as possible. Think long and hard whether each script adds enough value to your site to justify the performance hit.
For more control, you can also consider locally hosting some scripts, such as:
19. Use a Speed Enhancing Plugin
Some of the aforementioned tasks can be performed using a WordPress speed plugin. In fact, using these plugins could prevent the issues from occurring in the first place by ensuring that your WordPress site is optimized correctly when adding media, or content.
A highly recommended plugin is WP Offload Media. This speeds up your WordPress site by offloading your media to cloud storage, such as Amazon S3 or DigitalOcean Spaces, and then serving it lightning fast with a CDN. (It also has an Elementor integration).
Balance Great Site Speed With Great Site Design
Beyond everything we’ve examined, it’s important to remember that there is no perfect solution for speed.
It boils down testing and retesting, and above all, finding the balance between what we need our site to deliver and how fast we get it there.
As web creators, sometimes our mission is to blow our audience’s minds, but sometimes we’re risking speed. But this is precisely where creativity and ingenuity thrive — within limitations.
Looking for fresh content?
By entering your email, you agree to receive Elementor emails, including marketing emails,
and agree to our Terms & Conditions and Privacy Policy.


