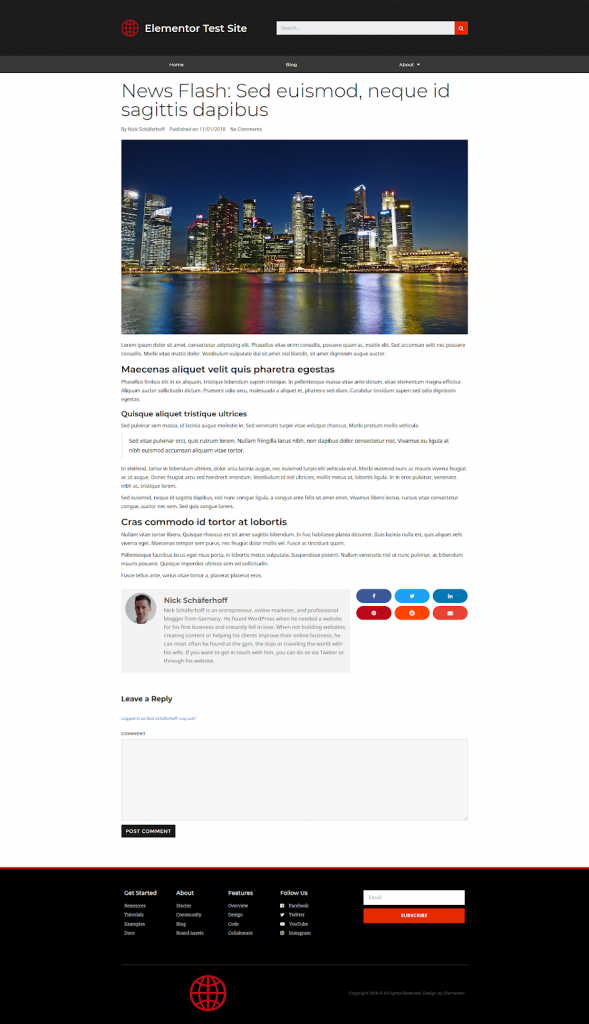
Use this step-by-step tutorial to learn about how to customize your WordPress theme.

Customizing your theme is one of the main tasks when building WordPress websites. Since they control a site’s design, this is where many professionals spend most of their time.

Creating a custom WordPress theme usually involves working with the theme files and a code editor. Layout changes happen in the template files, design changes via CSS. Plus, there is typically a lot of refreshing the browser window to view the effect, which can be a bit cumbersome. 

Luckily, with Elementor, this process becomes extremely easy, so you might want to check it out.

Table of Contents

What is a WordPress Theme

A WordPress theme is a collection of templates that define the visual aspect of a WordPress website.

The theme encompasses everything that affects the design of a website, from headers and footers to the color scheme, layout, and more. 

There are many themes available, free and premium, that fit almost any industry like photography sites, gym sites, barbershop sites, law sites, and much more. 

Why Customize a WordPress Theme? 

One of the main reasons for building a website is to promote one’s business. What better way to do it than by creating a unique website that promotes the business’ style and design. 

Can you image Amazon, eBay, or Google being what they are without their unique, signature design? Of course not, and that’s one of the reasons why we want to customize a theme. We want to make it unique and fit our business’ message. 

Additionally, sometimes, or rather, oftentimes, you run across a theme that’s plagued with bad design, colors that don’t go well together, or a theme that’s too heavy and impacts that site performance. The theme could be great, except for that one thing that bothers you. Customizing it and changing that one thing could solve all your problems and create a better user experience. 

How To Customize WordPress Themes

There are several methods to customizing a WordPress theme. 

  1. Manually, via the WordPress customizer
  2. With code
  3. With Elementor

How to Manually Customize a WordPress Theme

To customize a WordPress theme manually, you can use the in-built WordPress customizer. If you do it without code, you are oftentimes limited in what you can change. Some premium themes allow you more customization options, but in essence, there aren’t that many design options for you to do. 

Before we dive deeper into this, we’d like to point out that when you customize an existing theme with WordPress, it’s best that you use a child theme and not the parent theme.

WordPress Child Theme

A WordPress child theme is a theme that has the exact same functions and features of another theme, the parent theme. The child theme is used to customize and tweak the theme safely, without affecting the parent theme and without losing the ability to upgrade it. You can learn more child themes here.

WordPress Theme Customizer

So now that we know that it’s best to work with a child theme when tweaking them, let’s learn how to customize a theme with the WordPress customizer. To access it, you need to select a theme from the theme depository (located under the Appearance > Themes tabs) Then, go to your dashboard, press on the Appearance tab on the left-hand side and choose Customize

The main features that you can change with this customizer are: 

Adding a Title, a Logo, and a Website Icon

To add or change your title, logo, or icon, you can simply go to the Site Identity panel, and choose each of these elements to change them. 

Changing Theme Colors

Some themes will allow you to change their color schemes, but not all, and they are usually premium themes, meaning that they cost money. If your theme allows you to change the color scheme, you’ll see the option when you access the customizer.

Adding Navigation Menus

The customizer also allows you to add and edit the navigation menus for your website, easily. 

How to Customize a WordPress Theme With Code

You will notice that under the Appearance tab, you have the option to choose the Theme Editor. Upon clicking on it, you will be greeted by a window with the code of the theme. This option requires a good grasp of CSS coding and is not recommended for beginners. 

Here you’ll get access to files like style.css, functions.php, and others and it is exactly for this scenario that you’ll need a child theme so as to not break your website will editing it

The other way to customize your theme through coding is by downloading and uploading files using an FTP solution. The process involves creating FTP credentials via your hosting provider, downloading and installing an FTP solution (like FileZilla), login to your account and editing your files, which you then upload via the same FTP solution. 

Unless you are familiar with coding, we do not recommend this option. 

How to Easily Customize a WordPress Theme Using Elementor

You can do it straight from the user interface. There’s no need to change a single line of code or reload a browser window even once. 

Elementor allows you to modify every site element quickly and easily with just a few mouse clicks and you can even optimize these features for the mobile platform. 

Elementor makes this process much easier by using dynamic content and letting you preview your pages. That way, you can immediately see how the design changes are going to affect your actual site and content.

Customize The Header and Footer

Elementor allows you total flexibility when it comes to designing your headers and footers. We all know how annoying this may be, that you get a theme, and can’t change a single aspect of the header or footer design. You need specialized themes, plugins, etc. 

With Elementor, it’s easy. 

1. Create a Header Template

First set up a new header template. For that, go to Elementor > My Templates.

A Screen Shot Of Elementor'S My Templates

Here, one way to get started is to hit the Add New button at the top. In the next screen, use the drop-down menu to pick Header as the type of template you want to design.

A Screenshot Of The Adding A Template Window

You can also get to this screen by clicking on the Header tab in the previous screen and then hitting the big green button that will appear.

A Screenshot Of The Header Tab

This will pre-select Header as the template type. Either way, you need to add a fitting name for the template (so you’ll know what it is later on) and then continue by clicking Create Template

Doing so will take you here.

A Screenshot Of The Templates Window

With Elementor Pro, you can choose from premade header blocks. These are design templates you can use as a starting point for your own design, which is what we’ll do in this case. 

When you hover over a header block, a click on Insert lets you start designing it right away. Alternatively, click on the image first to see a larger version. Then, you can still hit Insert at the top. 

A Screenshot Of The Chosen Header

Alternatively, if you want to start from scratch, simply close the window by clicking on X in the upper right corner.

2. Modify the Basic Header Design

After you input the new header, the first thing you’ll notice is that the logo and menu we set up earlier are already present.

A Screenshot Of Header Customization With Elementor

That is exactly the reason why we set them up and we will talk about how to customize them soon. However, let’s first see how to customize the entire header section itself.

For that, simply hover over it and click the edit button at the top. This opens up a whole lot of editing options on the left.

A Screenshot Of Header Customization With Elementor - Additional Features

Here’s what you can control in the different menus: 

  • Layout – Control the width of the section, the size of the gap between columns, its height, vertical column, and content positioning, its assigned HTML tag, and the general structure. 
  • Style – Here you can change the background color including hover effects, even add an image or video if you want, add overlay effects, borders, and shape divider as well as modify typography settings. 
  • Advanced – This part lets you add CSS attributes like margin, padding, and z-index, animations, IDs, and classes. It also enables you to make the section sticky and control responsive settings (more on both later) as well as to add custom CSS. 

All of the above is fairly self-explanatory, and you’ll quickly get the hang of it by merely experimenting around. Be aware, that you can control the settings of the separate navigation menu in the same way. More on that below. 

3. Customize Header Elements

However, you can not only modify the header section as a whole but also the elements included in it. For example, to customize the site logo, simply click on it. This, too, will provide you with editing options on the left-hand side.

A Screenshot Of Logo Customization In Elementor

In the case of the logo, this gives you the following options: 

  • Content – Change image size, alignment, and where it links to. 
  • Style – Control width and height, add CSS and hover effects, include a border and box-shadow if you want. 
  • Advanced – Here you basically find the same options as for the header section. 

Use the settings to customize the logo in any way you want so it looks good in the header. Also, note that every element has its own type of options, so be sure to check each of them. 

4. Add Elements

Of course, with Elementor you are also able to add elements to the header. Just click the symbol on the top right to see what’s available.

A Screenshot Of Elementor'S Widgets

When editing a header template, Elementor will automatically display relevant blocks at the top of the list that makes the most sense for the circumstances. In this case, these are things like site logo, nav menu, and site title.

So, for example, if you want to add the site title next to the logo, just drag and drop it in there. However, the header template that I chose currently only allows me to add it above or below the logo. But, this is a problem easily remedied.

In a case like this is, first hover over the existing header and use the plus symbol to add a section above it.

A Screenshot Of How To Add A Section Above The Header

Here, click on the purple button to choose a three-column design. 

A Screenshot Of How To Choose A Three Column Design

Then, drag the elements from the existing header section into the new one and add the site title in the middle.

A Screenshot Of Dragging And Dropping Elements

But wait, the styling is totally different! No problem. Just right-click the existing header and select Copy. Then, right-click the new section and here pick Paste Style. Elementor will then apply the style of the existing section, which you can close afterward. More info on this feature here

A Screenshot Of Pasting The Style

Customize Single Post Template

In Elementor, you can also customize a single post template. Here’s how:

1. Create a New Template

Creating a template works in the usual way. However, this time choose Single as your template type. Then, below that, pick which single template you wish to edit. In this example that is Post

A Screenshot Of Creating A New Single Template

If you wanted to create a new page design, change your 404 page (more on that later) or edit a particular custom post type, you would choose something else. In either case, enter a name and continue. 

In the next screen, you can pick from pre-designed templates as usual. However, in this case, we want to create a new template from scratch. So, click the X on the top right to close this window. 

2. Set Up the Preview

Next up, set the preview window to an existing post. You can do this by clicking on the eye icon at the bottom of the editor options and then Settings

A Screenshot Of Setting Up The Preview

In the menu that opens up, under Preview Dynamic Content as choose Post. After that, in the next line, you can search and choose an existing post by name. 

Image32 How To Customize Your Wordpress Theme 5

Once you have done so, hit Apply & Preview. While you won’t be able to see anything at this point (since there is nothing on the page yet), it will tell Elementor to use that post’s data from now on. You will soon see what that means. 

3. Build the Above the Fold Section

First off we’ll create the above the fold section of the post. Here, you will typically find things like the post title and metadata like author, date, and category.

The first step is to click on the plus sign and create a single-column section.

A Screenshot Of Choosing A Section

When you do, in the layout section you have the possibility to control its width, height, positioning, and styling. In this case, there is not much to do here. Also, don’t worry, you can always go back and make changes later. 

Next up, pull the post title widget into the new section. 

A Screenshot Of Adding A Post Title

When you do, be sure to use all options available to you to adjust the design and layout to your liking. For example, here are my settings to make it look like above: 

A Screenshot Of The Elementor Customizer

There’s also one cool feature that you should learn about. When you click on the wrench symbol for the post title, you can add static content before and after your dynamic data. 

For example, if you were creating a template for a certain post category such as news items or recipes, you could add this to the post title like this: 

A Screenshot Of Advanced Styling Options

This way, this data would show up for every single post in that category. Since I am building the general template for all of my posts here, I won’t use that at this point, but I thought it was an important side note for you. 

Under the post title, we will now insert the Post Info widget to display the post metadata. 

A Screenshot Of Selecting The Post Info Option

Here are the settings that I use: 

A Screenshot Of Editing The Post Info

Plus, I used the Style options to make the design fit the rest of the page. Be sure to do the same. 

4. Set Up the Post Body

After the post head, it’s time to create the body of the page. If you want this part to have a different design than the head, it is an option to set up a new section for it. However, I keep it simple, so there is no need to do that. 

The first thing we want to insert is the featured image. For that, you can place the widget of the same name under what is already on the page. 

A Screenshot Of Setting Up The Post Body

I basically did not change any of the settings but just left everything as is. 

Then, it’s time for the post content. Here, too, you have a corresponding block. 

A Screenshot Of Adding A Content Block

You will notice that for both the featured image and post content Elementor automatically pulls what is already on the site. Make any adjustments to the design of the new block that you need such as playing with the typography settings.

Aside from that, that’s it. Not too much work to do here so we can move on to the final part.

5. Configure the Post Footer

In this case, we want the footer of the post to include the profile of the author, sharing options, and reader comments. To achieve this, first, we need to create a new section with two columns. To make more space for the author profile, you can set it to a 66.33 layout.

A Screenshot Of Configuring The Post Footer

After that, place the Author Box widget in the left section. 

A Screenshot Of Placing The Author Box Widget

Make sure to style it according to your needs. I added some background color, some padding, and adjusted the typography settings a bit. 

After that, it’s time to add the Share Buttons block on the right side. 

A Screenshot Of Adding Share Buttons

You can see my settings in the screenshot above. 

After this, all that’s left is to create one more single-column section underneath and drag and drop the Post Comments widget into it. 

A Screenshot Of Adding The Post Comments Widget

(By the way, if you ever have problems locating any of these widgets, just use the handy search function). 

A Screenshot Of Using The Search Options In The Editor

Make any adjustments to the comment section you deem necessary (I left it as is) and you are ready to publish. Here is the finished design: 

A Screenshot Of The Finished Design

Customize Archive Template

1. Set up Your WordPress Archive Template

By now, you already know the drill about creating new templates. The only difference is that in this case, you will choose the Archive as your template type. 

A Screenshot Of Creating An Archive Template

After that, as usual, you get a number of blocks to choose from or can also create your own from scratch. However, for archives, you pretty much only have two Elementorwidgets that are important anyway. 

2. Set the Archive Title

The first block I want to talk about is the Archive Title

A Screenshot Of Setting The Archive Title

As the name suggests, this shows the name of the archive on the page. Besides the usual settings under Style and Advanced, you can find one important option when you click on the wrench symbol under Title

A Screenshot Of Tweaking The Title Style

Here, you can switch on and off whether Elementor shows the type of archive on the page such as the part where it says Author: below. This happens via the button under Include Context

By the way, as usual, you can preview different archives by using the preview settings (Eye Symbol > Settings). That way, you can see the design for singular categories, tags, authors, and more. Just keep it in mind. 

3. Use the Archive Posts Block

The second important widget for archives is Archive Posts. This one brings all posts belonging to any archive onto a page. When you choose a pre-made template, they are already on there but you can also easily add them yourself with this block. 

A Screenshot Of Using The Archive Post Block

Let’s go over what options it gives you for customizing your archive pages: 

  • Skin – Choose to show off your posts in classic or card-style design
  • Columns – Determines the number of columns your posts are displayed in. 
  • Show Image – Switch featured images on archive pages on or off. 
  • Masonry – Display posts in masonry design or not. 
  • Image Size – The image size Elementor should use on archive pages. 
  • Title – Do you want to show post titles or not? 
  • Title HTML Tag – If so, which HTML tag should be wrapped around it? 
  • Excerpt – Include excerpts from your posts or show only the title. 
  • Excerpt Length – Determines the length of the excerpts. 
  • Metadata – Defines which post metadata is available to visitors. 
  • Separator Between – The separator symbol between metadata information. 
  • Read More – Include a “read more” link, yes or no? 
  • Read More Text – Here, you can input what you want the “read more” link to read. 
  • Badge – Allows you to add more information to posts, such as categories and tags. 
  • Badge Taxonomy – Here, you can decide what information to include. 
  • Avatar – With this, you can switch the profile pic of post authors on and off. 

In addition to the above, you have some more options. Under Pagination, you can define how archive pagination should be handled. For example, how to display it, the number of pages to include, and text alignment. 

Finally, Advanced allows you to define the message to display when a visitor lands on an empty archive. Everything else should be familiar. Just note that the Style options change according to which skin you chose.

4. Control the Number of Posts per Archive

One quick note on archive templates. To change the number of posts that appear in an archive (or on your blog page), you need to do so in WordPress under Settings > Reading

A Screenshot Of Changing The Number Of Posts Per Page

Here, simply input the number of posts you want your visitors to see and save your changes. 

Easy Theme Customization With Elementor

Customizing WordPress themes is the bread and butter of many WordPress professionals. While it usually involves a lot of coding and editing theme files directly, with Elementor that is no longer necessary. 

As you have seen above, the plugin is a full-fledged theme editor. It enables you to customize each and every part of a WordPress theme from its user interface. You can change the site header, footer, page and post templates, archive templates, and more, quickly and easily. 

What’s more, you can create detailed conditions for where the different theme parts show up. Whether that’s sitewide, for a single taxonomy, a single page, or any other use case, you can think of. It’s definitely easier than coding conditions by hand. 

Plus, thanks to the ability to use dynamic content and preview any part of your site, you can implement all customizations in true what-you-see-is-what-you-get fashion. 

In short, Elementor makes customizing your WordPress theme way easier. Instead of laboriously making changes with dozens of files and hundreds of lines of code, you can swiftly do it all in one place.