Table of Contents
About the author: Alan Kaler, Elementorist @ Elementor
Alan is an expert Elementorist at Elementor and a WordPress Magician who thinks that the three most beautiful words in our language are: I told you
One of the things that makes Elementor so versatile is that the built-in widgets are really just a starting point for what you can build with Elementor. With a few tweaks and some creativity, you can expand on a widget’s default settings and achieve even more interesting designs and better results for your website.
So what’s one example of this type of creative use? Well, you could use the Tabs widget in a different way to create a great-looking testimonial section (this will be my next post – don’t miss it!).
But in today’s post, I’m going to focus on another widget — the Nav Menu widget. You might’ve already used the Nav Menu widget in the header or footer of your site, as it’s what most people use to create their website navigation. But with some creativity, your site can also benefit from using the Nav Menu widget in other spots, which is what we’re going to do in this post.
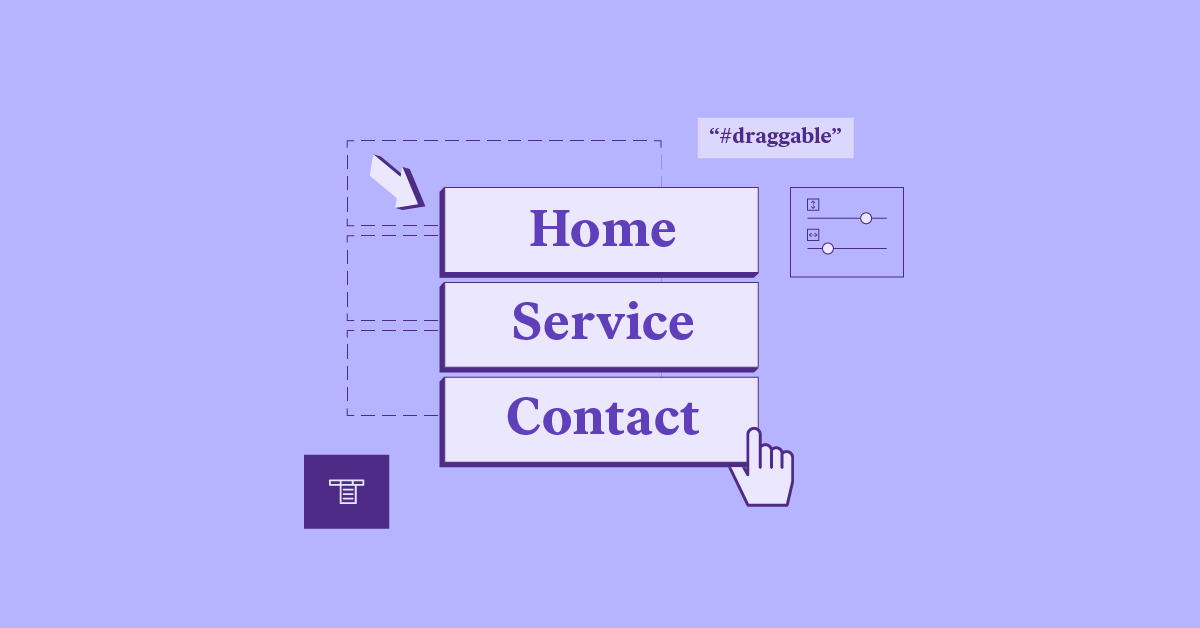
Specifically, I’m going to show you how to use the regular Nav Menu widget to create an engaging draggable navigation menu for your visitors. You can check out what the end result looks like in the example below and keep reading to learn exactly how to set it up:
What Is a Draggable Navigation Menu?
A draggable menu looks just like a regular menu at first glance. However, the key difference is that it allows visitors to move it by clicking on it and dragging it anywhere within the viewport.
You can place the draggable menu anywhere on your site, and you’ll also have full control over exactly which items show up in the menu.
For example, you could use it as an interesting way to showcase links to your individual portfolio items on a portfolio page. Or, if you have a WooCommerce store, you could use it to drive traffic to different categories of products, which is what I’ve done for the example above.
Here’s another creative example of a draggable menu, featured in Codrops:

The Benefits of Using a Draggable Navigation Menu
A draggable navigation menu can help you both create a more visually-engaging experience with its unique effect and also improve the utility of your site by making it easier for visitors to find content.
Here are some of the benefits that you can achieve with a draggable navigation menu:
- Create a more striking, eye-catching element to guide your users where to click.
- Highlight important content to drive users toward it and generate more sales.
- Improve your brand perception by creating an interesting, memorable design.
- Reduce support burden/lost revenue by making it easier for users to reach their goals.
- Increase user satisfaction by creating a better, more easily-navigable web experience.
- Lower the bounce rate on your site by making it easier for users to find content.
How To Create a Draggable Navigation Menu With Elementor
Now, I’ll get into the fun part — how you can create your own draggable navigation menu for your WordPress site using Elementor and Elementor Pro.
To set this up, you will need to use some JavaScript, so this tutorial is a bit on the technical side. However, I’ll give you all the code you need and show you every step, so you should be able to follow along with this tutorial no matter what level of knowledge you’re at.
In total, here’s everything that you’re going to need to create your draggable menu:
- Elementor Pro – you need this so that you can access the Nav Menu widget.
- One page that you create with Elementor – this is where you’ll include your draggable navigation menu. You could either add it to an existing page or create a brand new page.
- One WordPress menu – this controls the navigation items in your draggable menu and you’ll create this using the native WordPress menu area (Appearance → Menus).
- Three to four background images for your menu – these are optional, but having background images makes for a more interesting aesthetic (as you can see in the example above).
- Some JavaScript code – I’ll provide the exact code in the tutorial – all you need to do is copy and paste it (and I’ll also explain how you can tweak it by modifying the parameters if needed).
With respect to the JavaScript code, we’re going to use the jQuery UI library. This library is a curated set of user interface interactions, effects, widgets, and themes that are all built on top of the jQuery JavaScript library.
Ready to get started? Keep reading to learn how to put all of those elements together to create your menu.
1. Create a Regular WordPress Menu
To get started, you need to create a regular WordPress menu to house the navigation items you want to include in your draggable menu. This lets you separate the items in your draggable menu from your existing primary navigation menus.
In your WordPress dashboard, go to Appearance → Menus and create a new menu. Then, add the menu items that you want to include in your draggable menu. Below, you can see how I’ve configured the menu that I used for the demo above:

2. Create a New Page and Edit With Elementor
Once you’ve saved your menu, create a new page (Pages → Add New) and then select the option to Edit With Elementor. This is the page that’s going to include your draggable menu.
3. Create a Full-Width Section
Once you’ve launched the Elementor interface, create a new one-column section. Then, open the section’s settings and make the following configurations in the Layout tab:
- Content Width: Full Width
- Height: Fit To Screen

While working here, you can also optionally set a background, insert a header, or add any other elements that you want to go along with your draggable menu. Or, you can always come back here later after you preview how your menu works.
4. Create an Inner Section
Next, create an inner section in your full-width section by dragging in the Inner Section widget.
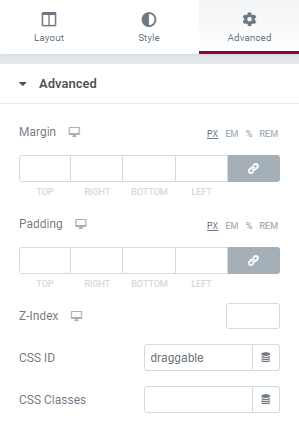
Then, open the settings for the column inside your Inner Section widget and set its CSS ID equal to draggable. To do that:
- Go to the Advanced tab of the column’s settings.
- Enter draggable in the CSS ID setting.
It should look like this:

5. Add the Nav Menu Widget
Now, drag the Nav Menu widget into the Inner Section widget that you just created (remember – you need Elementor Pro to access the Nav Menu widget).
In the Nav Menu widget’s settings, use the Menu drop-down to select the WordPress menu that you created in the first step.
Then, you can use the other settings to style the Nav Menu widget according to your preferences. For some more guidance here, check out our guide to designing a custom navigation menu and our Monday Masterclass on navigation menu design.
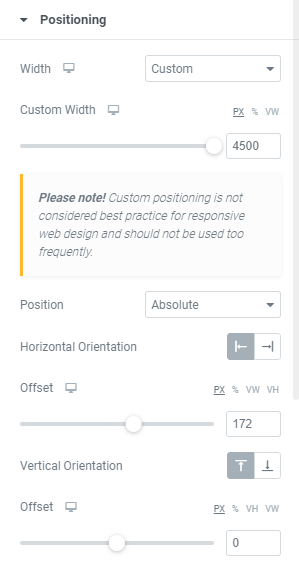
Once you’ve made your choices, go to the Advanced tab of the widget’s settings, and open the Positioning settings. Configure them as follows:
- Width: Custom
- Custom Width – set to the maximum possible (this will vary depending on your design). The main goal here is to ensure that the menu does not break the line.
- Offset (under Horizontal Orientation): 172 px (this will also vary depending on your design).
You can leave the other settings as the defaults. It should look something like this:
6. Add the Custom JavaScript
Now, it’s time to add the JavaScript code snippet and make the magic happen. This code snippet is what turns your regular navigation menu into a draggable menu.
Create a new section underneath the main section that you’ve been working in. Then, add the HTML widget.
In the HTML widget’s settings, add the following JavaScript snippet to the HTML Code box:
					<script src="https://code.jquery.com/ui/1.10.4/jquery-ui.js"></script>
<script>
jQuery( document ).ready( function ( $ ) {
$( "#draggable" ).draggable({containment: [-2000, 0, 300, 0], axis:'x'});
});
</script>
Here’s a quick explanation of what the different parameters are doing:
containment: [-3000, 0, 300, 0], axis:’x’
These allow you to define how far users can drag the menu and along which axis it’s draggable. With this configuration, visitors can drag the menu left and right (the ‘x’ axis) between the bounds that you’ve set (e.g. -3000 and 300).
Here’s exactly what each number means:
[containment.left, containment.top, containment.right, containment.bottom]
Axis x= horizontal
If you want, you can edit the numbers to match your unique situation. Or, you could even get creative and change the axis to ‘y’ if you want to create a vertical draggable menu.
And that’s it! Save your page and preview it in your browser to see the effect in action.
Create a Unique Navigation Experience
With Elementor, the default widget behavior is just a starting point for what you can do with your designs. With some tweaking, you can take even simple widgets and turn them into eye-catching showpieces, which is part of what we try to teach you here on the Elementor blog. For example, in September, Roy showed you how to create a sticky sidebar menu with Elementor, another unique twist on a navigation menu.
In this post, you’ve learned how to take the regular Elementor Nav Menu widget and turn it into a visually-appealing and user-friendly draggable navigation menu. Give this technique a try in your next design and let us know how it works.
Looking for fresh content?
By entering your email, you agree to receive Elementor emails, including marketing emails,
and agree to our Terms & Conditions and Privacy Policy.


