By now, you know how to install WordPress, and customize the content within. You will likely have a theme in mind, and make a selection of plugins to install. At this point, you need to put the pieces together, and launch your site.
Over the next few sections, this lesson will tie together everything we’ve talked about in the previous few. By the end, you’ll have a live site ready to roll!
1. Define the Structure of Your Site
Before you get into the creative process, you need to figure out what your site will consist of. In other words, you have to build the structure and hierarchy of your content.
Before you get into the creative process, you need to figure out what your site will consist of.
You can use a paper and pen for this. Start by jotting down the pages you want to have on your site. For example:
- An About page, where visitors find out more about you.
- A contact page, to let people engage with your site.
- You should want to present your products and services if you use the site for a business.
What’s more, you also want to figure out elements such as what the navigation will contain, and the makeup of the home page. It’s a great idea to think about starting a blog regardless of whether your site is for business or not. Content marketing is a top way to find traffic, and WordPress is tailor-made for it.
2. Purchase a Domain Name and Hosting
Once you have a clear structure for your site, the next step is to choose and purchase your domain and hosting. We would start with hosting, and take the following steps:
- Research your options based on your budget and user reviews. Consider whether you want long-term hosting, how large your site may get, and more.
- When you have a few solutions in mind, dig into what they have to offer and add your findings to your notes.
- Make a final decision, but keep the renewal window as short as possible. It could be that you have different needs in a few month’s time.
As for your domain, you should first decide what the domain name will be, and which Top-Level Domain (TLD) will suit you. While .com is still a prime TLD, it’s not the only one.
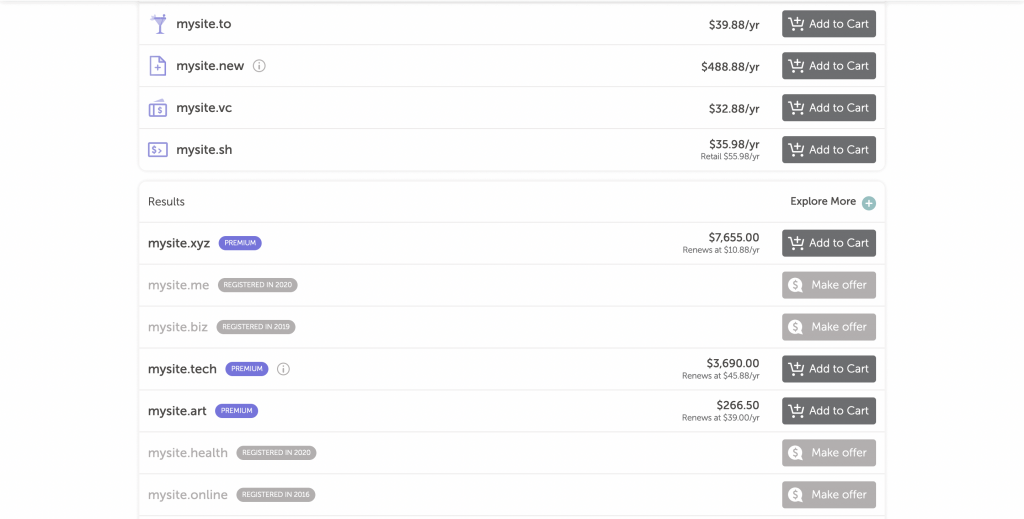
In fact, you could snatch up a few different TLDs for your domain name and redirect traffic to one of them; lots of sites do this as standard.
From here, there are a few other steps to take:
- Choose a domain registrar, such as GoDaddy or SiteGround. Base your decision on reviews as you did for your hosting.
- Add domain privacy into your package. This keeps your private information out of the public WHOIS database, and is recommended.
- Make the purchase for your domain name.
Once you have both of these in place, you should link the domain and the hosting so visitors can find your site. If you choose a combined registrar and host this should be straightforward, although most hosts will walk you through the process using a third-party registrar too.
3. Install WordPress On Your Server
At this point, you’ll need to install WordPress. The good news is that most hosts will either install it for you, or provide an ‘auto installer’. Of course, if you find that WordPress is pre-installed, this saves you some time.
Even so, using a dedicated installer is quick and simple. You’ll need to carry out the following steps:
- Find the relevant auto installer within your hosting control panel.
- Enter the basic information for your site, such as its domain name, and decide on some basic site settings.
- Choose login credentials for your new site.
From here, you can click the button to install WordPress and wait for the job to complete.
4. Create the Key Pages and Elements of Your Site
It’s now time to develop your site. There are a few aspects you need to consider:
- The posts and pages your site will contain. For this, refer back to your list from earlier.
- A dedicated home page, in order to have somewhere for your visitors to land.
- Your menus, and at the very least primary navigation. You also want to consider whether your header, footer, and sidebar need additional menus. In lots of cases you could create a menu for social media, or other relevant links.
Both the screens to create new posts and pages will be within the left-hand sidebar:
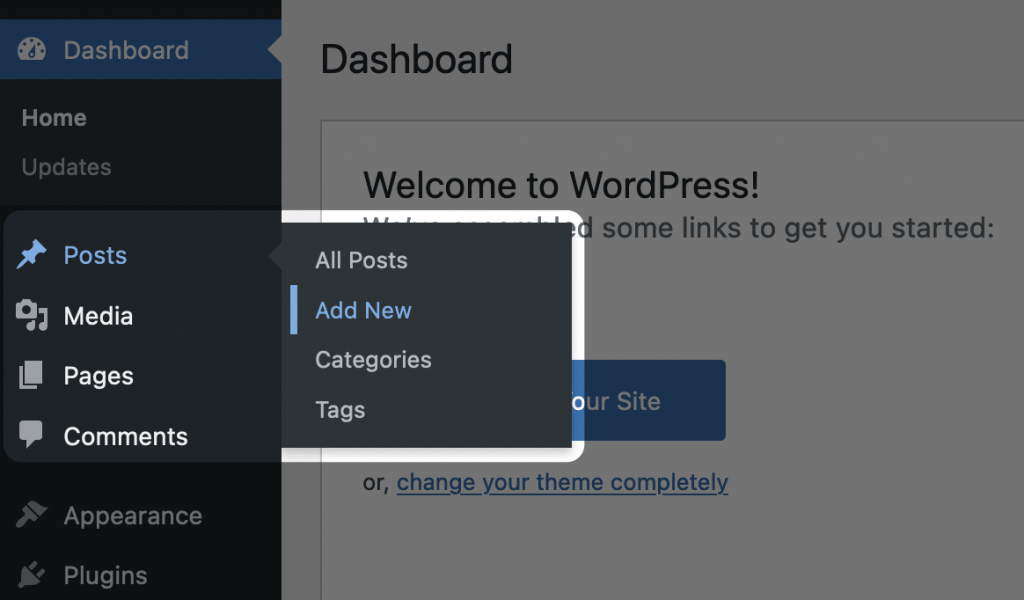
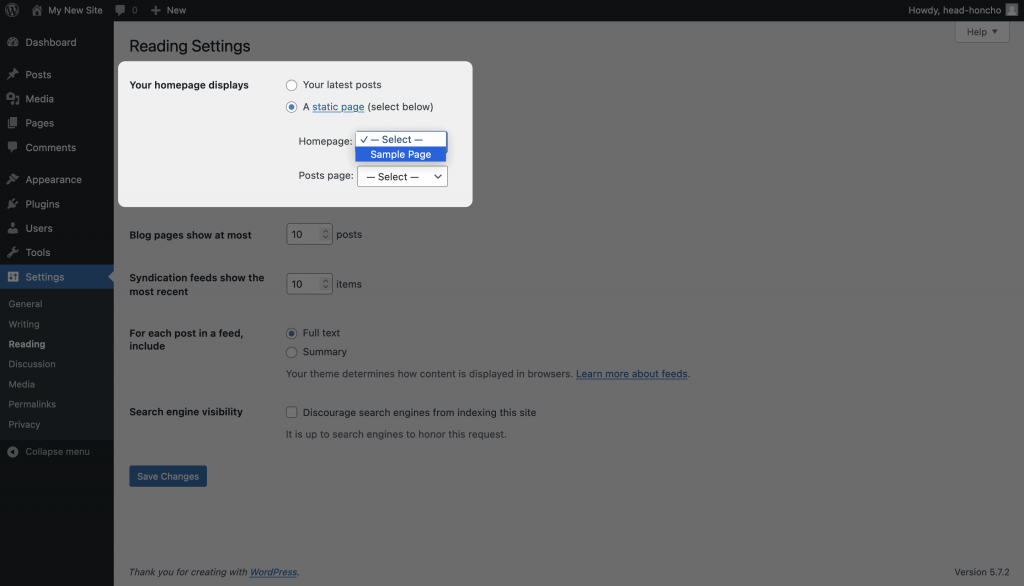
Most of your site’s structural content from earlier will be pages. Content marketing will often consist of posts. Your home page will be a page too, although you’ll need to set this within the Settings > Reading screen to see it:
You’ll create menus within the Appearance > Menus screen. We recommend at least four menus: Primary navigation, a footer menu, a sidebar menu, and a social links menu.
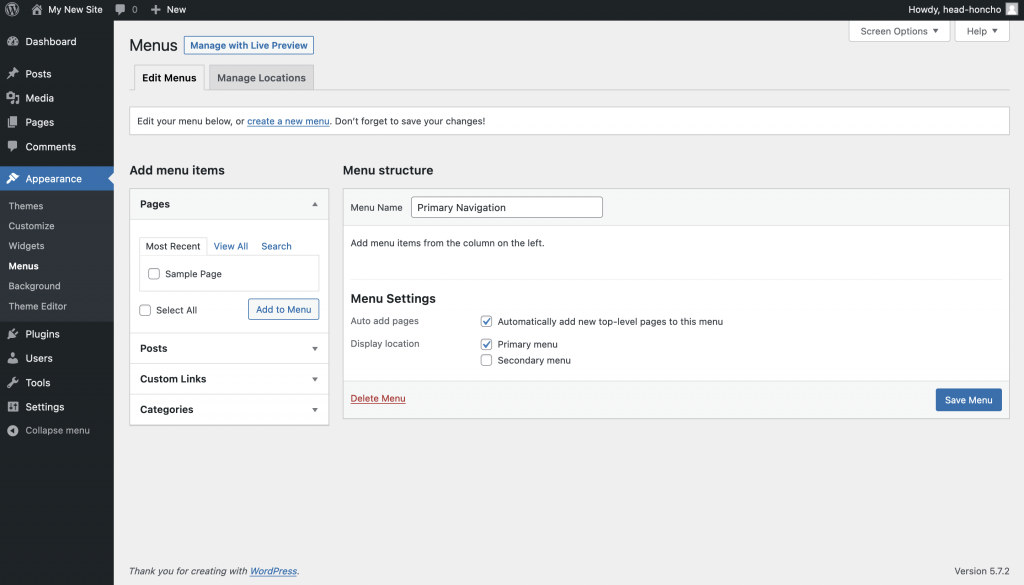
Of course, if your site doesn’t have a sidebar, you can skip that specific menu. You won’t know this for sure until you choose your theme.
5. Find the Perfect Theme
Once your site has the right foundations, you need to make sure it’s decorated. For this, you turn to your theme. You can think of this as a ‘skin’ for your site that deals primarily with its visuals. Though, it’s not restricted to the look of your site: lots of themes can also offer functionality too, if it’s inherent to what the theme offers.
You can think of themes as a ‘skin’ for your site, lots of themes also offer added functionality.
The first place to look is the WordPress Theme Directory:
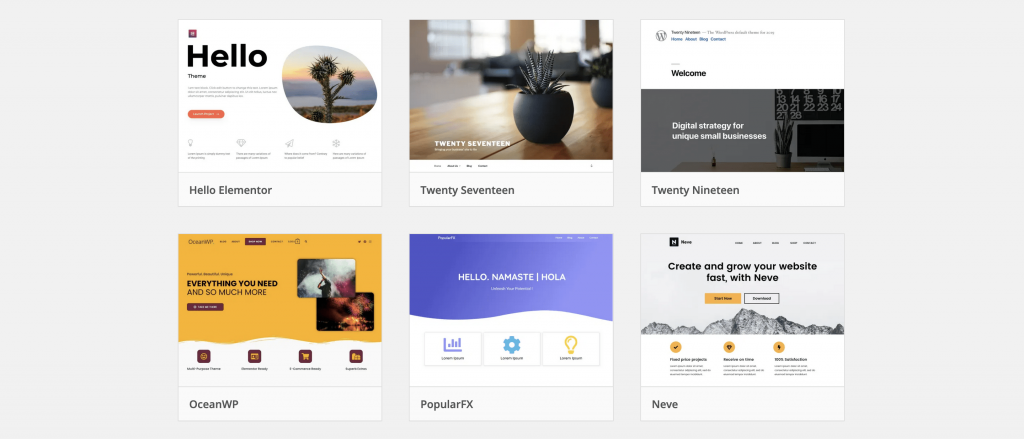
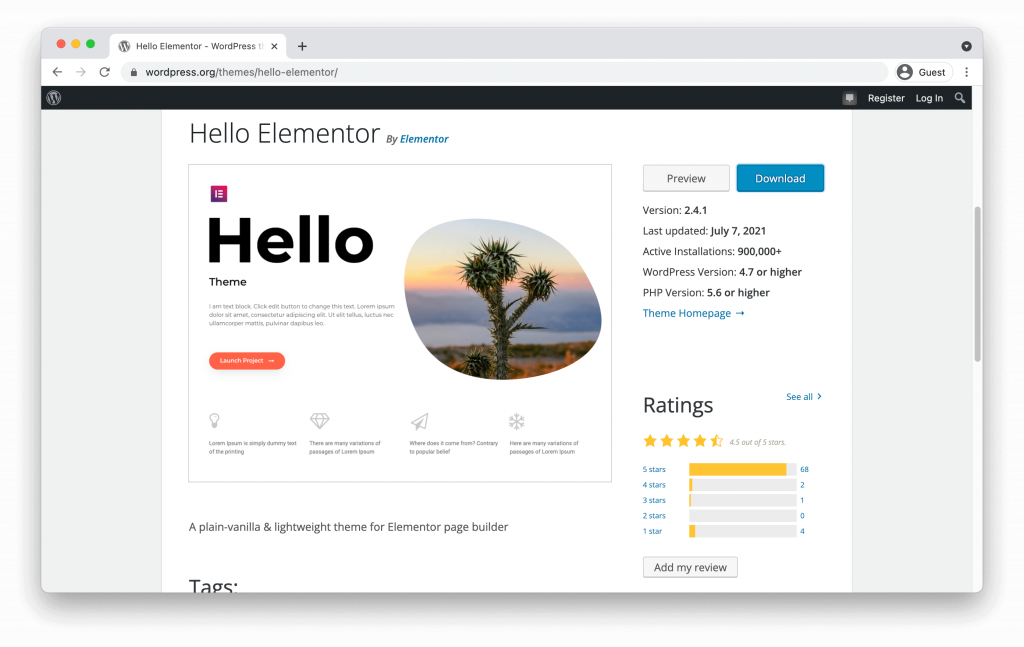
This is a collection of thousands of free themes, all vetted by WordPress’ dedicated community team. For example, you can find the Elementor Hello Theme here:
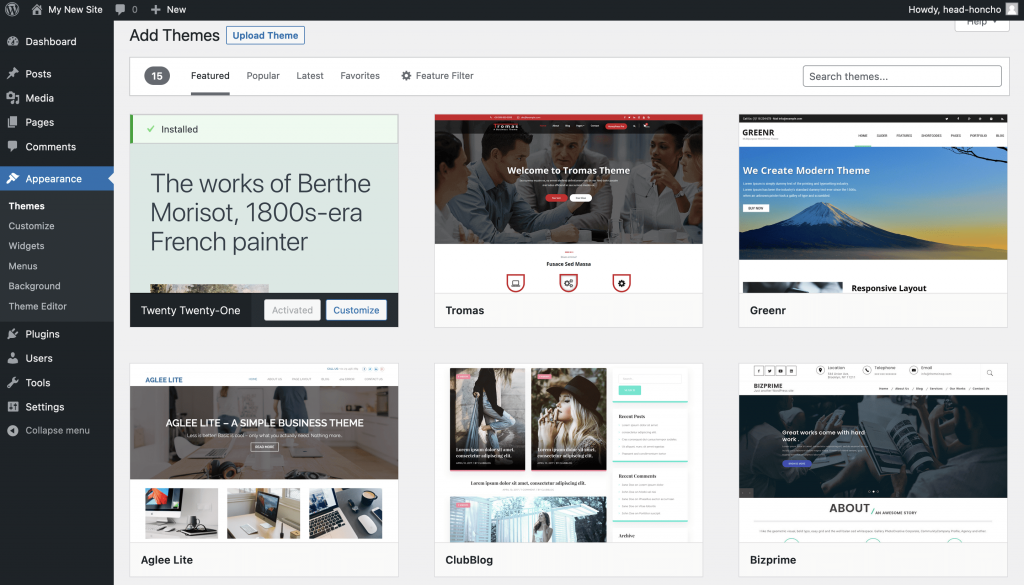
You can browse the entire collection, preview themes, and install your choice direct from the Appearance > Themes screen – once you click the Add New button, you’ll come to the Theme Directory:
If you’re looking for more features and functionality, greater support, and much more, a premium theme is a good idea. You can expect to spend around $50–100 on a theme, and a professional site will benefit from the quality of a dedicated solution.
Installing a premium theme is as simple as a free solution. You will still head to the Appearance > Themes screen and click the Add New button, though this time you’ll click Upload Theme:
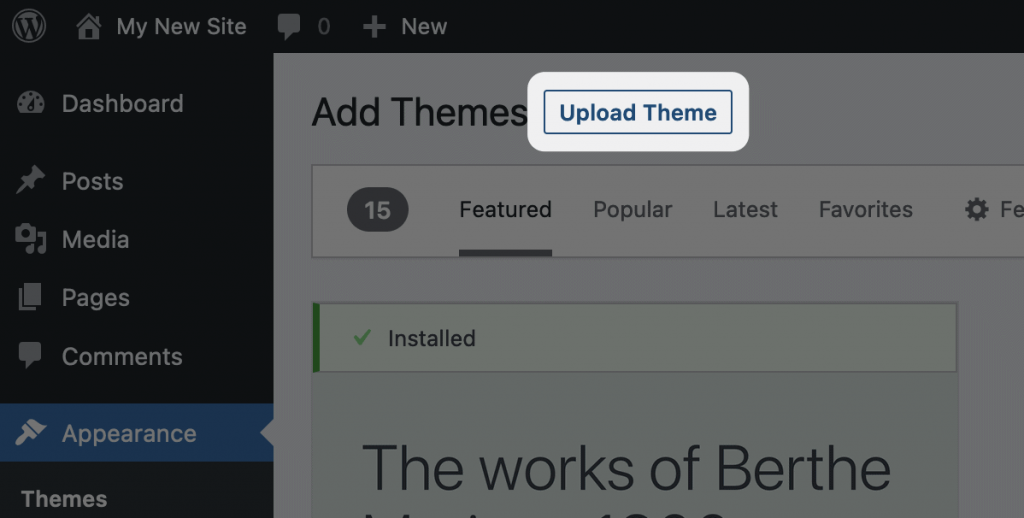
A premium theme often comes as ZIP file, and you’ll upload and activate it here. Once you’ve done so, you can use it just like any other theme.
6. Install the Plugins You’ll Need to Enhance Your Site
Just like your theme, you’ll also need plugins. Lots of these are essential, as they cover functionality such as security, contact forms, and much more. Unlike themes, the Plugin Directory is the best place to go for a suitable plugin:
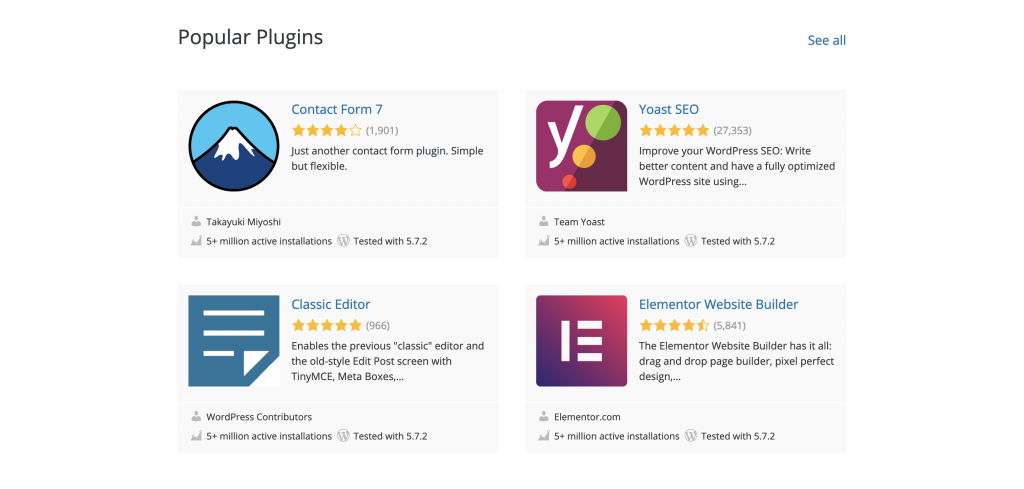
Free plugins with good ratings will often fulfill your needs, and also have good support from developers.
Free plugins with good ratings and reviews will often be suitable for your needs, and will also have good support from developers. What’s more, there’s often an upgrade path to premium solutions if you need the extra features. For example, Elementor has a free version of the page builder within the Plugin Directory:
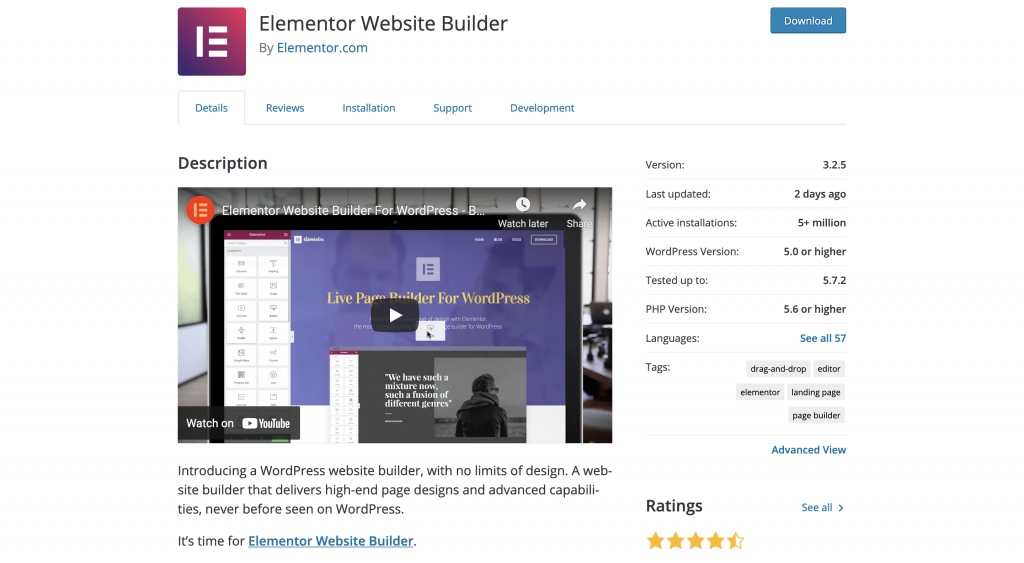
There is also a premium upgrade available that offers more templates, features, functionality, and support.
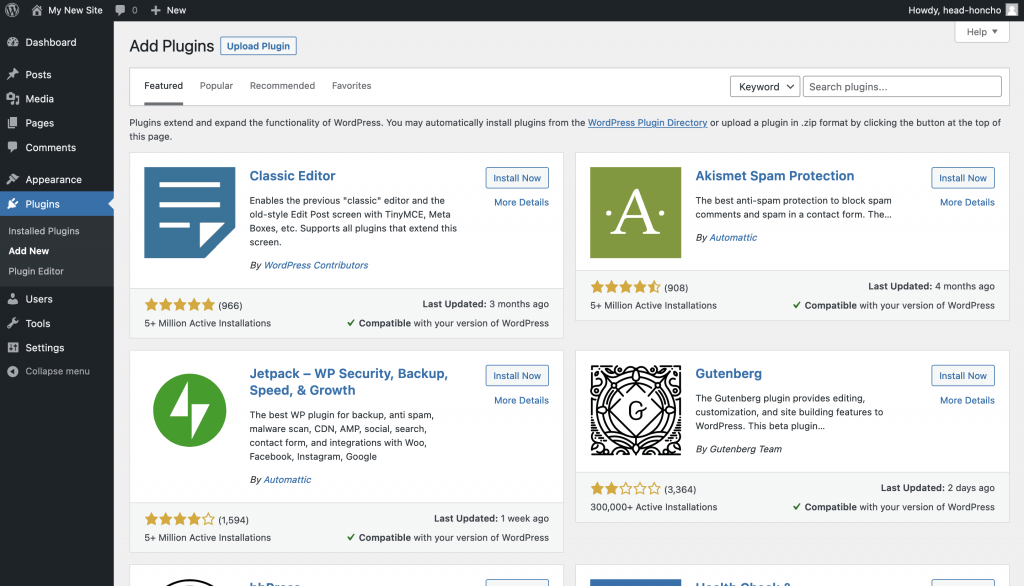
You can install plugins in a similar way to themes – this time through the Plugins > Add New screen:
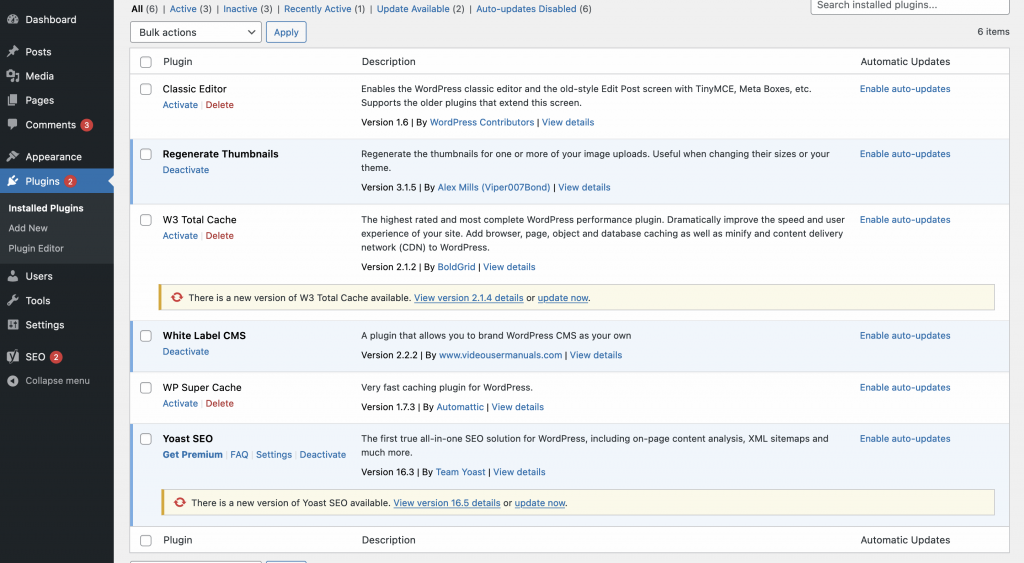
Once you’ve installed and activated the plugins you need, you can see a list of them within the Plugins > Installed Plugins screen:
At this point, you’re almost done. Your final step is to work to make your site the best it can be.
7. Carry Out the Final Customizations to Your Site
When you’re at a point where you want to launch your site, it’s a good idea to carry out some final checks. For example:
- Do you have all of the plugins you need on your site, in order to cover the functionality you need?
- Does every page on your site have a purpose, and match your brand?
- Check that the WordPress Settings are to your liking. Some of the most prominent settings are on the Reading, Discussion, and Permalink screens. We’ll talk more about these in detail in a later course.
- Can you send and receive emails from your dedicated domain address?
- Do all of your forms work as intended?
- Does your navigation and menus contain every item the visitor needs to get around your site?
Once you’ve answered these questions, you can officially launch your site. Owing to the fact that it’s on a live server, the public can find it, which means your site is online! As such, you won’t need to carry out any further steps to get to this point.
Instead, you’ll want to promote your site across social media, and eventually monetize it.
In Summary
Congratulations! You now have your very own WordPress website, live and ready for visitors. Though, this isn’t the end of your journey. There’s almost no practical limit to what you can achieve with WordPress and your site.
We hope you’ll join us in the next course to continue developing both your site and your WordPress skills!


