Creating your WordPress website should take time. As such, it’s important to have a local development environment on your computer. This will give you the resources of a server, within a pressure-free environment. If a Graphical User Interface (GUI) isn’t to your liking, a stack-based solution such as XAMPP is just as good. From there, you can install WordPress in XAMPP and get to work.
This lesson will look at how to install WordPress using XAMPP step-by-step. By the end, you’ll have a site up and running on your computer.
What Is XAMPP?
In a nutshell, XAMPP is a local development environment tool for WordPress. It lets you install and use a number of tools and services to run the equivalent of a web server. In the case of XAMPP:
- It’s a cross-platform tool that works on Windows, Mac, and Linux.
- The server itself is an ‘Apache’ type, and you can get other types too (such as Nginx).
- You add a MySQL or MariaDB database to hold all of your site’s information.
- XAMPP uses the PHP interpreter to understand what to do with your site’s files.
It’s a good idea to install WordPress within a local environment because you want to work without pressure. This means you won’t have to worry about elements such as your live server’s resources, security vulnerabilities relating to your unfinished site, and visitors arriving before you’re ready.
It’s a good idea to install WordPress within a local environment because you want to work without pressure.
On the whole, a local environment is the best place to build and develop your WordPress website. Over the next few sections, we’re going to show you how to get all of the elements installed and ready to use.
How to Install WordPress Using XAMPP
There are four main steps for installing XAMPP and WordPress. Once you’re ready, you can begin building your site as any other developer would. Though, your first task is to download and install XAMPP.
1. Download and Install XAMPP on Your Computer
The process to install XAMPP is straightforward. In fact, if you can download anything from the web, you’re good to go.
First, head to the XAMPP website and download the right installer for your system:
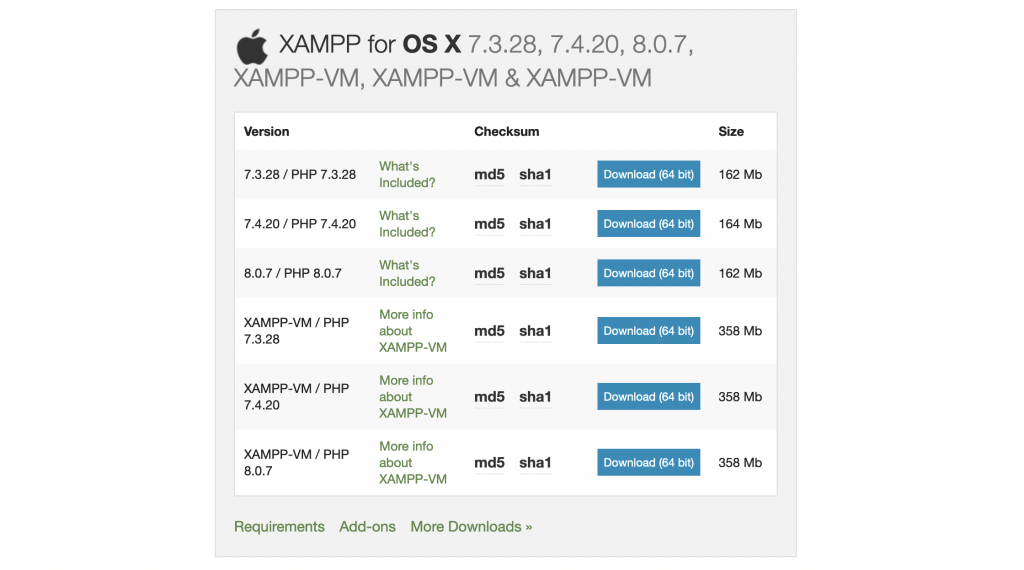
If you’re unsure which one to pick, we recommend one using PHP version 7.3 or 7.4, and not packaged with a Virtual Machine (VM).
Once the installer downloads, run it and you’ll see the Setup Wizard:
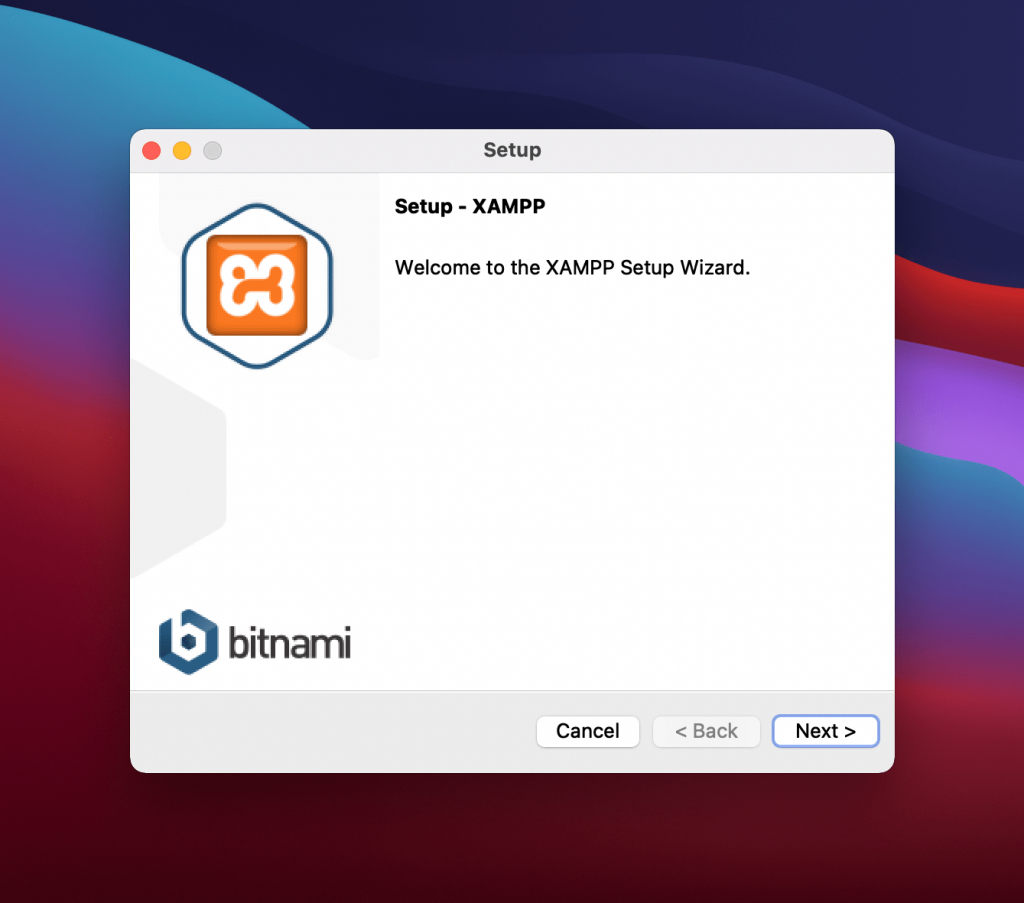
You can click Next through all of the initial screens until you get to the install process:
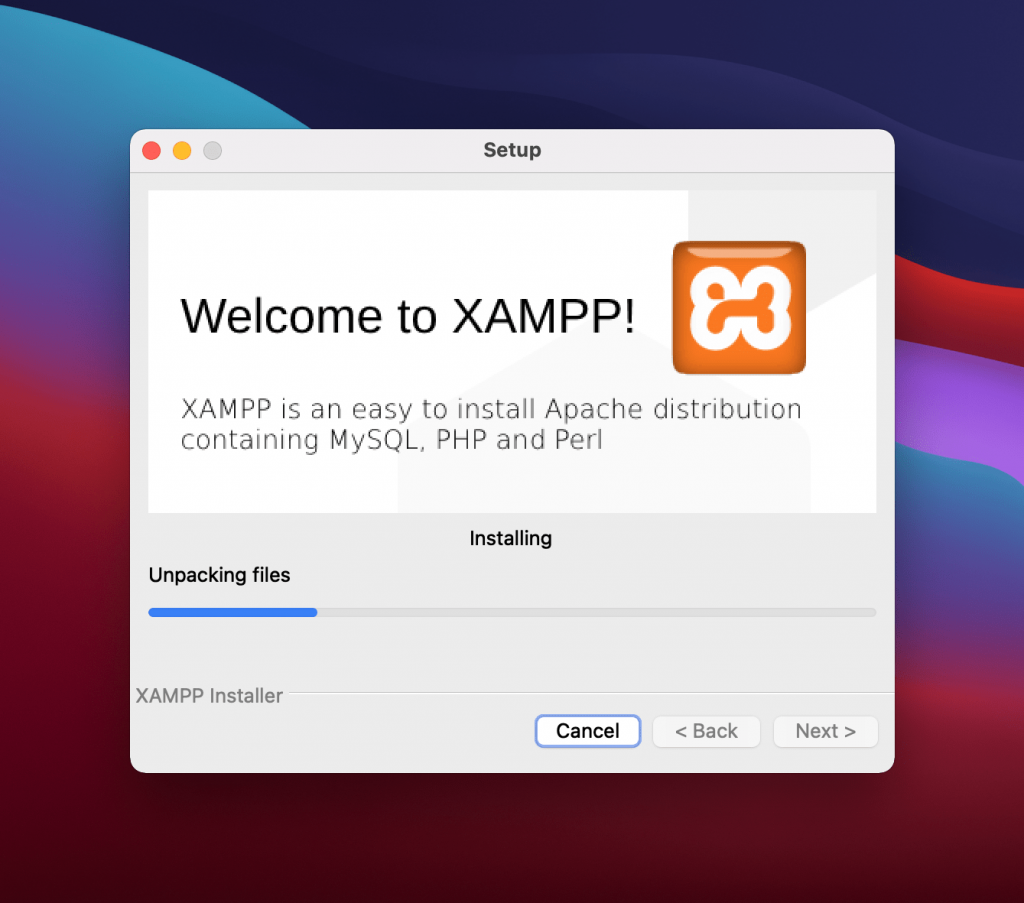
Here, wait for XAMPP to install. You may need to enter your computer’s administrator password to proceed, but this is safe to do.
Once the files are unpacked and installed, you can begin to fire up XAMPP itself.
2. Start XAMPP and Test the Connection
When you’re ready, start XAMPP from wherever your computer’s applications live. Once it’s loaded, you’ll see a dashboard waiting for your input:
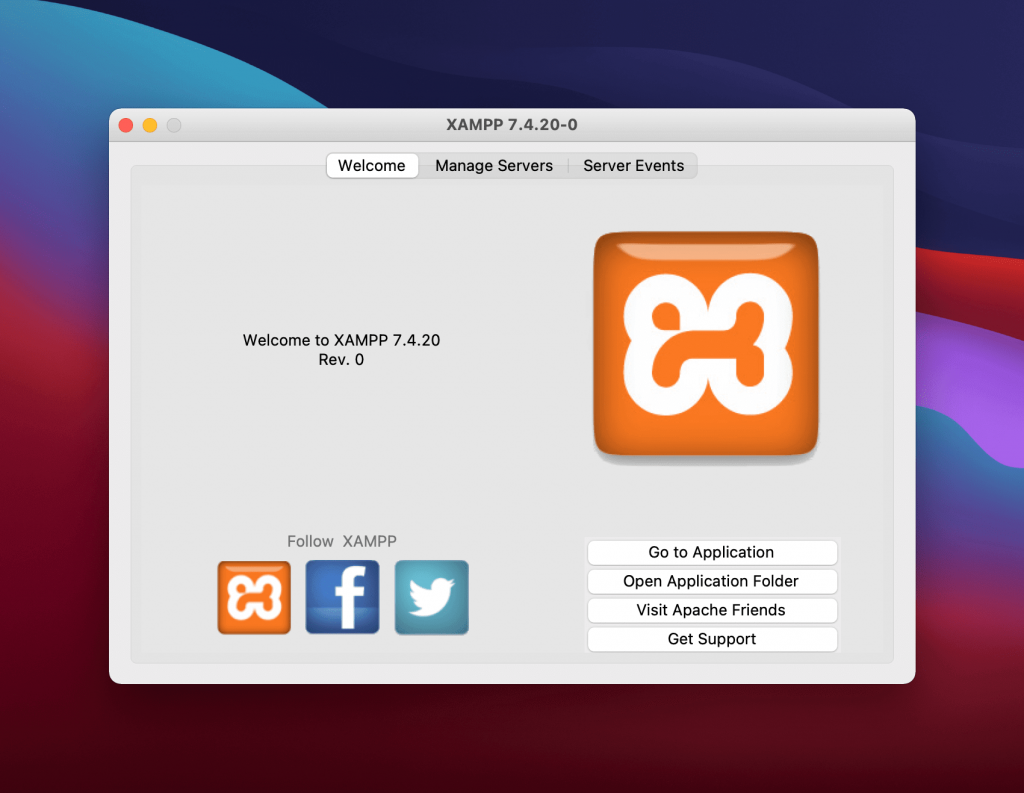
There are three tabs along the stop, and on the Manage Servers screen you can see the status of your local server:
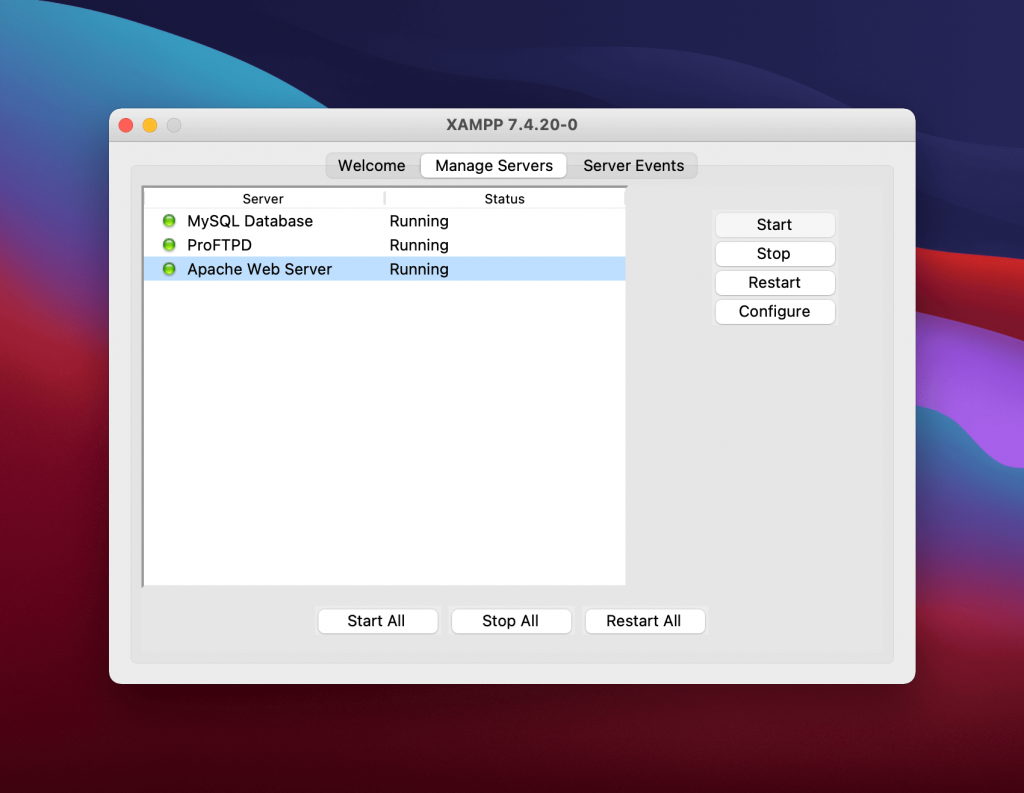
In order to run WordPress, you need to see the MySQL Database and Apache Web Server options with a green light. To do this, click the Start All button. When everything is green, head to http://localhost within your browser – you should see an XAMPP welcome page:
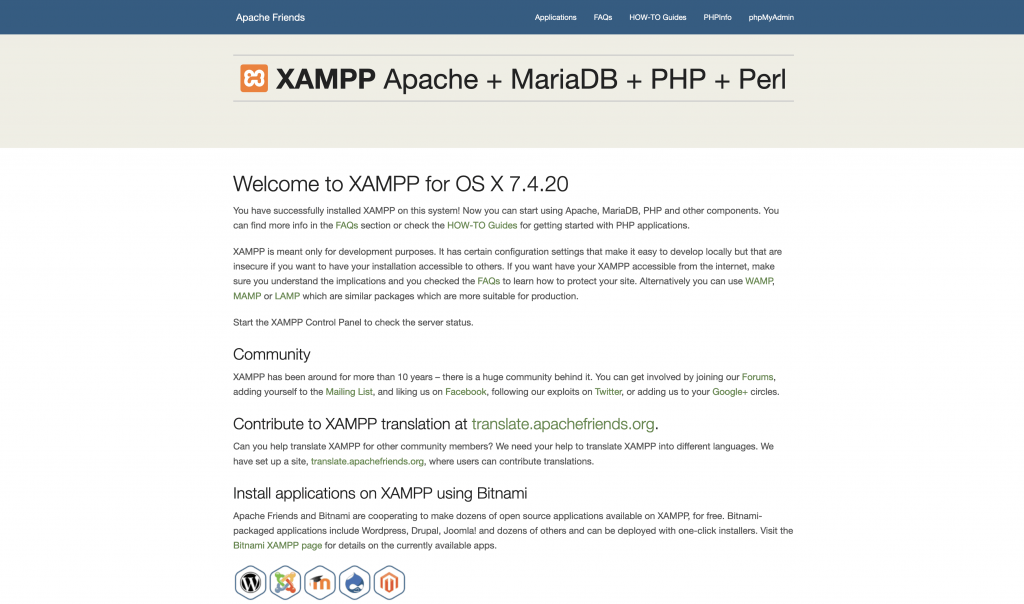
This confirms that XAMPP is running, which means you can begin to build your site’s database.
3. Create a Database for Your New Site
There are two parts to a WordPress website: the back end, and your database. The latter holds almost every piece of information about your site, so it’s an essential component.
To create one for your site, head to http://localhost in your browser, and click the phpMyAdmin link in the top right-hand corner:
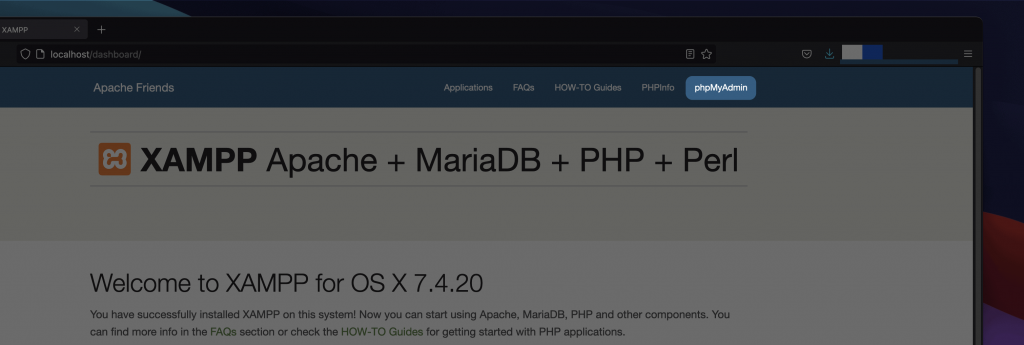
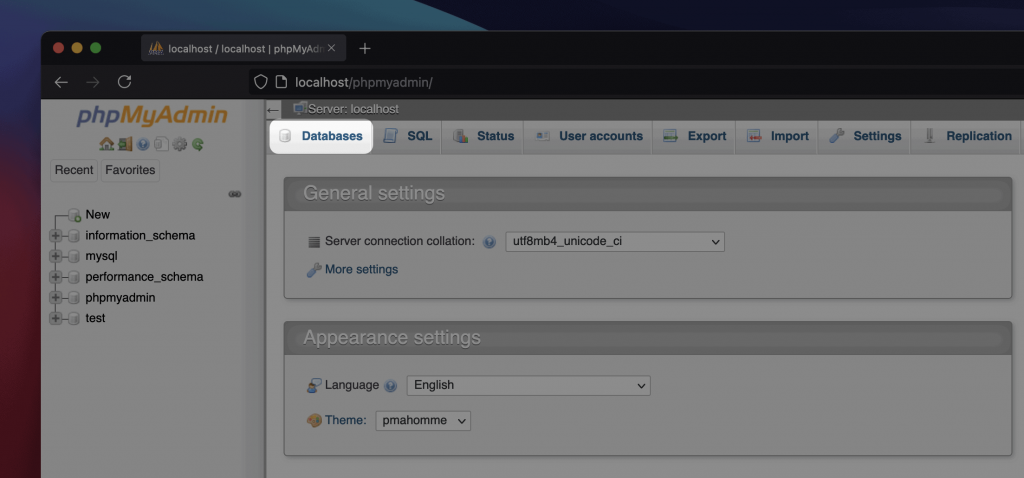
This will bring you to a screen to help you create and manage your databases. Much of this tool is beyond the scope of this lesson, although it’s straightforward to create a database. First, click the Databases tab along the top of the screen:
Next, enter a database name where it specifies, then click the Create button:
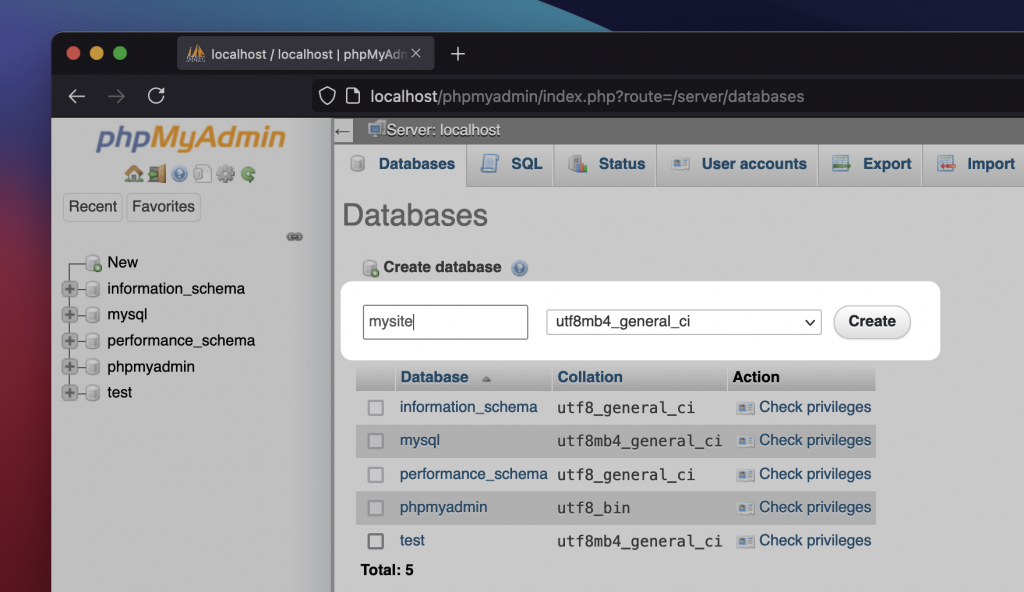
Unlike a live server, you don’t need to create a database user here, but you do need to remember the database name because you’ll need it next.
When you’re done, exit out of phpMyAdmin and get ready to install WordPress.
4. Download and Install WordPress in XAMPP
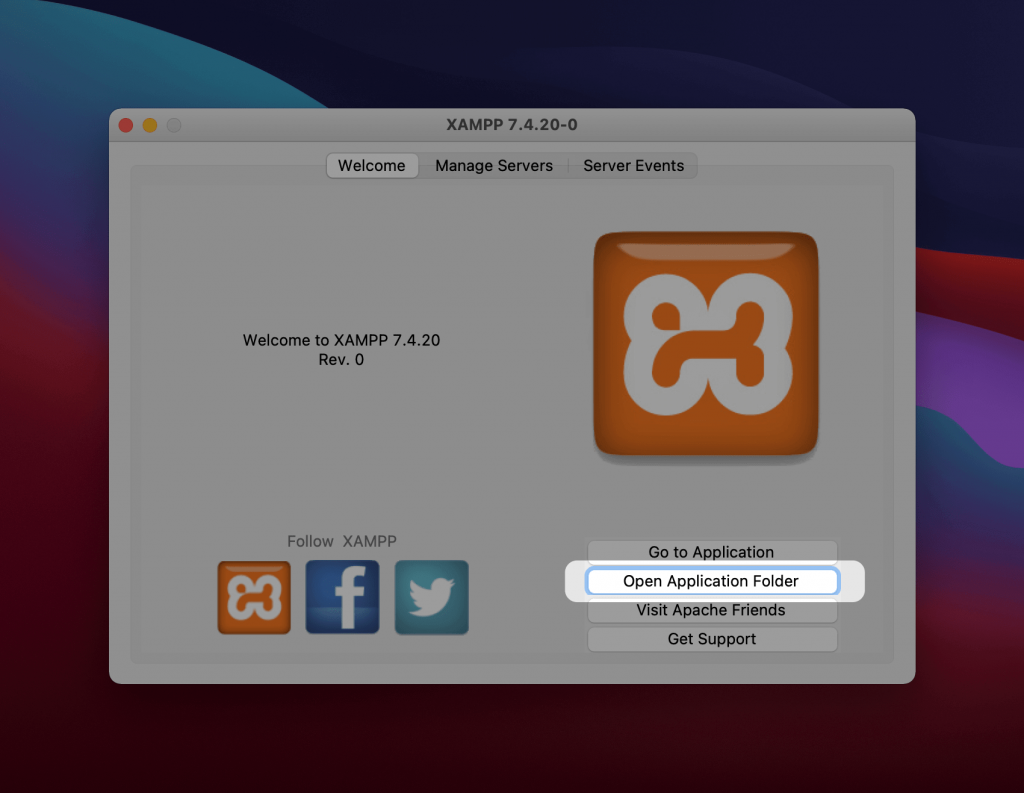
There are lots of ways to install WordPress, but when you use XAMPP, the best approach is to do so yourself. Your first job is to create a folder within XAMPP to hold your WordPress site. First, navigate to wherever you installed XAMPP. The best way to find this is to click the Open Application Folder link on the Welcome screen:
Here, look for a htdocs folder. This is where your site will live:
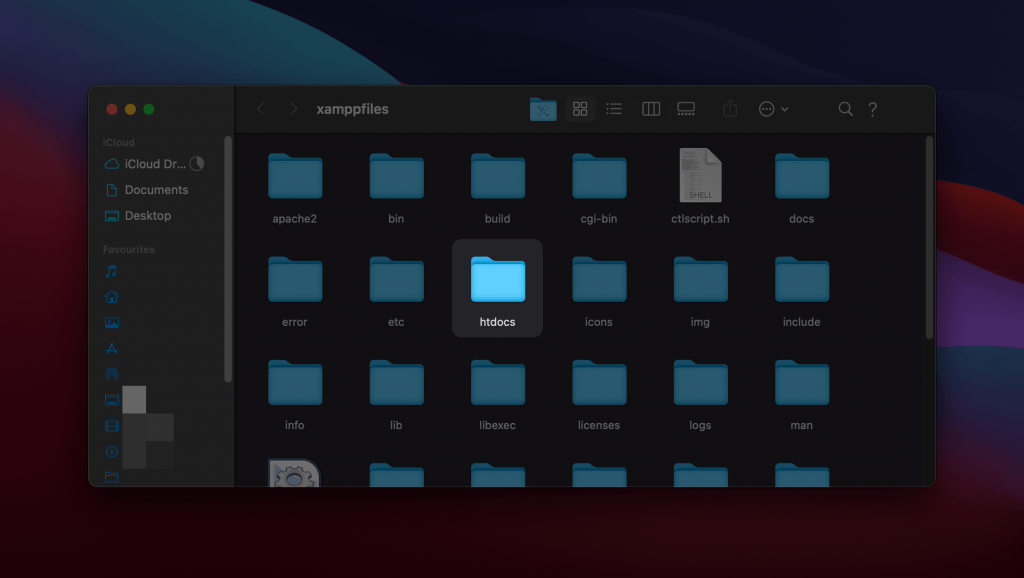
Inside, create another directory for your site. You can name it whatever you like, but we suggest something you will recognize, as you’ll need to access your site using it later.
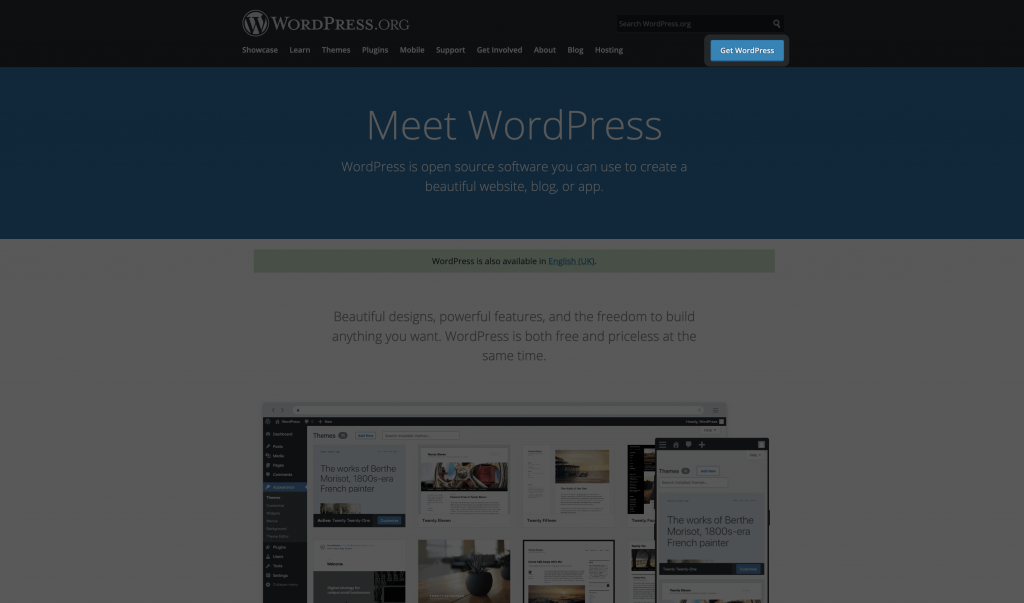
Next, head to the WordPress website within your browser, and click the Get WordPress button at the top:
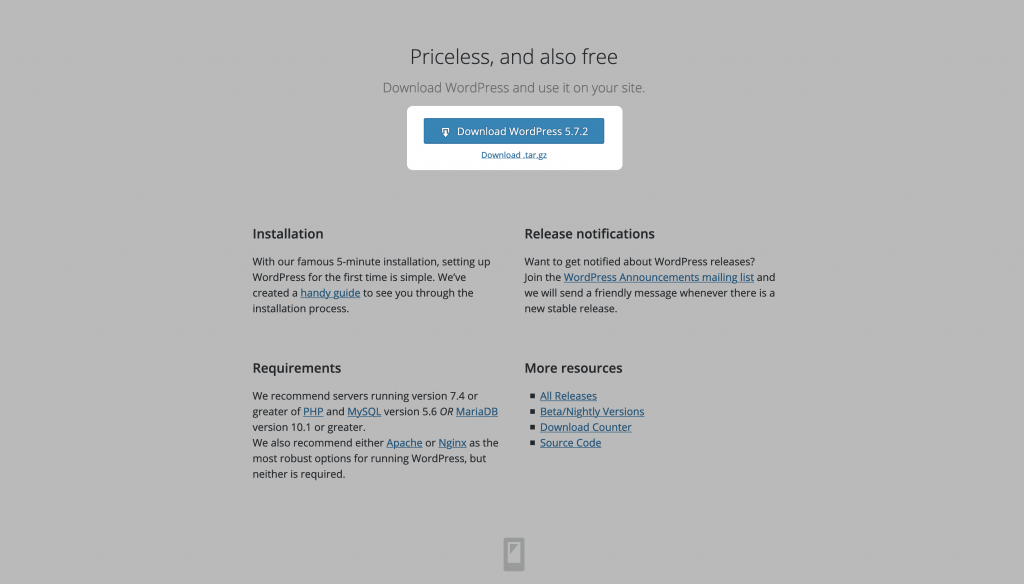
On this screen, scroll down, find the blue WordPress download button, and click it:
The process here is to extract the entire folder and move the contents into your site directory from earlier:
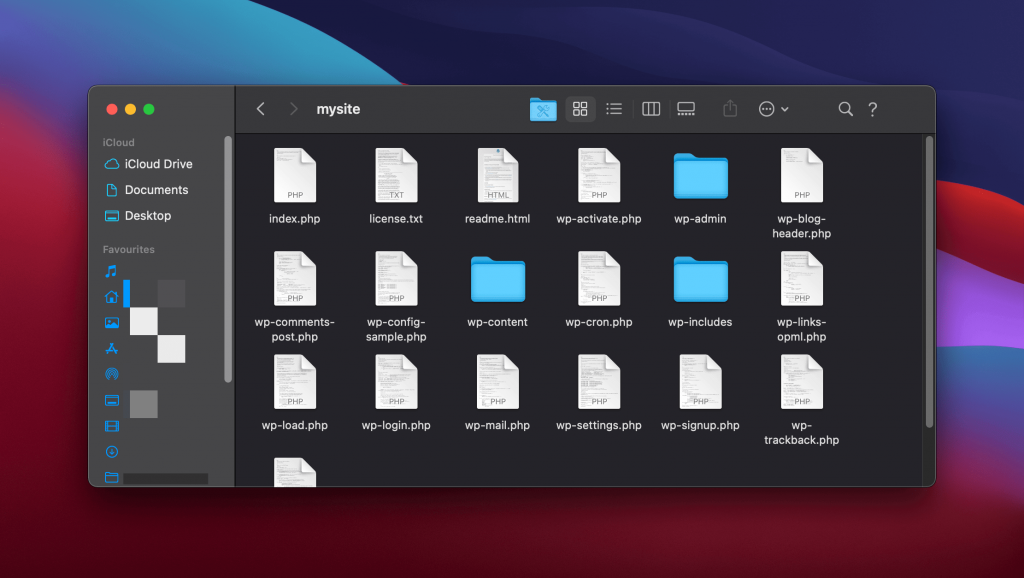
Next, head to your site’s URL within your browser. For example, localhost/mysite/wp-admin/setup-config.php. This will bring you to the infamous WordPress Five-Minute Install wizard:
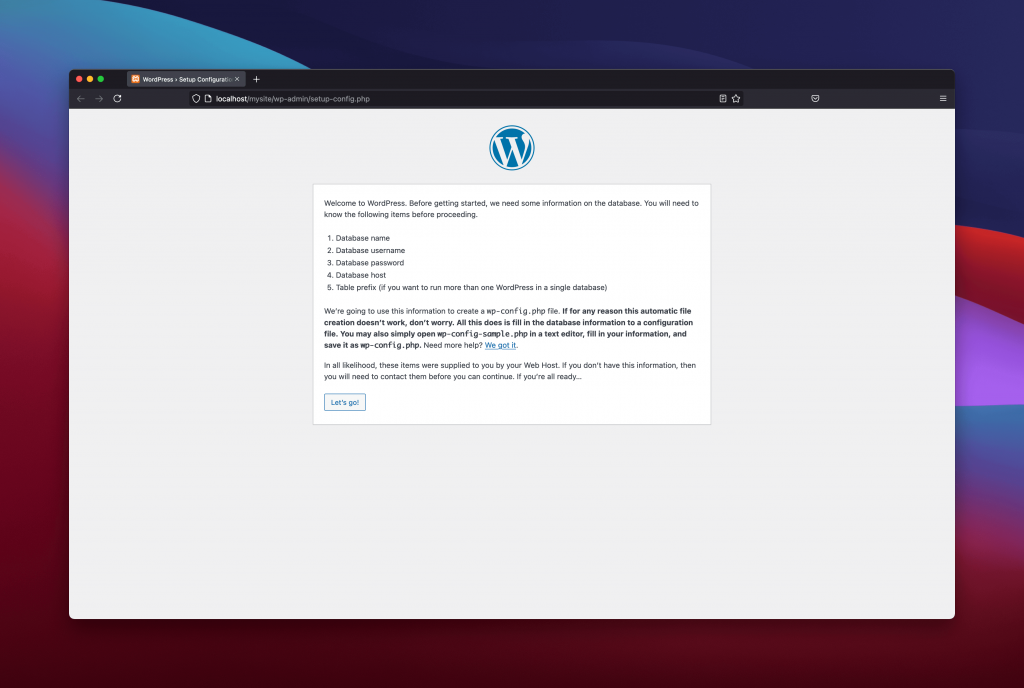
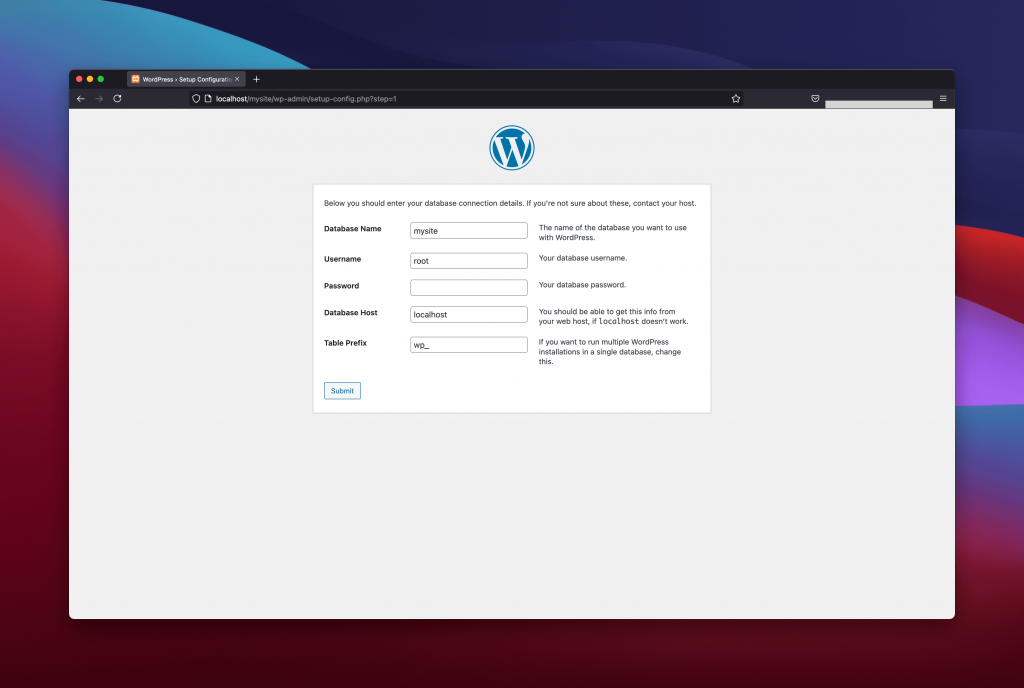
The first screen will ask you for your database credentials. Here, you enter the database name you created earlier, set the username as root, and leave the password field blank:
For the next screen, you can fill in the fields as presented – they’re relevant to your site and how you log into it:
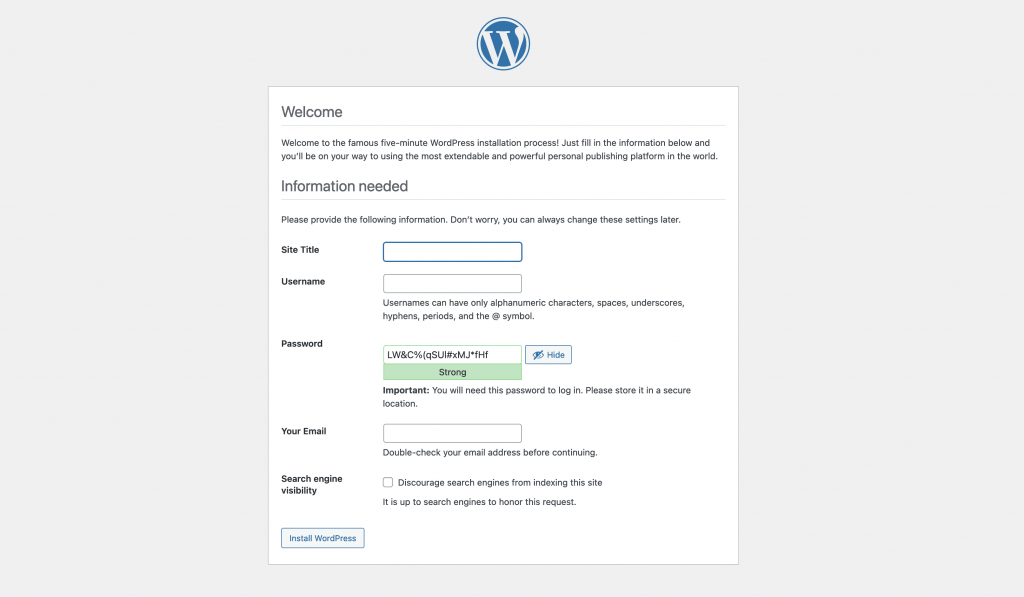
Once you click Install WordPress, you’ll see a success screen. From here, you can click the Log In link to access your WordPress dashboard.
5. Build Your WordPress Website, Starting With a Single Page
Once XAMPP and WordPress are installed and running, you’re ready to create content! The first step should be to create a single page, as this will help you learn the different aspects of WordPress.
Once XAMPP and WordPress are installed and running, you’re ready to create content!
The first screen you’ll see is the WordPress dashboard:
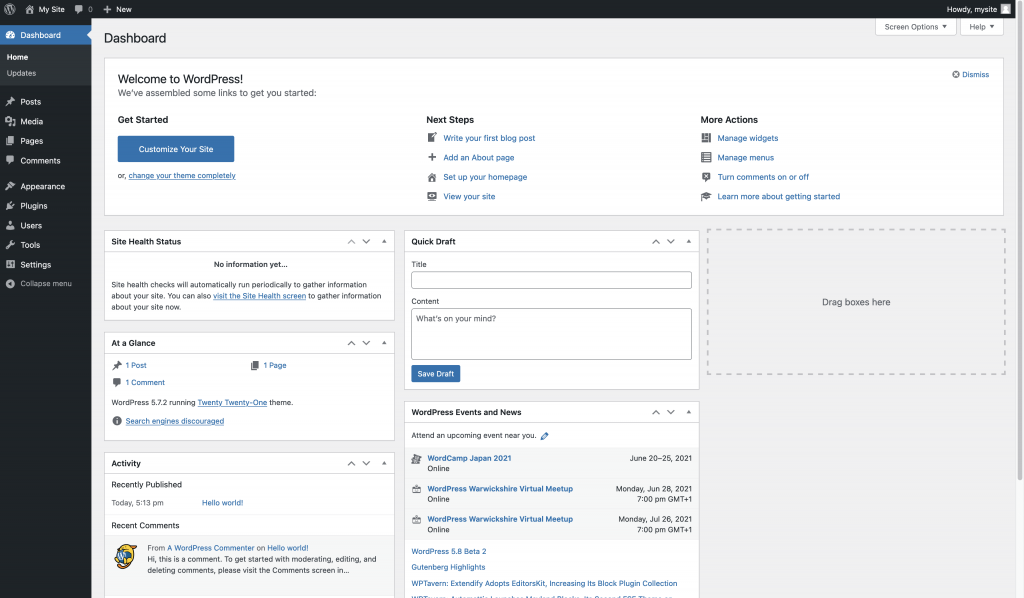
You access the different screens using the left-hand sidebar, and work with the information in the middle. Along the top is a toolbar that may look different depending on what you have installed on your system.
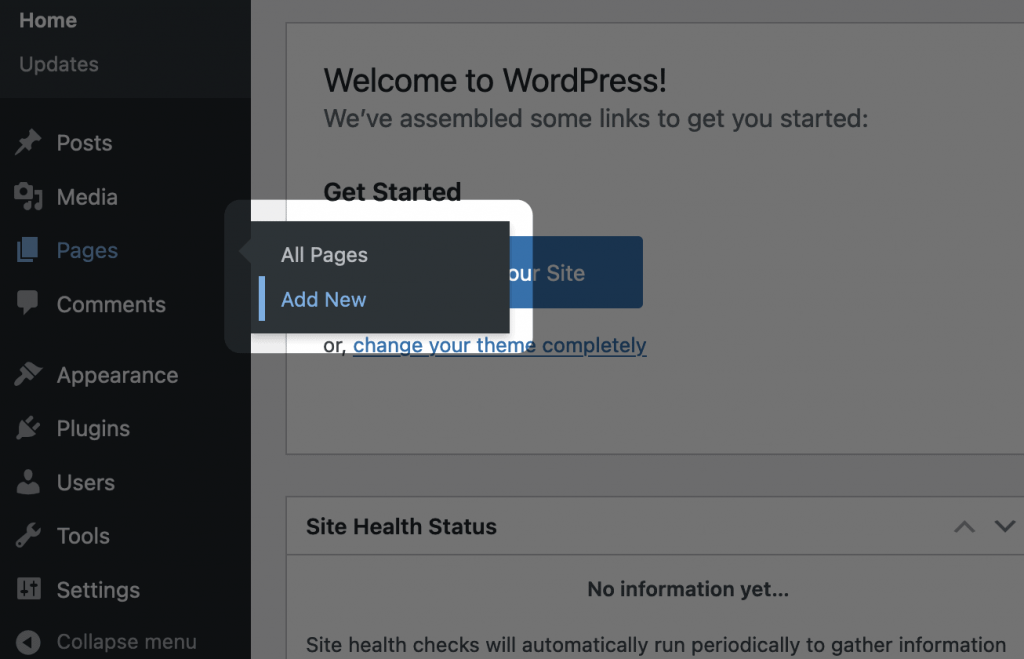
While you’re welcome to create a Post, we’re going to create a Page by clicking Pages > Add New link:
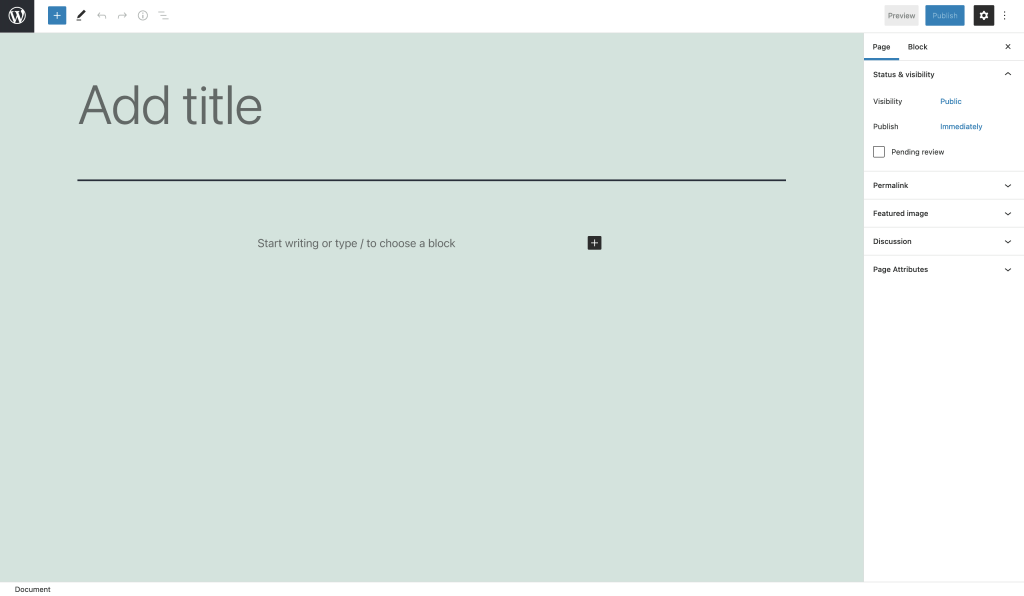
The screen will change to show the WordPress Block Editor. This is where you create your layouts and write content:
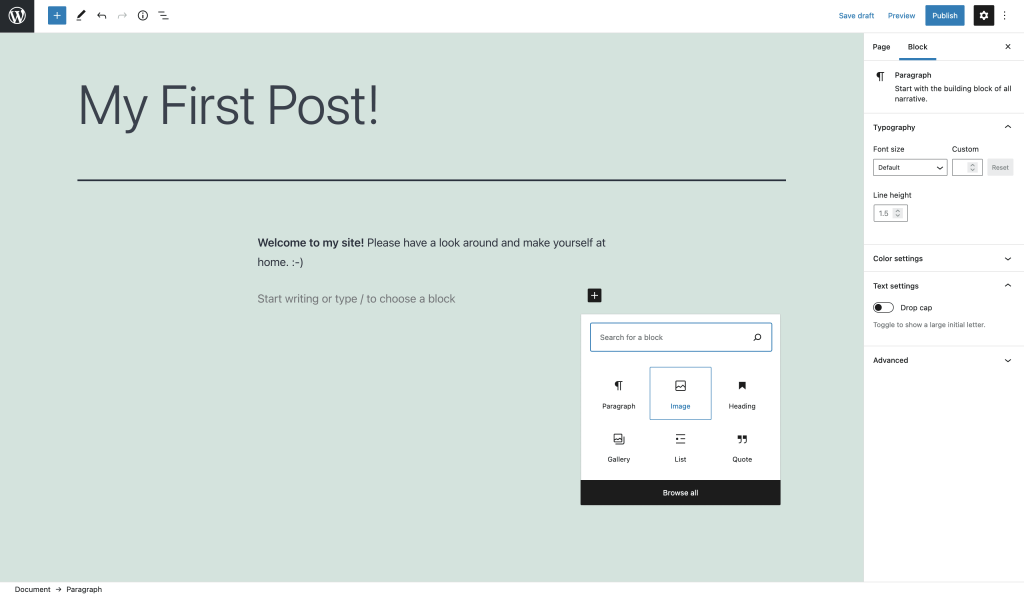
A great start is to follow the prompts and add a title and body content. From here, you can do almost whatever you want! For example, you can format text like you would in a word processor, or add Blocks to enhance the functionality of your Page:
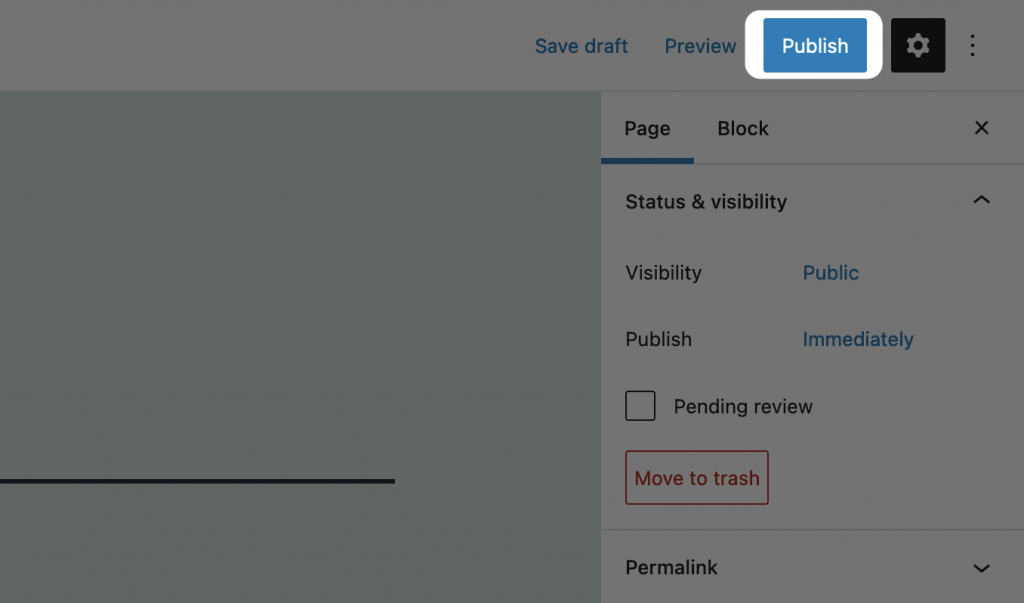
When you’re ready, you’ll want to Publish your page. You can do this using the blue publish button in the top right-hand corner of the screen:
WordPress will take a few seconds to publish your page, but you’ll then see a new link to your live page:
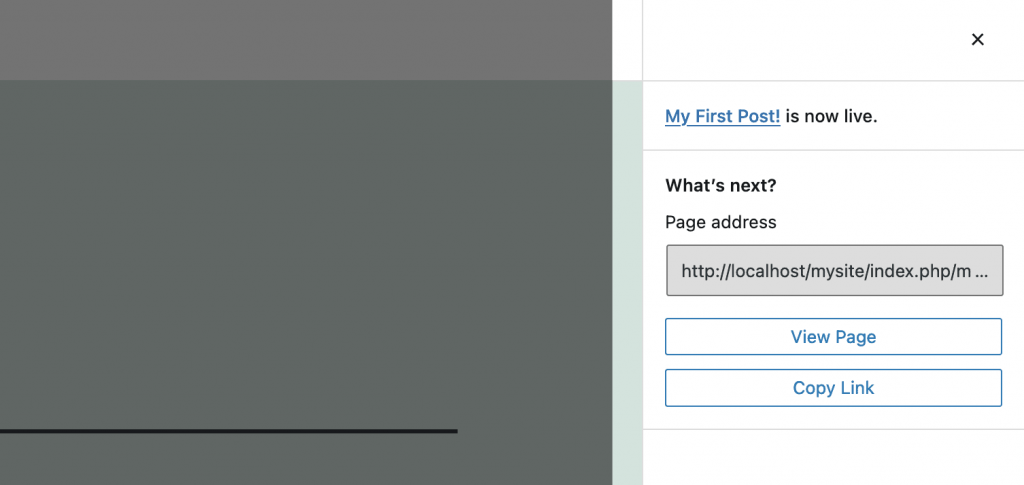
While the platform tells you the page is live, it’s only visible on your computer and not the whole internet. We’ll cover how to get your site online in another course.
In Summary
Stack-based solutions such as XAMPP make for a great way to develop WordPress websites on your computer. The entire setup process takes no time, and once you have everything installed, you’re able to create posts, pages, and the entirety of your WordPress website.
You’re almost at the end of this Getting Started course, and there’s one more lesson to go – we’ll meet you there!


