
Table of Contents
Do you want to become a successful blogger?
Is it a personal blog that you want to write, or is it to support your ecommerce store? Whatever it is, we at Elementor are here to help you.
If it’s your first time setting up a WordPress site, don’t worry. This beginner’s guide will show you how to do it in a few simple steps and make sure that your first blog is up and running in no time.
The simple steps involved:
- Signing up with a hosting provider and choosing a domain name.
- Installing WordPress.
- Writing your blog.
Step 1: Hosting and Domain Name
Assuming that you don’t have a WordPress website already, our first step will be to create a new site.
In order for you to start working with WordPress, you’ll first have to get yourself a hosting plan and a domain name.
What Is Hosting?
A web hosting service is provided by a hosting company and in essence, it is where your website will be stored. The hosting provider stores all of a website’s information on its servers.
In addition to storage, a hosting provider can also provide additional services like backup, security, support, and more, making it an essential part of having a smoothly working website.
Some hosting providers focus on blog hosting, others on ecommerce hosting. Some are better at supporting smaller clients, while others are are geared to support big corporations. So, which one would be best for you?
How to Choose a Hosting Plan?
Choosing a hosting plan really depends on your personal needs.
- How much support will you need? Some hosting providers are aimed at more experienced users, who have some technical expertise. If, however, you’re new to this and have little or no experience you might want to consider using a hosting provider with a reputation for offering great support.
- How much traffic are you expecting? Depending on the amount of traffic you are expecting, you might find that some hosting providers may are not a good fit for you. Some may not support the rate of traffic that you are expecting, while others may offer higher, or more professional level support, for a higher price.
- What server type is best for you? Different hosting providers offer different server types. For example:
- Shared Hosting. This is the cheapest type of hosting available. In a shared hosting plan, you will be sharing your server with other people. There are good sides and bad sides to this. Shared hosting is cheaper, however, you may find that there are performance issues.
- Dedicated Hosting. This is a more expensive option, where you will have your own server dedicated to your website. You do gain more support, but again, this option is more expensive.
- Cloud Hosting. Companies, like Google, Amazon and Microsoft, now offer cloud hosting, which allows for better flexibility in terms of scaling up (if you ever want to expand your site in the future), and it works very seamlessly. Prices vary, depending on your needs.
- Managed Hosting. While managed hosting may not be the cheapest, the benefits outweigh the costs. For example, with Elementor Hosting for WordPress, you not only receive an Elementor Pro license, but also benefit from Elementor’s premium support and expertise in managing technical aspects like backups, security, performance optimization, and server maintenance.
If you’d like to learn more about the different hosting options, we recommend reading this amazing article.
What Is a Domain Name?
In addition to hosting, you will be required to have a domain name. A domain name is your website’s, or, in this case, your blog’s address on the internet. For example, google.com and wordpress.com are domain names.
You’ll be able to choose a your own domain name once you sign up with a hosting plan.
How to Choose a Domain Name?
What kind of domain name would you like for your blog site? You’ve probably noticed that websites can have different suffixes (the letters on the end of a website address) like .com, .net, .info, .org, .biz, etc. They used to make a difference, but they don’t matter as much as they used to.
However, you should think carefully about how you would like your domain name to appear. Generally, the shorter the domain name, the better it is.
Make sure that it’s easy to spell and that it uses keywords (that is, the kind of words that people usually use when they search for the subject/s that you will write about in your blog).
Alternatively, if this is your personal blog, why not use your name?
Examples of Hosting Providers
Here are some good hosting providers. You can check out their plans and services, and choose the one that works best for you.
Step 2: Installing WordPress
The installation process varies from host to host. Managed WordPress hosts such as Elementor Hosting typically come pre-installed with WordPress, so you can skip this step and get started right away.
Option 1: Installing from Your Hosting Service’s Dashboard
If, for example, you’ve chosen Bluehost as your hosting provider then all you need to do is access to your Bluehost hosting account and click on the Login to WordPress button and follow their simple step-by-step guide to install and set up WordPress.
Alternatively, if your hosting provider is SiteGround, once you have signed in, you’ll be greeted by a “welcome” popup. There, select the option to install WordPress, and follow the guided steps.
Option 2: Installing WordPress From Scratch
- Go to the wordpress.org website, and download the latest version of WordPress. Once the download is complete, unzip the file.
- Create a database for WordPress on your server and a MySQL user who will have all the privileges for editing it.
- Upload the WordPress files to your server.
- Select the option to Install now and run the installation.
For a more detailed walkthrough, please check this excellent guide.
Whatever way you choose to install WordPress, once you have it installed, you can simply access its dashboard by typing your domain name followed by “/wp-admin” (e.g. if your domain name is www.johnsblog.com, enter: www.johnsblog.com/wp-admin).
Step 3: Start Blogging
Now you are ready to start writing your first post on your new blog.
Here’s a simple way to do that:
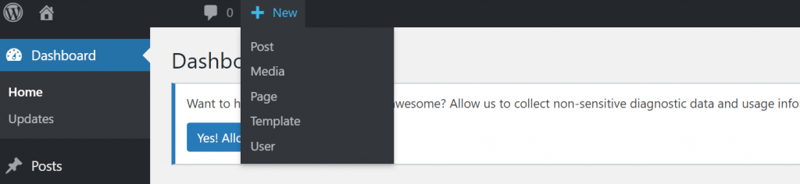
- Go to the WordPress dashboard.
- Click on the +New button on the top menu bar, and in the drop-down list of options, select Post.
Once a fresh new post page appears, enter a title, then write your blog and add your content. It doesn’t have to be all text. You can add add images, videos and other media.
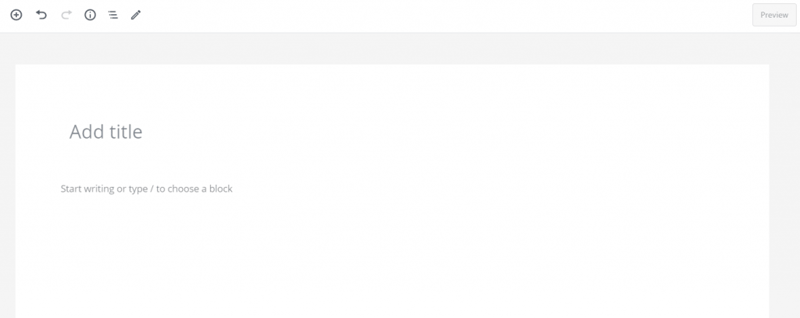
When you’re done, and you’re happy with your blog post, hit the Publish button, and that’s it.
Congratulations!! You are now a blogger with your very own blog site.
Step 4: Building a Better WordPress Blog Site
So far, we’ve covered the basics of how to create your very own blog site on WordPress. However, with a few additional tweaks, you can make your blog look and function even better — making it more visible on social media platforms.
Using a WordPress Theme
If you like to dabble in web design, even a little, then you should know that WordPress comes with a default theme. However, you can customize your blog using other WordPress themes, many of which are free (you can find a list of great, free WordPress themes here). Of course, there are also premium themes for that extra level of uniqueness.
So, how do you install a WordPress theme? Easily!
- First, go to your WordPress dashboard and select the Appearance tab on the sidebar menu (left). Then select the Themes option.
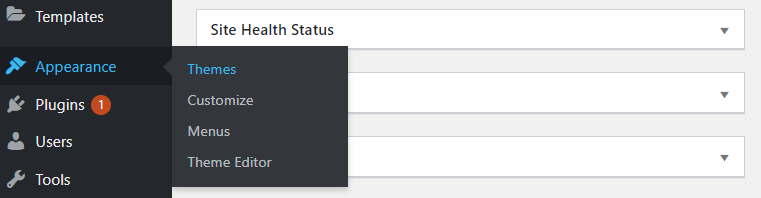
- Once the Themes section appears, click on Add New.
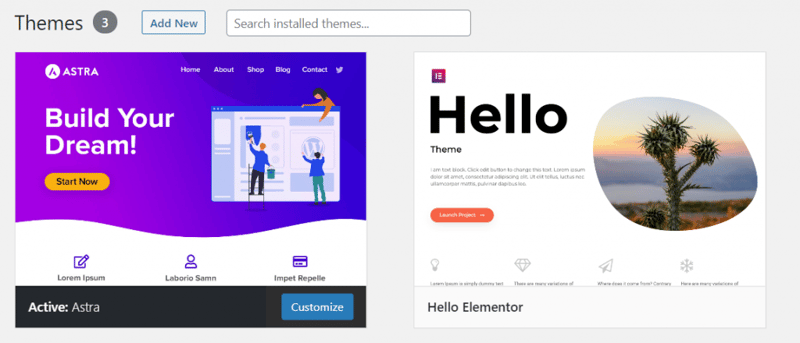
- Choose a theme, and click Install. Once the theme registers as installed, click on Activate. That’s all there is to it.
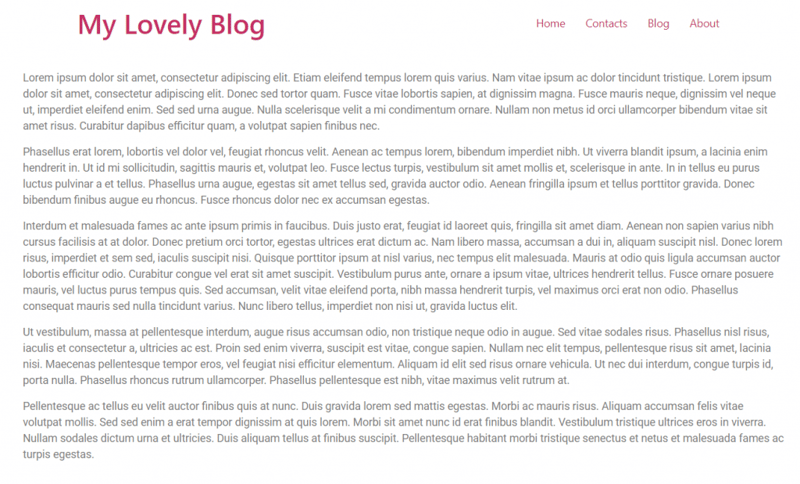
We recommend that you use the Hello Theme. This is a theme designed by Elementor as a lite, sometimes known as a “vanilla” theme. The advantage of this type of theme is that it is a very lean and uncluttered theme, giving you far more potential to customize your blog’s design any way you want, when using it with Elementor Pro.
Use Recommended Plugins
In addition to themes, which enhance the visual aspects of your blog, you can also add WordPress plugins that add numerous other practical benefits. Here are some of the recommended plugins for first-time bloggers.
Yoast
Yoast is an SEO plugin that will help you improve your position on search engine result pages.
Google Analytics
Google Analytics is a great tool for checking your blog’s performance in terms of the number of visitors, how much time they’ve spent on your website, and much more. With this plugin, you can move all the information into the WordPress dashboard, easily.
Contact Form
Another plugin that will be of help to you in the early stages of your blogging career is the contact form which will allow people to contact you, sign up for newsletters, and more.
Luckily, if you are using Elementor, you don’t need a contact form plugin. You have that, and many other functions, already built in.
How to Install WordPress Plugins
Installing a WordPress plugin is very easy.
- Go to the Plugins tab on your WordPress dashboard and select the Add New option.
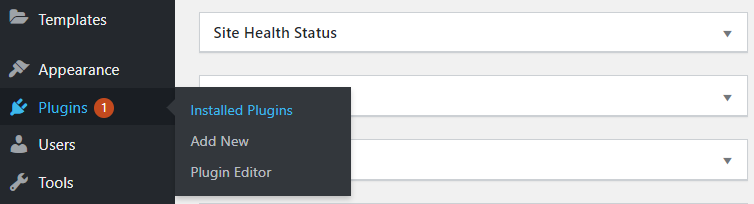
- A new window will open where you can choose to search for a plugin or browse the list of popular plugins.
Once you have found one that you want, and click Install.
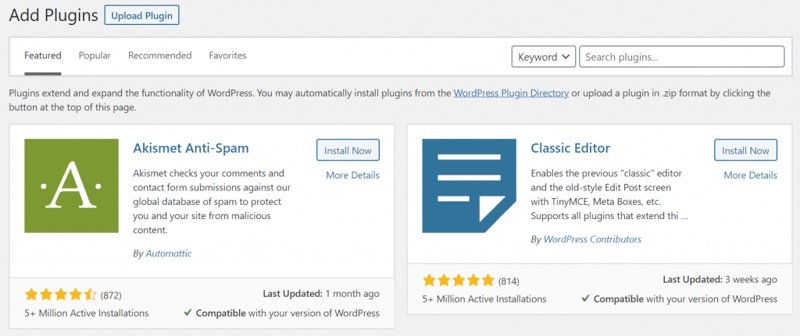
Or, alternatively, go to the WordPress plugins repository, choose the plugin you want and download the .ZIP file. Once downloaded, you can use the dashboard to upload it onto WordPress using the Upload Plugin option in the same window above. To learn more about free WordPress plugins, check out this great video.
Elementor makes many of these plugins obsolete with tailor-made website widgets and absolute control over all the design elements of the website. Make your blogs stand out with Elementor. Try it, it’s free.
Next Steps
Once your blog is up and running, you may want to consider making it better and even earn some money along the way.
Make Money
There are several ways to make money off of your blog. We’ll focus on two primary methods:
- Ads — or rather, banner adverts, are a great way to earn money on your blog. This is a visual form of advertising, which involves placing adverts on your blog pages. There are two ways to earn money via ads. One is through CPC (cost per click), where you get paid for every click on the ad. The other is CPM (cost per mile, or more commonly, cost per thousand impressions), where for every 1000 views of your banner, you will get paid a certain sum.
- Affiliate Marketing — in the simplest definition is the process of earning a commission by promoting other people’s products. There are different types of affiliate marketing, but the one most applicable to a blog is promoting the product through text and adding a unique, trackable link to the product. If a buyer clicks on the link and buys the product, the affiliate (you) will then get a commission.
Here’s an excellent guide to monetizing your WordPress website.
Get More visitors
Getting more visitors is paramount to the success of the blog. The above money-making methods will work better if you get more visitors. There are several ways that can affect how many visitors you get, and they all have to do with promoting your blog.
One way to make sure that people visit your blog, is to make sure that they are aware that it exists. This entails promoting your blog on social media, through email marketing campaigns and paid ads on search engines and social media.
- Social media interaction is important. You get access to millions of people, who in turn may share your blog with their friends and family. You want them to know about you, so make it easy to share your blog by placing relevant social media buttons on it.
- Email marketing campaigns can be a consistent reminder of your blog. Get a contact form ready, place it on your blog, prepare a newsletter, send it out and soon you’ll be seeing a great increase in the number of your visitors.
- Paid ads are not the cheapest of methods, but sometimes it’s the most straightforward. Get paid ads, and make sure that people see your blog when they search for certain terms and browse certain topics.
SEO Optimization
We’ve mentioned SEO optimization. But we’d like to linger a bit more on the subject. Search Engine Optimization (SEO) is the art, nay, the science of making sure that your content is visible first on a search engine’s results page. Why? Because people tend to choose the top results. The higher you are, the more likely they’ll click on the link to your blog.
Companies hire SEO professionals to make their websites successful, but there are some things that blog owners can do themselves to optimize their SEO.
- Meta Titles & Meta Descriptions — these are the titles and descriptions that you see on the results page. So, you need to make sure that they explain what your blog is about, and make it appealing to the reader.
- Keyword Research — when you write your blog, make sure to do keyword research, and see what people are looking for when they are searching for a specific topic and add these keywords to your blog.
- User Experience — User experience is affected by several factors, chief amongst them are the design of the blog, its navigation, the blog’s loading speed, and whether or not the blog is optimized for mobile devices. Make sure that you take these into consideration. Make it easy for your users to navigate from one post to another, reduce the size of your images, and make sure that the design you implement works well on the mobile platform via a responsive mode feature — just like Elementor has.
- Competition — Check out your top-ranking competitors and try to understand why they are doing better than you. Get inspiration from them and improve your blog.
- Value — Lastly, but most importantly, always think of the value you can give your users and try to give them the best experience.
Conclusion
Creating a blog on WordPress is very easy. All you need to do is get a hosting plan, register a domain name, install WordPress and you are ready to go.
However, to truly become a blogging master, we recommend that you invest a little more in the tools you use and the methods you employ. In this video tutorial, you’ll find some great tips on writing successful blog posts.
If you need more information on how to build a WordPress website and specific elements in it like a homepage, a header, and footer, and more, here is a great video tutorial, and here is a great article for those struggling with building their first WordPress website.
Creating a blog is much easier with Elementor. It removes the need to download many of the plugins, gives you total control over the visual design of your website, and has numerous other benefits.
Looking for fresh content?
By entering your email, you agree to receive Elementor emails, including marketing emails,
and agree to our Terms & Conditions and Privacy Policy.


