By now, you will have a solid foundation in most of the WordPress concepts you need. So far, you haven’t been able to work with WordPress itself. Let’s change that! Learning how to install WordPress is a fundamental skill you need, and the basics are well within the scope of all users.
For this lesson, we’re going to show you how to install WordPress in four steps. When you’re done, you’ll be able to work with your WordPress website as any other user can!
How to Install WordPress: Step-by-Step Guide (4 Steps)
By the end of the article, you’ll have a WordPress site up and running, with a basic piece of content ready to roll. First, you need to have the right host by your side.
1. Choose the Right Hosting Provider
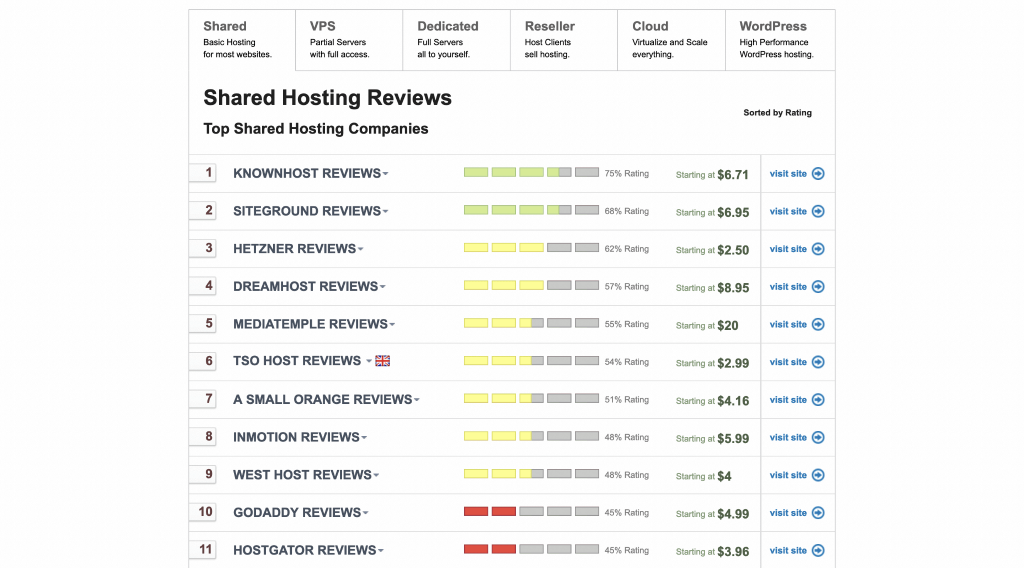
Even a quick search online can bring up so many web hosting options that it could be hard to know which one to pick. To find the right host, you should look for unbiased reviews and consider other WordPress developers’ options.
For the former, a site like Review Signal curates ratings for web hosts from social media posts. As such, it’s not biased by any one company or affiliation:
Using recommended hosts based on the opinion of WordPress developers is also good, although some sites can be biased towards one particular company. It’s a great start, especially if you can find a well-balanced selection:
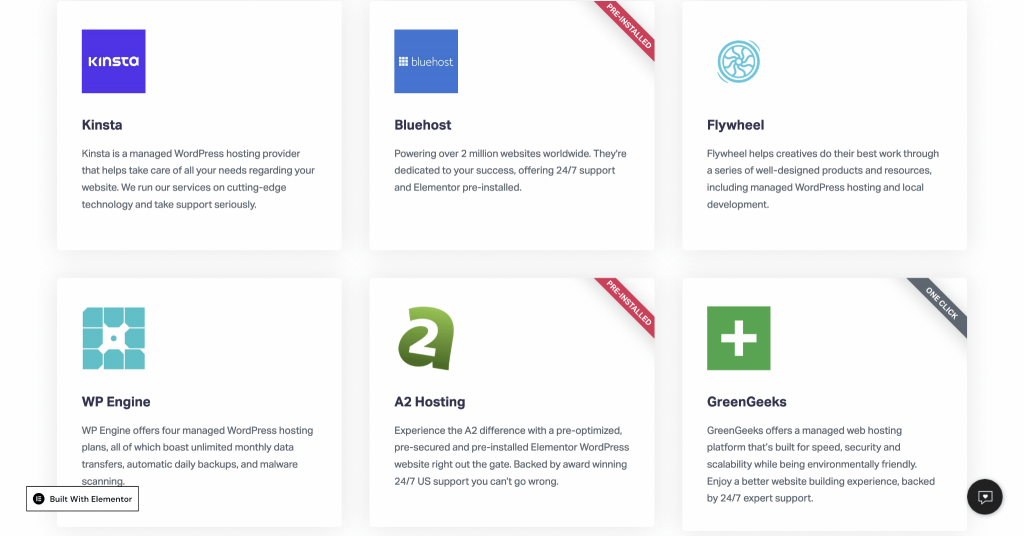
If you’re still struggling to find the right host, here’s what we think are the best options:
- Low-budget, low-risk. Bluehost is a cheap hosting provider with a solid set of features. For your first host, it’s a great pick.
- Cost-effective, long-term hosting. A2 Hosting is a step up over Bluehost and can duke it out with some of the major players within hosting, depending on the plan you choose.
- Big budget, with great ambitions. Kinsta is the king of managed, well-maintained web hosting. Though, it’s much more expensive than other hosts (for a good reason).
As for purchasing hosting, the process is straightforward. In fact, if you’ve bought an item online, you can do this too. Our advice is to keep your choices simple at this stage. You’ll often find ‘upsells’ throughout the checkout process.
For example, you may be offered email, add-ons to make your site more secure, and a domain. While most of these are necessary, it’s not something you should decide on an impulsive basis.
You’ll often find upsell offers during the checkout process, good for those in need of premium services.
2. Decide Upon a Domain Name For Your Site
Given that it’s your website’s address, it is vital to get your domain name right. Choosing the actual name is a big decision, as it will affect your branding from the start.
Once you have settled on a name for your site, the next step is to choose a domain registrar. This is a library of domain names available to purchase, and the price will differ depending on a few different factors:
- The ‘value’ of the domain name itself. For example, “dogs.com” will command a high price because it’s a common search term.
- The Top-Level Domain (TLD). This is the .com, .net, .org signifier. While the general consensus used to be that .com was the way to go, it’s no longer the case. You can choose from hundreds of relevant TLDs.
- The length you wish to buy the domain for. Nothing is stopping you from making a years-long purchase, although, at this stage, 12 months will be plenty.
Choosing a registrar can be as involved as picking a hosting provider. There are two basic options: Use your host’s registrar if possible, or use a third-party one. Our advice is to use a third-party domain where necessary, although you can choose whichever is most appealing.

When it comes to domain registrars, there are a few go-to options:
- GoDaddy is a leading player when it comes to domain names, and they offer a good service.
- Namecheap does what it says on the tin: It’s a cheap domain registrar with a good selection of TLDs.
Again, making a purchase here is simple and much like any other online purchase. There may also be upsells here. You can disregard most of them, other than any domain privacy options. This stops your personal information from going public on the WHOIS database – a curation of every hosting purchase made.
By this point, you’ll have hosting and domain. The exciting part now starts: Installing WordPress.
3. Install WordPress On Your Hosting Server
There are myriad ways to get WordPress onto your hosting server. In fact, because the platform is so popular, many hosts have dedicated ‘auto installer’ software to help you.
Because WordPress is so popular, many hosts have dedicated ‘auto installer’ software to help you.
The best way to install WordPress on your server is not to do it at all! Lots of managed hosts (such as Kinsta) provide pre-installed WordPress, and it’s another perk of choosing this type of option:
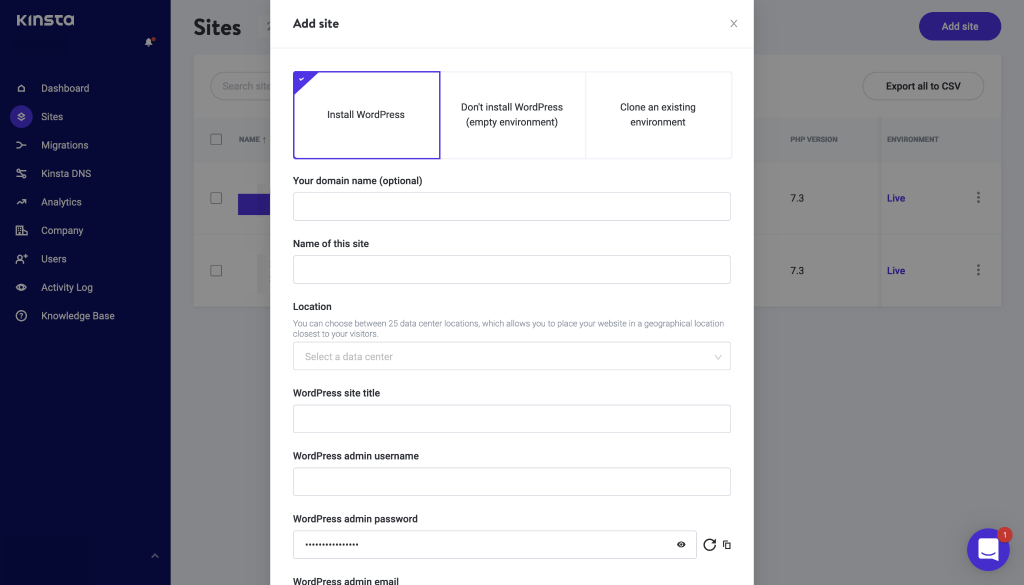
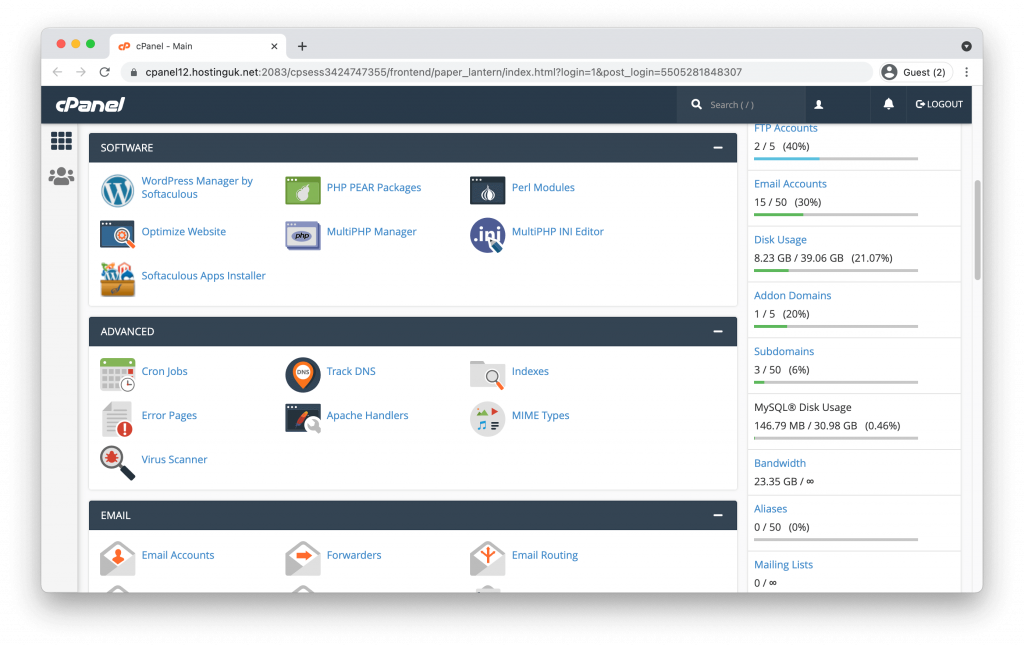
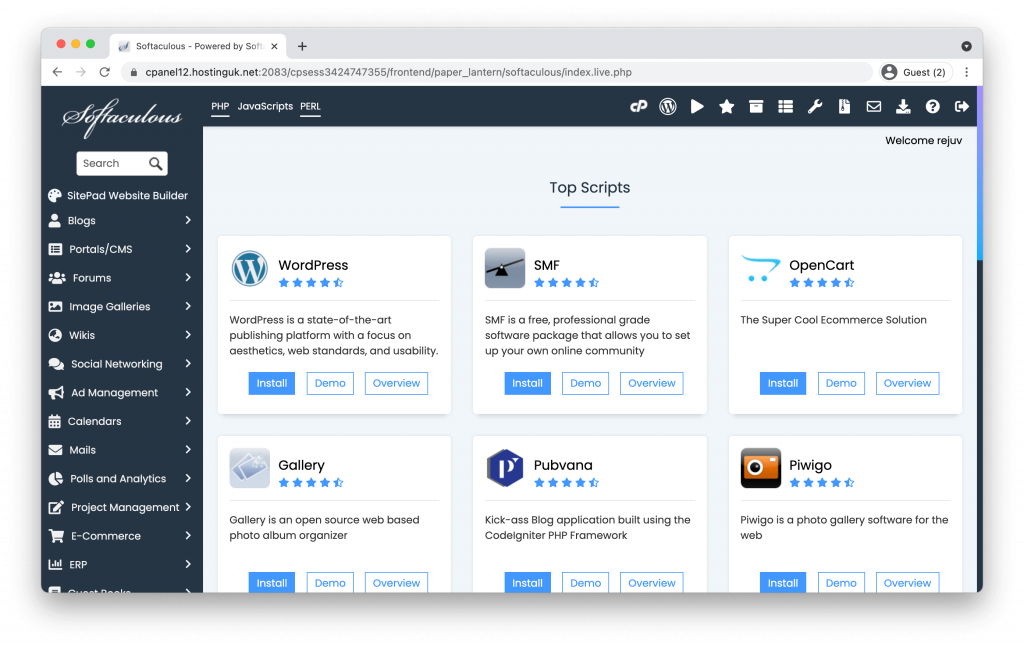
A host could also give you an installer for WordPress and let you handle the fine details. For example, the cPanel hosting dashboard found on some web hosts will let you choose the Softaculous installer. Others will give you MOJO Marketplace, and there are a few others.
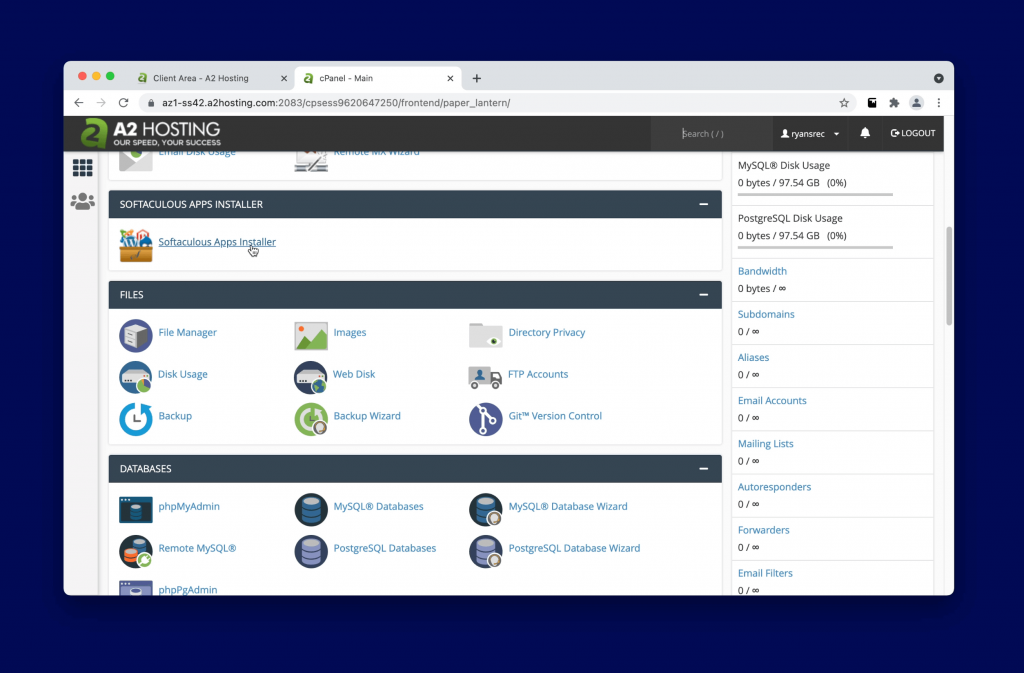
Even so, the process is straightforward. First, find the dedicated installed within your hosting control panel and click through it:
Next, you’ll see an information screen. You’ll find an Install Now button (or similar depending on your auto-installer software) here:
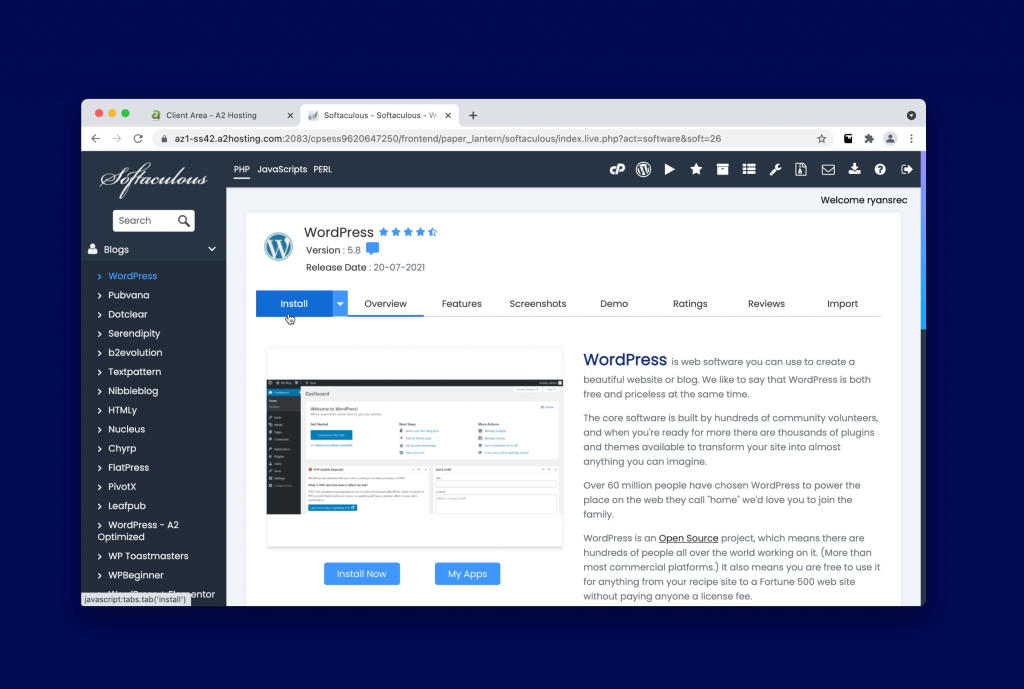
From here, you need to enter the basic details for your site. It could encompass any of the following:
- Protocol. For most new users, this should be HTTP. However, if you know you have an SSL certificate installed, it should be HTTPS.
- Domain. While you could put your new domain here, there’s some extra setup that you’ll need to carry out. This will be something we look at in a future lesson – for now, you can check out our Getting Started resources. We cover how to connect your domain in a video here.
- Directory. In most cases, this is left blank. It’s asking you where to install WordPress, and for the majority of new sites, it will be in the root directory (which means you don’t need to do anything).
- Site Settings. Here, give your site a name and tagline that will be visible on your site. Also, keep any settings related to Multisite unchecked for now.
- Login Credentials. Add an administrator username, password, and email address here. We recommend choosing something more unique as a username than “admin,” as this could compromise your site’s security.
Once you’ve filled out all of these fields, you’re ready to hit the Install button:
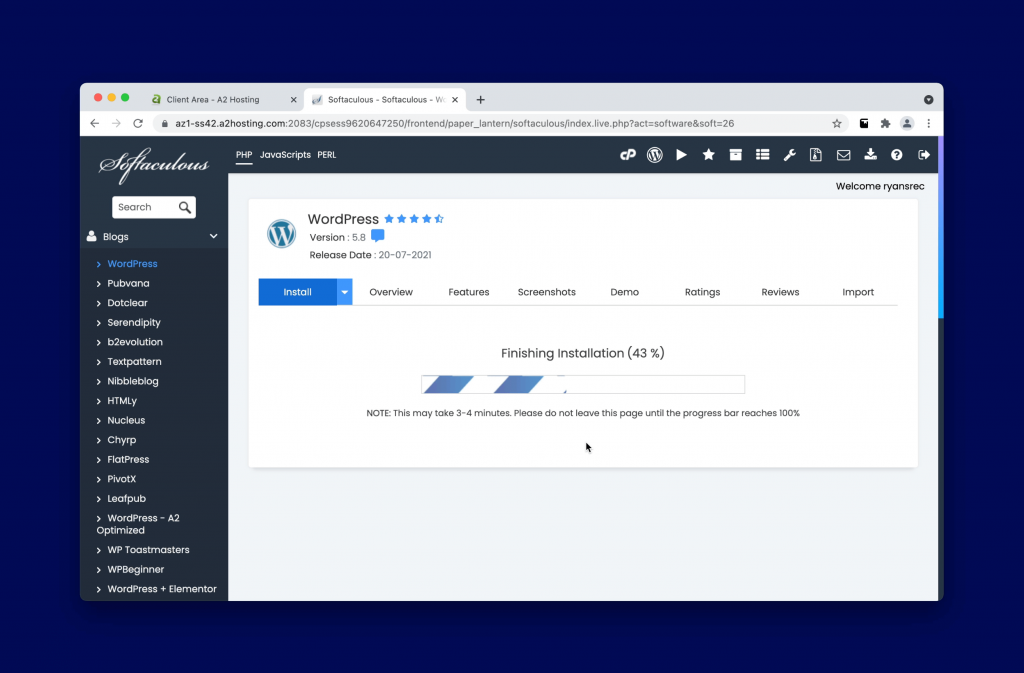
The auto-installer will run through the process, at which point you can browse to your site. The URL you need to access the WordPress admin screen is yourdomain.com/wp-admin. Of course, you’ll want to use your own domain name rather than our placeholder.
4. Create Your First Piece of Content
Once you access your WordPress dashboard using the login details you set earlier, you’ll come to a screen filled with options:
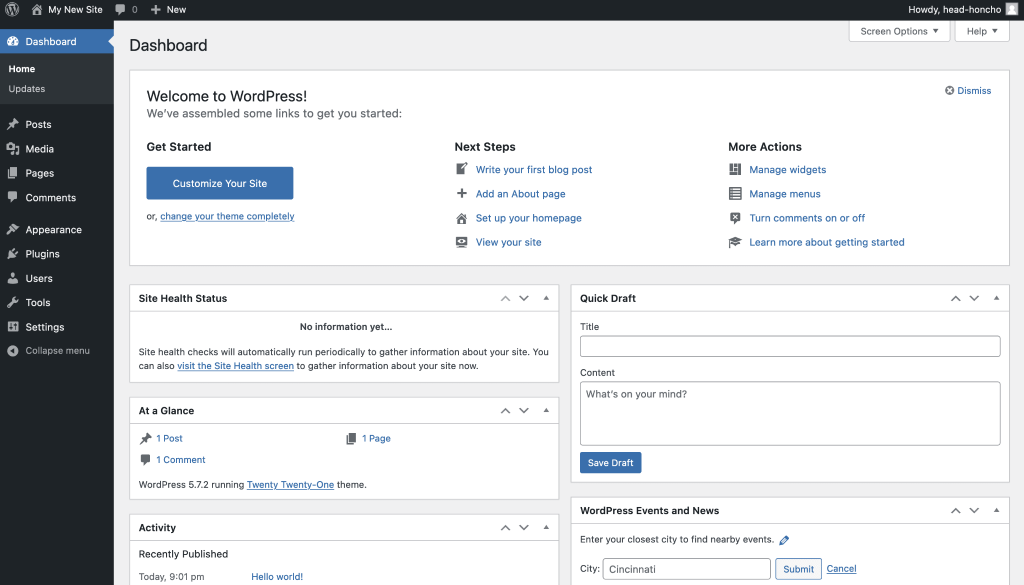
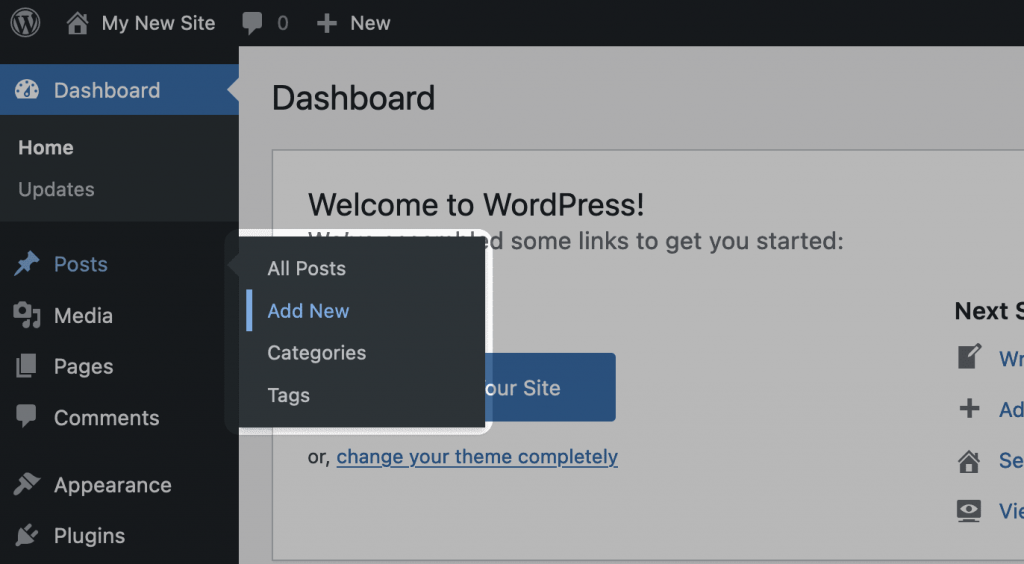
We’re going to look at these options in greater detail in a later course. For now, head to the Posts > Add New screen from the left-hand toolbar:
Once you click this link, you’ll come to a new Block Editor screen:
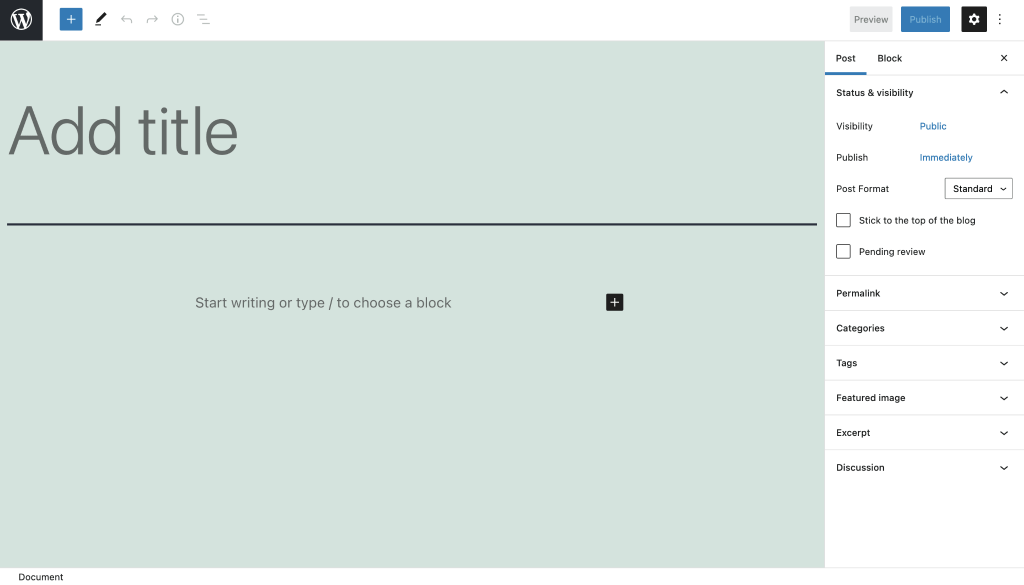
There will be a pop-up introduction to the editor, which you can read if you wish. When you’ve finished, you’ll see that there are instructions in the editor – specifically to add a title to your post and to begin writing:
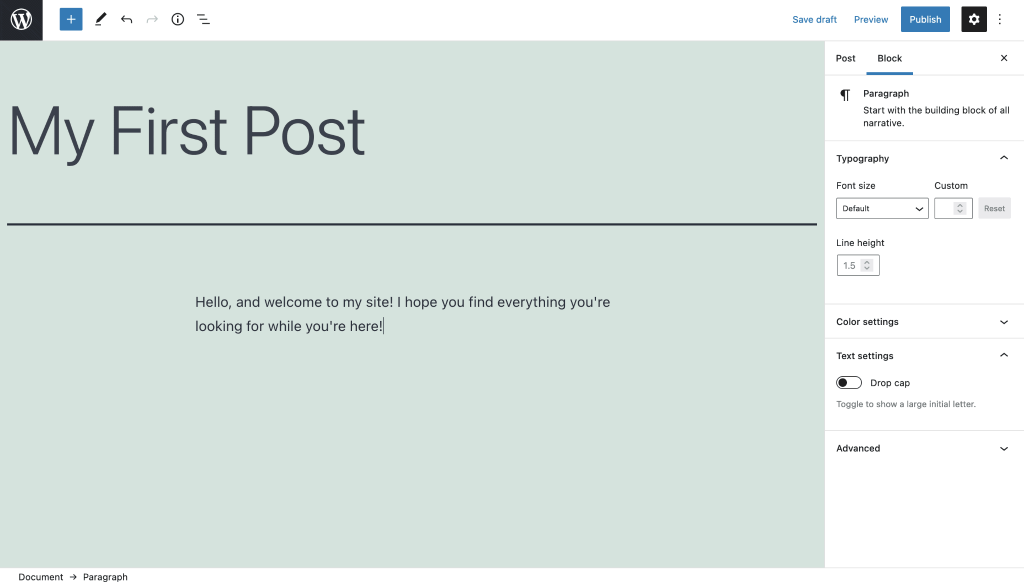
When you’ve finished writing, click the blue Publish button in the upper right-hand corner. This turns the page live, and if you browse to it, you’ll see it’s now part of your website:
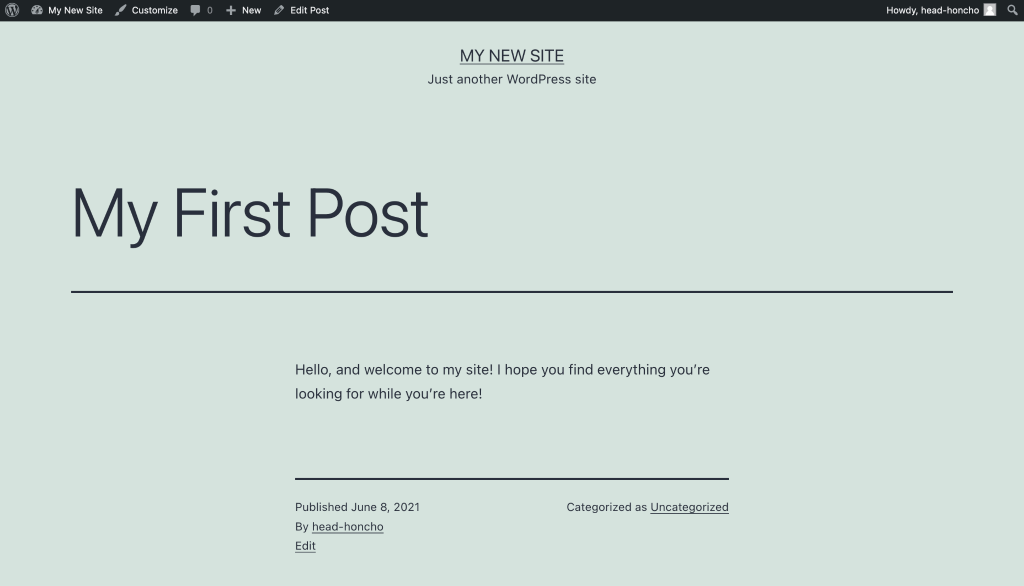
You can now populate more of your site and create all of the elements you need. For some tips and tricks, you’ll want to keep reading our lessons and courses to make your site stand out.
Summary
This lesson is the most technical so far, but it’s achievable for almost every user. By now, you’ll know how to install WordPress and will have a host and domain up and running. We’ve even looked at how to create a new post – you can create a page in the same way.
That’s it for this lesson – we’ll see you at the next one!


