Table of Contents
The word sales funnel gets thrown around a lot in the web creation world, and it’s usually connected to a high price tag and possibly a ‘top secret’ formula.
While researching this blog post, I’ve read a lot of OTHER posts about building funnels, none of which actually talk about the essential details of building a sales funnel in WordPress.
The truth is you can use a small set of tools to easily create and perfect your sales funnel.
A sales funnel, however, is not worth the effort, if you don’t have the means to optimize it. That’s why we’ll be giving you the foundation knowledge of what a sales funnel is, how it works, and how to create the essential module of a funnel, and how to connect it to analytical tools so that you can know what works and what does, giving you the hard data with which to tweak and perfect your sales funnel.
In this post, we are going to remove all the barriers that used to hold you back from getting more sales and conversions. We’ll start you off with an introduction to the alluring world of funnel building.
What Is a Sales Funnel?
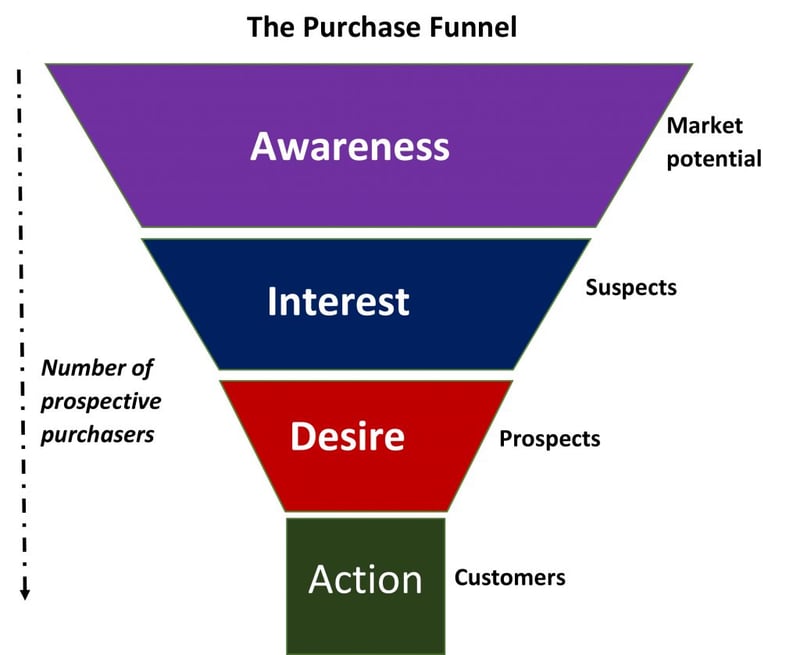
The term ‘marketing funnel’ or ‘sales funnel’ is used to describe the way that human beings can be convinced, through a 3-4 step process, to perform an action – in our case this usually means purchasing a product or service.
Those steps are:
- Attention. When the consumer becomes aware of a product or brand
- Interest. They develop an interest in product/brand benefits and how it fits in with the lifestyle they have or wish to have.
- Desire. The consumer develops a fondness or an attachment towards the brand
- Action. The consumer shops around, tries the product, or even purchases it.
The basic process, also known as AIDA, was devised by Elias St. Elmo Lewis as far back as 1898. Other than its name, almost nothing has changed. But why should it? Purchase behavior hasn’t really changed.
The reason everyone likes to call this process model ‘a funnel’ is because of the way it looks on paper:
Top of the funnel – In a contemporary online marketing funnel, we have a vast number of viewers, gaining initial awareness at the beginning.
Middle of the funnel – Going down the funnel, the number shrinks to the number of people who remain interested.
Bottom of the funnel – This number shrinks again, to the number of people who are now considering to take you up on your idea/proposal, before shrinking once more into a group of people who will actually take action and do what it is that you have been luring them into doing.
To borrow a fishing analogy, as marketers in the digital era, we should be thinking in terms of using fishing boats rather than relying on a fishing pole and a lot of patience.
The good news is that if you missed the better part of your catch on the first pass, your chances will be better on your next pass with another funnel — you’re next campaign.
As with a great many things, by grasping the workings of a small funnel, you’ll be able to progress to more elaborate funnels much quicker.
For the purposes of demonstration, let’s start with a test case scenario.
What Do You Need to Build a WordPress Sales Funnel?
For our WordPress funnel example, we’ll be using the fake example of Ms. Alice Cheivementz, a business coach who is looking to expand her mailing list. Her plan is to send a weekly newsletter with business advice and tips, with a future goal to develop leads that will convert into paying clients.
Looking at our workflow, we’ll be discussing the assets we will need, we’ll build those assets, we’ll connect the assets together to form our funnel, and finally, we’re going to test our funnel by setting up Google Analytics and Google Optimize tags, using Google Tag Manager.
Assets for a WordPress Sales Funnel
Since the newsletter is a new service, our main asset will be a landing page. The question is, what is more likely to get the viewer to subscribe?
I’d like to have a button to gain enough interest to take the first action in a chain of actions that eventually gets the viewer to subscribe. I decide to run an A/B test, on two ideas I have and see which works best.
So the assets that I’ll need are:
- 2 ElementorLanding pages, each with a slight variation.
- An ElementorPopup with a subscription form
- And a Thank-You page, also built-in Elementor.
Just to clarify the logic and flow of our WordPress funnel:
- Users will be directed to the site from a campaign (this could be a Google or a Facebook ad) to a landing page.
- The landing page will have a CTA button that opens a popup with a subscription form.
- We’ll be testing two variations of microcopy on the CTA button, to determine which one brings the most subscribers. Each variation of microcopy will appear on a separate copy of the landing page.
- Once the user fills and submits the form, they will be transferred to a Thank-You page, and simultaneously added to the mailing list on Active Campaign.
- This entire process will be monitored by Google Optimize. The traffic will be equally divided in two, with 50% reaching each of the two copies of the landing page.
- We’ll allow the test to run for a few days, to gain significant data, determining which microcopy directs more users to the Thank-You page (signifying that they have completed the subscription action). This microcopy will then be used with future traffic.
How to Build a Sales Funnel in WordPress
Step 1: Setup the Plugins & Services
Here is the list of free plugins and services we’ll be using:
- Hello Theme. This lightweight WordPress theme will make sure your landing pages load fast and are easily managed.
- Envato Elements. We’ll be using the ‘Business Coach’ template kit for our landing pages, Thank-You page, and popup.
- Active Campaign. The subscriber forms will register users to an email marketing platform. We’ll be using Active Campaign, and connecting our account to our site through Elementor’s integration settings.
Analytical Tools:
- Duracell Tomi’s GTM plugin. This plugin provides us with an easy way to connect the site to Google Tag Manager (GTM), which we’ll be using to manage the site’s Google Analytics and Google Optimize tags, that will provide us with the data we’ll need to optimize our funnel.
- Tag Assistant extension for Chrome. The official GTM extension for Chrome will allow you to monitor your site and make sure all our GTM tags have been properly installed.
Step 2: Build Two WordPress Landing Pages: Thank-You Page & a Popup
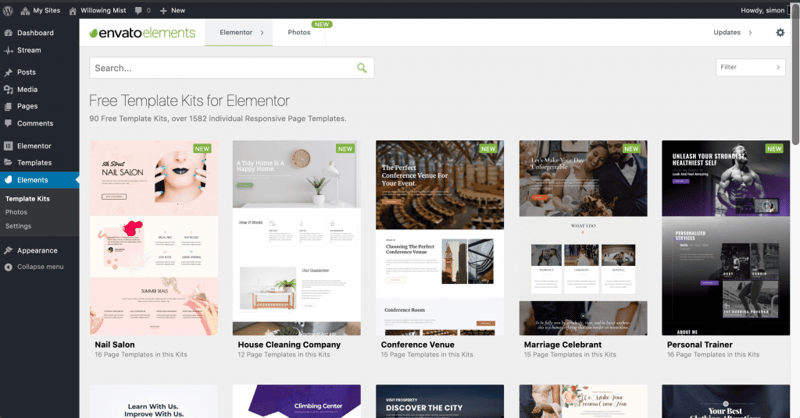
We’ve mentioned the release of the Envato Elements plugin in our blog before. With over 2,000 designer-made templates, it really is a must-have plugin for every professional web creator.
For Alice’s website, we’ll be using 3 templates:
1. Business Coach – Home 1, for the two landing pages

2. Business Coach – Work With Me 3, for the Thank-You page

3. Business Coach – Popup

Step 3: Connect the Pages, Popup & Email Platform (Active Campaign)
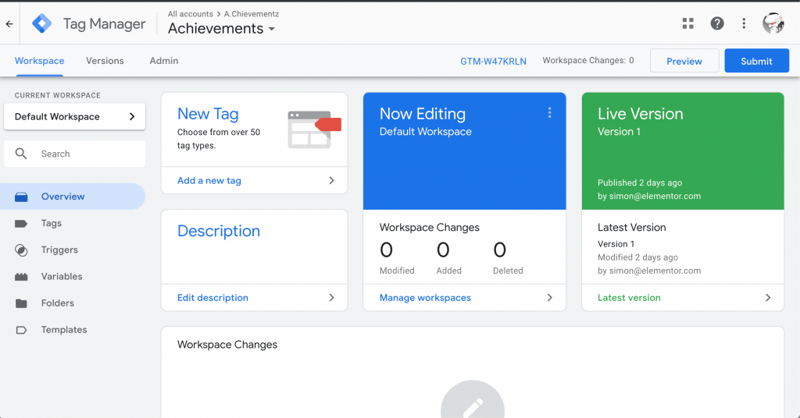
This is how you can be sure the user-flow functions well:
We’ll need to connect the buttons on our two landing pages to the popup. Then connect the form on our popup to the Thank-You page and our email account with Active Campaign.
Connecting the email platform to Elementor directly through the integration settings allows us to synch our account to our site, and save us a lot of work in the future.
For example, when we set up a new mailing list for the newsletter in Active Campaign, the list will automatically appear in the options for the integrated platform in the Elementor editor for the website.
Step 4: Install Google Tag Manager, Google Analytics & Google Optimize
So far, everything we’ve done has been extremely simple. This next part may seem complex, but once you’ve done it a couple of times, you’ll have to agree that it’s not that complicated at all.
Remember, a funnel is only as good as what it can teach us about its users. There are plenty of services that use tags to analyze every pixel and script on your site, behind the scenes, to give you that kind of information. However, in doing so, they add weight to your site’s loading time (and sometimes worse).
Google Tag Manager allows us to connect to our site to a multitude of other services like Google Analytics and Optimize, keeping your tags organized and preventing any conflictions and site-loading issues. As with any research, our data will be collected through tests or experiments. In Google Analytics, we refer to those tests as ‘goals’, and in Google Optimize we refer to them as ‘experiences’.
The next few steps are pretty straightforward:
- First, connect Google Tag Manager to your site using the Duracell Tomi plugin we mentioned.
- Second, connect Google Analytics and Google Optimize to Google Tag Manager.
Now we’ll set up a goal in Google Analytics, to monitor the number of redirects to the Thank-You page from each landing page, and connect our Analytics’ goal to an experience in Google Optimize.
Step 5: A/B Test and Optimize Your WordPress Funnel
All that’s left to do is to test your experiment:
- Activate the Tag Assistant extension in your Chrome browser.
- Preview one of the Landing Pages, and click the button to activate the popup.
- Open the Tag assistant and make sure that you have 2 working tags there.
- Enter an email into the popup and click subscribe. Now check your email platform account to verify that the email addresses are registering on the list you set up.
And you’re done! Nothing left to do but wait and see what the users do.
Don’t be too hasty. Reliable information never comes quickly. Once you start growing your list, you can use marketing software like HubSpot to nurture them and eventually convert them into clients.
Start Creating Your Sales Funnel With Elementor
Elementor isn’t only a Page Builder and it can also be used as a WordPress funnel builder plugin – by now you should know the difference between meticulously steering your potential clients until they become customers, as opposed to dropping them off on a random landing page and hoping for the best.
You don’t need expensive funnel gizmos, nor heavy lifting manuals for building successful funnels. Start small, use what you’ve learned here to get your users to subscribe to your mailing list. From there on, the world of high conversions is your oyster.
So don’t delay any longer, get Elementor Pro, and build your sales funnel.
Looking for fresh content?
By entering your email, you agree to receive Elementor emails, including marketing emails,
and agree to our Terms & Conditions and Privacy Policy.
