
One of the most time consuming tasks for web creators is working with clients to create a brief. These briefs are the foundation needed to build a site your client will approve of. With Elementor Site Planner you can greatly streamline this process, creating an
entire draft website after just one Zoom meeting with your client.
Prerequisites
- Zoom. You can use either the app or the online version of Zoom.
- An Elementor account. For details, see Create your account.
After creating your brief, Elementor Site Planner creates a website for you. To use this website you’ll need:
- To set up a website using Elementor Host.
- (Optional) The WooCommerce plugin.
or - A WordPress website.
- The Elementor plugin.
- (Optional) The Elementor Pro plugin.
- (Optional) The WooCommerce plugin.
Create your brief
- Set up a Zoom meeting with your client.
- Click Use an AI Notetaker.
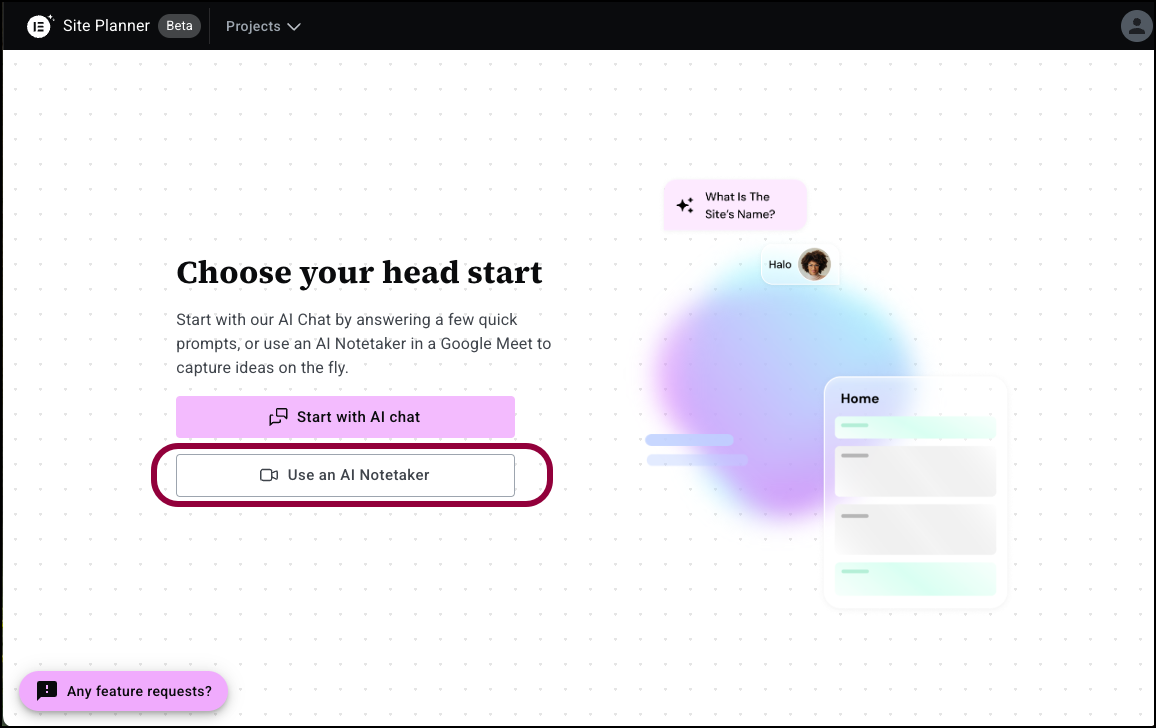
This opens the AI Notetaker window. - In the text box, enter the URL of the Zoom meeting.

- In the meeting, click Invite AI Notetaker.

- Click Allow recording to let AI Notetaker transcribe the meeting.NoteIf you change your mind, you can turn Notetaker off by clicking the tile and selecting Remove.

- After your meeting starts, Admit Notetaker to the meeting.
AI Notetaker will record and analyze the meeting. These results are used by AI Site Planner to create a brief for your site.TipDuring your Zoom meeting, you should discuss things like:
The name of the business or website
What the client does
What pages they want on their site
What they expect the website to do for them - Go back to the Site Planner window.
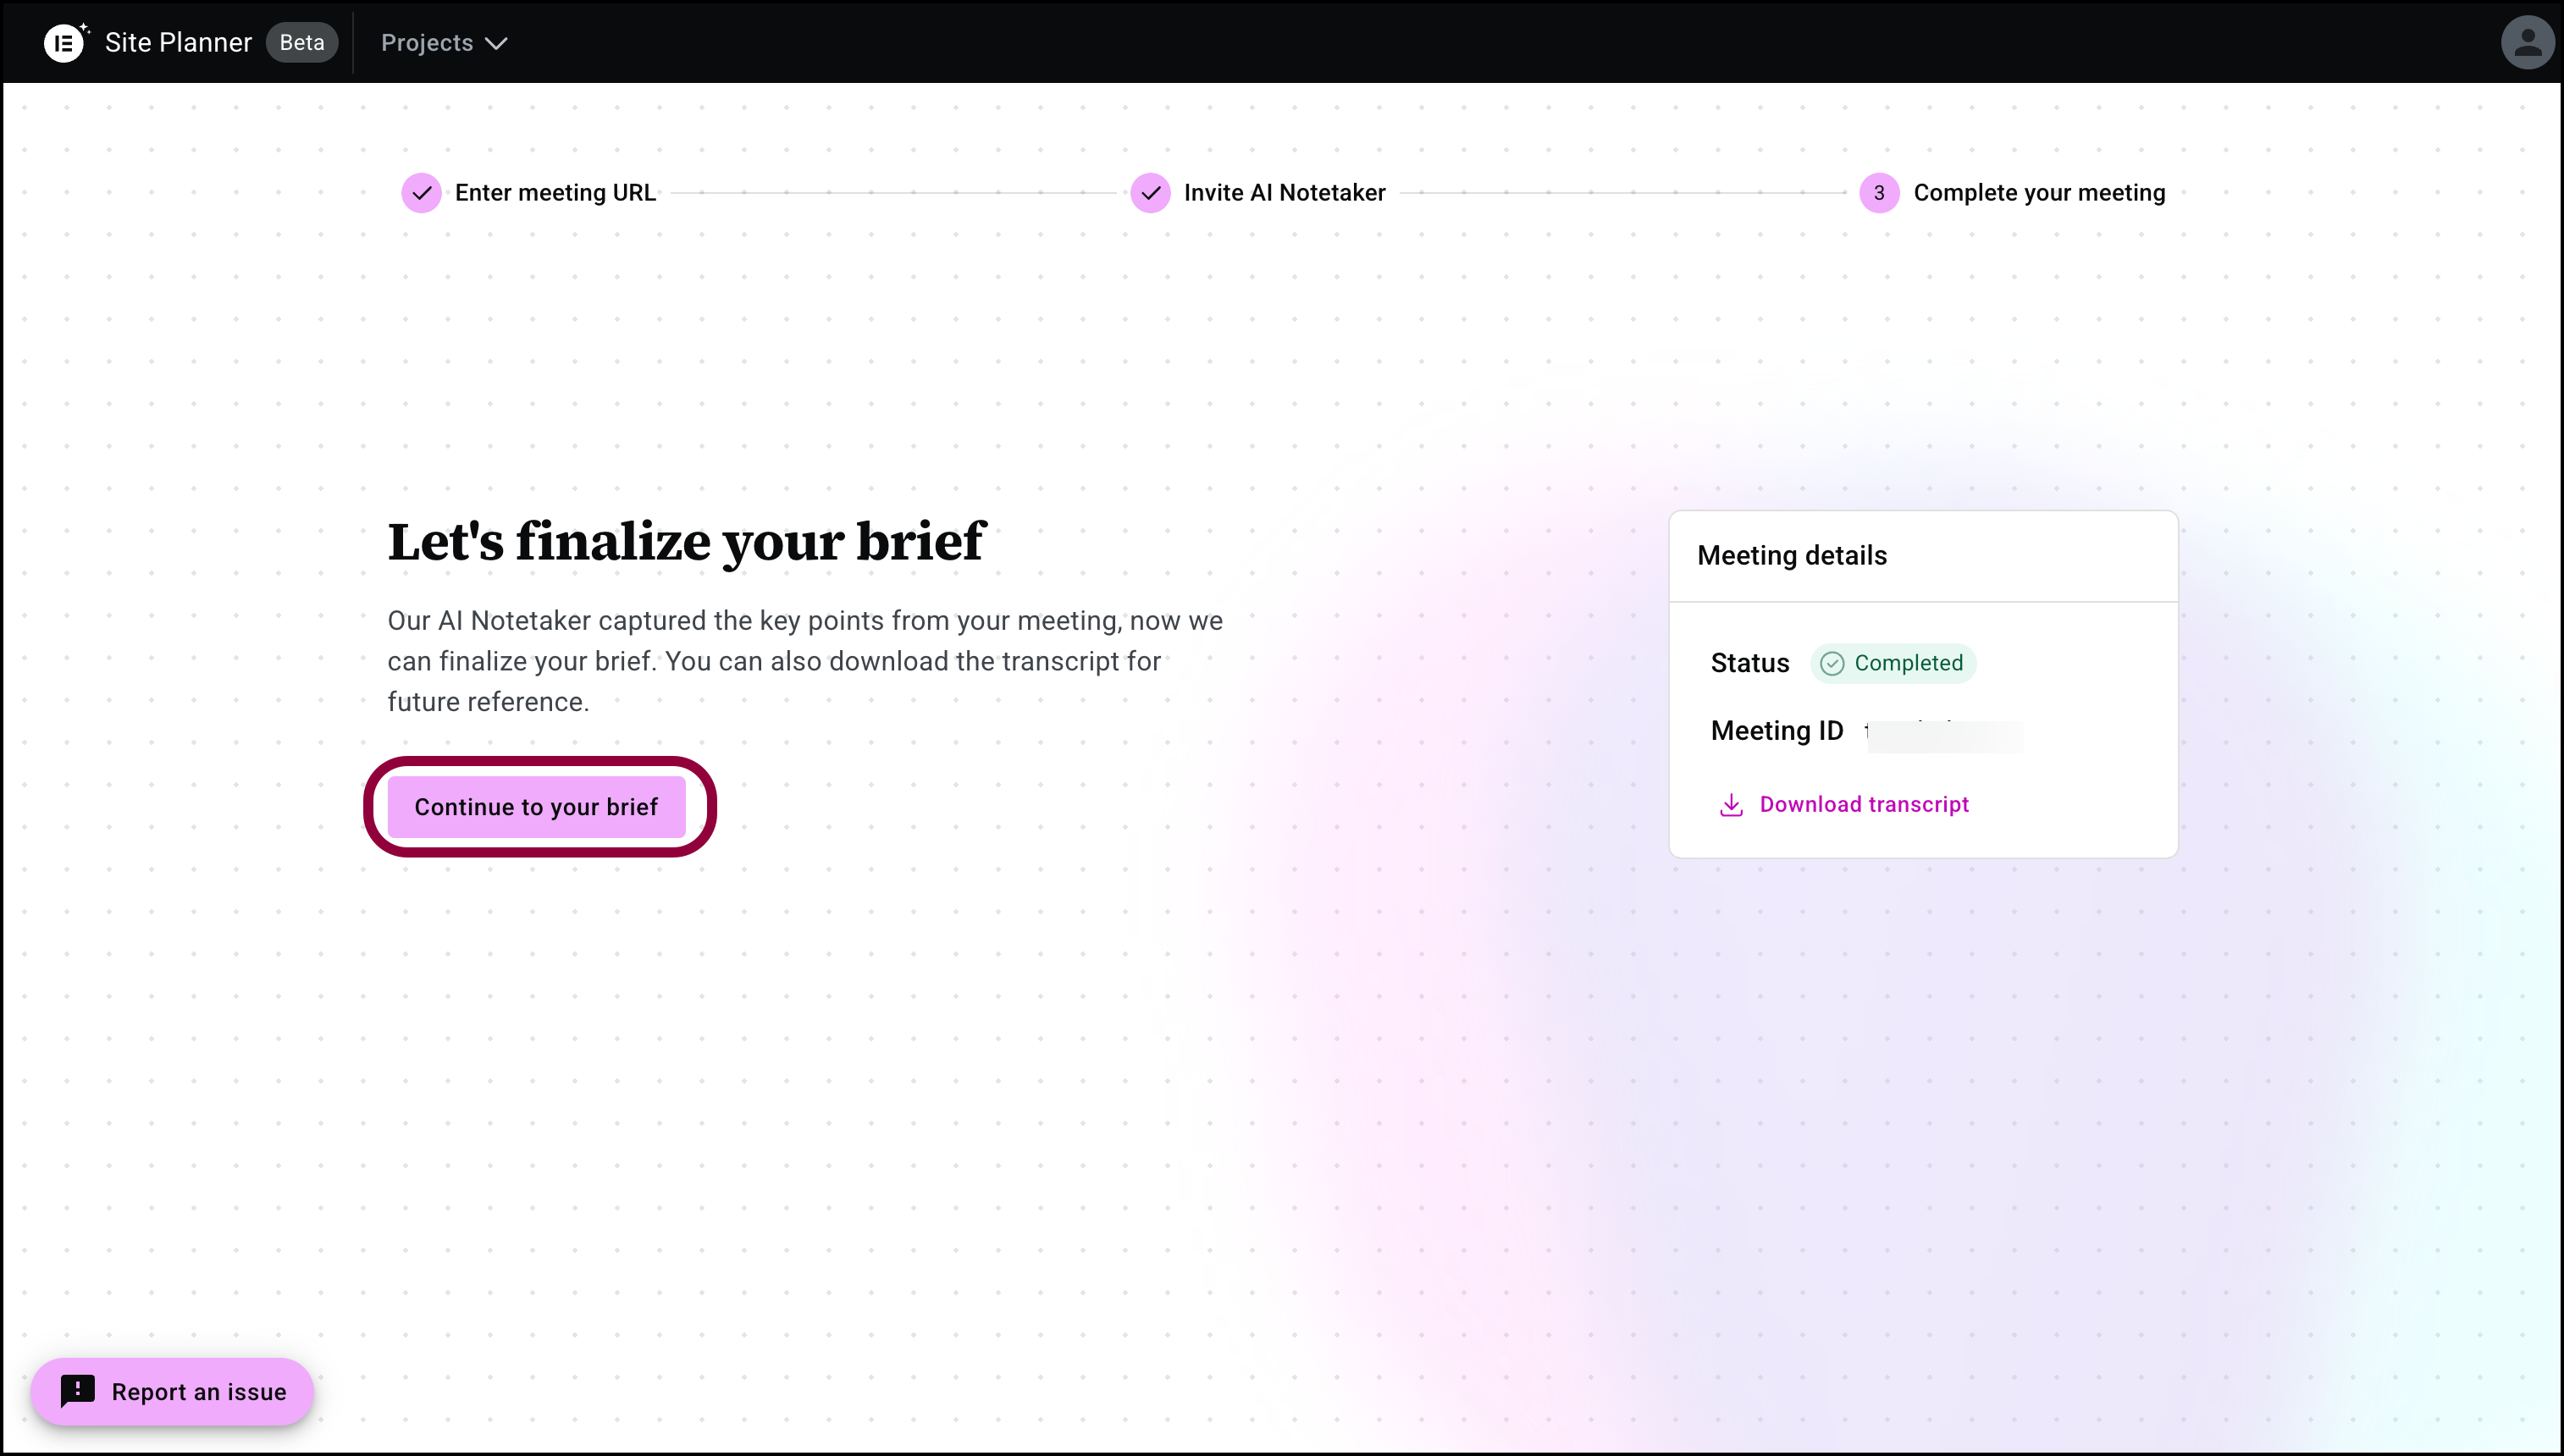
- Click Continue to your brief.
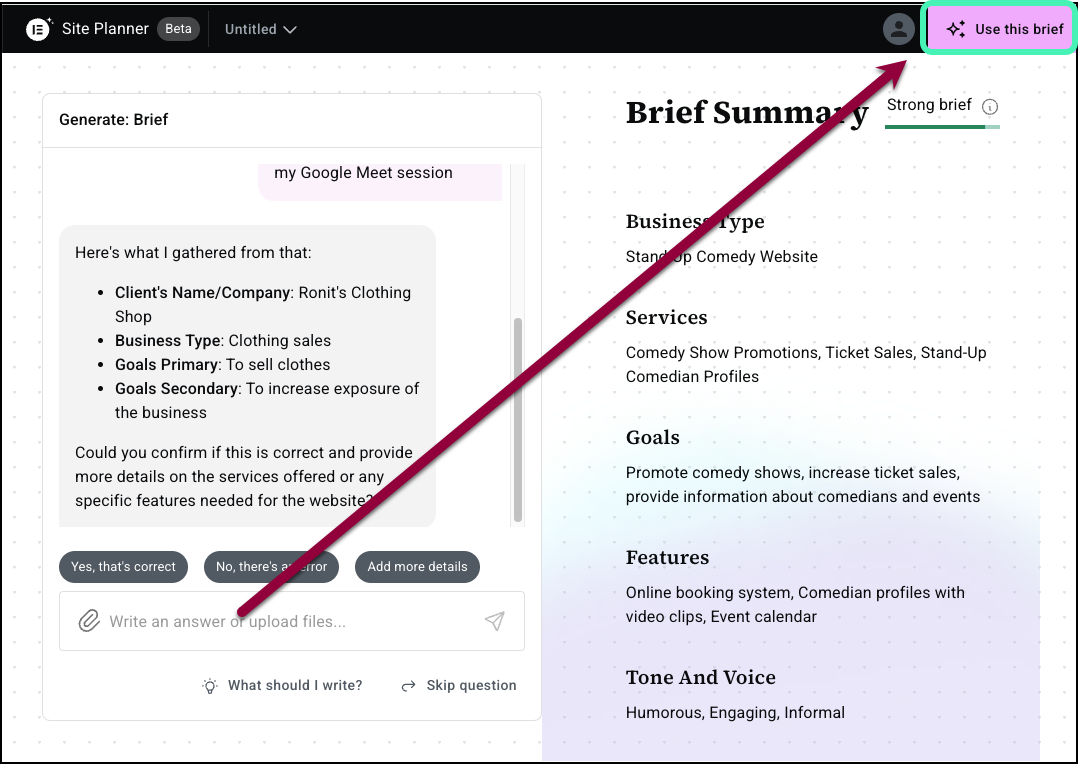
- If the recording contains enough information for a brief, and you’re happy with the brief, click Use this brief in the upper right corner.
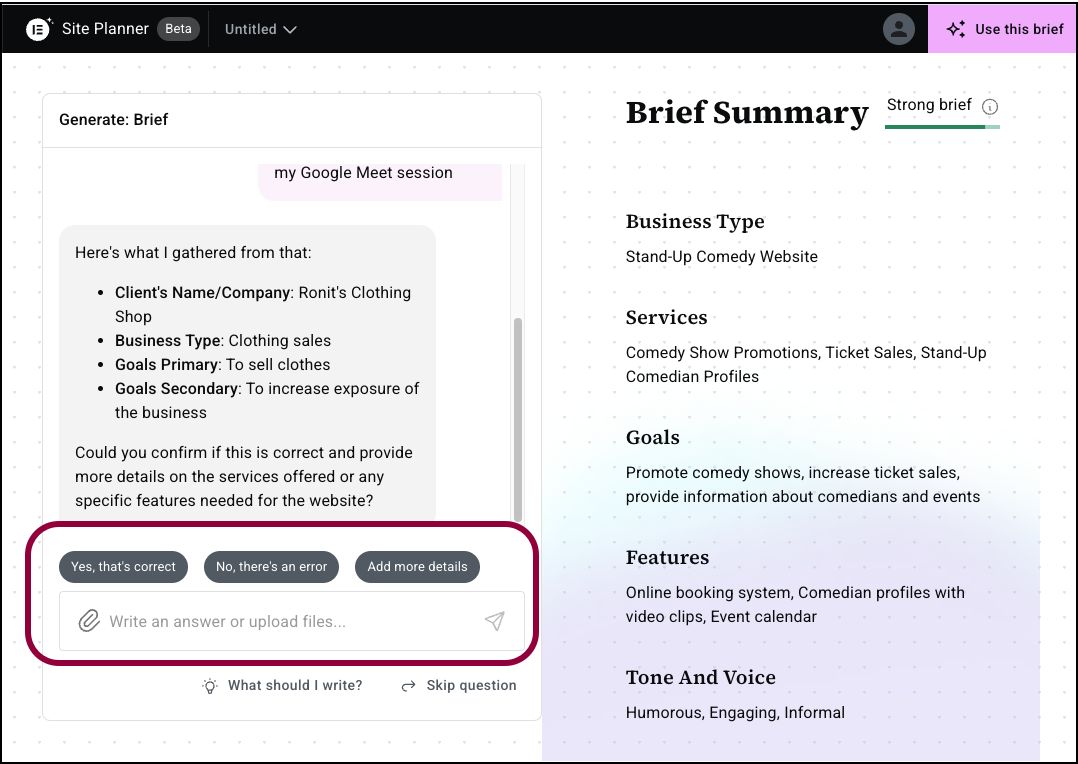
- If information is missing or you want to add something, use the panel to enter more information.
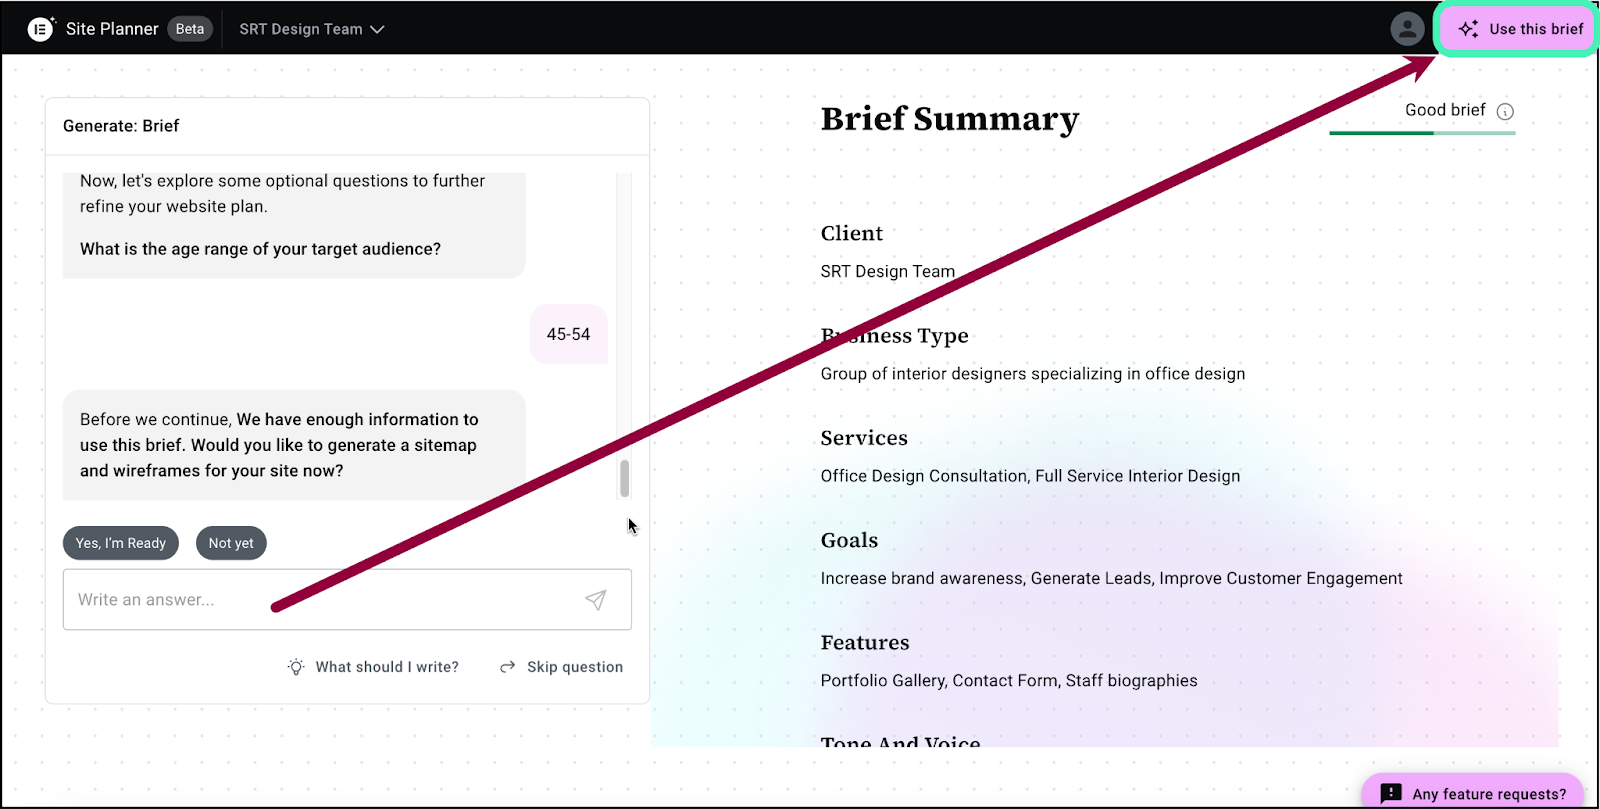
- When you feel you’ve added enough information, click Use this brief.
Site Planner will create a sitemap and wireframe layout for your site.
Work with your draft layout
Site Planner drafts a sitemap and wireframe for your site which you can then customize to your needs.
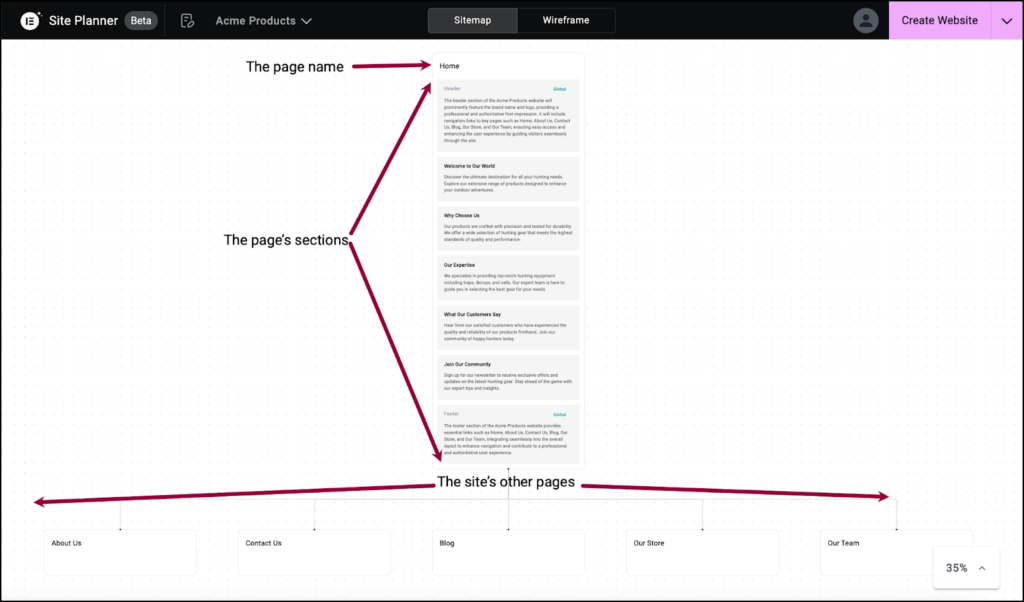
Site Planner presents the sitemap one page at a time, listing the different sections of the page.
- Click a page name to see the map of that page.
You can customize the site layout using either the sitemap or wireframe, although some features are only available from either the sitemap or the wireframe.
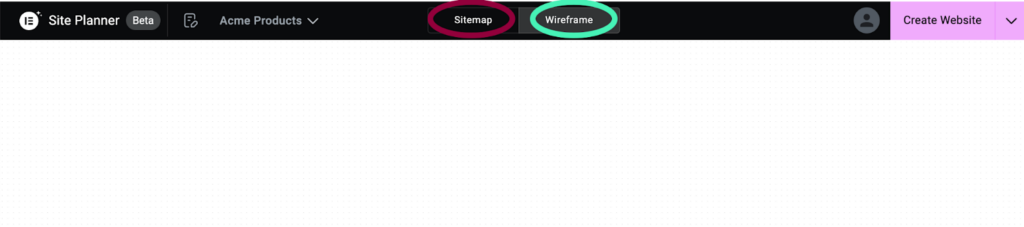
Use the Sitemap and Wireframe buttons to switch between the two views.
You can examine and edit the layout using the following features:
Zoom in on a page
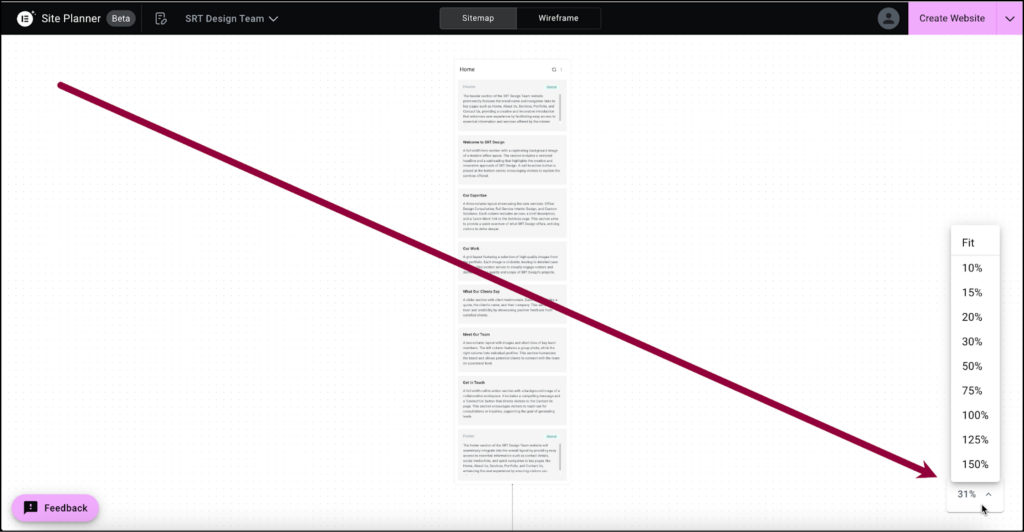
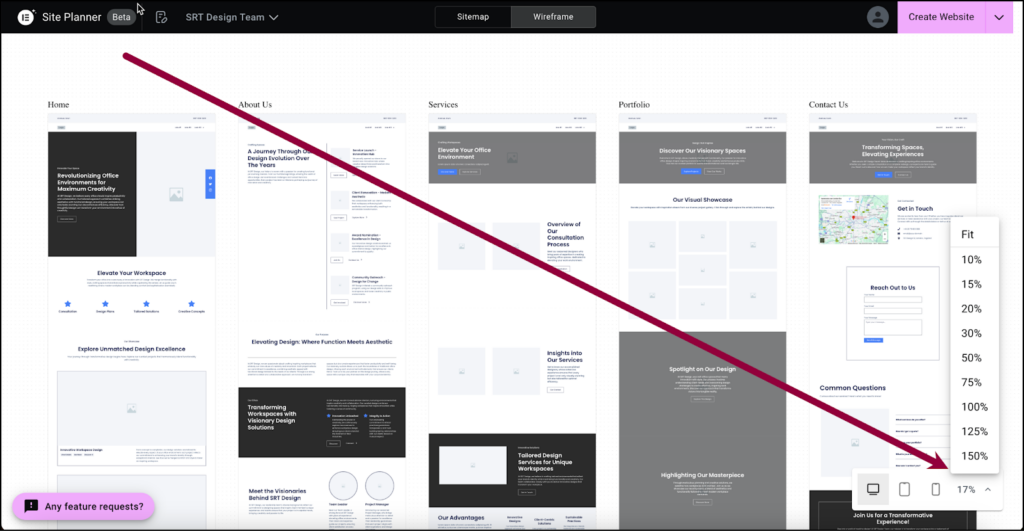
Use the View dropdown menu to zoom in and out.
Add a page
Adding a page can only be done from the sitemap.
If there’s a page missing from the layout, you can add it from the sitemap.
To add a page:
- Hover your mouse over the space between two pages.
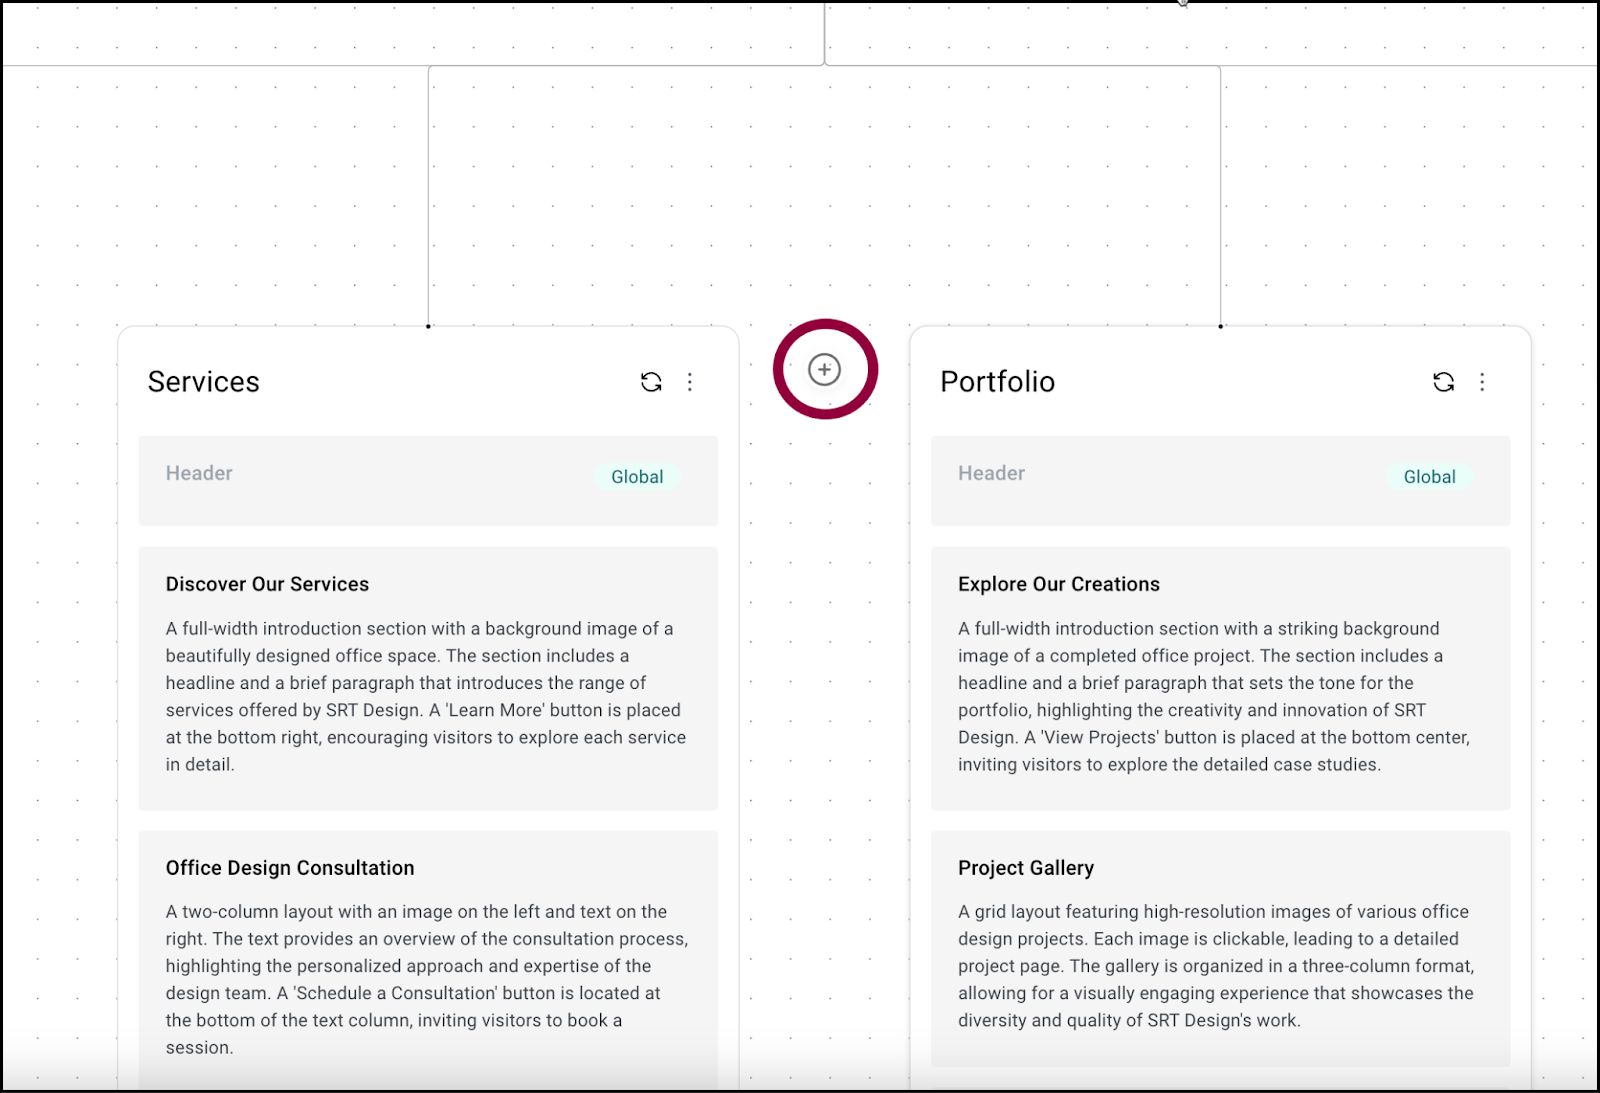
- Click the plus symbol.

- (Optional) Add a page name.
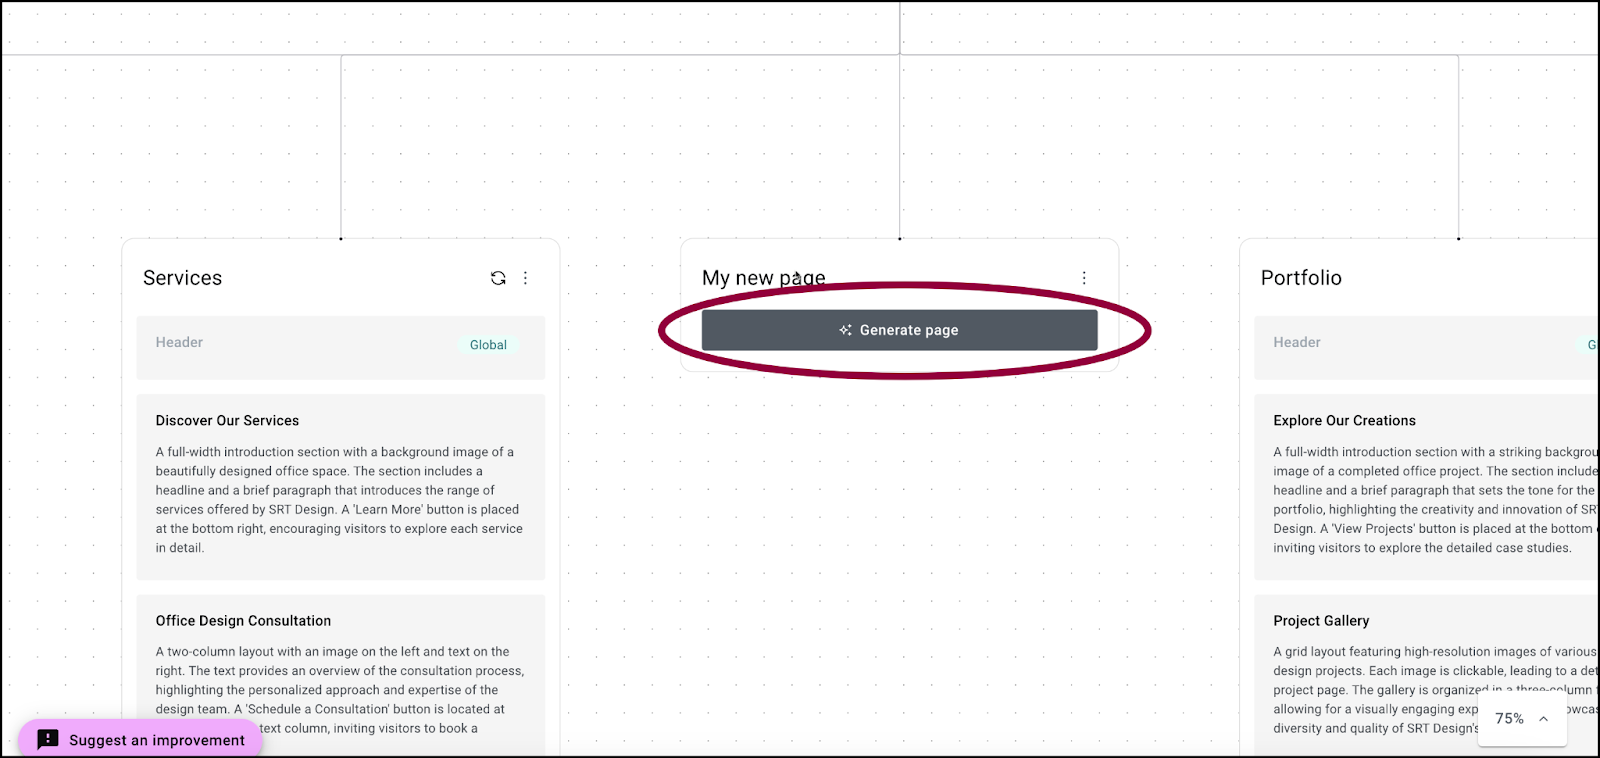
- Click Generate page.
Site Planner will generate a new page using the page name and the other information you provided in your brief. For instance, a page titled “Our Products” will yield different results than a page titled “Meet our staff”.
Regenerate a page or section
If you don’t like the layout of a page or page section, you can have Site Planner regenerate it until you get a result you like.
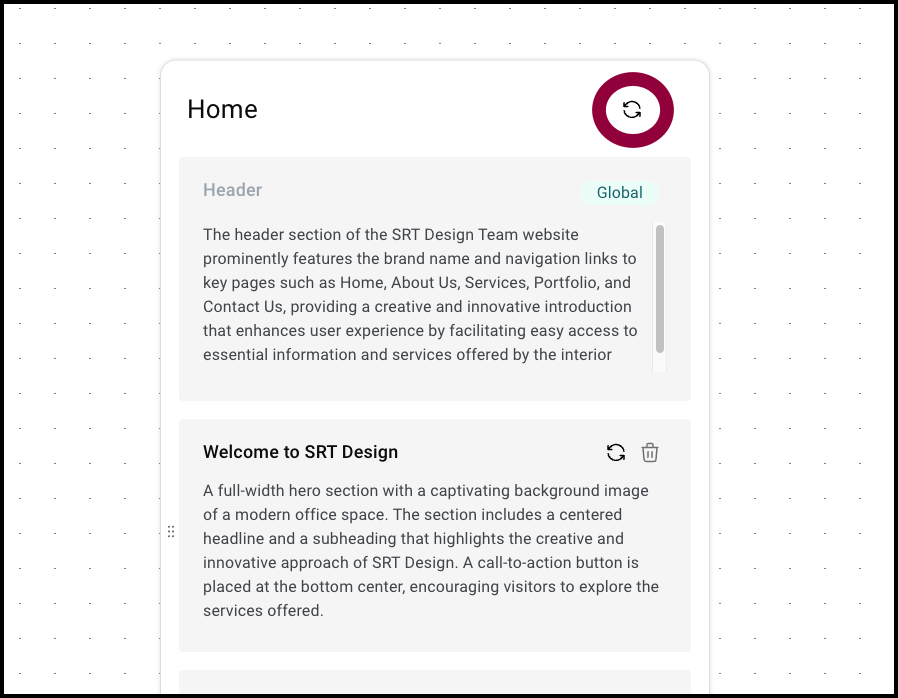
To regenerate a page Site Map only):
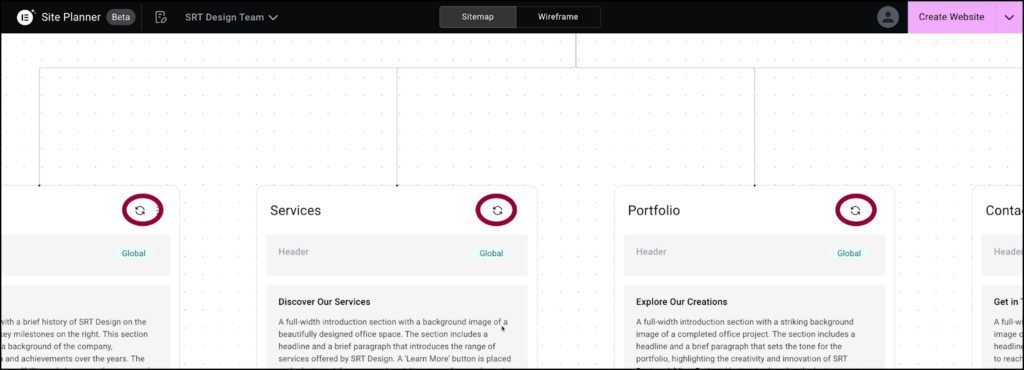
Hover over the top of the page and click the regenerate icon.
To regenerate a section:
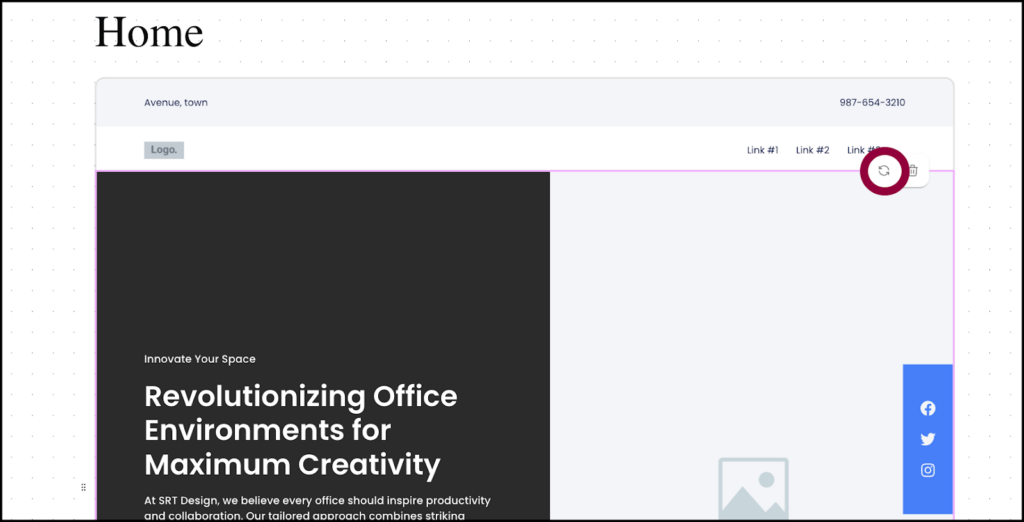
Hover over the top of the section and click the regenerate icon.
Delete a page or section
If you decide a page is unnecessary, you can delete it, if your page is too long, you can delete a section.
To delete a page (Sitemap only):
- At the top of the page click the ellipses.
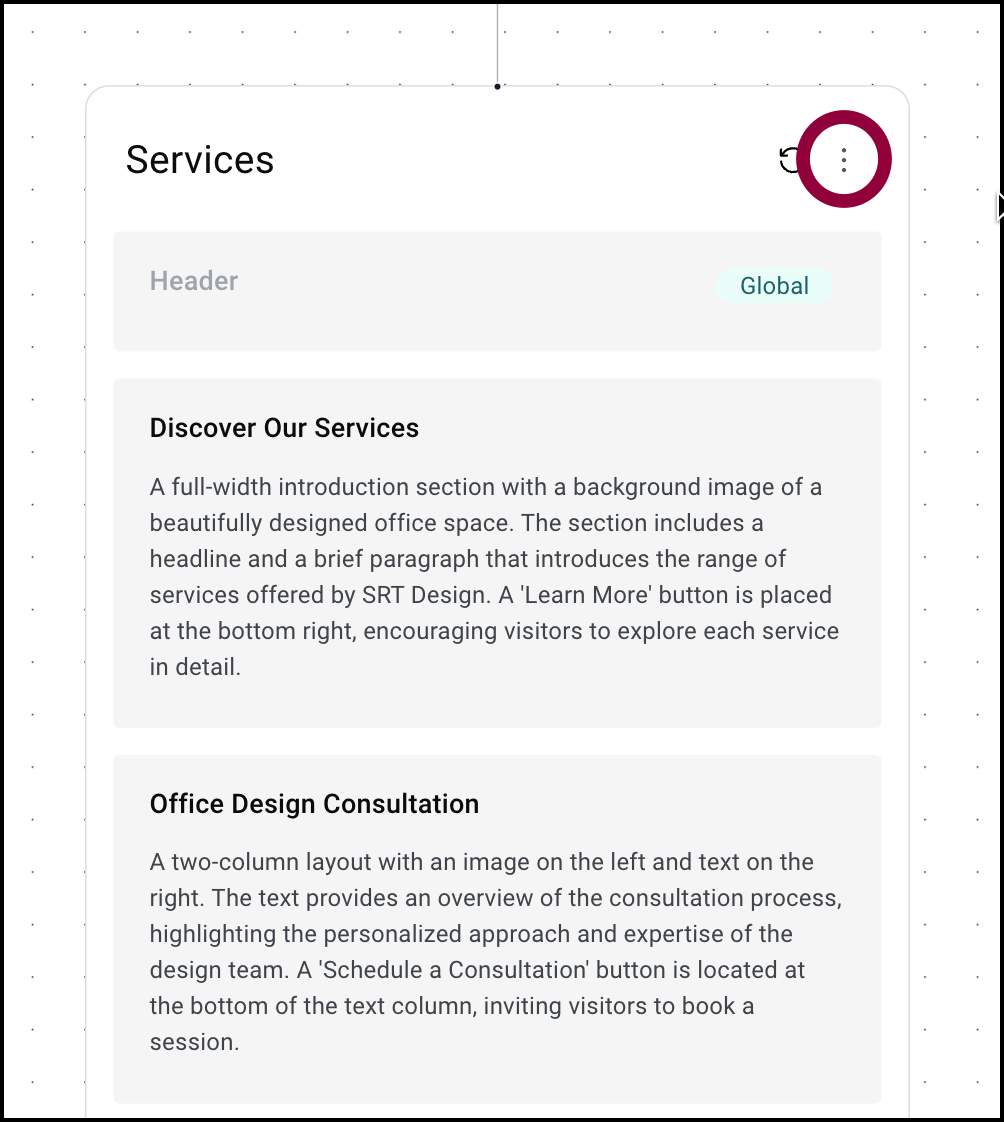
This page menu appears.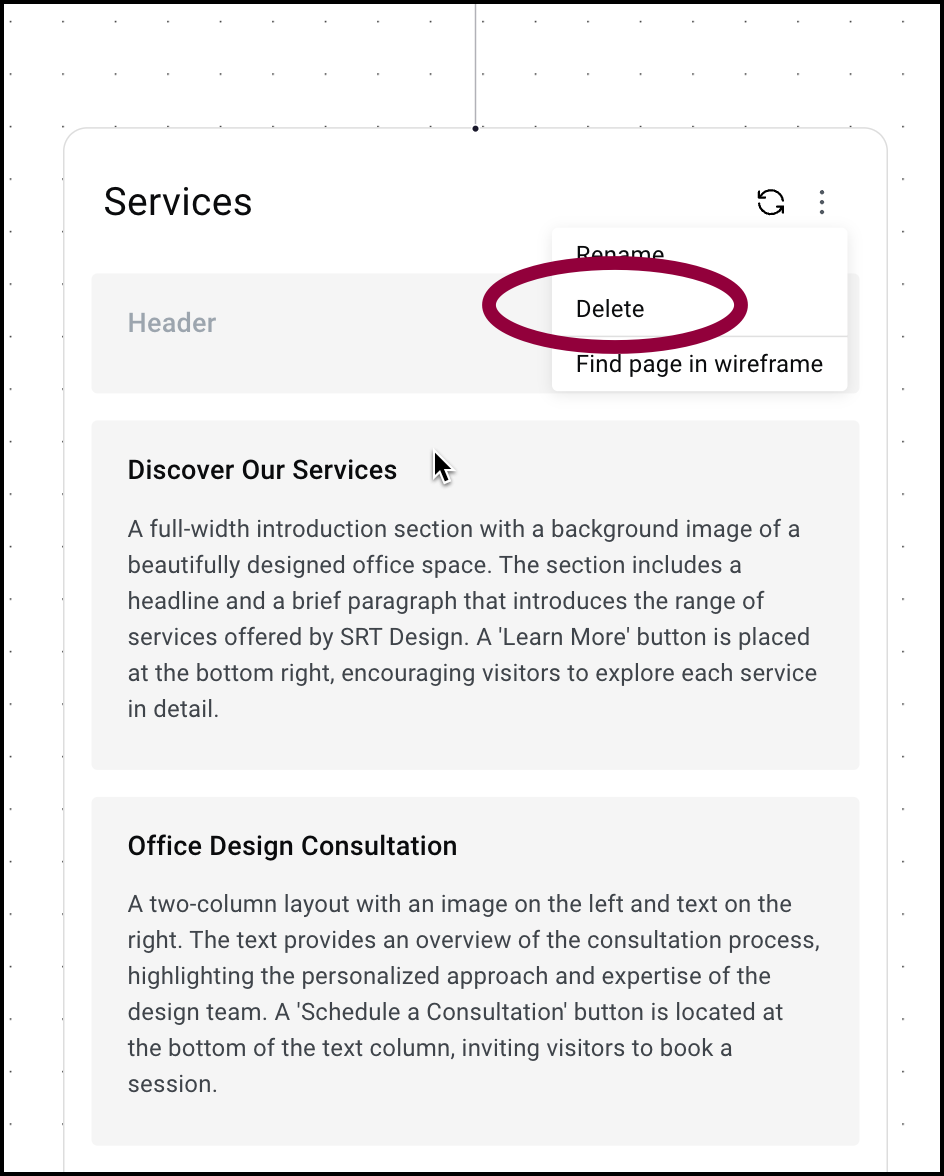
- Select Delete.NoteYou cannot delete the Home page.
To delete a section:

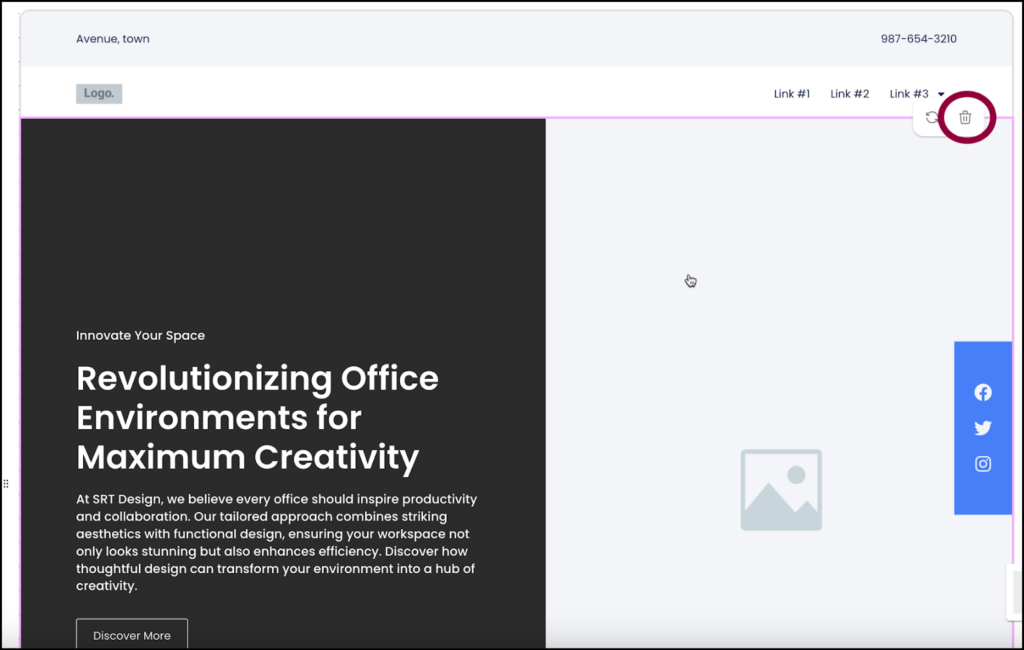
Hover over the section and click the delete icon.
Layout responsive views
Responsive views are only available from the wireframe.
You can see how your site will look on different devices by using responsive views.
To see responsive views:
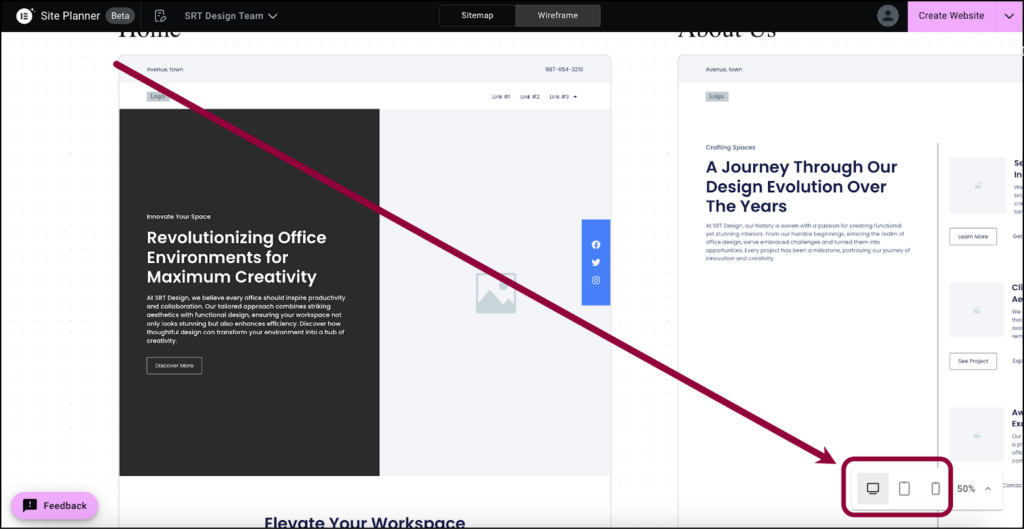
- Click the appropriate icon to see how the site will look on a desktop, tablet or mobile.
Create your website
After going through the wireframe, you’re ready to generate your website. There are two ways to create your site:
- Create a site using Elementor Host.
- Create a site using third-party hosting
Create a site using Elementor Host
You can seamlessly move from Site Planner to Elementor Host in a few easy steps. You can check out this new website for free before deciding if you want to purchase an Elementor Host site.
To create an Elementor Host site:
- Click Create Website in the upper right corner.

The website creation window appears.
- Select Launch a fully hosted website and the click Continue.
The wizard creates the site for you.
- Click Start Editing to begin customizing your site.
See below for articles on how to use the Elementor Editor.
You’ll be able to use the site for a demo period. If your satisfied with the site, you’ll have the option to purchase an Elementor Host subscription.
Create a site using third-party hosting
To create your website using third-party hosting, you’ll need to download the site from Site Planner and upload it to your WordPress website.
To download your site:
- Click Create Website in the upper right.
The website creation window appears.
- Select Import your kit to a site and the click Continue.
Site Planner takes your content and creates a downloadable website kit. - To download the kit, click Download & apply manually.
- (Optional) Enter the domain address of your existing WordPress site and click Run check. Site Planner will check to see what plugins your site needs.
Site Planner creates your kit as a zip file.
- Click Download kit.
Once your kit is created, you’re ready to publish your website. In order to publish your site, you’ll need:
- A website host with a WordPress website. For background information about WordPress, see What is WordPress? For details about website hosting, see What is website hosting?
- The Hello Theme. For details, see What is the Elementor Hello theme?TipIn most cases, you’ll want to choose the disable page titles option in the theme settings. To find out how, see Edit the Hello Theme settings.
- The Elementor plugin. For details, see Install & activate Elementor Core.
- (Optional) Elementor Pro. We recommend Elementor Pro, as it ensures compatibility with Pro elements and simplifies the process of creating your website. Without it, you may need to replace some theme parts and Pro features.
- For details about purchasing Elementor Pro, see Purchase an Elementor Pro plan. For details about installing Elementor Pro, see Install and activate Elementor Pro.TipETo learn more about Elementor Host sites, see Purchase and create an Elementor Host site.
Once your website is set up, you’ll need to import the zip file to create your site. To learn how to import your website, see Export and Import Elementor sites.
After importing your site, you need to edit the site using the Elementor Editor. For information about the Editor see:
- Explore the My Elementor dashboard
- Access WP Admin
- Understanding WP Admin
- Create or open a page
- Explore the Elementor Editor
- Use containers to build your first page
FAQ
What happens to the meeting data if I remove the AI?
The AI will stop transcribing the meeting once it is removed. anything discussed after removal will not be recorded by the AI nor will it be part of creating the brief. The meeting notes recorded before removal will be transcribed and used to create the brief.

