Table of Contents
The importance of website accessibility has been discussed for many years, but the information needed to make a site accessible was often difficult to understand, or difficult to implement. That is changing somewhat, although there is still a fair amount of confusion, and quite a few impediments to implementing code changes into many sites, scripts, and plugins.
Luckily, people are leading the way in helping us understand the importance, and giving us the information we need to make changes to our own sites.
Elementor can help you make your site more accessible. In this tutorial, we’ll show you a few examples of how easy this can be.
We’ll start by creating a couple of design elements on a page, including a hero block and a sign-up form.
Using the advice given on “ Improving Accessibility of Your WordPress Website”, we’ll fine-tune our page using Elementor and Elementor Pro.
Font Size and Font Family
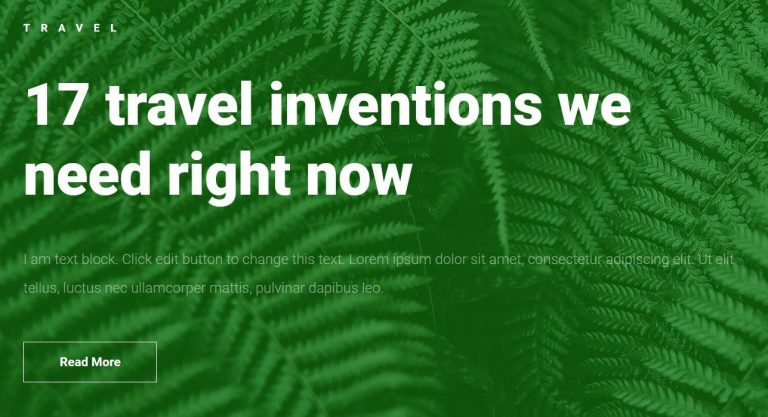
Our Hero Block is the part we’ll begin with. This is what it looks like before we begin our accessibility changes.
We’ll begin by focusing on font family and font size, ensuring the text is always readable. Of course, using your theme’s options via the WordPress customizer is a great first step. Set your default font family and sizes for body text, Hx tags, etc. there, and you’ll have less to worry about once you start designing your pages. But if you need to change the typography on any Elementor-designed page, of course, it is simple to do so.
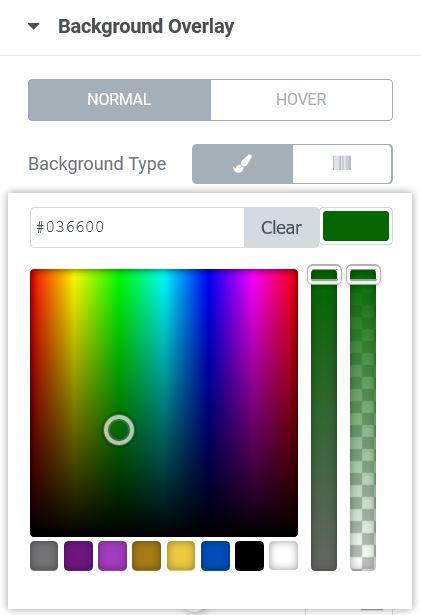
Our default font size in the customizer is set at a comfortable, easy-to-read 16px, which corresponds to the default size that most browsers use. For the TRAVEL tag, the font size is set to 12px, which can be difficult for many users to read.
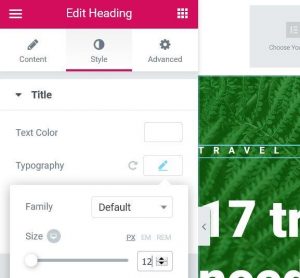
Let’s change it to .9 REM so that it is slightly smaller than default, but still very readable. Elementor makes it easy to change the size. Simply go to the widget’s Style > Typography settings, click on REM, and either use the slider or enter .9.
Why use REMs instead of Pixels for font size? Accessibility is the key reason here. As we’ve mentioned, most browsers use 16px as the default text size, but a user can, and often do, change their default browser text size to be something different. If a user sets the default size at 20px, all text should scale upwards accordingly. If we design sites using pixels, we take away the ability for that user to have control over the size of the text, making our sites less accessible. Instead of setting your heading at 32px, set it to 2REM instead. This means the heading will be 2x larger than the base font size (16px normally, or in the case of our user who changed her default size to 20px, our heading would now be the equivalent of 40px). While we might wish for it to be exactly the size we want, it is the user’s right to see our text at a size that is readable to her. Let’s not take that choice away from her.
Tip: There are a number of online calculators to help convert PX to REM. My favorite is OffRoadCode’s REM Calculator. Simply input your base font size in PX (for our example, that’s the 16px we set in Customizer as the default size). Then enter a list of sizes in PX that you’d like to convert to REM, separated by commas (eg, 16,18,20,22,24,27,33,36,65). Click the Calculate button and a list will be generated showing the REM size that is comparable to each of the PX sizes you’ve requested.
Next, change any other fonts to corresponding REM sizes throughout the page, as needed.
Proper Color Contrast
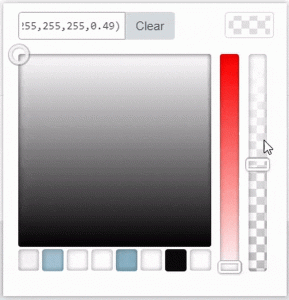
Now we’ll focus on making sure there is sufficient contrast between background and foreground colors. The text within our hero’s description is currently very difficult to read because there is not enough contrast between the text color and the background image colors.

This is primarily because our text was not at full opacity. Merely increasing the opacity to 1 instead of 0.49 brings the contrast level to a PASS grade in accordance with the AA specs.
We can also pass the AAA specs by darkening the background filter slightly.
The final result is now very readable:
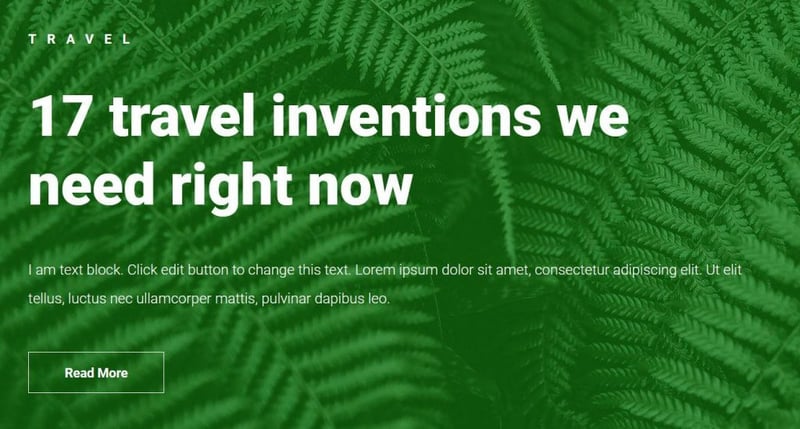
Image ALT Attributes
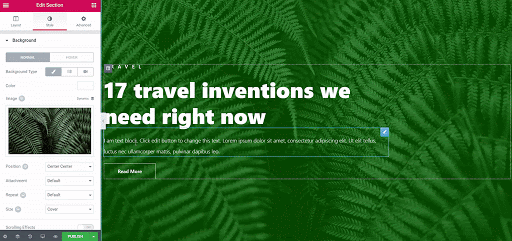
But what about that background image? We need to make sure it has an image ALT attribute, so screen readers can describe the image accurately to our visually impaired readers. Our image didn’t originally have an ALT attribute defined in the media library.
To solve this, simply click the image in the section’s Style tab, and add an ALT attribute in the media window for the image.
ARIA-Labels
Our hero section has a Read More button. Let’s enable our visually impaired users the opportunity to have some context added to that button, by providing an ARIA Label to the link. With Elementor Pro’s Custom Attributes feature, this is easy to do.
Edit the Button’s Advanced > Attributes, and enter something like:
aria-label|Read more about 17 travel inventions we need right now
Notice that we’ve entered our data using the format key|value. The key, in this case, is “aria-label” and the value of that key is “Read more about 17 travel inventions we need right now”.
The result is code that is added to the HTML, like this:

Accessible Forms
Our subscription form needs similar treatment as our Hero block. We’ve adjusted all the text to ensure it has readable fonts, using REM sizes, with proper color contrast.
Forms need to handle TAB Order appropriately. Luckily, Elementor Pro’s Form Widget takes care of this by default. Each successive press of the TAB key brings us to the next field automatically, and then to the Submit button last. Pressing SHIFT-TAB through the fields works backwards as expected as well.
HTML5 Semantic Elements
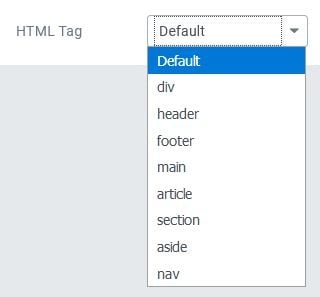
Elementor also makes it very easy to use HTML5 semantic elements such as <header>, <footer>, <article>, <aside>, <nav>, <main>, and <section> in place of <div>. Just look for the HTML Tag option in either the Section > Layout or Column > Layout, and choose whichever you need.
Making “All The Things” Accessible
Of course, we’ve only shown a small portion of one web page. There are many other elements to consider when making a website accessible, as mentioned in the Improving Accessibility of Your WordPress Website article. Each website is different, so the approach taken to make them accessible may differ. But by implementing a well-thought-out process, making strategic use of your theme’s options, and utilizing Elementor’s ability to have fine-grain control over page elements, you’ll go a long way towards making your site accessible to all users.
Want To Give Users Even More Options?
Elementor has you covered there as well. The Elementor / Pojo team created the popular (and free) One Click Accessibility plugin.
One Click Accessibility plugin adds a number of helpful accessibility features with the minimum amount of setup and without the need for expert knowledge.
Accessibility Toolbar:
A small icon on the left or right side of a page allows a user to click it and open a toolbar that allows the user to:
- Resize fonts (increase/decrease)
- Change page to Grayscale
- Show page with Negative Contrast
- Show page with High Contrast
- Show page with a Light Background
- Change Links to have Underline
- Change font to a Readable Font
- Link to Sitemap / Feedback / Help pages
Accessibility Features:
- Enable Skip to Content
- Add outline focus for focusable elements
- Remove the target attribute from links
- Add landmark roles to all links
- Customizer for style adjustment
You can enable or disable each of the options and make appropriate setting changes for each. This plugin can be used whether or not you’ve already made changes to your site to make it more accessible.
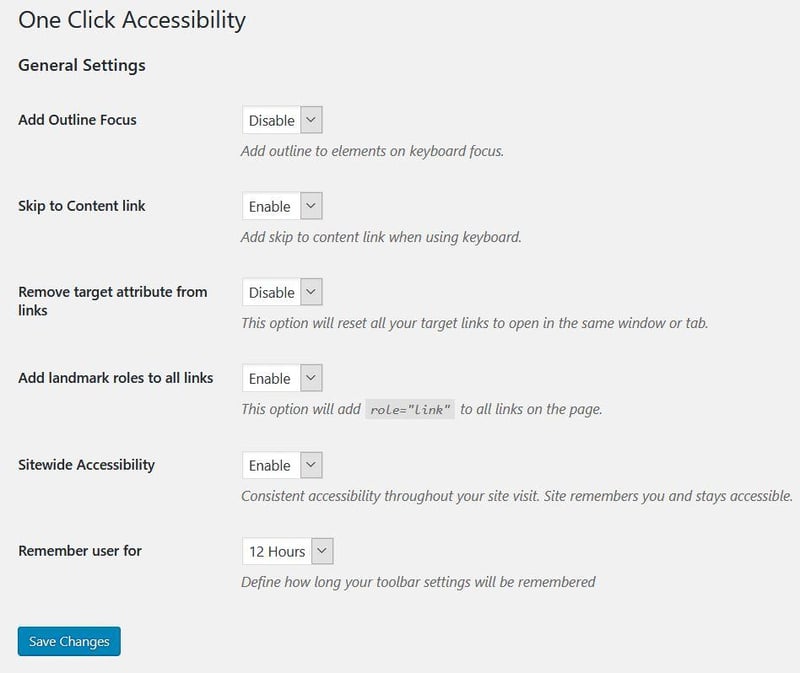
General Settings
This panel controls the plugin’s main functionalities. For example, the Add Outline Focus, which adds a visible border around an area that is currently in focus.
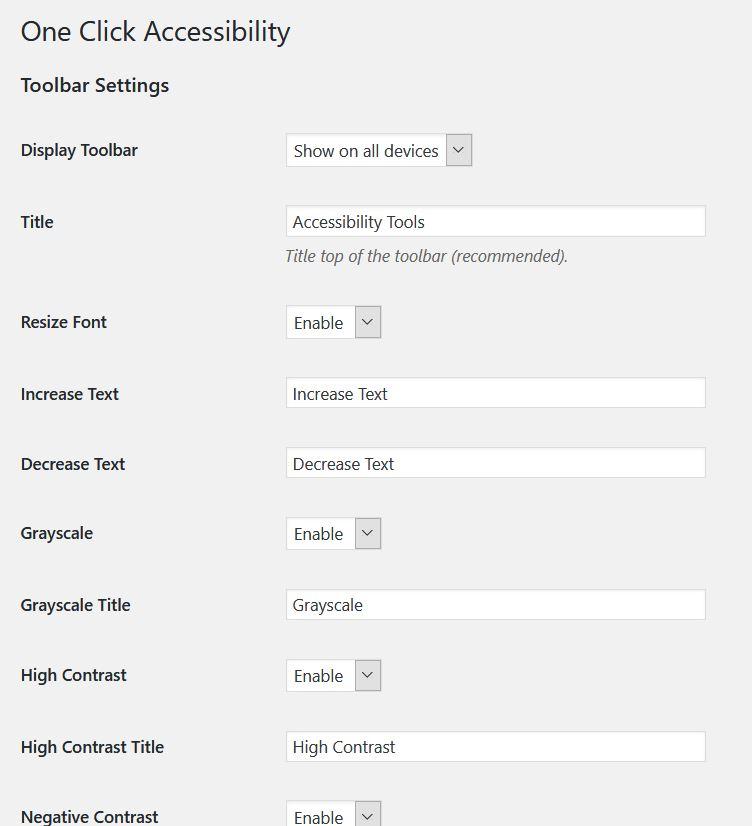
Toolbar Settings
This set of controls determines which settings will appear in the toolbar.
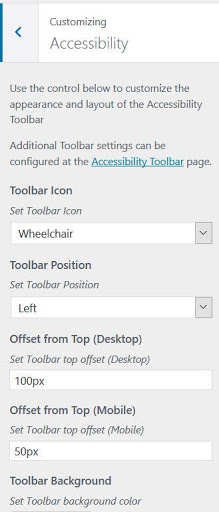
Customize
This panel sets the position and visibility of the toolbar, as it is seen by the user.
What Does The User See?
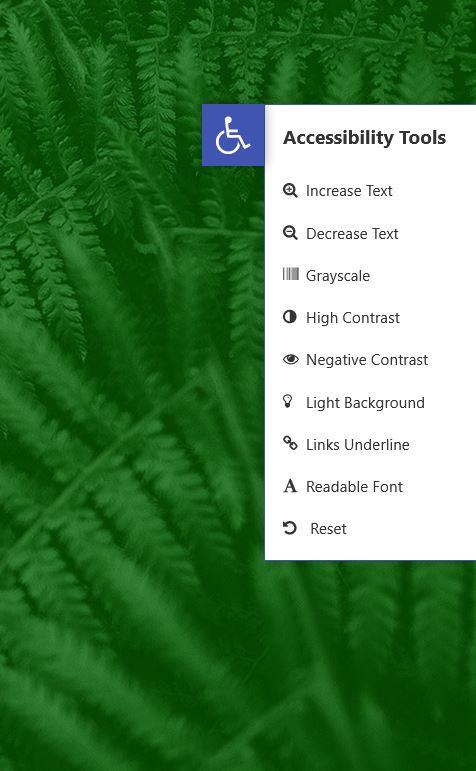
As you can see, just by adding the plugin and adjusting a few settings, the user has many accessible options at their fingertips, all with only one click of the Accessibility Toolbar Icon.
Web Accessibility is a complex subject. No short tutorial can cover everything you need to know to make your site accessible, but we hope these instructions help you take the first steps in doing so.
Looking for fresh content?
By entering your email, you agree to receive Elementor emails, including marketing emails,
and agree to our Terms & Conditions and Privacy Policy.


