
Table of Contents
Image optimization is a very trendy topic in the WordPress space of today. Let’s face it; websites are not getting any smaller! A lot of reasons for that: audiences are ever more eager to consume visual content, WordPress themes are expanding, design trends are getting more photo-dependent by the day. Clearly, using “fewer images” isn’t the solution; what we need is better ones.
This post is an in-depth look at one of those solutions. Optimole is an image optimization service that’s built to integrate with Elementor flawlessly while giving you top-of-the-line image optimization capabilities (up to 80% savings).
What Is Optimole and Why You Should Consider It Instead of the Alternatives?
Okay, so if you look at the label, Optimole might look like your garden variety image optimizer for WordPress. So, if you’re already using Smush or Imagify, you would probably ignore it completely.
No hard feelings. I won’t hold this against you!
There are, however, a few differences that make Optimole stand out:
- It is fully compatible with Elementor. This means that instead of optimizing just what’s in your media library, it also works with every image that’s processed via Elementor. This includes backgrounds, plus anything else that’s in the custom CSS that Elementor outputs.
- The optimization happens in the cloud. This means that Optimole doesn’t alter anything in your media library. You get to keep your original images intact.
- The images are served from a fast CDN. If you’re using the free Optimole plan, you get seven edge locations all over the globe. On the paid plans, you get access to 130+ locations. On top of that, you can also lazy-load images without jQuery, which is good for performance.
- You can lazy-load images without jQuery, which is good for performance. This lazy loading mechanism works not only with in-HTML images but also backgrounds handled through CSS.
- You can also optimize GIFs by converting them to video files (MP4 and WebM). Videos are smaller than animated GIFs in most cases.
- Optimole checks the visitor’s device and browser and always delivers an image that’s tailor-optimized for them. This also works for visitors with slow internet connections. Optimole downgrades the image quality accordingly when needed. On the other end, if the visitor’s browser supports them, Optimole serves Retina and WebP images.
- You can set exclusions to not optimize images based on image extensions, names, or whole page URLs.
- You can watermark your images (beta) for improved security – if you’ve had your images stolen by other sites.
Apart from the above, Optimole also has the whole package of must-have features among image optimizers. I’m talking about things like compression level controls, lossy and lossless optimization, tracking and monitoring your compression stats, and, last but not least, a full autopilot mode.
I’m going to show you some performance tests and the sort of gains you can expect from Optimole (on an Elementor-built page) later in this post. But first:
How to Set up Optimole With Elementor
The installation process of Optimole is the same as with any other WordPress plugin. You can get it either from here or just install it directly from your WordPress dashboard in Plugins → Add New (type in “Optimole”).
After activating the plugin, you’ll be asked to register for an API key. Since Optimole processes your images in the cloud, the API key is how you authenticate your site with the main Optimole service.

As you can see in the screenshot above, you get to show your optimized images to up to 5,000 visitors a month for free.
You’ll get your API key via email. Just copy and paste it into the activation box.

After that, you’ll see the main Optimole panel.

At this stage, Optimole is already set to work on autopilot on most WordPress sites. However, you might still want to take a look at the Settings tab to make a few tweaks and customize your needs perfectly.

- Enable image replacement – this one needs to stay enabled if you want Optimole to do its job.
- Scale images & Lazy load – this option is where you turn on one of Optimole’s most useful features – serving optimized images based on the visitor’s viewport and device. Leave it enabled for best results. Lazy loading is the icing on the cake.
For additional settings, switch the tab from General to Advanced.

You’ll find a couple of sub-tabs there, offering the following settings:
- Enable network based optimizations – enable when you want to serve more heavily optimized images for visitors on slow internet connections.
- Enable Gif to Video conversion – very useful if you like to publish a lot of animated GIFs.
- Enable Retina images – makes sure that your images look good on all screens, even the big ones.
- Enable lazyload for background images – this is one of the most unique features of Optimole’s; the name says it all.
- Exclusions – if you don’t want to optimize certain types of images, specific image files, or images on specific pages within your site, then you can exclude them here:

- Compression level – this is where the fun starts! Let’s discuss this one in a bit more detail:
Optimole comes with three settings for the compression level. Depending on your site and the types of images you publish, some of these settings might be better for you than others. I’d recommend switching through the Low, Medium, and High settings to see what the impact is on your images. Optimole offers a quick preview as you toggle through these settings.

If you use a lot of photographs on your site, you can set this to High. For more nuanced and detail-heavy images, the Medium setting might be better.
Now let’s talk about the main thing you came here for — how Optimole can work with Elementor.
How to Check If Optimole Is Working
Optimole’s superpower is that it integrates with Elementor and takes care of all the image files that are in use on your site. This is due to Optimole’s architecture and how it approaches the task of image optimization in the first place.
Most image optimization plugins on the market work directly inside the media library of your WordPress site. However, since much of what Elementor does with your content presentation happens on the fly, those pre-made optimizations go out the window.
Optimole works in the cloud by intercepting the final images being used on the page and then replacing them with optimized versions.
Here’s how to make sure that Optimole works with your Elementor-powered site correctly:
- Install Optimole via the process described above.
- If you have Elementor already enabled on the site, you’ll see this notice:

3. From the wp-admin go to Elementor → Tools. In the General tab, regenerate CSS. Like this:

Among other things, this will replace Elementor’s standard image paths with those going through Optimole.
With that done, Optimole is fully enabled to work with Elementor!
Here's How to Check If Everything Is Working Correctly
For the purpose of this demo, I’ve built myself an About page in Elementor. That page actually comes from my other tutorial on the blog.
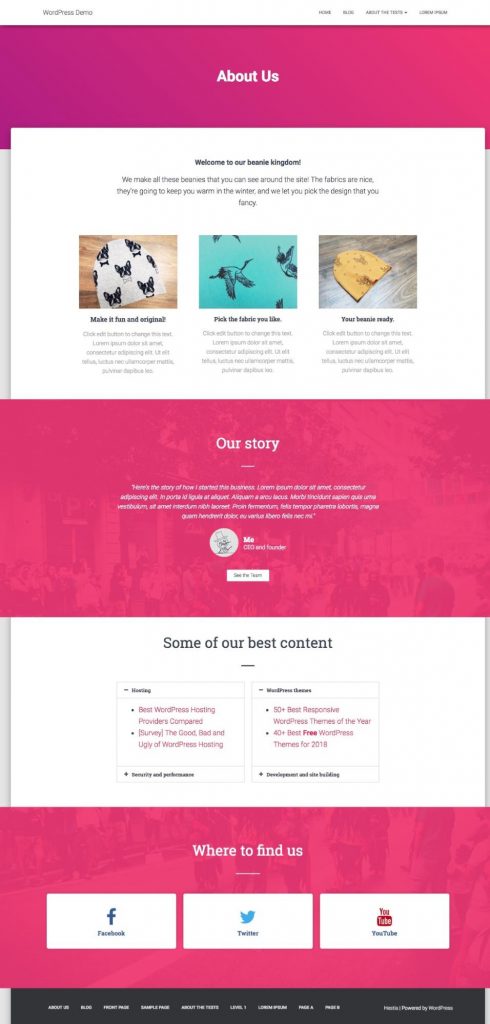
As you can see, there’s a handful of images there. Specifically:
- the three images in the center – the hats
- a profile image – this one comes from Elementor’s testimonial block
- two background images – you can barely see them underneath the red overlay
- (the social media icons are actual icons, so we can ignore them)
Those are very different types of images from the perspective of an image optimization plugin.
All we have to do to ensure that Optimole is doing its job correctly is view the source of the page and see the path (or src) of our images.
In other words, you should see something like this when checking the path of your images:

If you do a bit more digging, you’ll see that all images listed above have been replaced with Optimole-origin URLs. Those URLs tend to look like this: USER_TOKEN.i.optimole.com
So those are on-page images, but what about the backgrounds? Since the CSS for that is generated on Elementor’s end, we need to fire up Chrome developer tools to investigate.
Once you find the block with the background and view its CSS, you can see that the image has been replaced as well:

With that, you can now be confident that Optimole has been integrated with your Elementor-powered website correctly!
On the frontend, of course, it’s business as usual. All your images should look just as good as ever.
Optimole Performance Tested With Elementor
Even though I’m going to show you some raw numbers for load times with and without Optimole enabled on that About page of mine, those numbers are not entirely the point in themselves.
Load speed is an important UX and SEO factor overall. So any upgrade you can implement there will benefit you in more ways than one. Better speed = more engagement = more happy readers = more sales = more revenue.
Might seem far-fetched at first, and like a huge oversimplification, but it does make a lot of sense. Chasing speed improvements is just worth it in general, and the size of your images is simply the lowest-hanging fruit.
Images tend to take up more than half the size of your average web page (up to even 90%), so finding a method to reduce their impact can go a long way.

With that said, here are the results of my tests:
First off, as I said, I’m testing the About page I built a minute ago. Here’s what Pingdom says about the load times when I have Optimole enabled:
- load time: 898 ms
- page size: 1.1 MB
- images take up 49.22% of page size
And here are the results when I disable Optimole:
- load time: 2.7 s
- page size: 5.3 MB
- images take up 89.24% of page size
We have a ~67% better load time and a page that’s nearly 5x smaller.
Granted, those are just a couple of tests, and you shouldn’t treat them as any set-in-stone thing. Sure, the load times can fluctuate based on network conditions, but the savings in page size are the true winner here.
Those optimizations bring a number of benefits:
- faster loading pages are better for UX and SEO
- smaller pages are reportedly better for SEO as well
- smaller pages mean less content you have to send to the visitor
- you get better performance on mobile devices and for low connection speeds
You get the idea. But that’s not all:
The type of user who will benefit from those optimizations, even more, are people who rely on Elementor quite heavily for things like custom page builds with custom backgrounds and in-design images (images that are part of the page design). Optimole will process all of those for you.
I hope I’ve got you on board! Feel free to check out Optimole, do some tests of your own, and see what it can do for you.
Looking for fresh content?
By entering your email, you agree to receive Elementor emails, including marketing emails,
and agree to our Terms & Conditions and Privacy Policy.


