Getting Started with WordPress
You might be wondering, “Why should I choose WordPress over other website platforms?” Great question! Let’s dive into some of the key benefits that make WordPress stand out among its competitors.
- You own your content: One of the main reasons to choose WordPress.org is that it’s an open-source platform. This means you have full ownership and control over your content. If you ever need to switch hosting providers, you can easily move your website and content without any hassle.
- Flexible and customizable: WordPress offers a wide variety of themes and plugins, allowing you to create a website that’s uniquely yours. With thousands of options available, you’re sure to find the perfect design and functionality for your site, no matter your niche or industry.
- Great for beginners: Even if you’re new to website building, WordPress makes it easy to get started. The user-friendly interface and helpful community make it simple for beginners to learn the ropes and create a professional-looking website.
- Enhanced design possibilities with Elementor: Together, Elementor and WordPress make for an unbeatable combination. Elementor’s intuitive page builder plugin allows you to effortlessly design and create stunning websites, even without any coding knowledge. Meanwhile, the all-in-one Elementor Hosting solution further streamlines the website creation process, making it a breeze for beginners to launch and maintain their websites with minimal hassle.
- Room to grow: As your own site and online presence expand, WordPress is equipped to grow with you. Whether you’re adding an online store, a membership area, or any other advanced feature, WordPress has the tools to make it happen.
- A strong community: With WordPress powering a massive 43% of the internet, you’ll never be alone in your journey to build a WordPress website. There’s a large and active community of WordPress users, developers, and experts ready to help you with tips, advice, and support.
It’s important to note that not all platforms are created equal. For example, Wix, Squarespace, and even WordPress.com have certain limitations and are considered closed environments. At this point, it’s essential to understand that WordPress.com is different from WordPress.org. WordPress.org is a self-hosted platform that offers full control, customization, and ownership of your website. You need to find your own hosting and pay for additional costs, such as domain registration and premium plugins. In contrast, WordPress.com is a hosted platform with limited customization and control. It offers a free plan with basic features, but paid plans are required for more advanced options. While WordPress.com is an option, it may be more expensive in the long run and restricts monetization options compared to WordPress.org. Opting for a managed host like Elementor Hosting is a smart choice. It offers WordPress.org pre-installed and unchains you from any limitations, enabling seamless website building.
So, with all these fantastic benefits, it’s no wonder that so many people choose WordPress.org as their go-to platform for creating a website.
How much does a WordPress Site Cost?
When it comes to building a WordPress website, many factors contribute to the overall cost. The core software itself is free, but additional expenses like a domain name, web hosting, and premium themes and plugins come into play.
That’s where Elementor Hosting shines as a cost-effective solution. By providing an all-in-one package, Elementor’s hosting plan for WordPress simplifies the process and saves you from having to piece together various tools and services.
With Elementor Hosting, you’ll enjoy access to a powerful page builder, a vast library of templates, and an array of features designed to streamline website creation – all at a competitive price.
With a clear understanding of the costs involved in creating a WordPress website, let’s go through the essential steps to get started.
Before You Begin, Here’s What You Need
Before diving into building your WordPress website, there are a few essential things you’ll need to have in place. In this section, we’ll cover two crucial components: a domain name and web hosting. Let’s break down each of these, so you know exactly what to look for and how to get started.
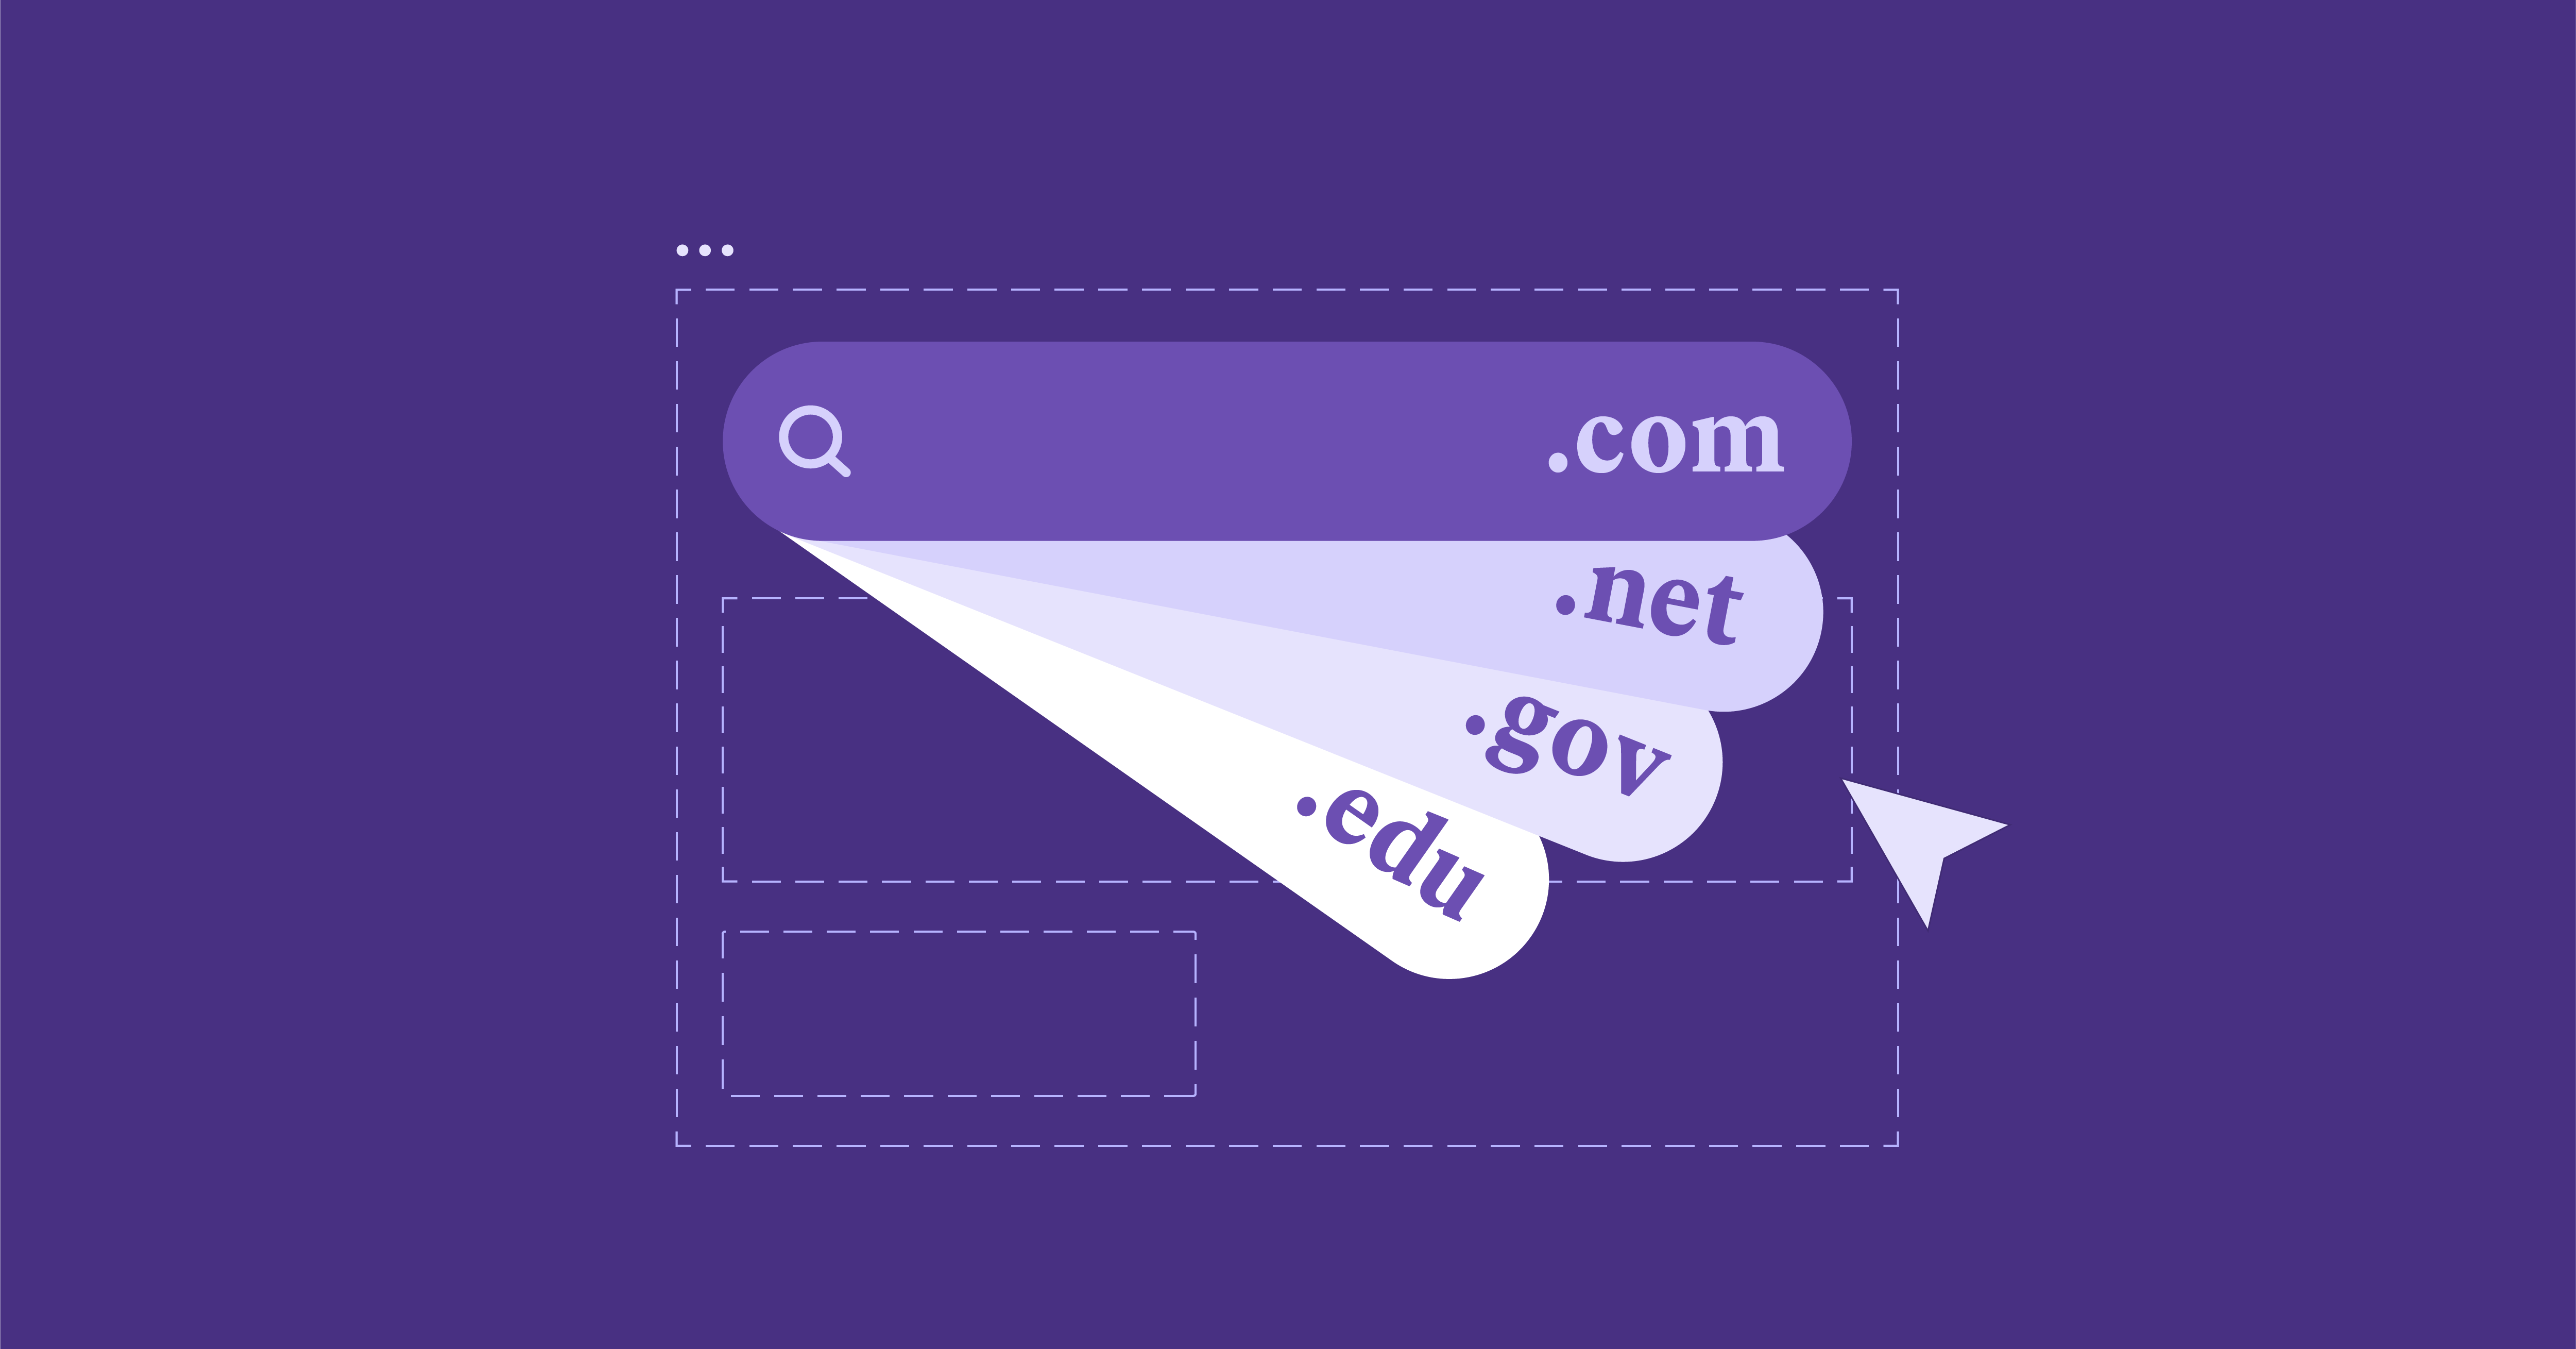
Domain Name
Your domain name is your website’s address on the internet. It’s what people type into their browser to visit your site. Choosing the right domain name is important because it represents your online identity and can impact your website’s success.
Here are some tips for selecting the perfect domain name:
- Keep it short and memorable: Aim for a domain name that’s easy to remember and type. The shorter and more straightforward it is, the easier it will be for people to find and share your website.
- Use relevant keywords: If possible, include keywords related to your niche or industry. This can help make it clear what your website is about.
- Choose the right extension: While .com is the most popular domain extension, there are many others to choose from, like .net, .org, or even industry-specific ones like .photography. Pick the one that best fits your website’s purpose.
If you are not ready to purchase a domain just yet, most hosting providers will provide you with a temporary free domain name while you build your site.
Tip
If you are having trouble choosing a custom domain name or finding an available one, try harnessing the power of AI with a tool such as Smarty Names or DomainsGPT.
Web Hosting
Web hosting is the service that stores your website’s files and makes them accessible to people on the internet. There are several types of web hosting, but as a beginner, you’ll want to focus on finding a top web hosting service provider that’s both reliable and easy to use.
Here’s what to consider:
- Shared Hosting: While shared hosting is often the most affordable option, it can include hidden fees and be challenging for those without technical know-how. You may run into issues such as limited resources, slow website performance, and decreased security. Shared hosting often involves using a control panel like cPanel, which can be complex with many different options and settings to navigate, making it overwhelming if you have limited technical experience.
- Managed WordPress hosting: This type of hosting is designed specifically for WordPress websites. It offers automatic updates, enhanced security, and optimized performance. This type of hosting is ideal for those who want a hassle-free solution without the need for technical knowledge.I highly recommend Elementor Hosting for anyone seeking a streamlined and stress-free experience. With Elementor’s managed hosting, you can set up your website with just a single click, making the process quick and simple. Additionally, Elementor offers award-winning support, available 24/7, so you can get the help you need when you need it.
- Virtual Private Server (VPS): VPS hosting is suitable for websites that require more control and resources. However, it may not be the best option for smaller, less demanding websites. VPS hosting requires a higher level of technical knowledge and management compared to other hosting options, so it may not be ideal for those without technical experience.
Once you’ve chosen a web hosting provider, you can sign up for an account on their website. They’ll guide you through the process, and some providers even offer one-click WordPress installation to make things even simpler.
In the following sections, we’ll dive into the step-by-step process of how to build a website, ensuring you have a smooth and enjoyable experience as a first-time website builder and creator!
How to Download and Install WordPress
Now that you’ve got your domain name and web hosting sorted, it’s time to install WordPress and start building your own website. In this section, we’ll go through different methods of installing WordPress, so you can choose the one that works best for you.
Managed WordPress
If you’ve opted for a managed WordPress hosting plan, such as Elementor Hosting, the great news is that WordPress will be pre-installed for you! This means you can skip the installation process and jump right into Configuring Basic Settings. Be sure to check with your hosting provider for specific details on accessing your WordPress dashboard.
Automatic Installation (One-Click Install)
For those using shared hosting or other hosting types, many providers offer a simple one-click WordPress installation feature.
One-click installation saves you time and effort by automatically setting up WordPress on your hosting account. It’s perfect for beginners with a web hosting service that may not be familiar with more technical aspects of website setup.
Step-by-step guide:
- Log in to your hosting account’s control panel (cPanel, Plesk, etc.).
- Locate the “WordPress” or “One-Click Install” section.
- Click on “Install” or “Install WordPress.”
- Fill in the required information, such as your domain name, site title, and admin details.
- Click “Install” or “Finish” to complete the process.
- Wait for the installation to finish, and you’ll receive your WordPress login details.
Manual Installation
While it’s a bit more involved, manual WordPress installation is ideal for users who want complete control over their WordPress setup or need to install WordPress on a specific server configuration.
Step-by-step guide:
- Download the latest version of WordPress from elementor.com/wordpress or wordpress.org.
- Extract the downloaded zip file.
- Create a new MySQL database and user for your WordPress site through your hosting control panel.
- Edit the “wp-config-sample.php” file with your database details and rename it to “wp-config.php.”
- Upload the extracted WordPress files to your hosting account using an FTP client.
- Navigate to your domain name in your browser to begin the WordPress installation process.
- Follow the on-screen instructions to complete the installation, including setting up your site title and admin details.
Logging in to Your WordPress Dashboard
Regardless of the installation method you chose, you’ll now need to log in to your WordPress dashboard to start customizing your website.
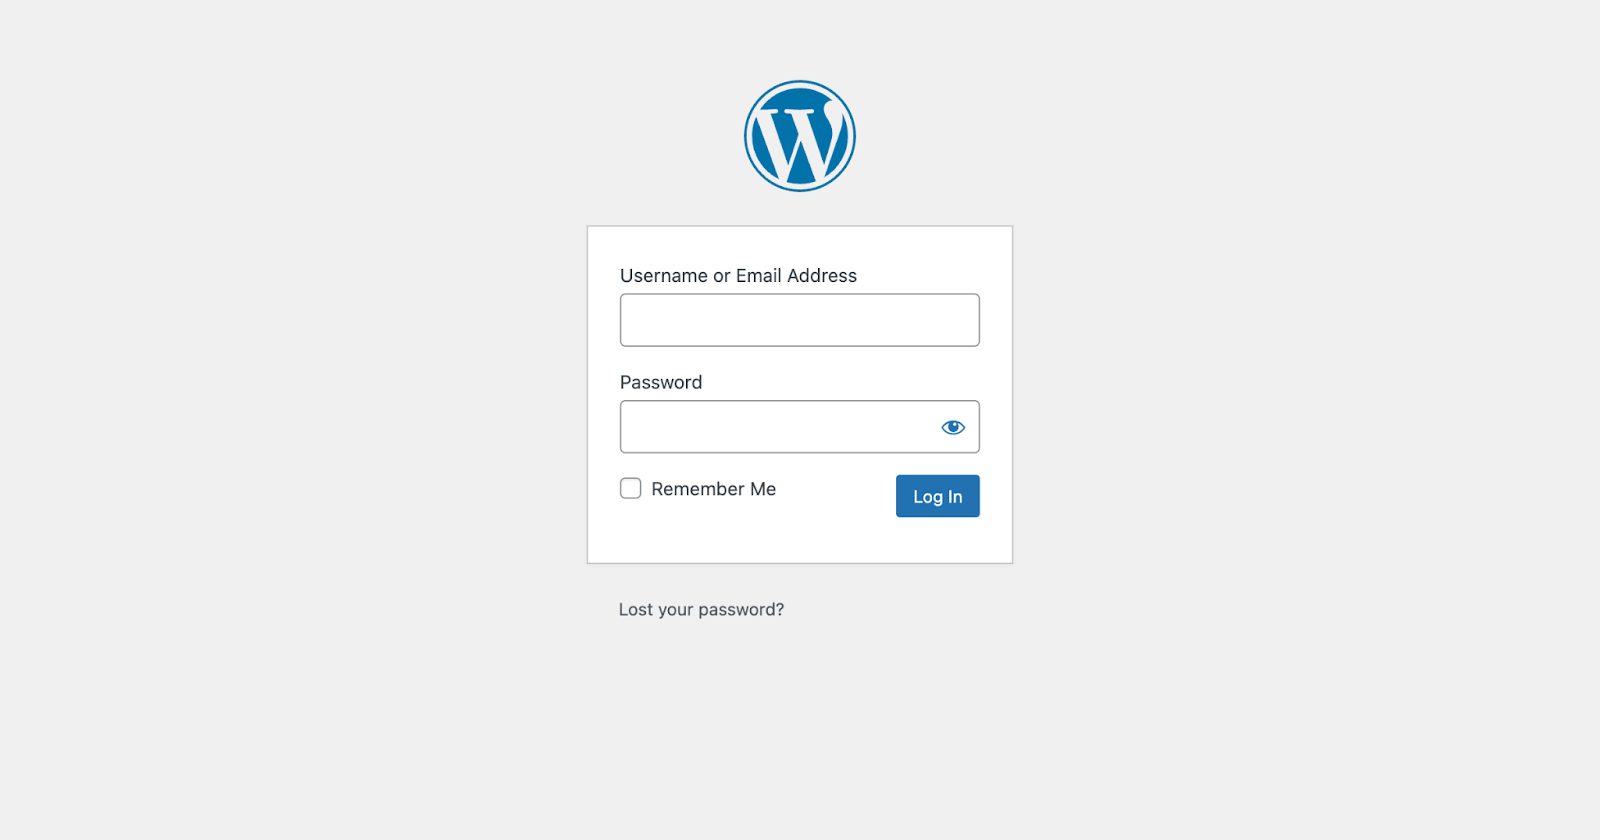
To do this:
- Visit “yourdomain.com/wp-admin” (replace “yourdomain.com” with your actual domain name).
- Enter your username and password from the installation process.
- Click “Log in,” and you’ll be taken to your WordPress admin dashboard.
Congratulations! You’ve successfully installed WordPress and are ready to start creating your dream website. As we continue with this blog post, we’ll guide you through the process of customizing your site and making it uniquely yours.
Configure Basic Settings
Now that you’ve installed WordPress and logged in to your dashboard, let’s make some tweaks to the basic settings to ensure your website runs smoothly and looks professional. In this section, we’ll walk you through adjusting general settings and permalink structures. Let’s dive in!
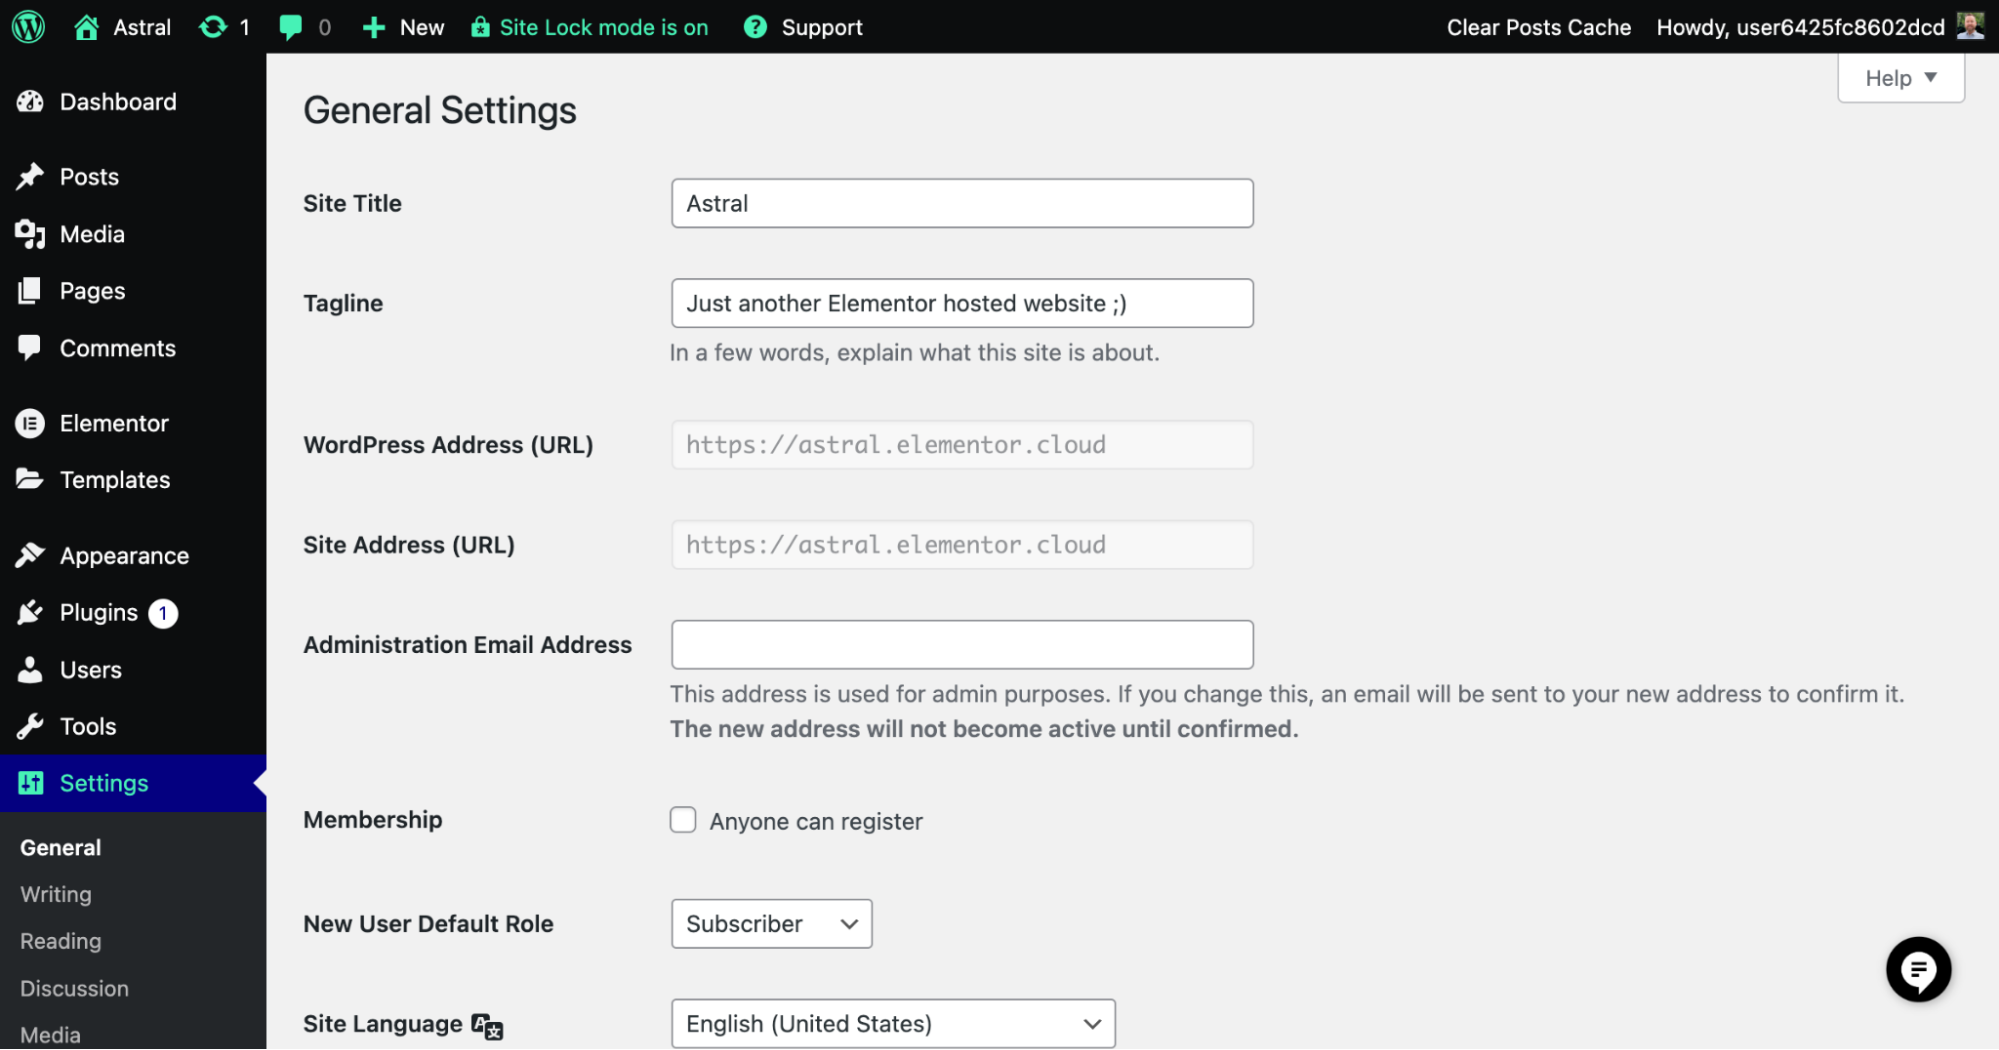
General Settings
The general settings of your WordPress site help you establish your site’s identity and tailor its appearance to your preferences.
Here’s what you need to know:
- Site title and tagline: Your site title and tagline briefly describe your website and give visitors an idea of what to expect. To set them up, go to “Settings” > “General” in your WordPress dashboard. Enter your desired site title and tagline, and click “Save Changes.”
- Timezone, date format, and time format: Setting the correct timezone ensures that any date and time information on your website is accurate. Additionally, you can customize the date and time format to match your preferences. To adjust these settings, go to “Settings” > “General,” choose your timezone, and select your desired date and time formats. Don’t forget to click “Save Changes.”
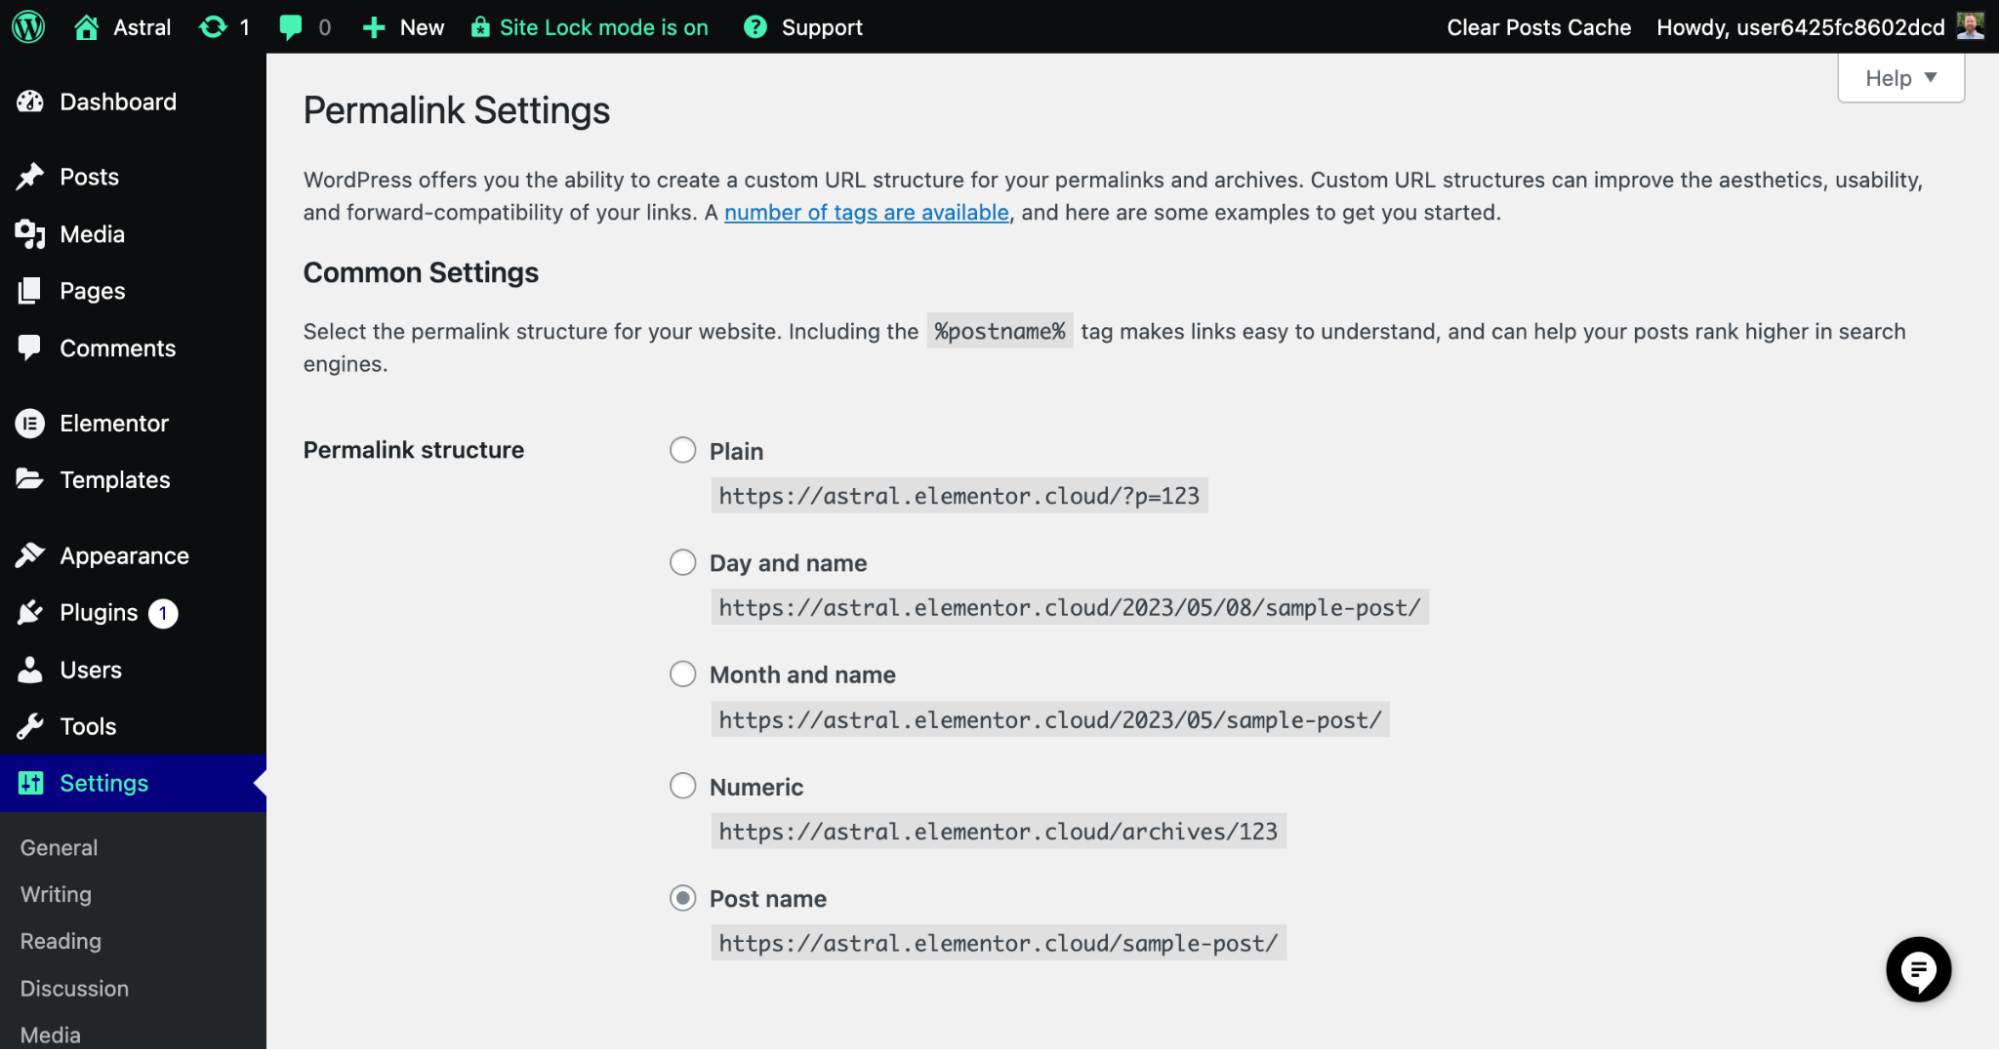
Permalinks
Permalinks refer to the permanent URLs for your website’s pages and posts. Having an SEO-friendly URL structure is essential for making your site more accessible to search engines and easier to navigate for users.
SEO-friendly URLs are clean, descriptive, and easy to read. They help search engines understand the content of your web pages, and can improve your search rankings. Additionally, they make it easier for users to share and remember your URLs.
- Setting up permalink structure: To configure your permalink structure, go to “Settings” > “Permalinks” in your WordPress dashboard. You’ll see several options, but we recommend choosing “Post name” for the most SEO-friendly and user-friendly option. This setting will include the post title in the URL, making it easy to understand at a glance. Click “Save Changes” to apply your new permalink structure.
With these basic settings configured, you’ve laid the groundwork for a professional and user-friendly WordPress website. As you continue to explore your dashboard and customize your site, you’ll discover even more options for tailoring your website to your needs and preferences.
Choosing and Installing a WordPress Theme
Now, let’s move on to one of the most fun parts of the process – choosing and installing a theme or an Elementor Kit. Both options lay the foundation for your site’s appearance and layout, so choosing the right one is crucial. In this section, we’ll discuss the importance of a good theme, introduce the Hello Theme, compare free vs. premium themes, explore the differences between Elementor Kits and traditional themes, recommend some theme providers, and walk you through installing and activating a theme or a kit. Here we go!
The importance of a good theme
A well-designed theme is crucial for creating an attractive and functional website. It determines the overall appearance, user experience, and navigability of your site. Choosing a good theme ensures that your website looks professional, is easy to use, and keeps visitors engaged – which ultimately leads to better conversion rates and success.
Free vs. Premium Themes
When it comes to WordPress themes, you’ll find both free and premium options. Free themes can be an excellent starting point for beginners, but premium themes often come with added features, customization options, and dedicated support. If you’re serious about your website, investing in a premium theme might be worth considering.
Hello Biz Theme by Elementor
The Hello Biz Theme is a free WordPress theme created specifically for business owners building their first website. It builds on the simplicity of the Hello Theme and adds features that streamline the website creation process:
- Professionally Designed Template Kits: Full website kits crafted for a wide range of business types help you launch quickly and confidently.
- Visual Layout Presets: Easily style essential sections like headers, footers, hero blocks, contact areas, and forms directly from the widget settings—no need for custom design work.
- Simplified Site Identity Settings: Define your site’s branding on the home screen where you can access every page and website part you need. Upload your logo and favicon, and visually choose your color palette and typography.
Combining Elementor’s visual editing power with business-focused tools, Hello Biz Theme helps you launch a polished, professional site with minimal effort—no coding needed.
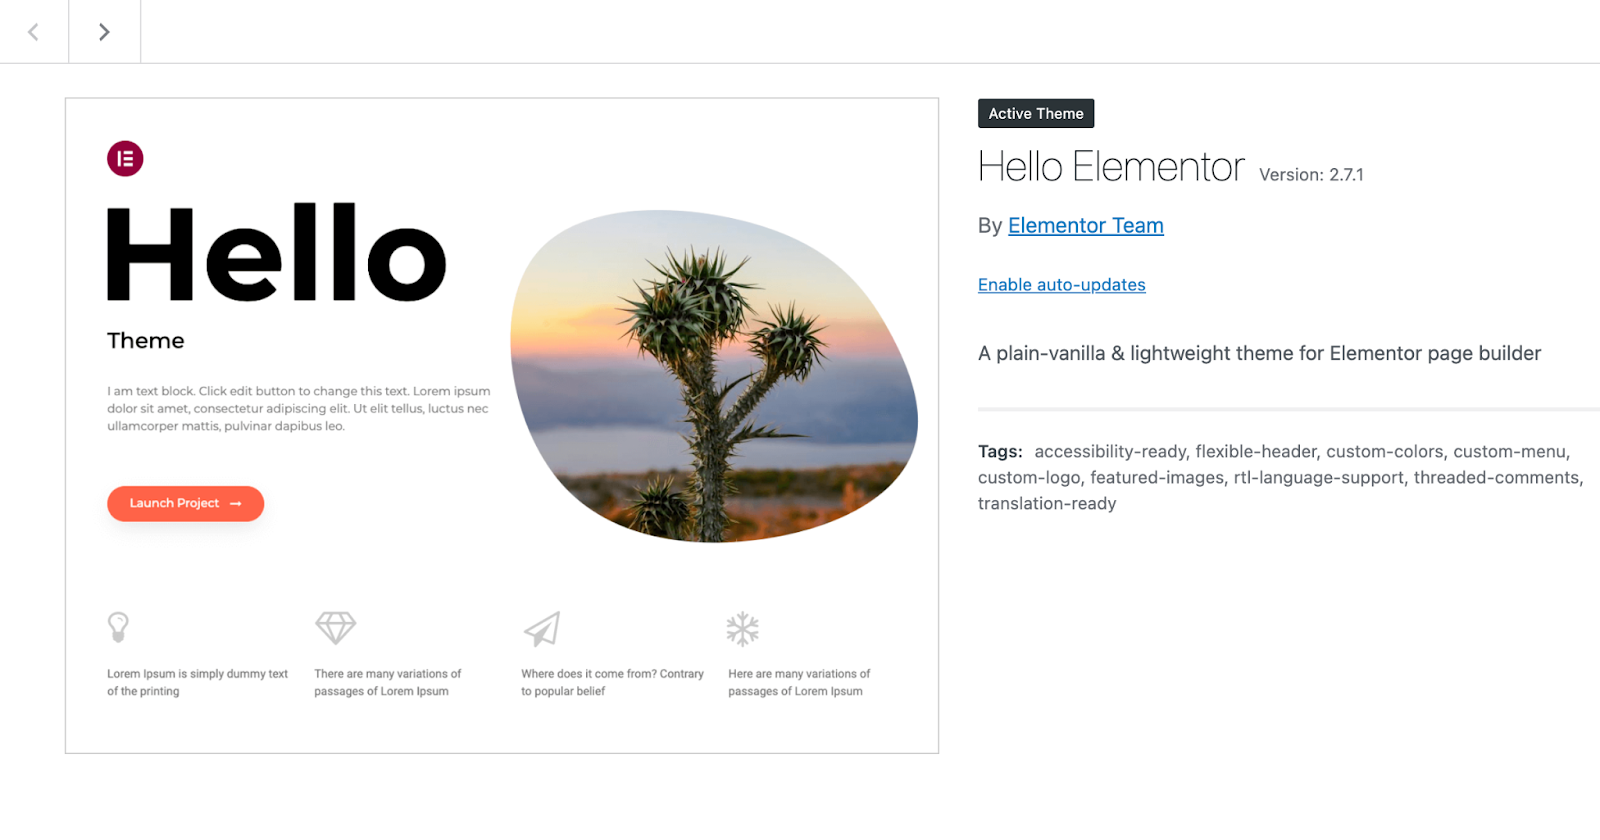
Hello Theme by Elementor
The Hello Theme is a lightweight, free, and highly customizable theme designed specifically for use with the Elementor page builder. It serves as an ideal starting point for your website, providing a clean and minimalistic canvas that works seamlessly with Elementor’s drag-and-drop editor. The Hello Theme is optimized for speed and performance, ensuring a positive user experience and better search engine rankings. Additionally, it is fully compatible with Elementor’s powerful features, including a library of 100+ widgets. By choosing the Hello Theme, you can enjoy the benefits of a modern and efficient approach to website building while maintaining total design freedom without any extra cost.
Elementor Kits vs. Themes
While themes have long been the go-to solution for website design, Elementor Kits are a more modern and efficient option. Kits are pre-designed templates created specifically for use with the Elementor page builder. They offer a more streamlined approach to building cohesive and professional-looking websites compared to using a traditional theme.
A key advantage of using kits is their ability to simplify the design process by providing a single versatile tool for creating your own website. With other themes, you often need to familiarize yourself with the unique features and settings of each one, which can be time-consuming. In contrast, kits allow you to access numerous design options of Elementor without the need to learn a new theme every time. When used in combination with the compatible Hello theme, you can benefit from both the minimalistic canvas and advanced design options provided by the kit for a truly personalized website experience.
Recommended Theme Providers
There are countless theme and kit providers available, but some stand out for their quality and support. Some popular and reputable providers include:
- Elementor Kit Library: A wide range of pre-designed Elementor Kits, specifically tailored for use with the Elementor page builder.
- ThemeForest: A marketplace offering thousands of themes from various developers.
Take your time browsing these providers and others to find a theme that suits your needs and style.
Tip
I highly recommend using the Hello theme in Conjunction with an Elementor kit, as it’s the most efficient way to begin building your website period with minimal effort, you can easily customize the kit to match your business’s colors and brand identity, resulting in a professional looking site in no time
How to Install and Activate a Theme
Once you’ve chosen a theme, installing and activating it is simple.
Just follow these steps:
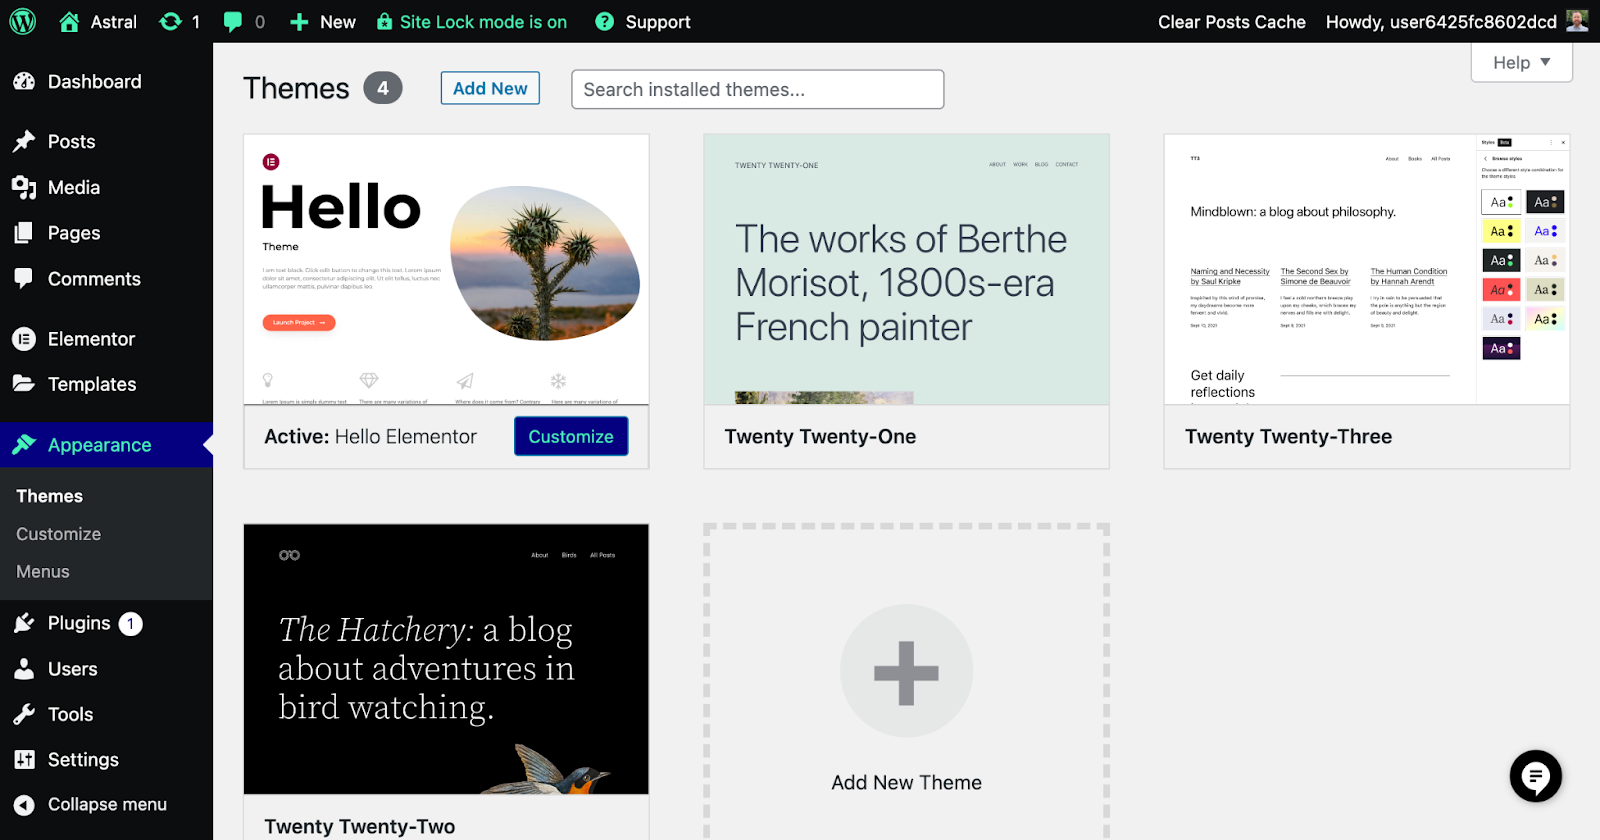
- In your WordPress dashboard, go to “Appearance” > “Themes.”
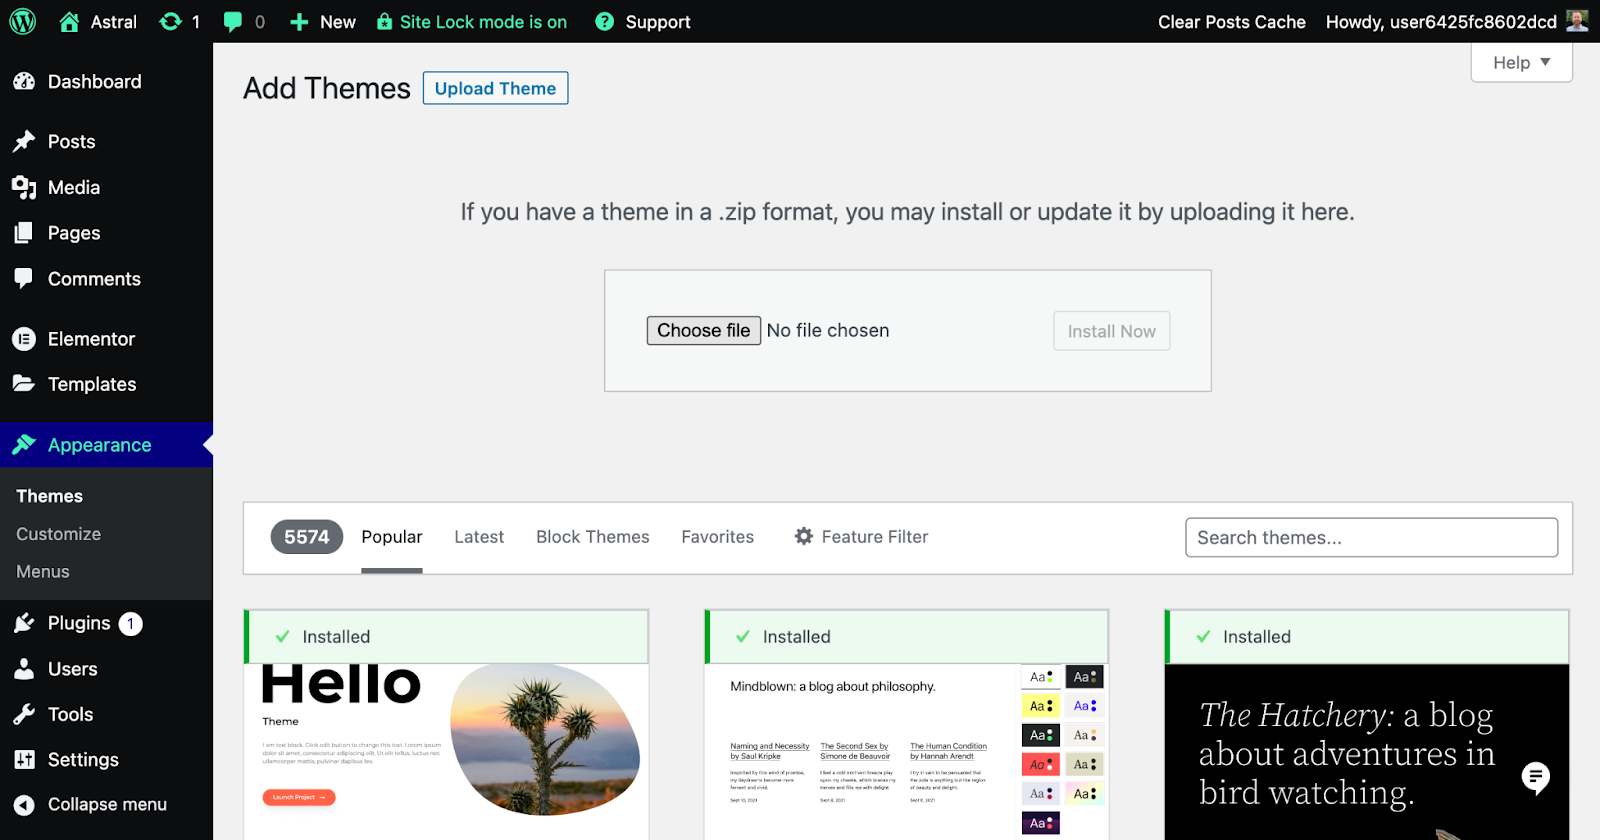
- Click the “Add New” button at the top of the page.
- If you’re installing a free theme from the WordPress repository, search for the theme’s name, and click “Install.” If you’ve purchased a premium theme, click “Upload Theme,” then select the theme’s ZIP file from your computer.
- After installation is complete, click “Activate” to make the theme live on your website.
How to Install an Elementor Kit
Installing an Elementor Kit from the library is a simple process that allows you to take advantage of the pre-designed templates and features that come with it.
Just follow these steps:
- If you use Elementor Hosting, during the installation process, you will be given the option of starting with a website kit. If you already have a website using Elementor Hosting, you can select a kit by going to the Kit Library in the WordPress dashboard and selecting a kit via the Templates tab.
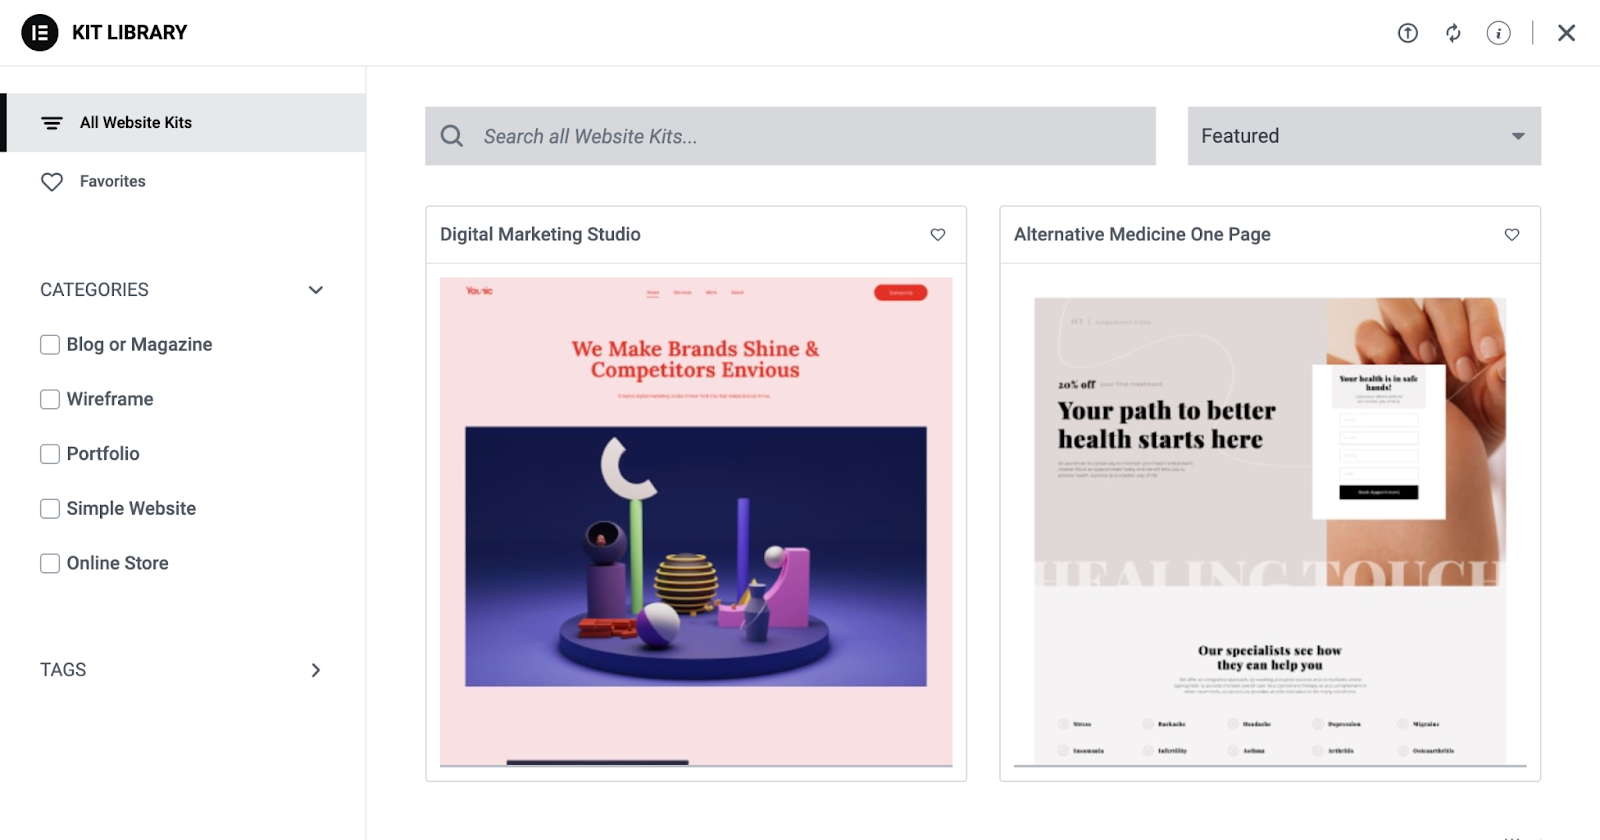
- For website owners who chose not to use Elementor Hosting, go to the Kit Library in the WordPress dashboard, located in the Templates tab. Here you can scroll through the library, search for specific terms, order by Featured, New, Popular, or Trending, and filter by category, tags, types, or plan.
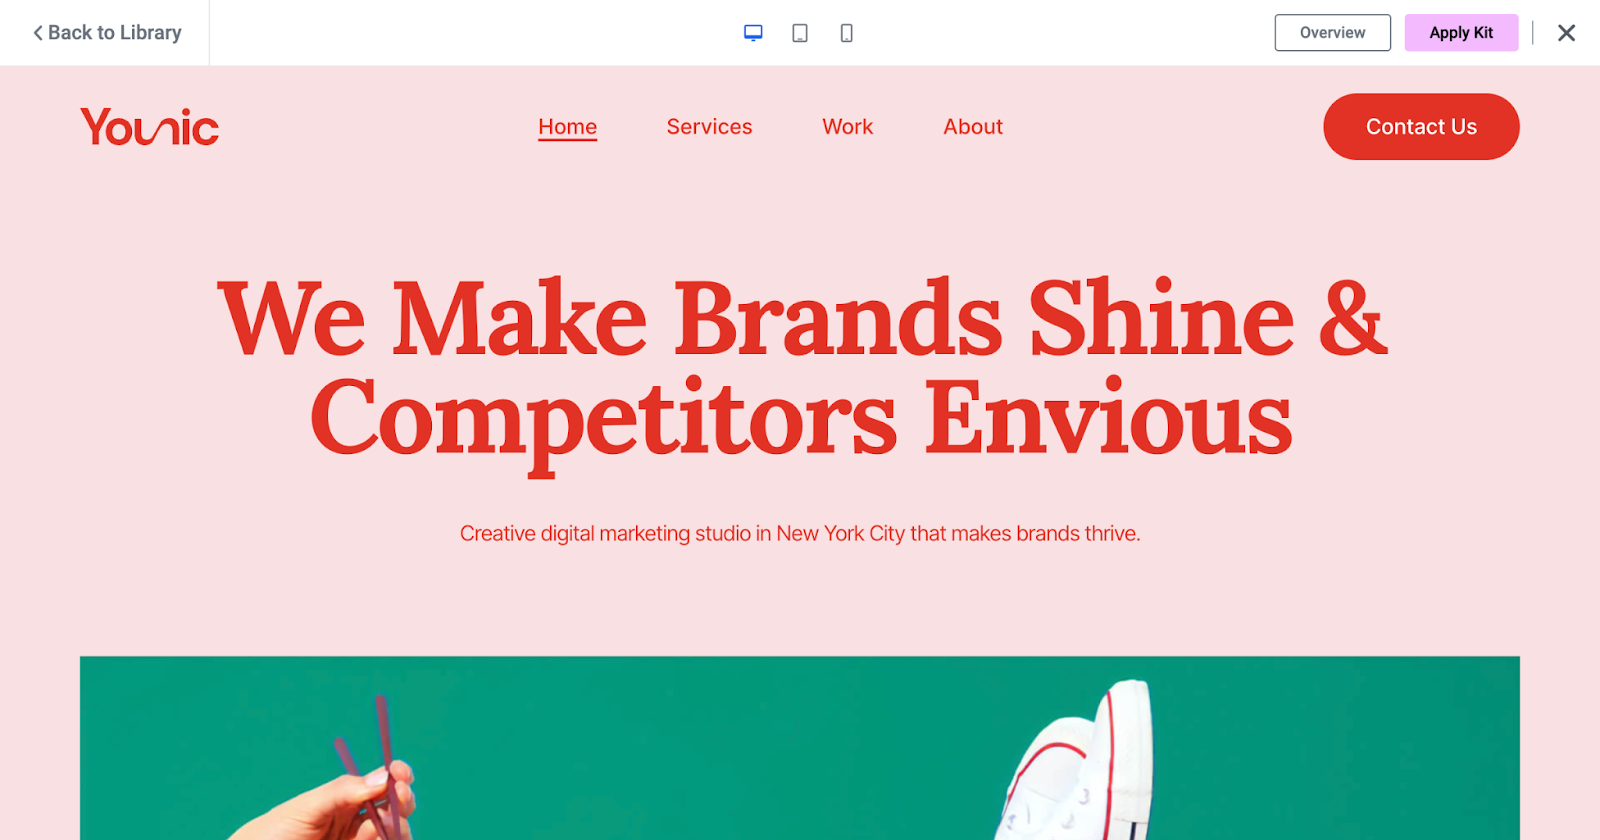
- Once you find a kit you like, hover over it and click “View Demo” to see the kit’s pages and site parts.
- If you want to apply the kit to your site, click the “Apply Kit” button. Elementor may ask you to enable the importation of SVGs before applying the kit – you should allow it.
- You will then be asked whether you want to apply the whole kit or customize the parts you want to import. Unless you’re an experienced Elementor user, it’s recommended to apply the whole kit.
- Wait for the importer to complete; don’t close this screen until it’s finished!
- Once the import is complete, click “Next.” You’ll then see a list of items that were imported successfully.
- Click “Close” to complete the process and exit the import wizard.
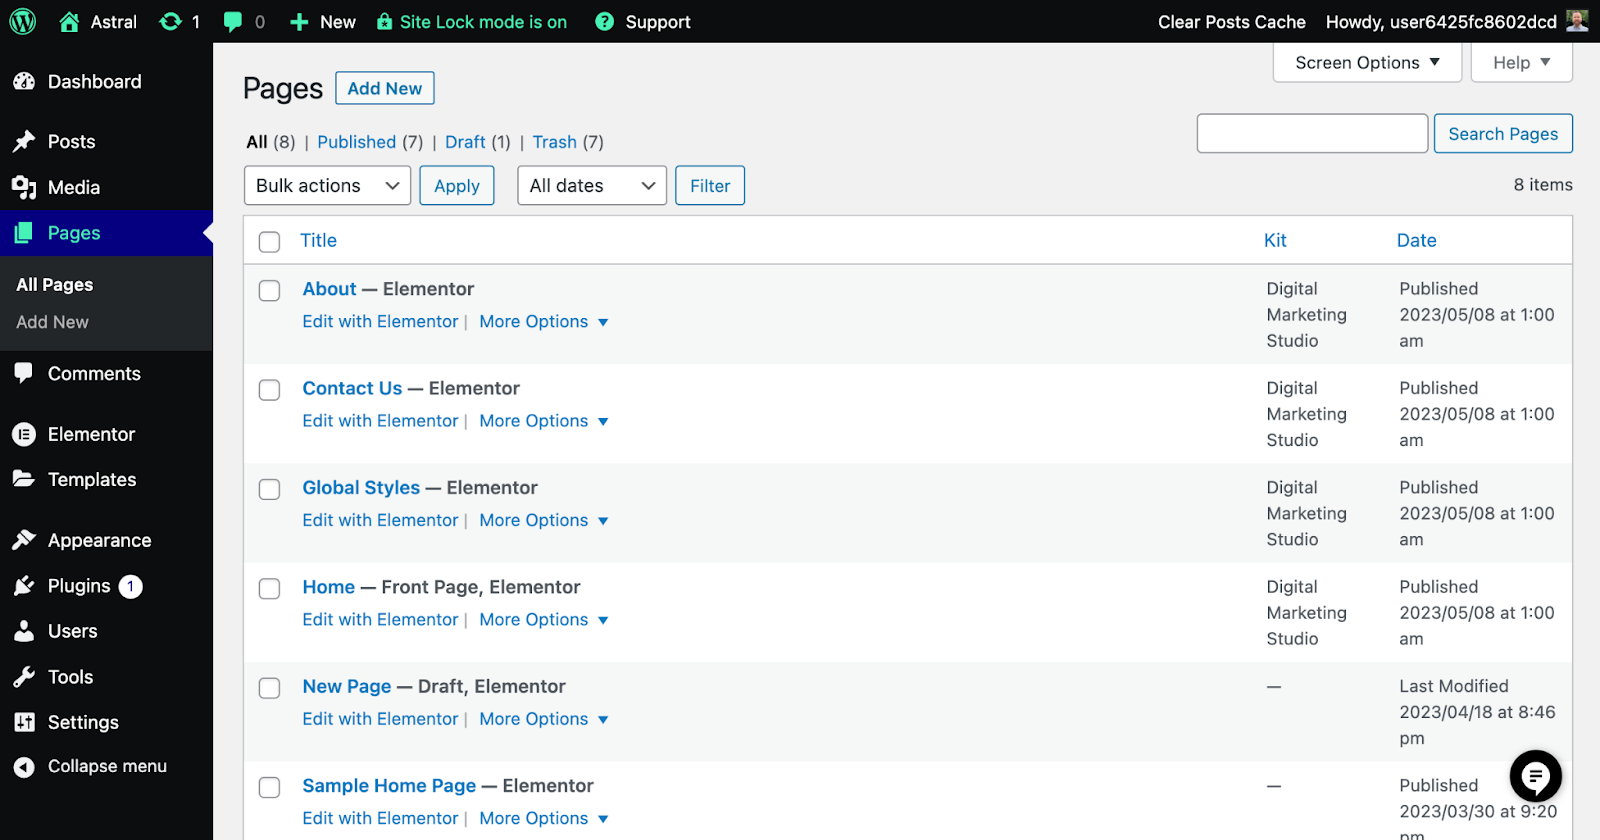
- Once back in the WordPress dashboard, click the “Pages” tab to view your new pages and begin customizing them.
That’s it! With your theme or kit installed and activated, you’re now ready to move on to the next section, “Customizing Your Website,” where you’ll learn how to personalize your site’s appearance and make it truly unique. Enjoy exploring the possibilities that your new theme has to offer!
Customizing Your WordPress Site
Great job on choosing and installing your theme! Now comes the exciting part—customizing your website to make it truly your own. It’s important to note, with Elementor, you don’t need to learn how to use each theme or kit from scratch. Thanks to its consistent system and workflow, Elementor makes the process much easier. While there are countless themes out there, each with its own customization options, using Elementor means the customization approach remains consistent. Still, be sure to refer to your theme’s documentation for specific guidance. In this section, we’ll walk you through some general customization options available in WordPress, from tweaking your site’s identity to adjusting typography, colors, navigation menus, and more. Let’s explore this further.
Customizer Overview
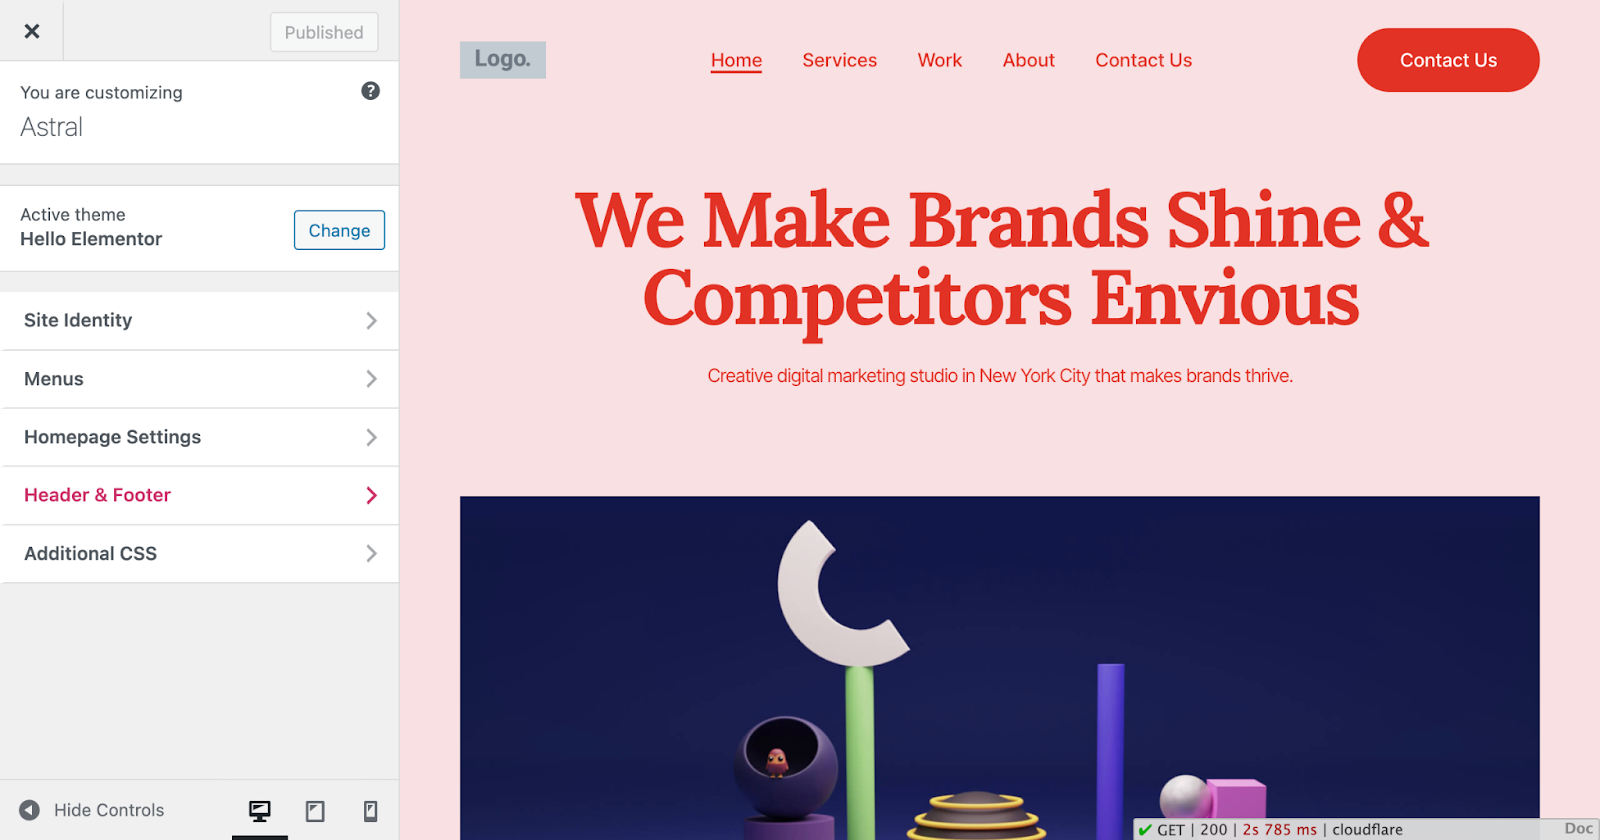
WordPress features a built-in Customizer that lets you preview changes to your site in real-time before making them live. To access the Customizer, go to your WordPress dashboard and navigate to “Appearance” > “Customize.”
Site Identity (Logo, Favicon)
Your site’s identity is essential for branding and recognition. In the Customizer, click on “Site Identity” to upload your logo and favicon (the small icon that appears in browser tabs). Here, you can also edit your site title and tagline if needed.
Typography (Fonts and Font Sizes)
Typography plays a significant role in your site’s overall design and readability. In the Customizer, you might find a “Typography” section, where you can choose fonts and font sizes for various elements like headings, body text, and links.
Colors and Background
Colors help set the tone and atmosphere of your website. In the “Colors” or “Background” section, you can usually customize your site’s primary colors, background color, and even upload a background image if your theme supports it.
Navigation Menus
Navigation menus help visitors find their way around your site. To create and customize menus, go to “Menus” in the Customizer. From here, you can create new menus, add pages, posts, or custom links, and rearrange items as needed.
Widgets and Sidebars
Widgets are small, customizable content blocks that can be added to sidebars or other widget-ready areas in your theme. To manage widgets, click on “Widgets” in the Customizer. Here, you can add, remove, or reposition widgets to enhance your site’s functionality.
Additional Customization Options (Depending on the Theme)
Your chosen theme may come with additional customization options specific to its features and design. Explore these options in the Customizer to make the most of your theme’s unique capabilities.
With your website customized to your liking, you’re now ready to move on to the next section, “Creating Content,” where we’ll guide you through the process of crafting engaging and informative content for your audience.
Creating Content
Now that your website is looking great with its customized design, it’s time to start creating content and implementing a content strategy! In this section, we’ll cover the differences between pages and posts, guide you through creating both, and give you some tips on how to edit in WordPress using the Gutenberg editor, media library, and publishing options. We’ll discuss the importance of having a well-planned content strategy to ensure your website succeeds and resonates with your target audience. Let’s get started!
Develop a Content Strategy
Having a content strategy is essential to ensure you create engaging and relevant content for your target audience. To develop your strategy, start by setting goals and understanding your audience’s preferences. Conduct keyword research, plan your content, and optimize it for SEO (we’ll discuss this in detail later). Finally, promote your content and measure its performance using tools like Google Analytics. A well-planned content strategy will help your WordPress website succeed and resonate with your audience.
Pages vs. Posts
In WordPress, content is organized into two main types: pages and posts. Pages are typically used for static, timeless content such as “About Us” or “Contact” pages, while posts are used for dynamic, timely content like: blog post articles and news updates.
Creating a Page
- Adding a title and content: To create a new page, go to your WordPress dashboard and click “Pages” > “Add New.” Add a title for your page and start typing your content in the editor.
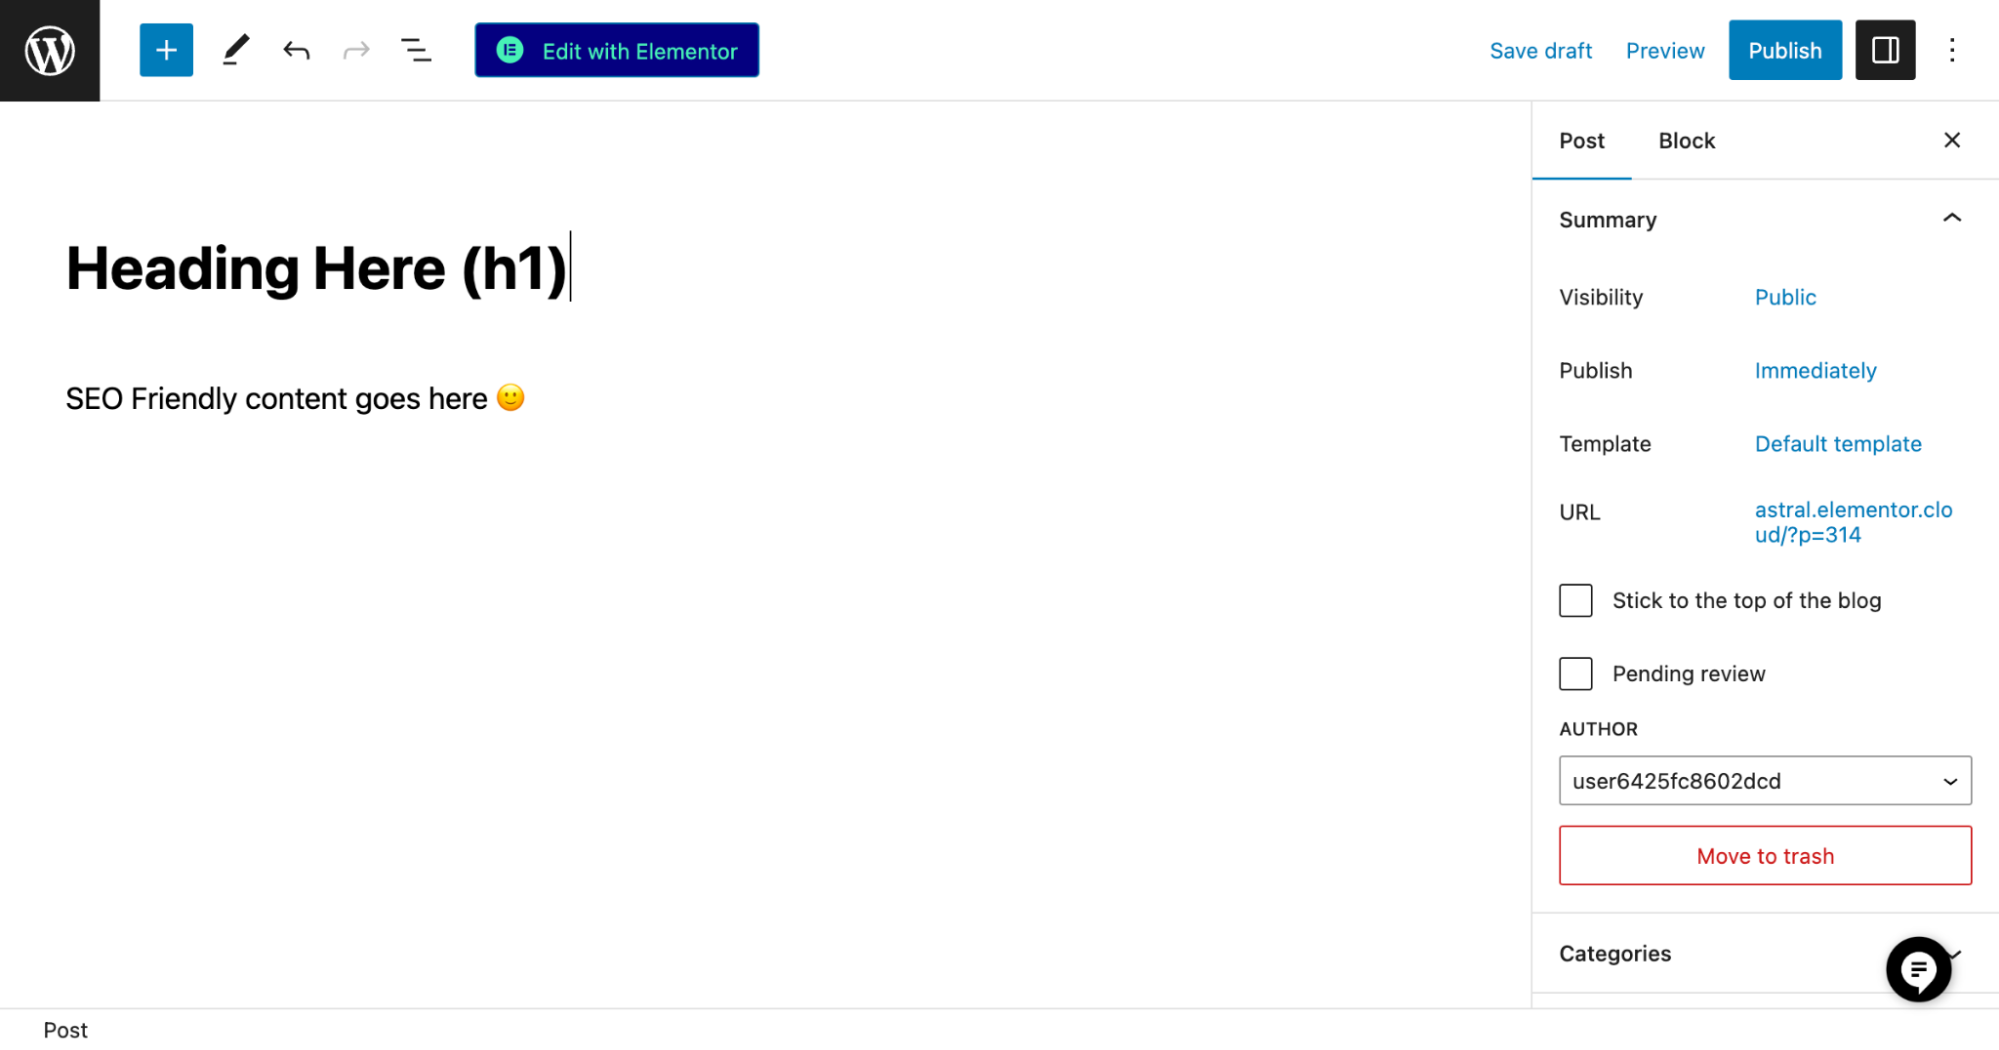
- Using the Gutenberg editor (blocks): The Gutenberg editor uses a block-based system to create and format content. Blocks are content elements like paragraphs, headings, images, and more. To add a block, click the “+” icon and choose from the available options.
- Setting a featured image: Some themes support featured images for pages. In the right-hand sidebar, click on “Featured Image” and upload an image that represents the content of the page.
- Page templates and attributes: Depending on your theme, you may have different page templates available, such as full-width or sidebar layouts. In the “Page Attributes” section, you can select the desired template and set the order of your pages if needed.
Creating a Post
- Adding a title and content: To create a new post, go to your WordPress dashboard and click “Posts” > “Add New.” Add a title for your post and start typing your content in the editor.
- Using categories and tags: Organize your posts by assigning them to categories and tags. Categories are used for broad topics, while tags are used for more specific details. You can add or manage categories and tags in the right-hand sidebar.
- Post formats: Some themes support different post formats, like video, audio, or gallery. If available, you can select the appropriate format for your post in the right-hand sidebar.
Using Media Library
The Media Library is a powerful tool within WordPress that allows you to manage and organize all your uploaded images, videos, and documents. It serves as a central repository for all your media files, making it easy to find and use them in your website content.
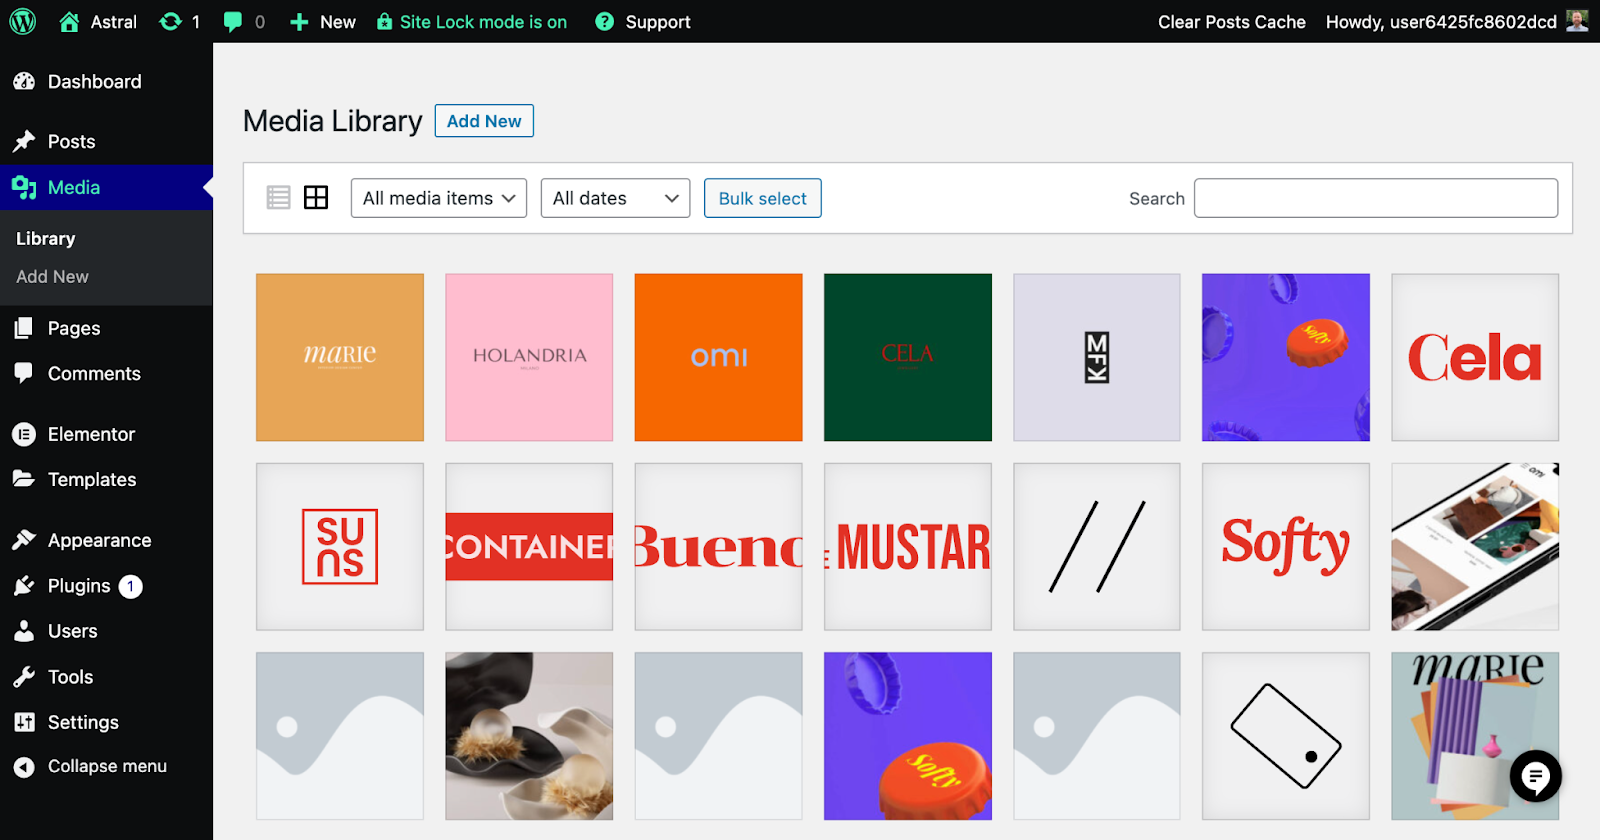
To access the Media Library, navigate to your WordPress dashboard and click on “Media” followed by “Library.” You will be presented with a grid or list view of all the files you have uploaded. From here, you can upload new files, edit existing ones, or delete unused media.
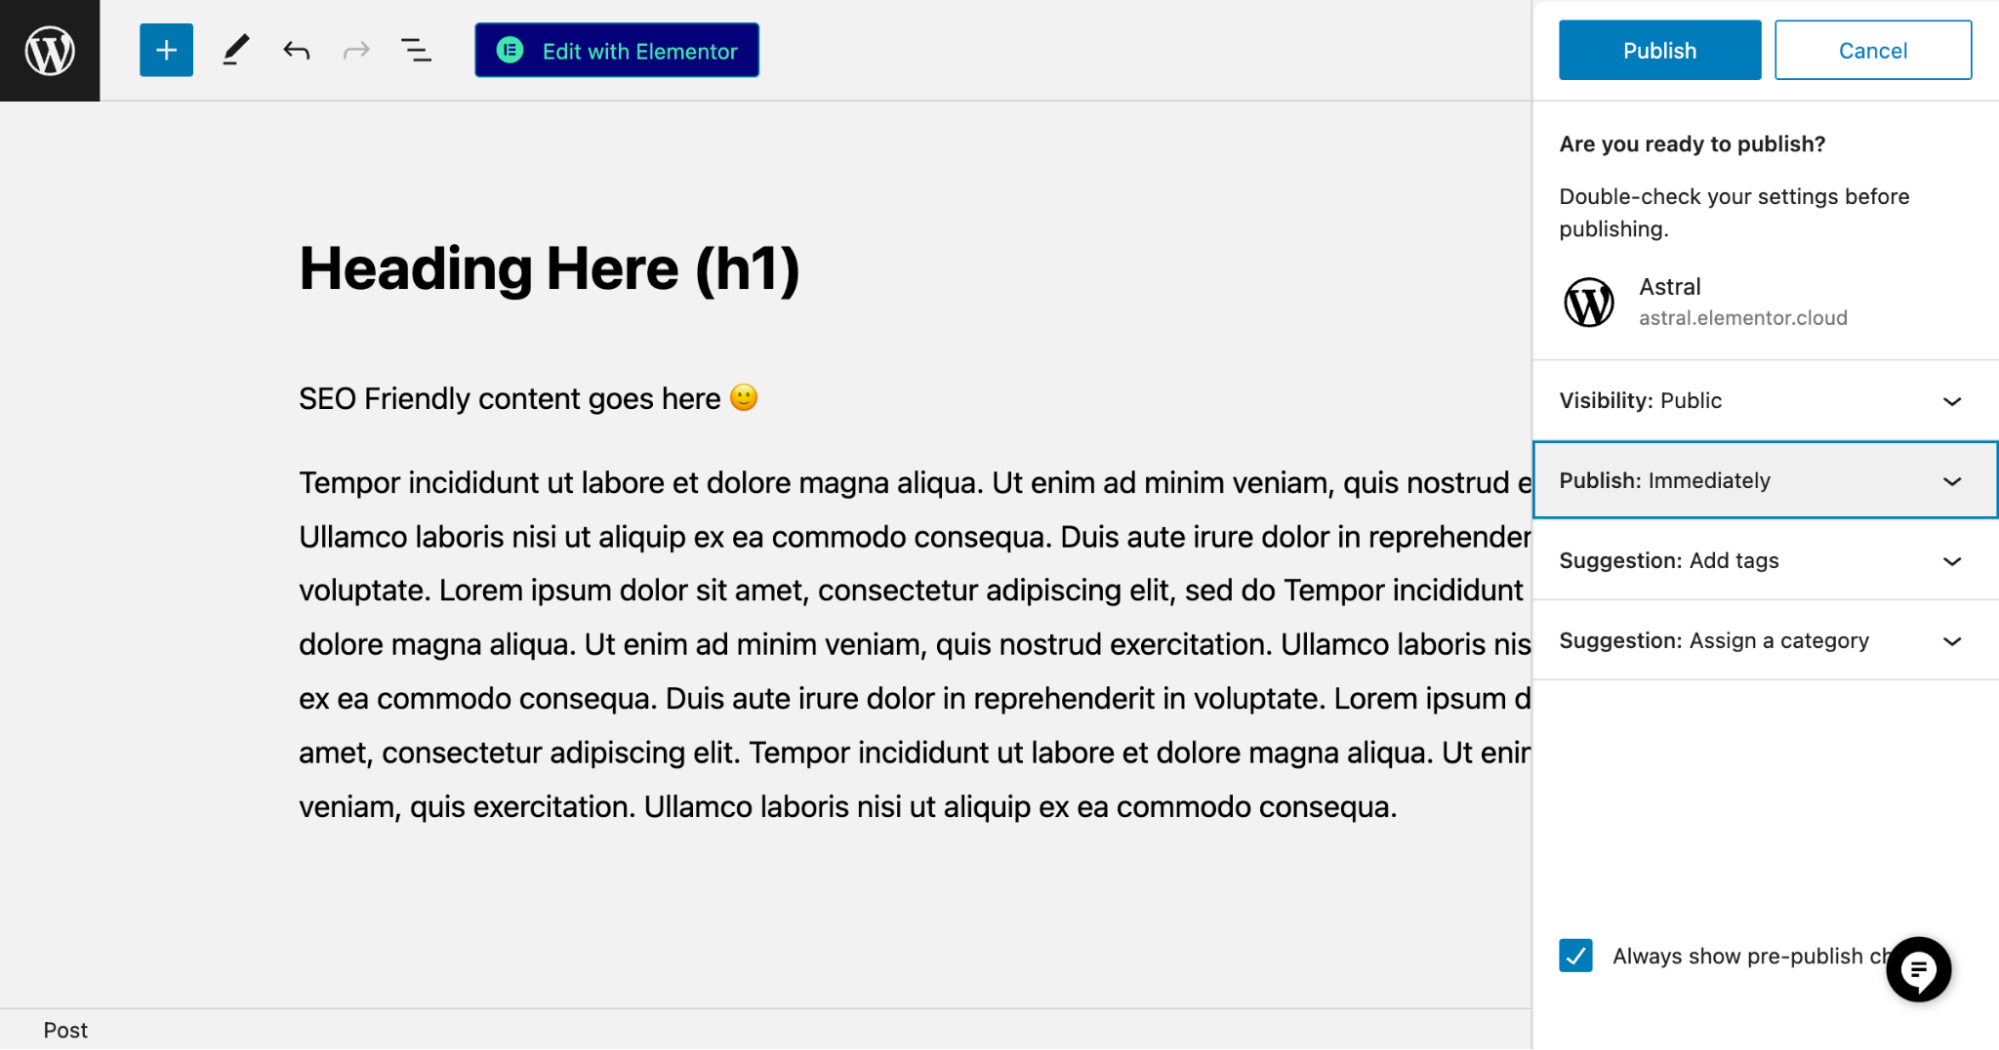
Scheduling and Publishing Content
When you’re ready to make your content live, click the “Publish” button in the top right corner. If you want to schedule your content for a future date, click the “Immediately” text next to “Publish,” and set the desired date and time.
And there you have it! With your content created, you’re well on your way to building a successful WordPress website. In the next section, “Essential Plugins,” we’ll introduce you to some must-have plugins that can help enhance your site’s functionality and performance.
How to Use WordPress Plugins for Enhanced Functionality
Plugins are like apps for your WordPress website. They are a fantastic way to help you add new features, improve performance, and enhance the overall user experience. In this section, we’ll introduce you to some essential plugins that every WordPress website should consider installing.
Security Plugins
Security should be a top priority for any website owner. Plugins like Wordfence Security, iThemes Security, or Sucuri Security can help protect your site from malware, brute force attacks, and other threats.
Choosing a reputable hosting provider that offers advanced security features can make a significant difference. For example, Elementor managed hosting provides you maximum security with integrated layers of security, DDoS, Firewall protection, and it’s monitored around-the-clock by a team of experts which may make the use of an additional security plugin unnecessary.
Performance Plugins
Keeping your site fast and responsive is crucial for a great user experience and better search engine rankings. Performance plugins like WP Rocket, W3 Total Cache, or LiteSpeed Cache can help optimize your site’s speed and performance. Elementor Hosting offers an integrated caching tools that boosts performance.
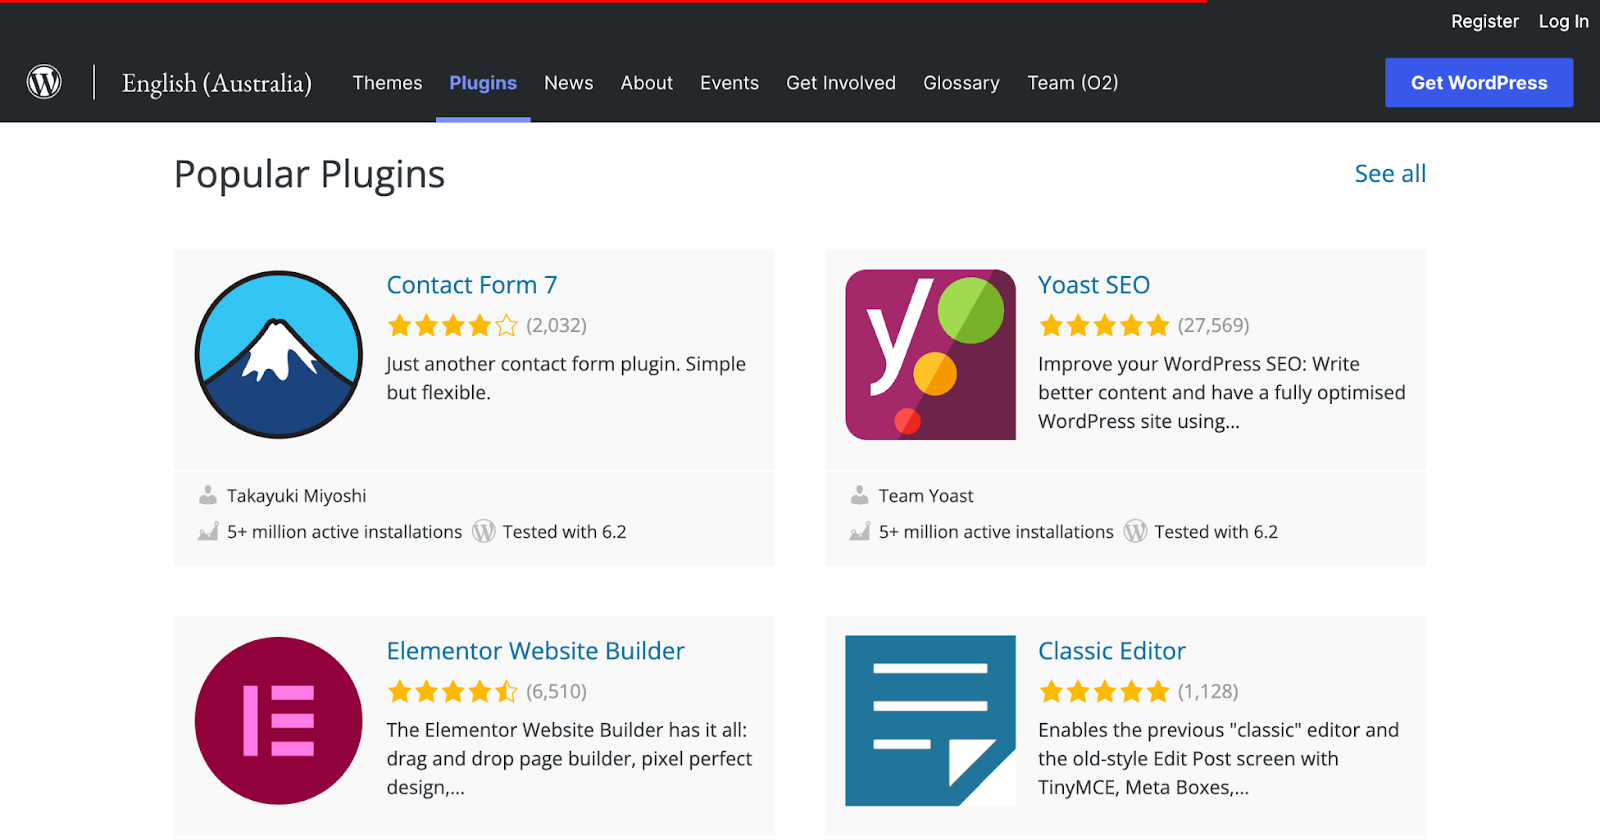
SEO Plugins
Search engine optimization (SEO) is essential for increasing your site’s visibility on search engines like Google. Plugins like Yoast SEO, Rank Math, or All in One SEO Pack can help you optimize your content and improve your site’s search engine rankings.
Contact Form Plugins
Having a contact form on your website allows visitors to get in touch with you easily. Popular contact form plugins like Contact Form 7, WPForms, or Ninja Forms make it simple to create and customize contact forms for your site. However, if you’re using Elementor, you can also take advantage of its integrated form widget.
Elementor Forms is a powerful feature built into the Elementor page builder, allowing you to create fully customizable and visually appealing contact forms without the need for an additional plugin. With its drag-and-drop interface, you can easily design and style contact forms to match your website’s aesthetic period. It also offers features such as multi-step forms conditional logic and integration with popular email marketing services for streamlined communication and lead generation. By using Elementor forms, you can create an engaging and user-friendly contact experience for your customers.
Image Optimization Plugins
Optimizing images can help improve your site’s load times and overall performance. Plugins like ShortPixel, Imagify, or Smush can help you compress and optimize images without sacrificing their quality.
Tip
By simply installing Elementor Pro or choosing Elementor Hosting, you can get all the crucial features you need for a fully functional website in an all-in-one solution. Fewer plugins on your WordPress site can improve your website speed and performance, reduce security risks and simplify maintenance tasks.
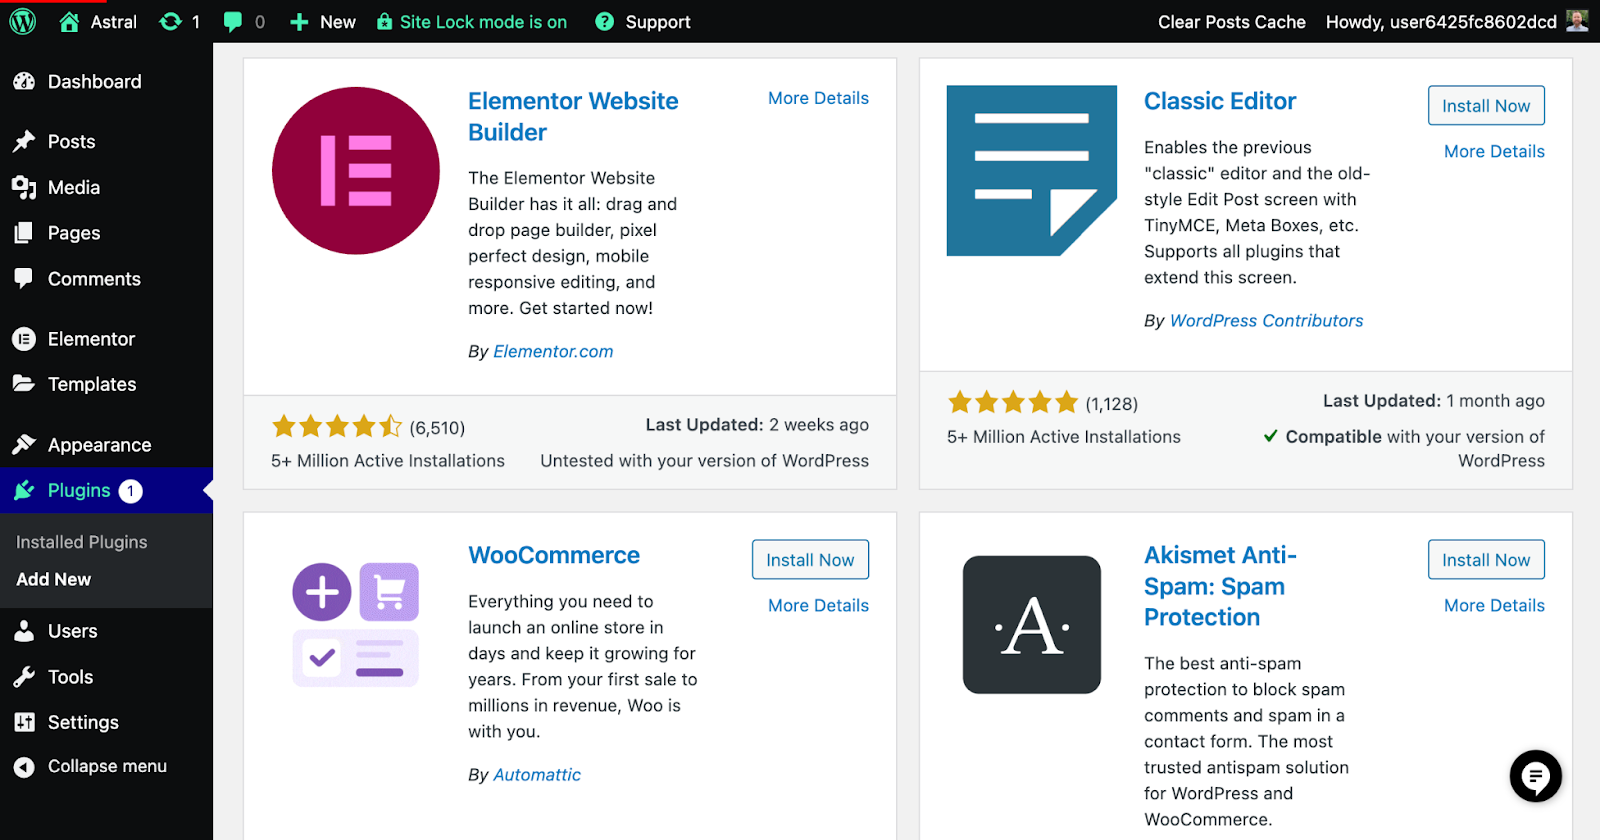
How to Install WordPress Plugins
To install a plugin, go to your WordPress dashboard, click on “Plugins” > “Add New,” search for the desired plugin, and click “Install Now” followed by “Activate.”
Keep in mind that it’s essential to keep your plugins up-to-date and only install trusted plugins to maintain your site’s security and performance.
In the next section, “Search Engine Optimization (SEO),” we’ll delve deeper into how you can improve your site’s visibility on search engines and attract more visitors.
WordPress SEO: How to Optimize Your Website for Google
In this section, we’ll explore the world of Search Engine Optimization (SEO). SEO is vital for increasing your website’s visibility on search engines like Google, helping you attract more visitors, and growing your online presence. Let’s dive into the importance of SEO and some basic techniques to get started.
Importance of SEO for your website
SEO helps improve your website’s rankings on search engines, making it easier for potential visitors to find your content. A well-optimized website can attract more organic traffic, which can lead to increased engagement, conversions, and revenue. In short, investing time and effort into SEO can significantly benefit your online business or blog.
Basic on-page SEO techniques
On-page SEO refers to optimizing individual web pages to rank higher on search engines. Here are some basic techniques you can implement:
- Keyword research: Identify relevant keywords that your target audience is searching for and incorporate them into your content.
- Title tags: Create unique and descriptive title tags for each page, including your target keywords.
- Meta descriptions: Write informative and compelling meta descriptions that summarize the content of each page and include your target keywords.
- Headings: Use headings (H1, H2, H3, etc.) to structure your content and include relevant keywords.
- Image optimization: Optimize your images with descriptive file names, alt tags, and proper compression to improve page load times.
- Internal linking: Link to related content within your site to help search engines understand your website’s structure and improve user experience.
Installing and configuring an SEO plugin
As mentioned in the previous section on essential plugins, using an SEO plugin like Yoast SEO, Rank Math, or All in One SEO Pack can make optimizing your website more manageable.
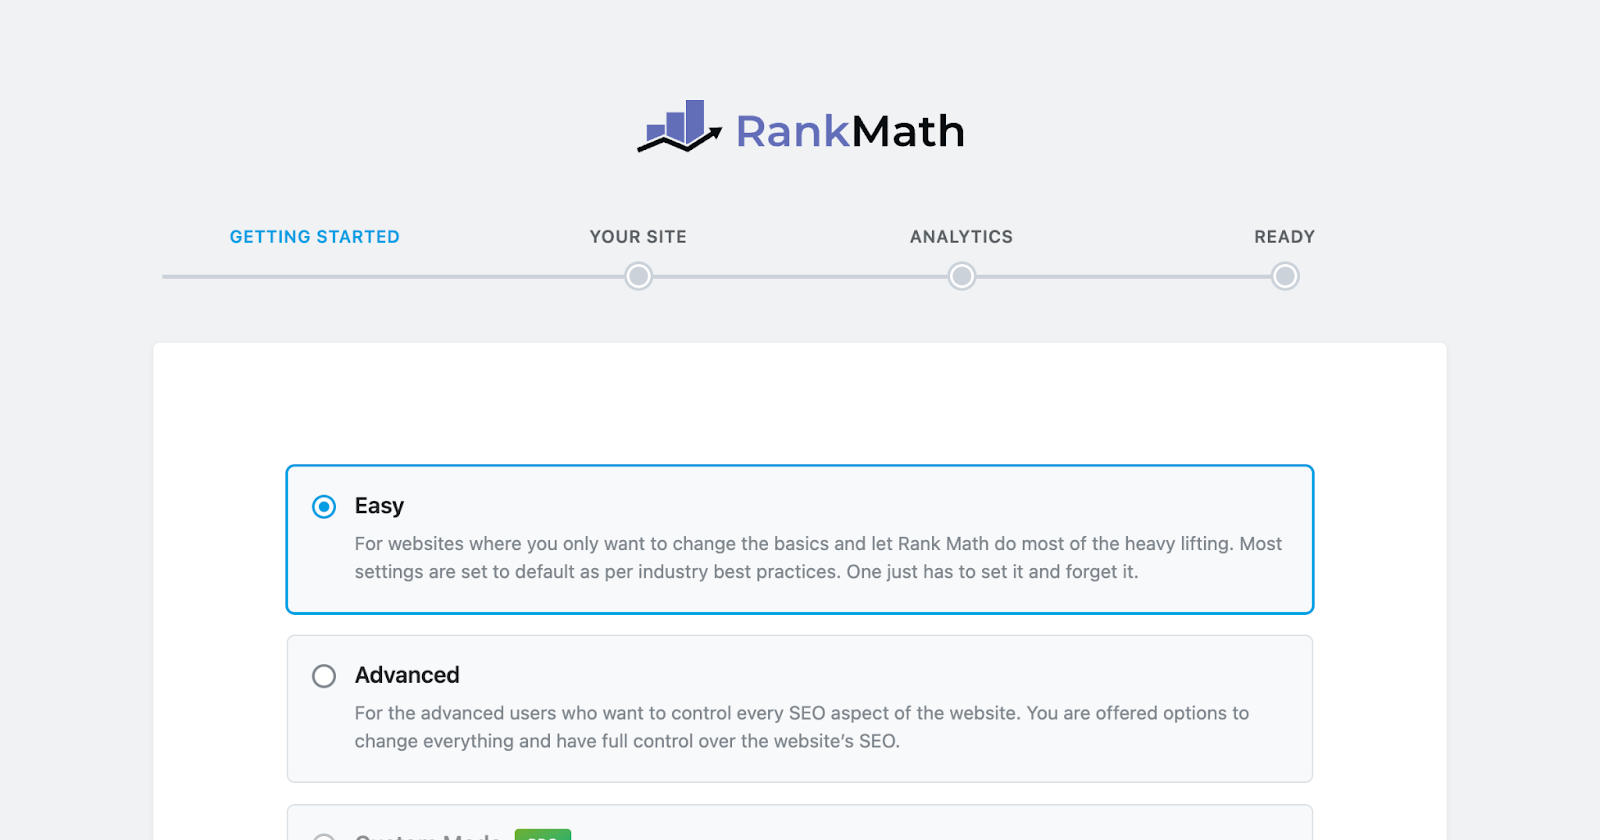
Here’s how to install and configure an SEO plugin:
- Go to your WordPress dashboard, click on “Plugins” > “Add New,” search for your desired SEO plugin, and click “Install Now” followed by “Activate.”
- Once installed, you’ll find a new menu item for the plugin in your dashboard. Click on it to access the plugin’s settings.
- Configure the plugin according to your needs and preferences. Most SEO plugins come with a setup wizard or comprehensive documentation to guide you through the process.
- Start optimizing your content by following the plugin’s recommendations, such as adding focus keywords, meta descriptions, and improving readability.
With these SEO techniques in place, you’ll be well on your way to improving your website’s search engine rankings. In the next section, “Monitoring and Maintaining Your Website,” we’ll discuss how to keep your website running smoothly and efficiently.
Monitoring, Maintaining, and Tracking Your Website
We’re almost there! In this section, we’ll discuss the importance of monitoring and maintaining your website. As well as tracking your site’s traffic using Google Analytics. By regularly checking on your site’s performance and keeping everything up to date, you’ll ensure a smooth experience for both you and your visitors.
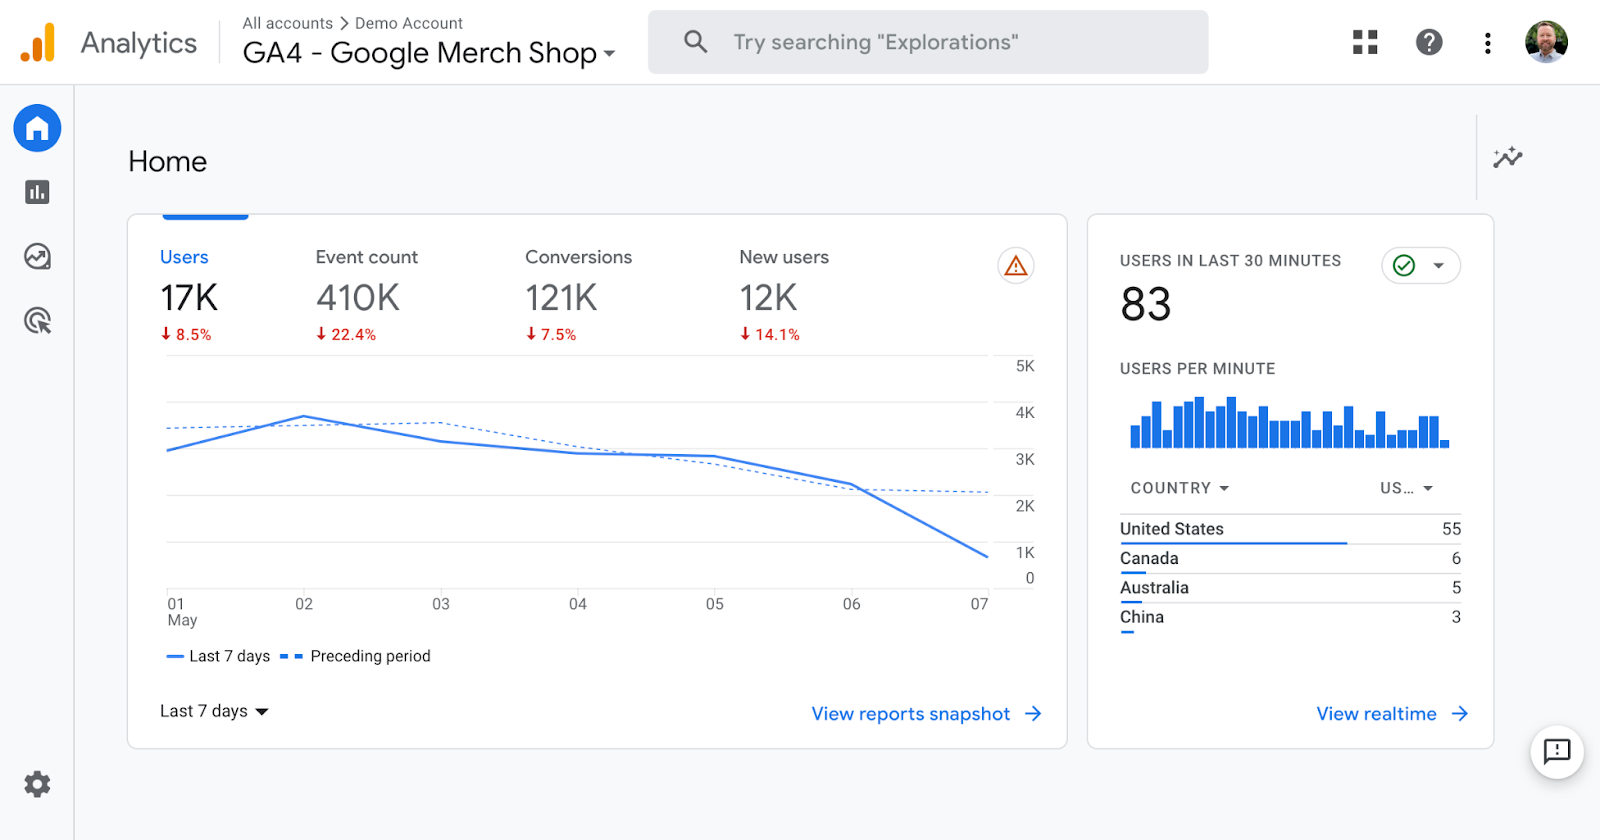
Monitoring Website Traffic with Google Analytics
Understanding your website’s traffic and visitor behavior is crucial for optimizing your content and improving user experience. Google Analytics is a powerful, free tool that allows you to monitor various metrics about website visitors, such as the number of visitors, their location, and the pages they visit on your site.
To set up Google Analytics 4 (GA4) on WordPress using Google Site Kit, you can follow these steps:
Install and Activate the Google Site Kit Plugin
- Login to your WordPress admin panel: This is usually located at
yourdomain.com/wp-admin, where “yourdomain.com” is the URL of your website. - Go to the Plugins section: From the dashboard of your WordPress admin panel, navigate to the “Plugins” section which is usually located in the left-hand sidebar.
- Add New Plugin: Click on the “Add New” button located at the top of the Plugins page. This will take you to the WordPress plugin marketplace.
- Search for Site Kit: In the search bar at the top right of the Add New Plugin page, type “Site Kit by Google” and press enter. The Site Kit plugin should appear at the top of the search results.
- Install and Activate Site Kit: Click on the “Install Now” button next to the Site Kit plugin. After the plugin is installed, the “Install Now” button will change to an “Activate” button. Click on this button to activate Site Kit on your WordPress site.
Add GA4 Tag to the Site Kit Plugin Settings
- Go to your WordPress dashboard, then navigate to Site Kit >> Dashboard.
- At the top of the page, you should see a banner prompting you to connect your GA4 Property to Site Kit.
- Select your GA4 Property from the Google Analytics 4 Property drop-down.
- Once you select a property, your GA4 property will be connected and you will see a confirmation message.
Check the Site Kit Settings
- Once you’ve successfully connected your GA4 property in Site Kit, you can check to make sure that your GA4 property is showing up correctly in the Site Kit settings and that the snippet has been enabled.
- Go to Site Kit >> Settings.
- Under the “Connected Services” tab, click on the “Analytics” section to expand it.
- Under the Analytics settings, ensure that you see both a UA and a Google Analytics 4 property listed. Under each property, the option to place the analytics code should be toggled on.
- If these settings look good, data should start showing up in your GA4 dashboard within about 24 hours.
Alternatively, if you are using Elementor Pro, you could add Google Analytics to your website without the need for an additional plugin thanks to Elementors Custom Code (Pro). Simply follow these steps.
- In your Elementor website, go to Elementor > Custom Code and click on the “Add New” button.
- Give your custom code a title, such as “GA4 Tracking Code.”
- Select the location where you want to add the tracking code. In this case, select “<head>” from the dropdown list.
- Paste your GA4 tracking code, including your Measurement ID, into the designated area.
- Set the priority level for the tracking code to run. I recommend 1 or 2.
- Click on “Publish” to save your custom code.
Once set up, you can access detailed reports and insights about your website’s traffic and performance directly in your Google Analytics account. Regularly reviewing this data will help you make informed decisions about your content strategy and site improvements.
Importance of regular maintenance
Just like a car, your website needs regular maintenance to stay in tip-top shape. Maintaining your site helps prevent issues such as slow loading times, security vulnerabilities, and broken features. Plus, a well-maintained website provides a better user experience, which can lead to higher engagement and conversions.
Keeping WordPress, themes, and plugins updated
Updates are essential for keeping your site secure and functioning correctly.
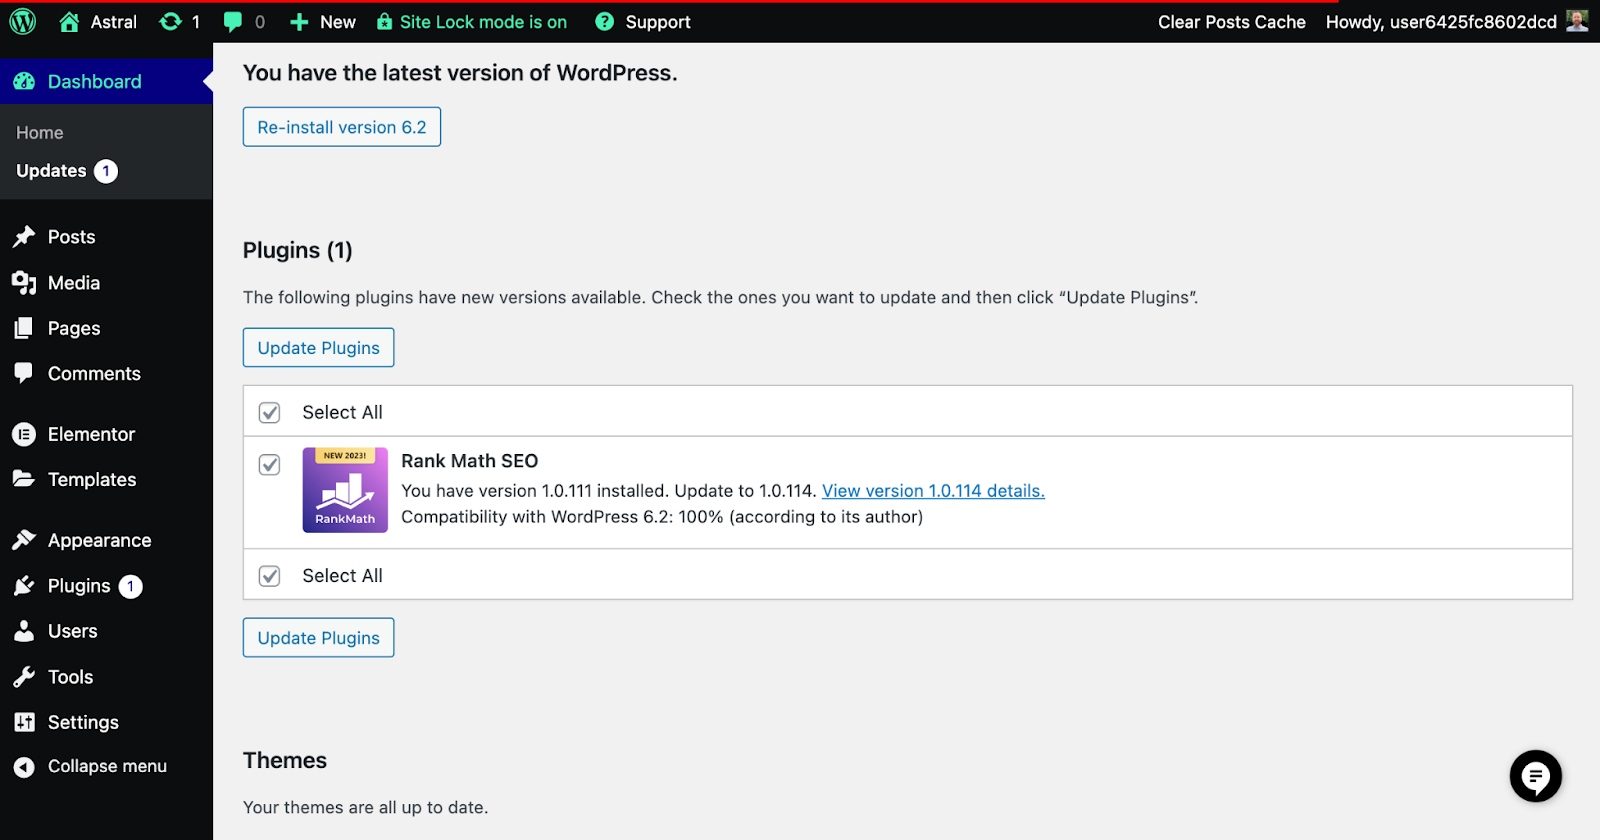
Here’s how to keep everything updated:
- WordPress: When a new version of WordPress is available, you’ll see a notification in your dashboard. Follow the prompts to update your site.
- Themes: To update your theme, go to “Appearance” > “Themes” and click on the “Update Now” button if an update is available.
- Plugins: Check for plugin updates by going to “Plugins” > “Installed Plugins.” If updates are available, you’ll see a notification with an option to update.
Remember to backup your site before updating (see the next section), as updates can sometimes cause issues.
Creating backups
Regularly backing up your website is crucial for protecting your content and ensuring you can quickly recover from any mishaps. Many web hosts offer backups, including Elementor Hosting, which provides automatic backups for added peace of mind, ensuring users can easily recover their data in case of any issues.
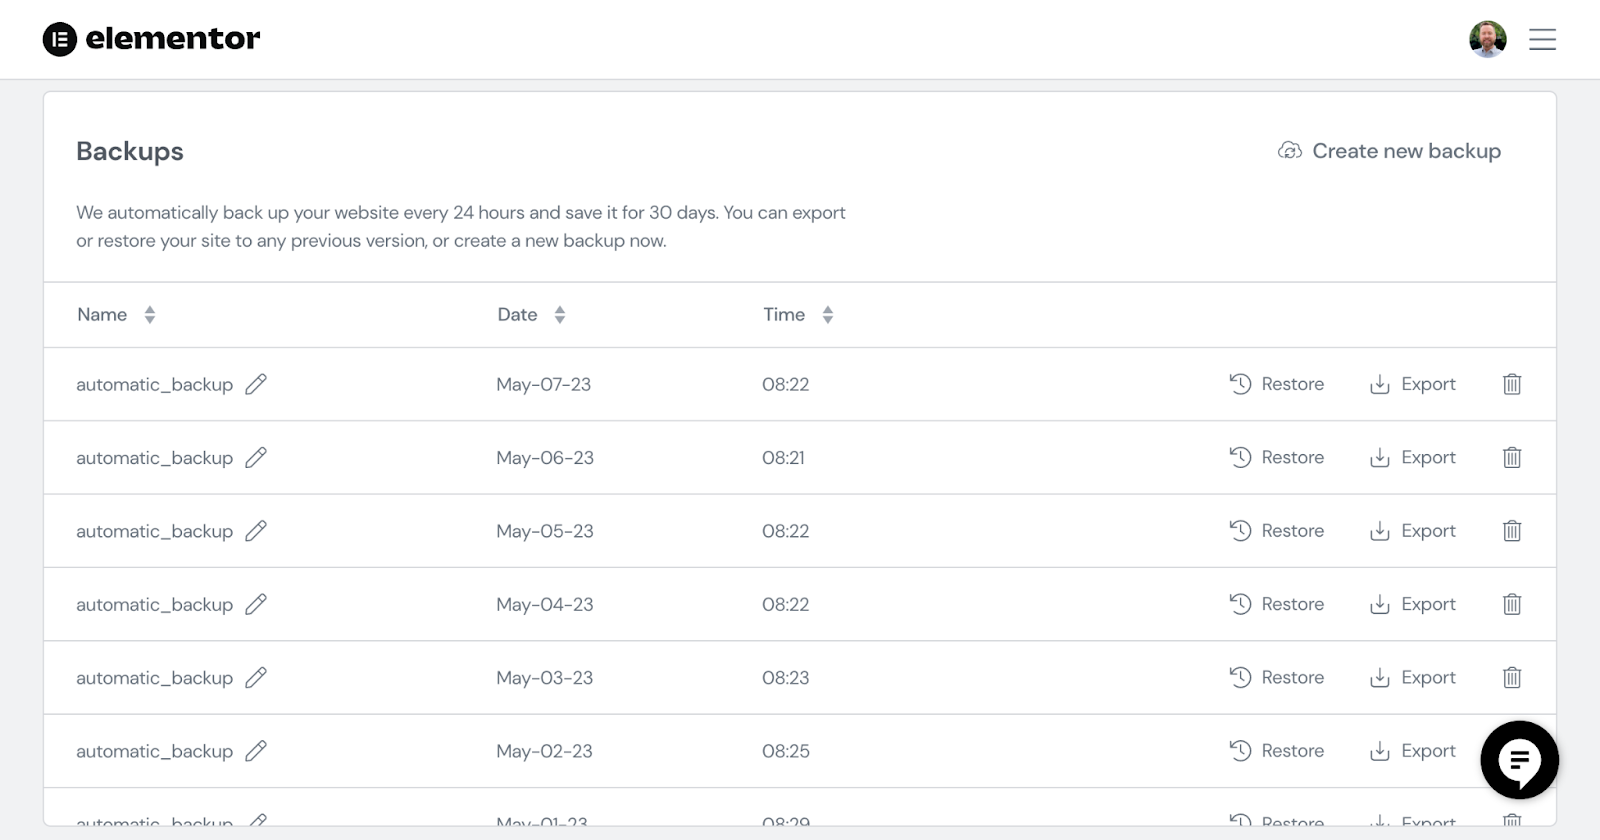
Additionally, you can use a plugin like UpdraftPlus or BackupBuddy to create and manage backups. Schedule your backups to run automatically, and store copies in a safe location, such as a cloud storage service or an external hard drive.
Monitoring website performance and security
Consistently checking your website’s performance and security helps you address potential issues early on and provide a seamless experience for your visitors.
Here’s how you can monitor both aspects:
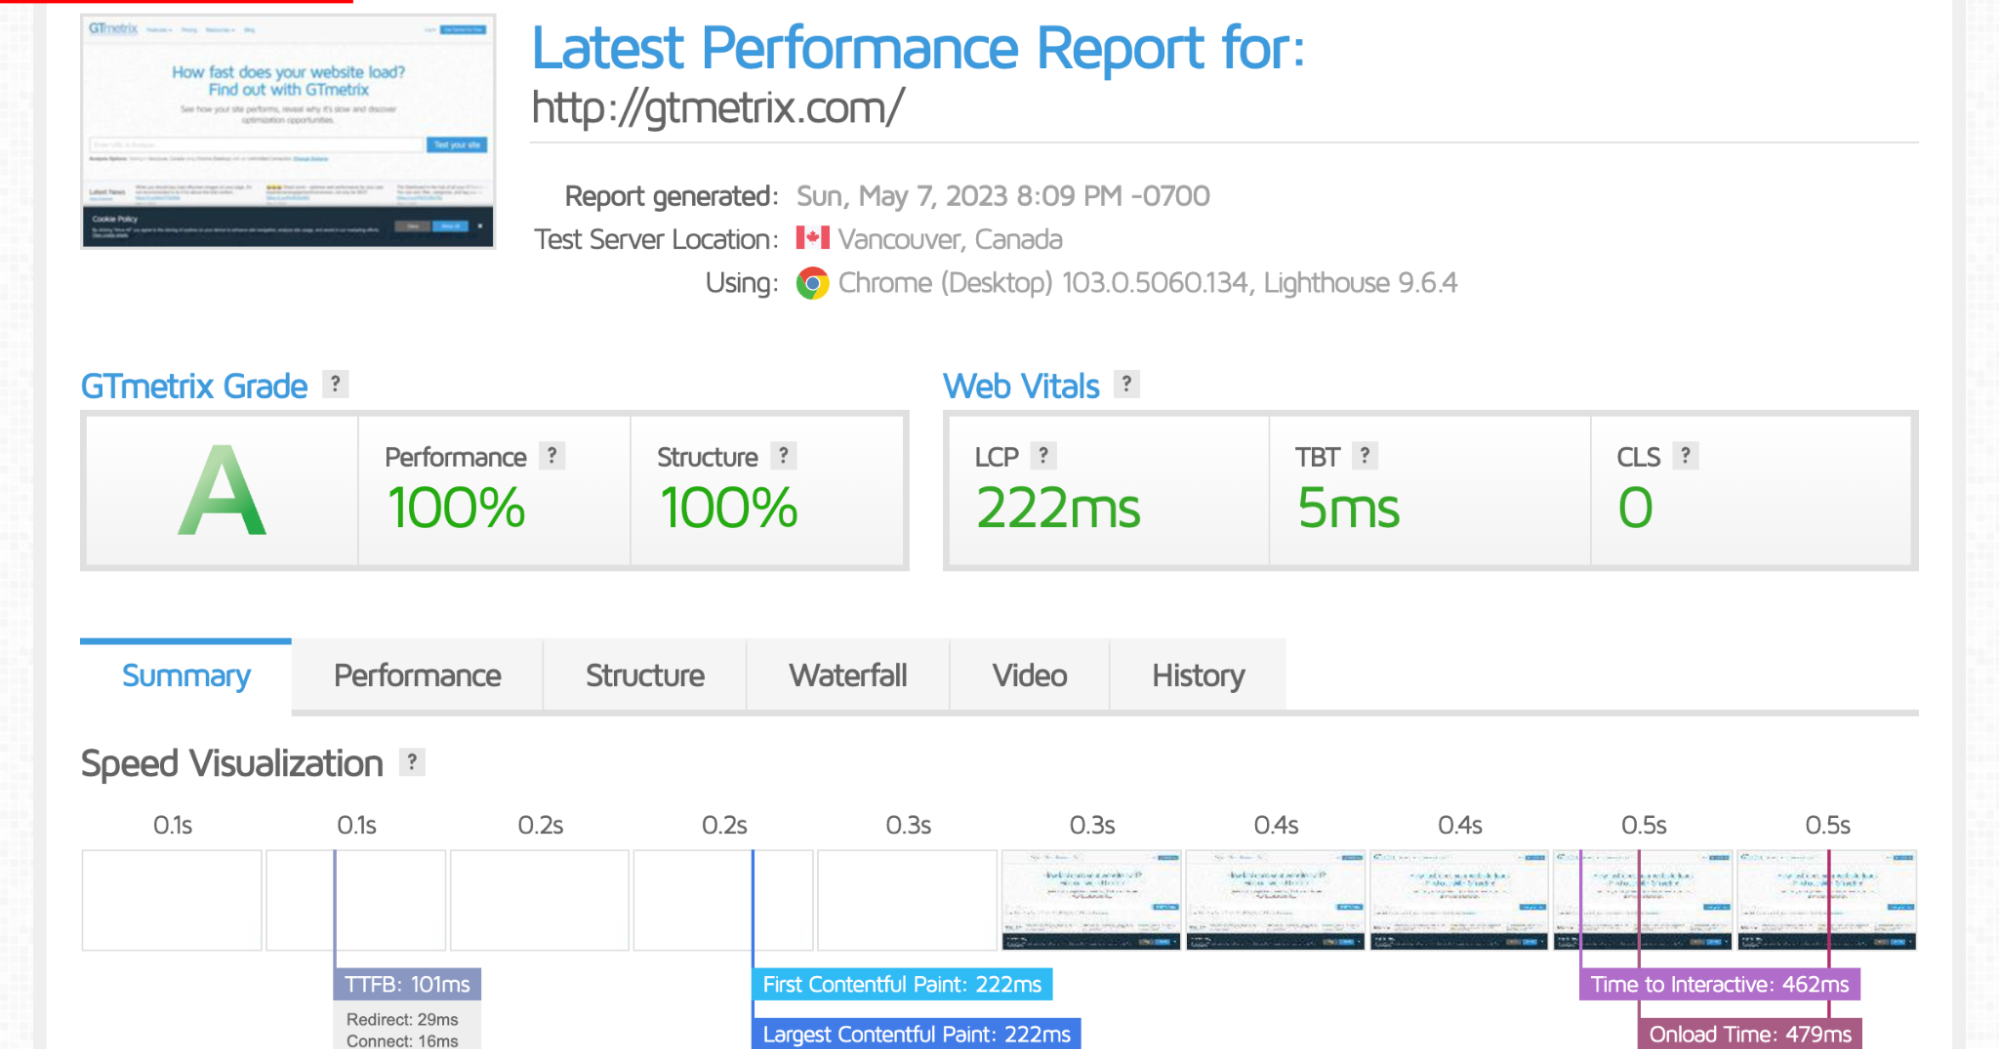
- Performance: Use tools like Google PageSpeed Insights, GTmetrix, or Pingdom to monitor your site’s load times and identify areas for improvement.
- Security: Install security plugins like Wordfence, Sucuri, or iThemes Security to protect your site from hackers, malware, and other threats. Regularly scan your site for vulnerabilities and promptly address any issues.
By actively monitoring and maintaining your business website, you’ll ensure it continues to run smoothly and securely, providing a great experience for your visitors.
The Importance of Choosing the Right Host for Performance and Security
When it comes to website performance and security, the choice of hosting provider can make a significant difference. Hosting plays a vital role in determining the speed, reliability, and security of your website. While there are various hosting providers available, Elementor Hosting is an excellent option for those looking for top-notch performance and security features.
Elementor hosting is optimized for WordPress, making it the ideal choice. It has advanced caching mechanisms that allow your website pages to load quickly and efficiently, ensuring an exceptional user experience. With caching, frequently requested data, such as HTML and static files, a stored on a content delivery network (CDN) that’s available worldwide, ensuring that your website loads fast no matter where your visit is located. Plus, you have complete control over your caching preferences, ensuring that the content of your website is always up-to-date.
In addition to caching, Elementor Hosting has implemented several security measures to protect your website from malicious attacks. Its servers are equipped with firewalls, malware scanning, and intrusion detection systems to ensure that your website is secure.
By using Elementor Hosting, you have you can have peace of mind knowing that your website is in good hands, leaving you free to concentrate on creating and managing your successful business website.
Wrapping Up Your WordPress Journey
We’ve come a long way in learning to create a WordPress site from scratch, designed to suit your unique needs. Throughout this journey, we’ve covered understanding the importance of choosing a good custom domain name and hosting provider, installing WordPress, configuring basic settings, selecting and installing a theme or an Elementor kit, and customizing your website’s appearance and functionality through the WordPress dashboard.
We also delved into creating engaging content with pages and posts, installing essential plugins for added features, and monitoring website traffic. Optimizing your website for search engines with SEO techniques, such as using Yoast SEO plugin, is crucial to your site’s success. Additionally, regularly maintaining your website’s performance and security is key.
Now that you’ve built your WordPress website, it’s essential to remember that the journey doesn’t end here. The online landscape is constantly evolving, and it’s important to stay updated on the latest trends and best practices. Continue learning and improving your website to provide your visitors with the best possible experience.
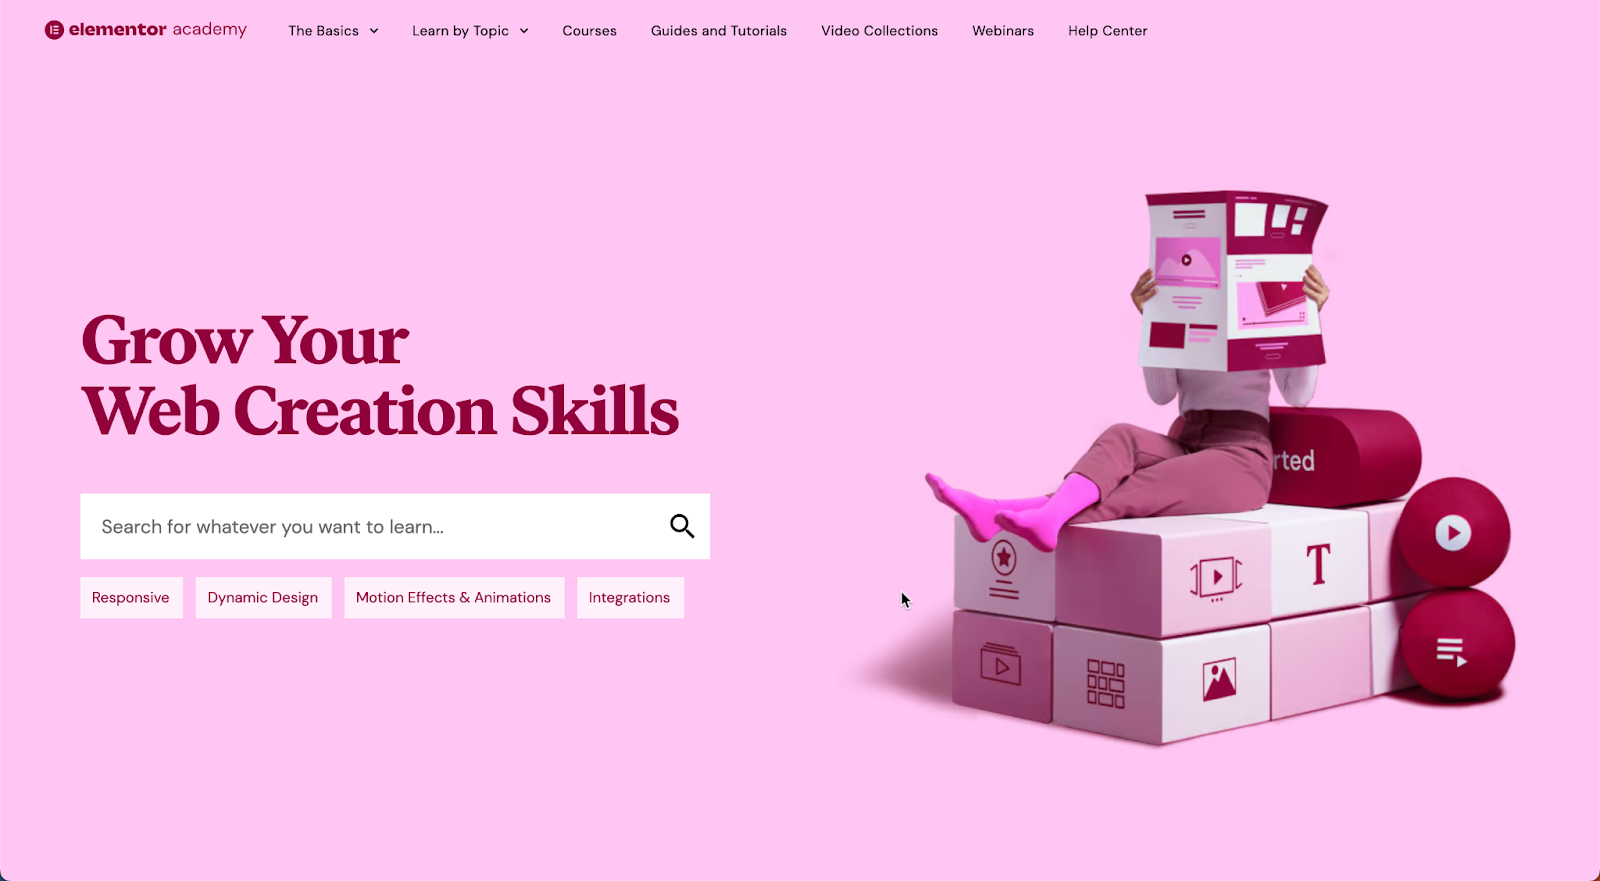
Don’t hesitate to seek out resources, tutorials, and the supportive WordPress community to help you along the way. If you’re using Elementor, make sure to take advantage of their robust support system, active community, and the Elementor Academy for valuable insights and guidance.
Join the Global Elementor Community on Facebook. The Elementor community is a fantastic group of people always eager to share tips and knowledge. This community is perfect for users of all skill levels, from beginners to experts in design, business, and coding.
Elementor also hosts regular meetups, both online and in-person, for web creators to connect with designers, developers, marketers, and Elementor experts. These events are a great opportunity to get inspired, network, and grow your business.
With dedication and a passion for growth, you’ll continue to thrive and make your mark in the digital world. So, go forth and conquer your WordPress journey, one step at a time! Good luck!


