Zapier is an automation service similar to IFTTT (IF This Then That). Zapier regularly checks for a trigger on the apps you’ve chosen, if the trigger occurred Zapier will perform an action or even multiple actions.
What does Zapier have to do with Elementor?
One of the most powerful features of Elementor is its Form widget. With this widget, you can create forms and start collecting leads on your site. This is a crucial step for any growing business.
The collected leads can be automatically adding to email marketing automation and CRM services that have already been integrated to Elementor. These include MailChimp, MailPoet, ActiveCampaign, Campaign Monitor, GetResponse, Drip, and Hubspot.
You can also set the forms to integrate with Zapier, thus connecting them to the over 1000+ services that are hooked to Zapier.
The process of connecting Elementor forms to Zapier is a bit longer than the usual integrations. It includes creating a trigger in Zapier from Elementor. Once an Elementor form is sent the Zapier trigger is fired. After this, the action or actions are made, causing the form submission to enter the integrated service.
This two-step process of creating the trigger and action is all done with Zapier, and in the following steps, you will learn just how to set this up.
Creating the Elementor trigger inside Zapier
Your first step is to create a ‘Zap’ in Zapier. A Zap is a blueprint for a task you want to do over and over. In words, a Zap looks like this: “When I get a new thing in A, do this other thing in B.”
Inside Zapier
1. Click on ‘Make a Zap’
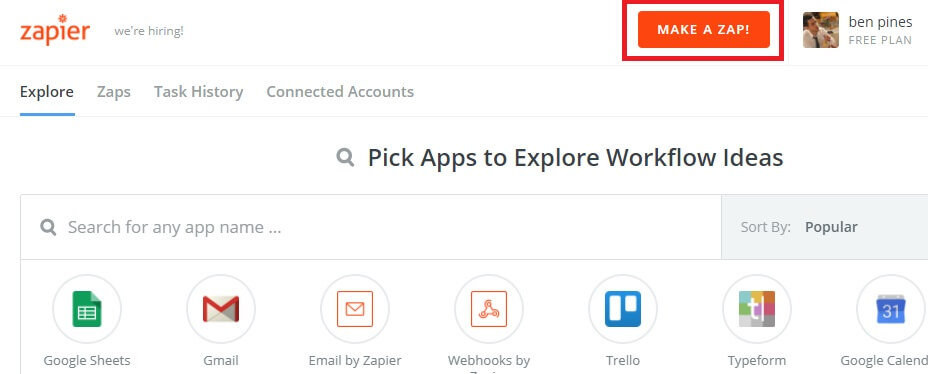

2. Choose app – On the left, you will see all the steps needed to complete the Zap. Choose ‘Webhooks’ under ‘Built in apps’
3. Choose trigger – On the ‘Select webhooks by Zapier trigger’ screen, choose ‘Catch hook’ and press ‘Save + Continue’

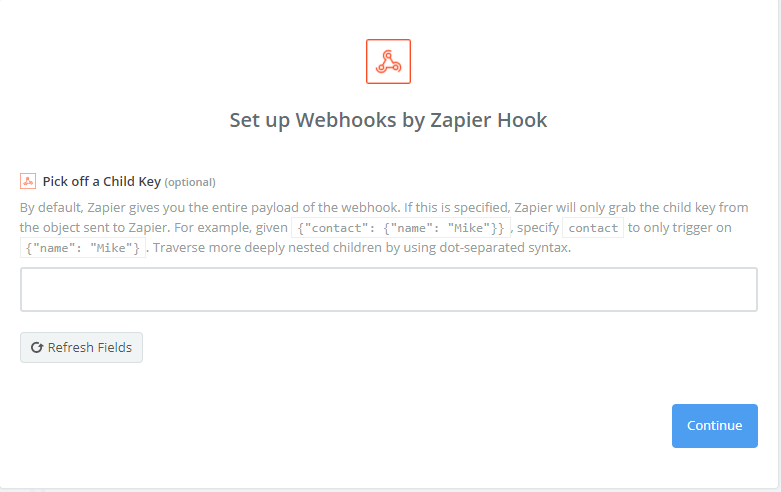
4. Set up options – In the ‘Set up Webhooks by Zapier Hook’, no additional actions are needed (choose ‘Continue’)
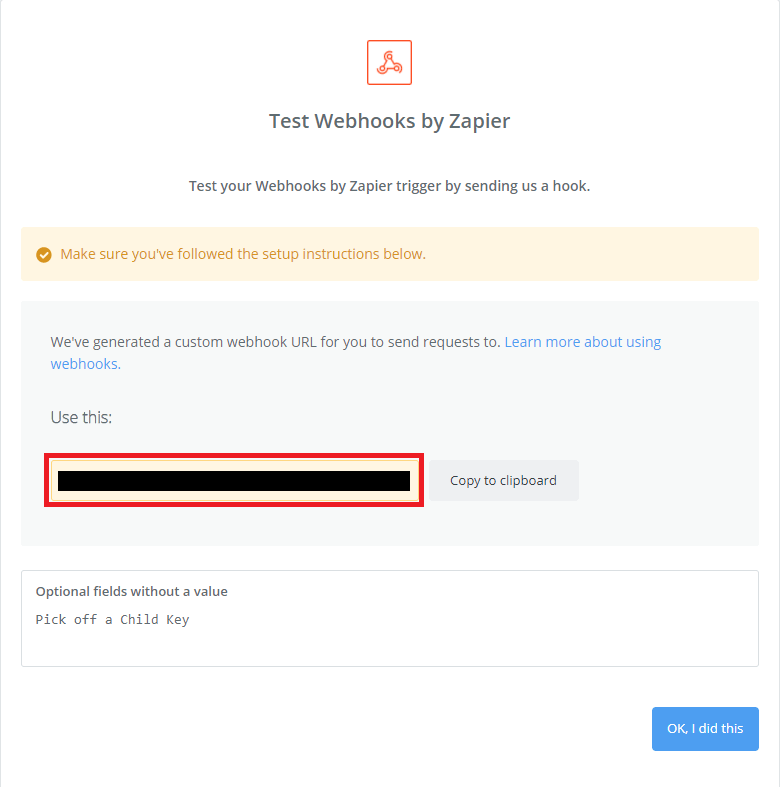
5. Test this step – Copy the Zapier webhook to your clipboard
Inside Your Own Website
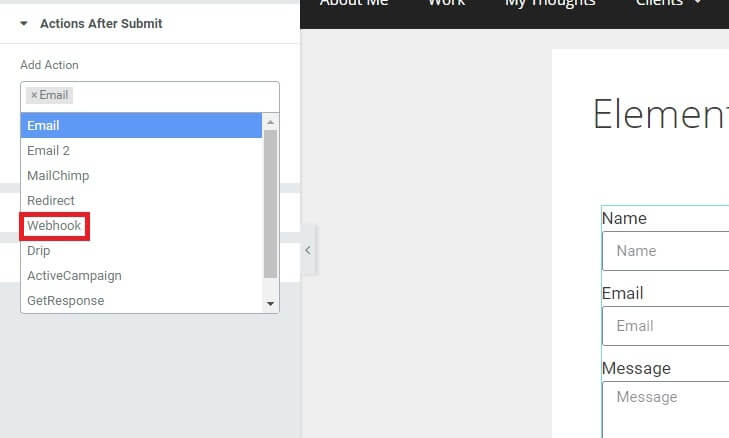
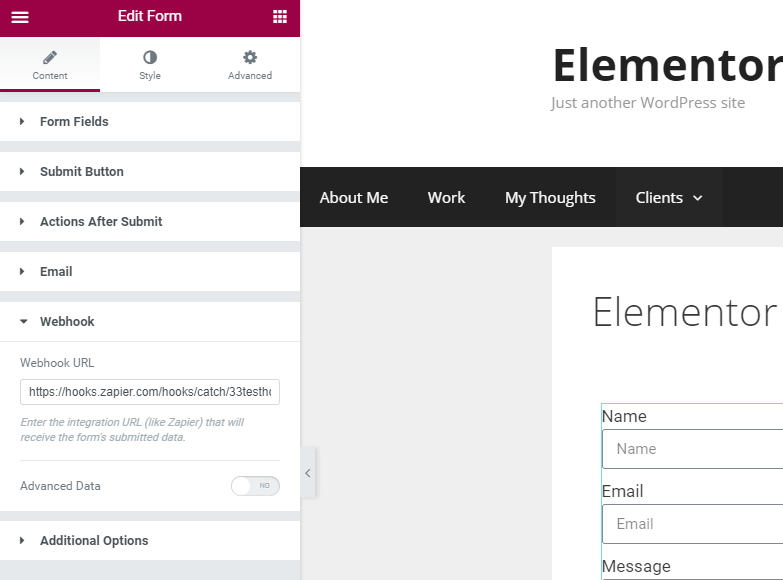
1. Go to your website, and inside Elementor, edit the form you want to get integrated to Zapier. Under Actions after submit, add Webhook.
2. Open the Webhook toggle, and enter the hook you copied from Zapier
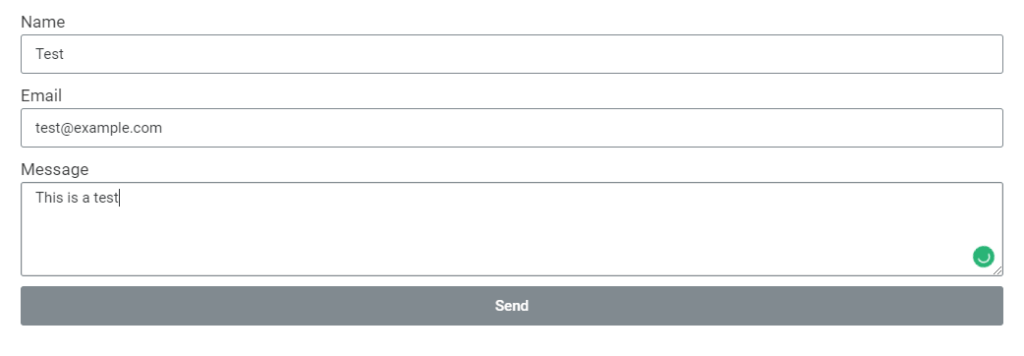
3. Save the page, and go to the live version of the page. Now, submit the form. This sends the Webhook to Zapier, to confirm the hook we created.
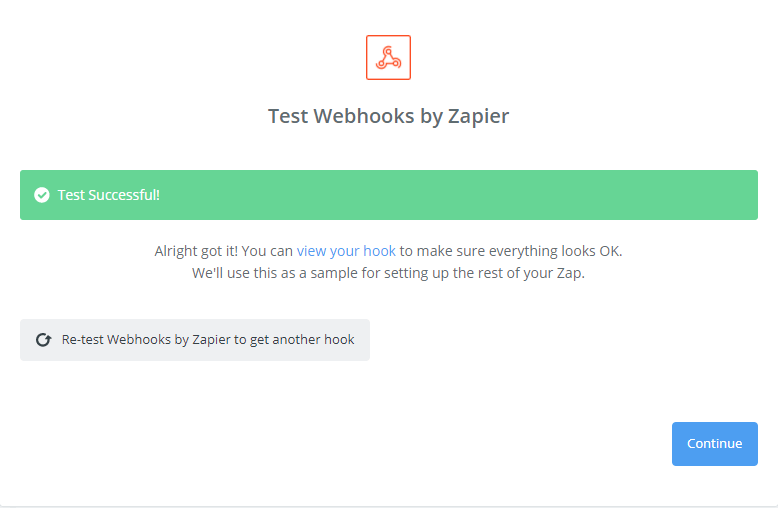
4. Back in Zapier, click continue. You should get a ‘Test successful’ notice.
Create the Action That Zapier Performs
In this part, we create the action that follows our trigger. As a reminder, the trigger is the Elementor form submission.
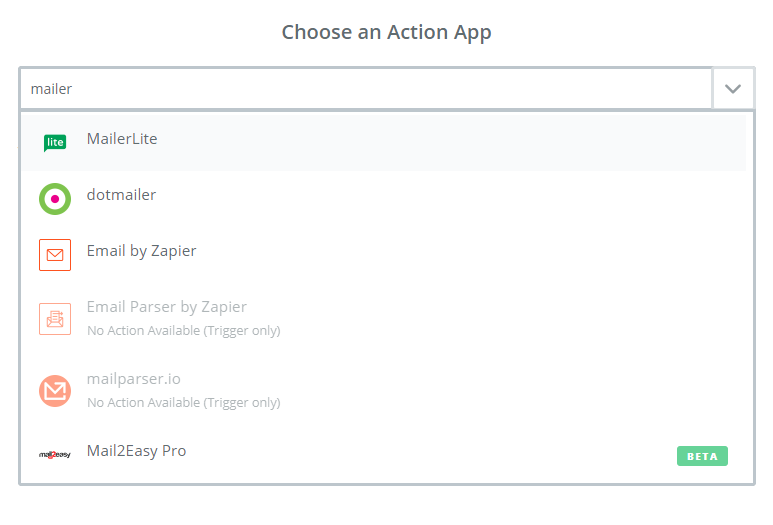
Let’s choose one of the 1,000+ apps to show how to add the action to Zapier. I’ll go ahead and choose MailerLite.
Inside Zapier
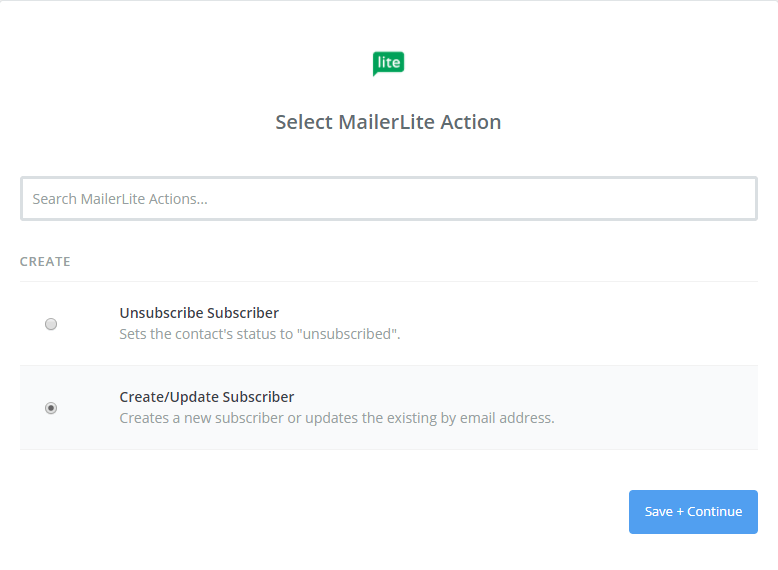
1. MailerLite – In the search bar, enter MailerLite
2. Create / update subscriber – Choose ‘Create / update subscriber’ and click ‘Continue’
Inside MailerLite
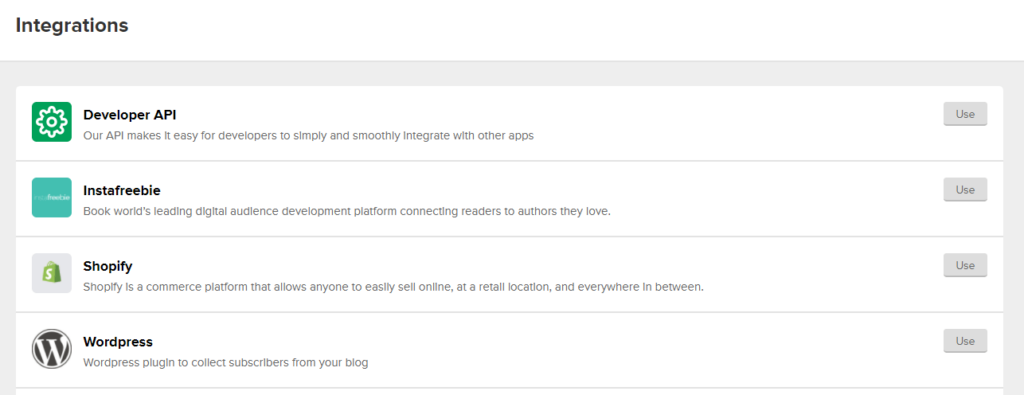
1. Go to MailerLite website – Let’s get the API from MailerLite by going to your profile image > Integrations > Developer API and click ‘Use’
2. Copy the API key

Back in Zapier
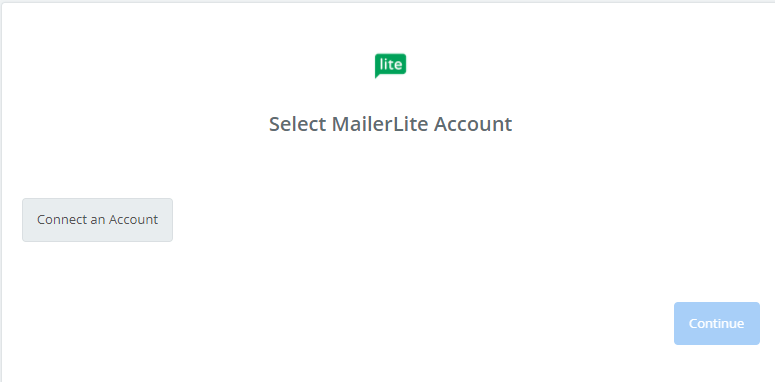
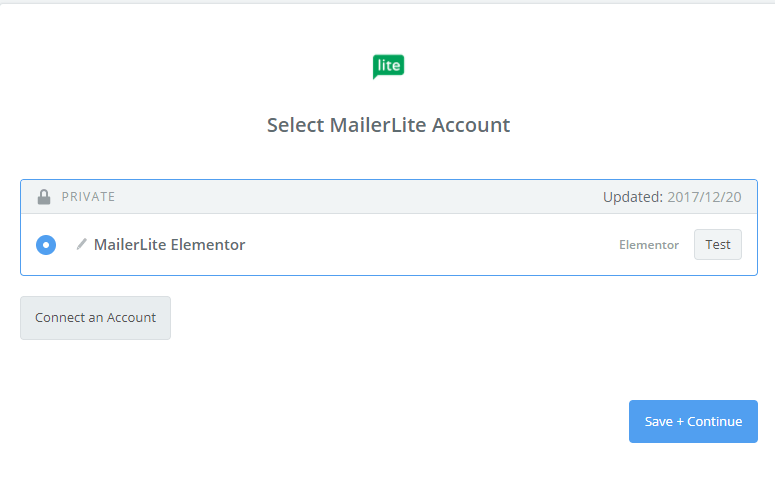
1. Back in Zapier, let’s connect our account
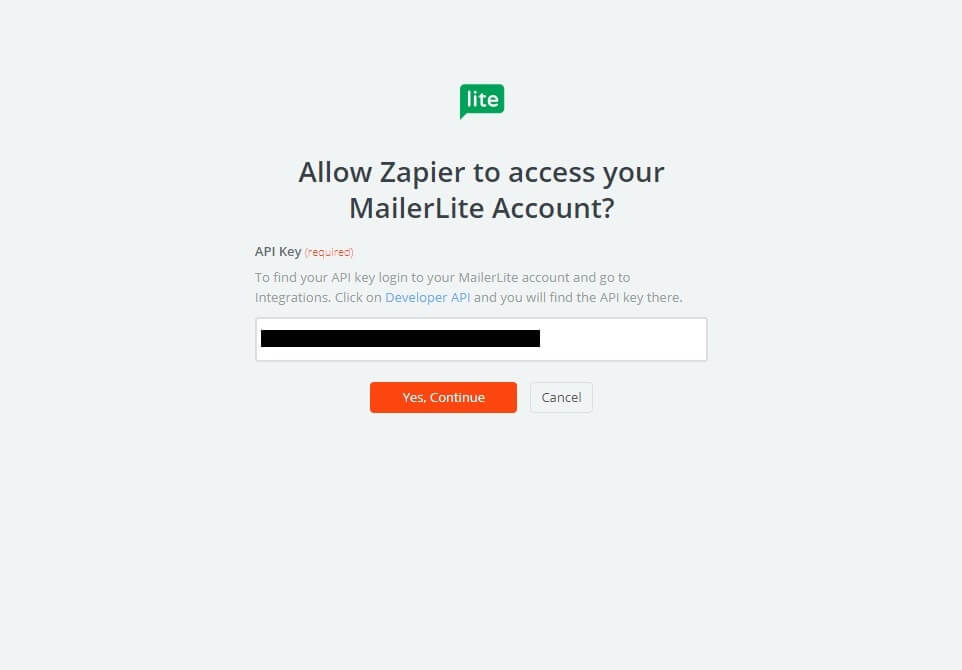
2. Paste our API key
3. Continue to the next step
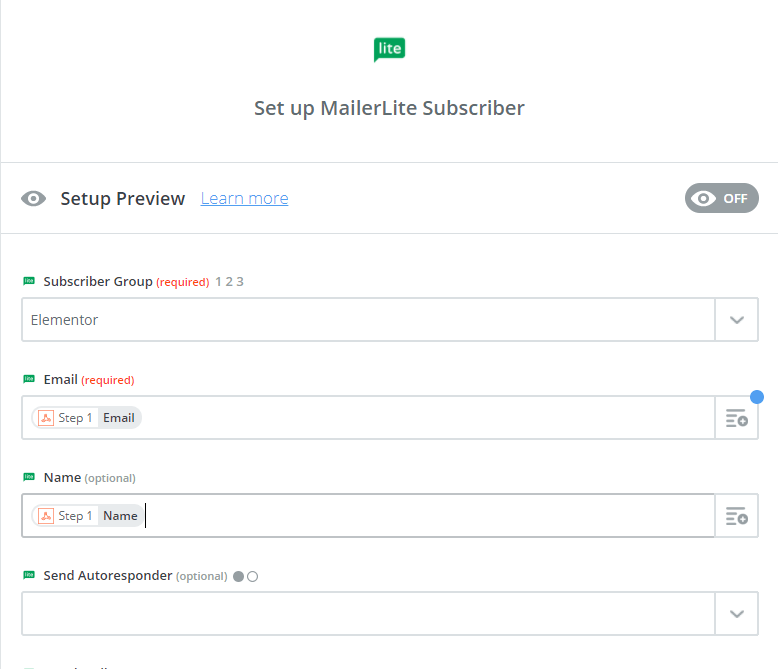
4. Edit template – Match the subscriber group and list fields
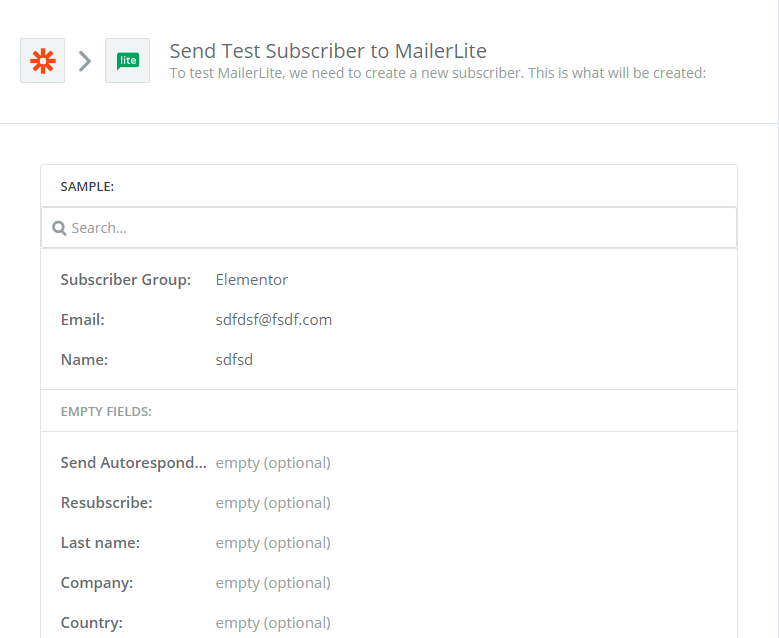
5. Test this step – Run a test to MailerLite
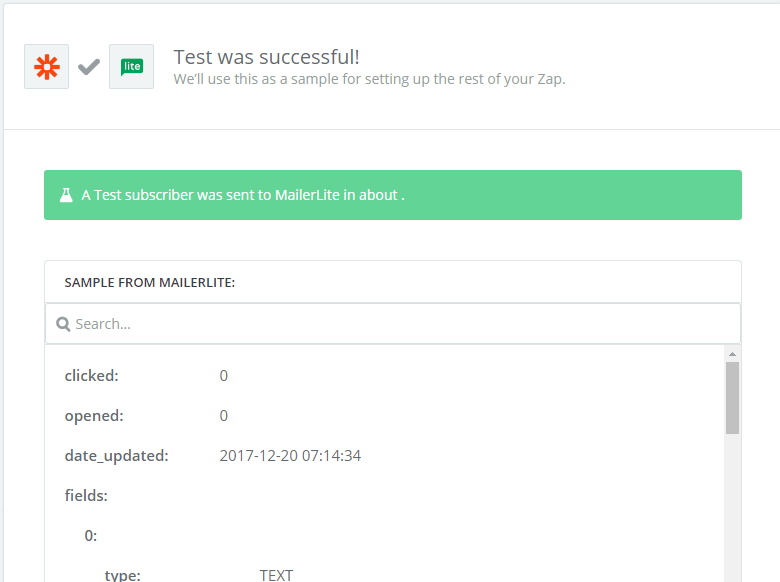
6. Test this step – Get the approval for the test
7. Rename step – Switch your Zap on and name it
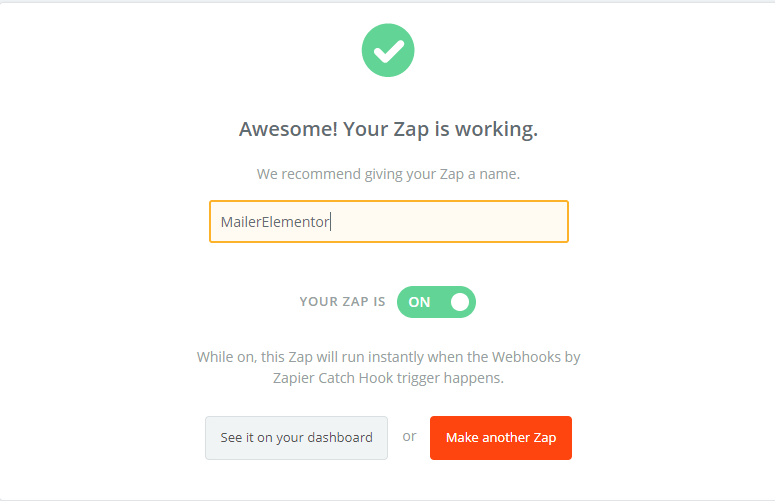
DONE!
Now go to the Elementor page on your website, send a test form submission, and go to MailerLite to make sure that the new submission was added correctly.

