What is the Hello Biz Footer?
Footers appear at the bottom of your site’s pages. They usually contain your site’s logo, navigation links for quick access to important pages and a CTA button.
Customizing your Footer
To customize your Header:
- Go to WP Admin.
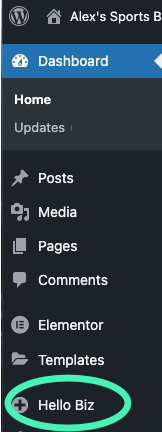
- In the panel, click Hello Biz.
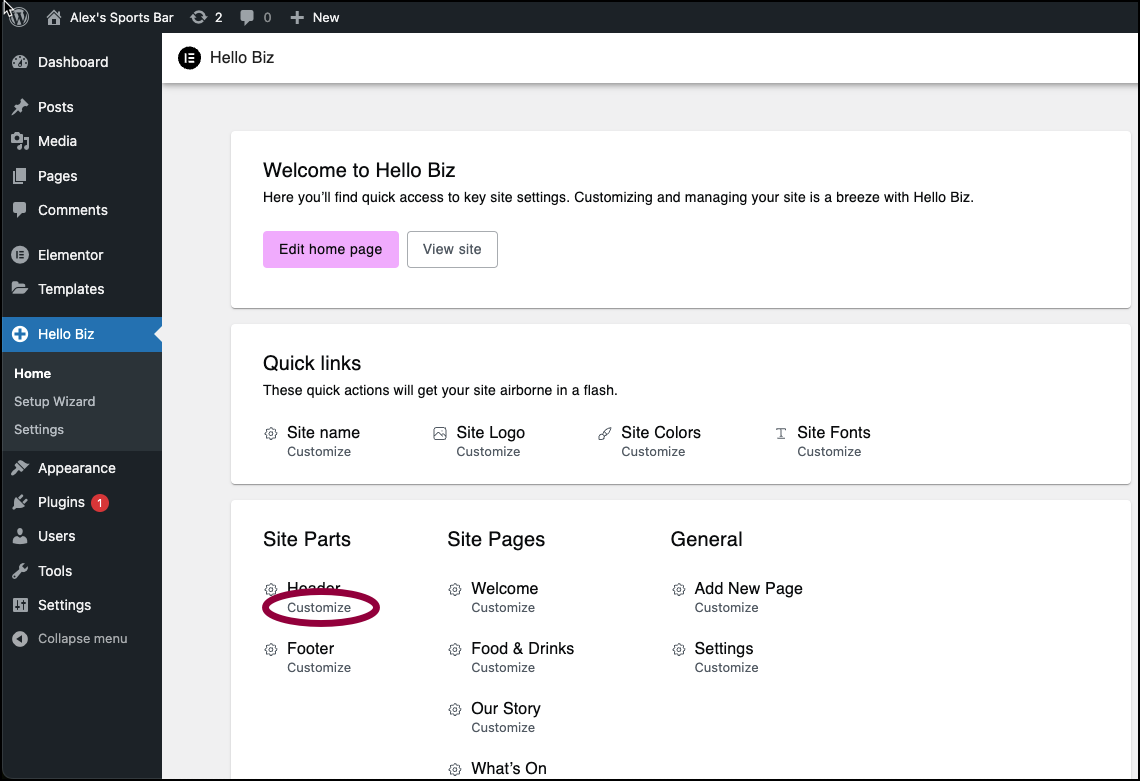
- In the Site Parts section under Footer click Customize.
The Elementor Editor opens with the Header and Footer visible.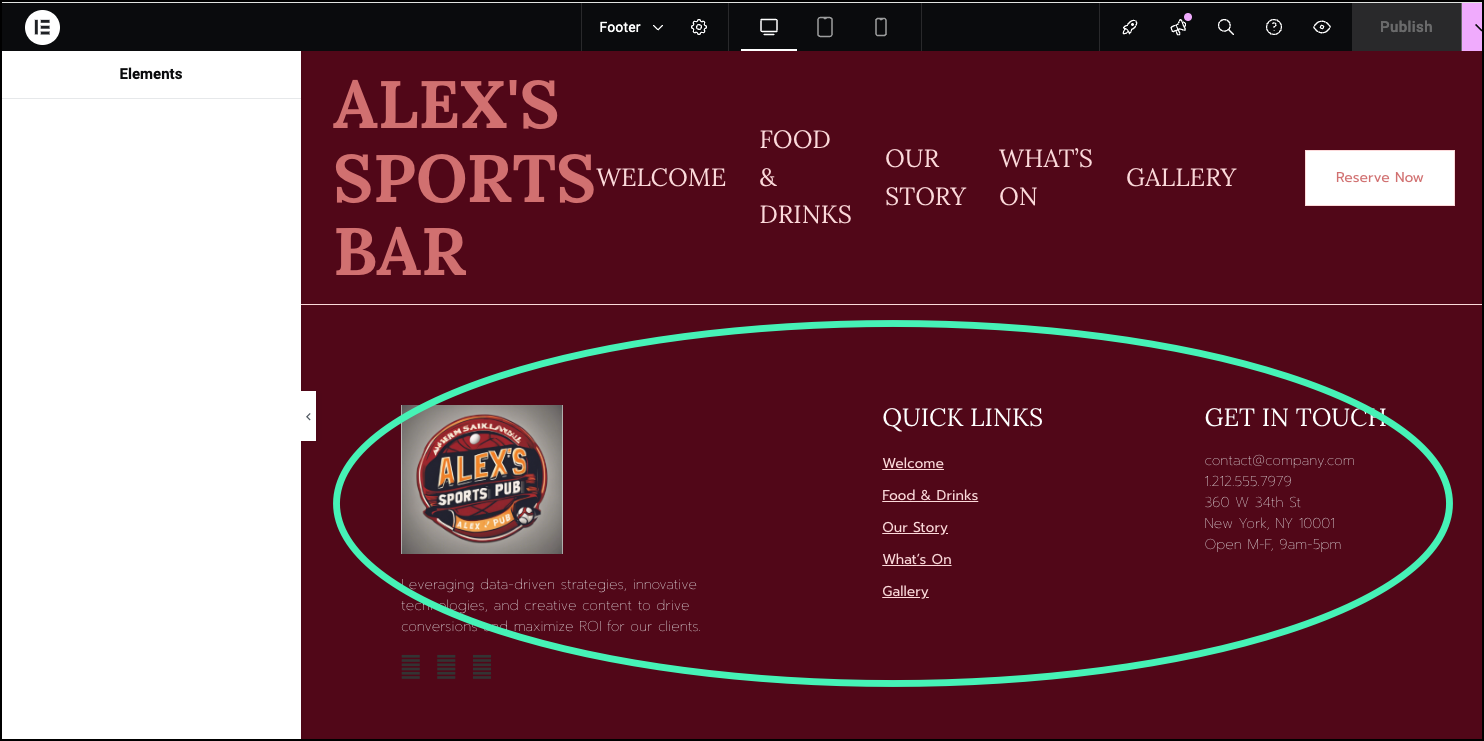
- Click the Footer to start editing it.
The Footer options appear in the panel.
Customize the Footer options
The Footer has three sections:
- Brand: Use a logo or business name to identify the site, quick links to your social media accounts and copyright notifications.
- Navigation: Create quick links to the site’s main pages.
- Contact: : Provide visitors with your address, phone number and email.
- In the Brand section, the dropdown menu should be in the default position of Site Logo.
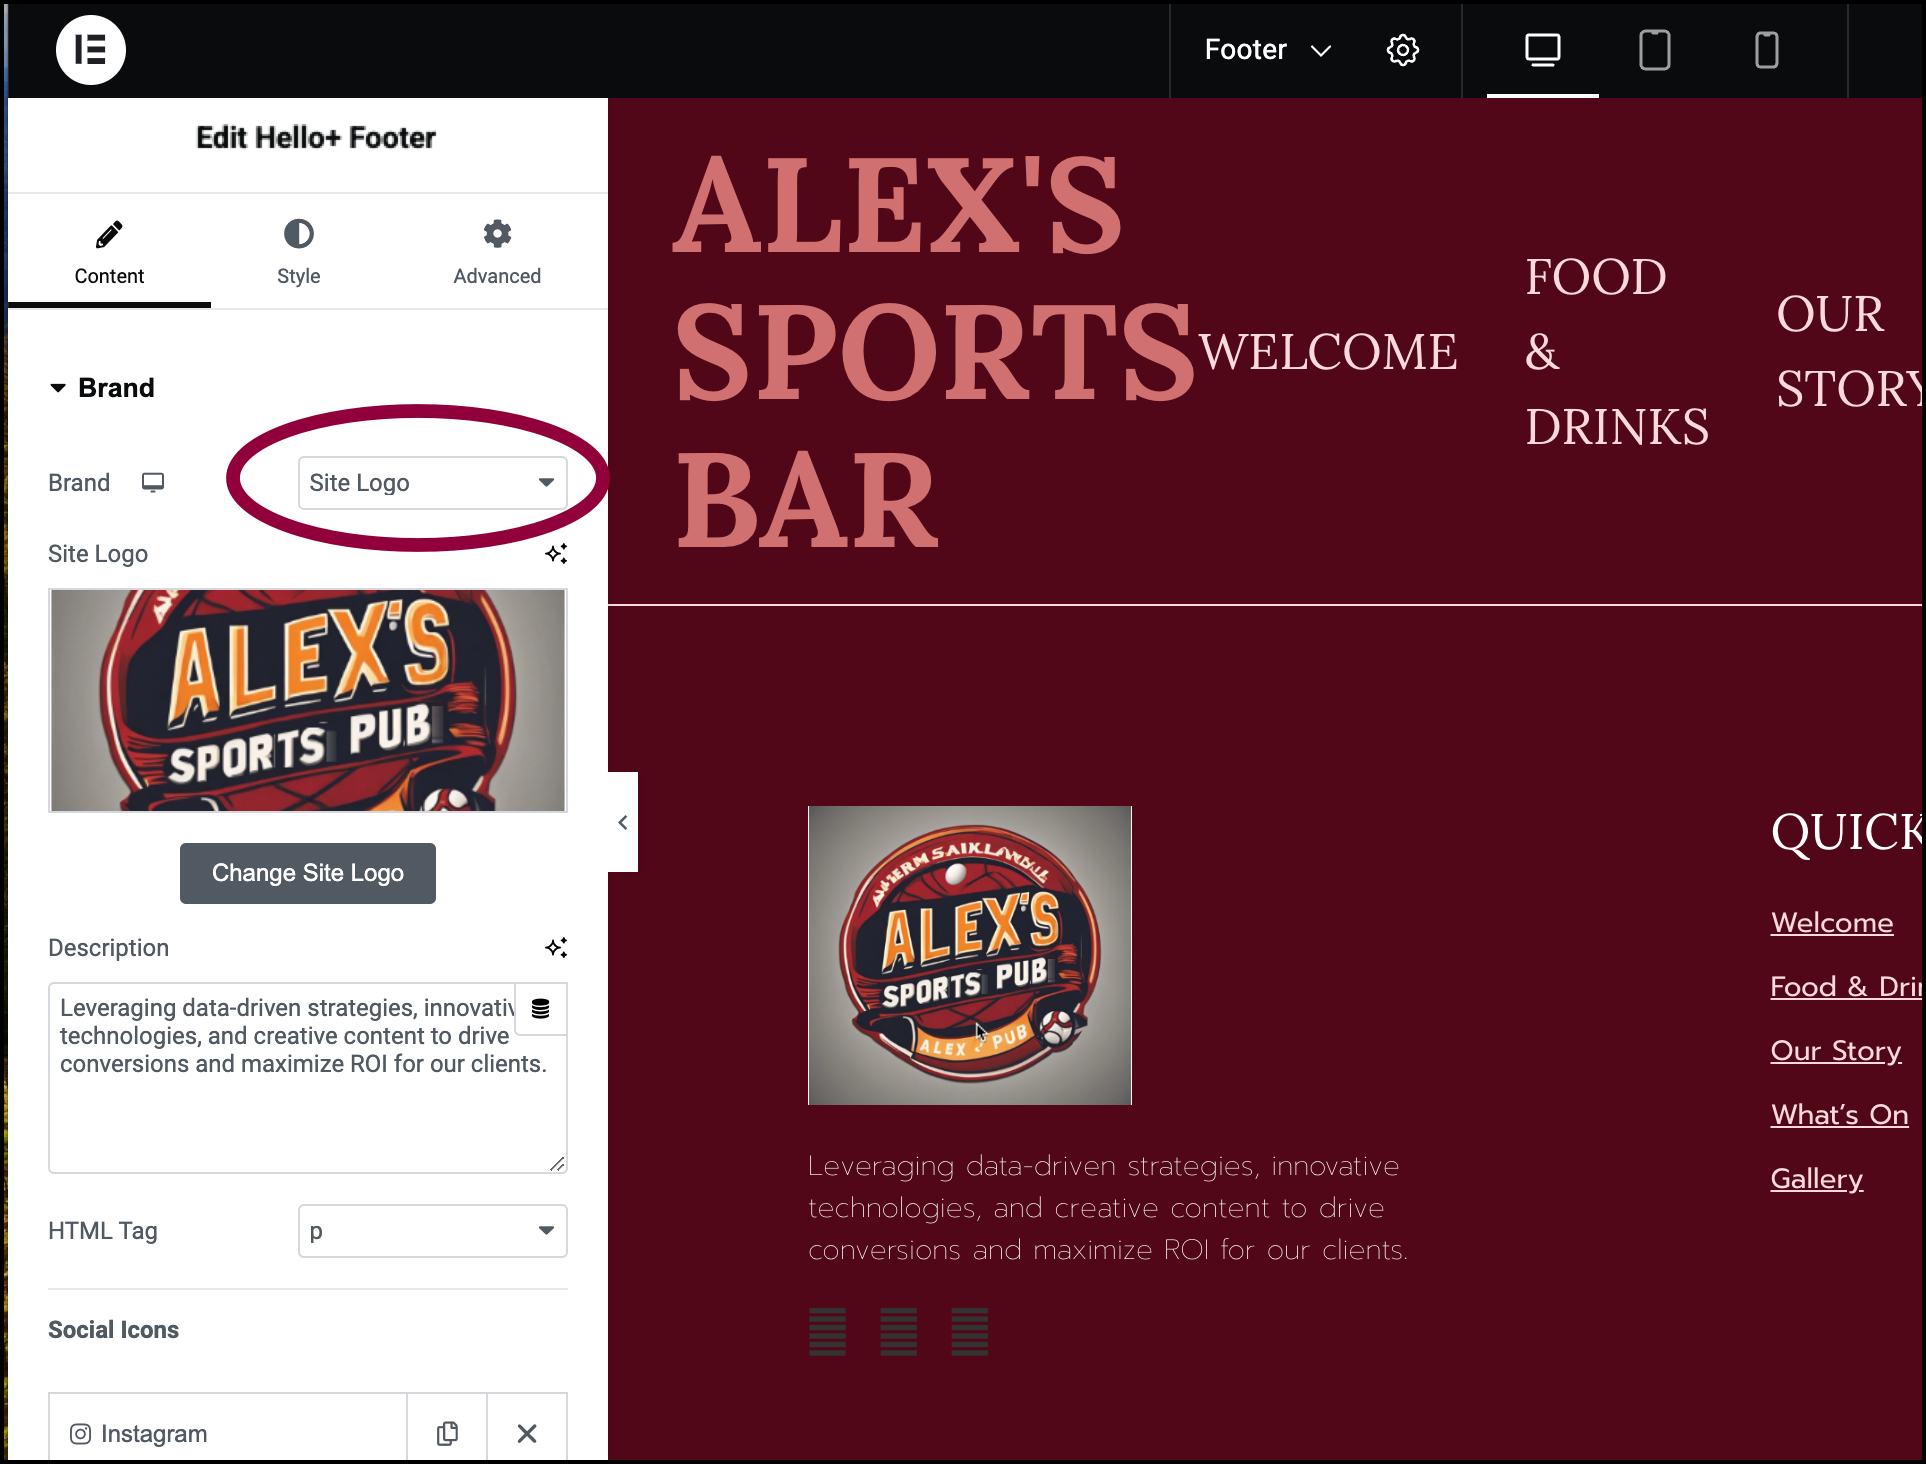
Selecting a logo is part of customizing your site.
You can change your logo by clicking Change Site Logo in the panel. For details, see Adding images and icons.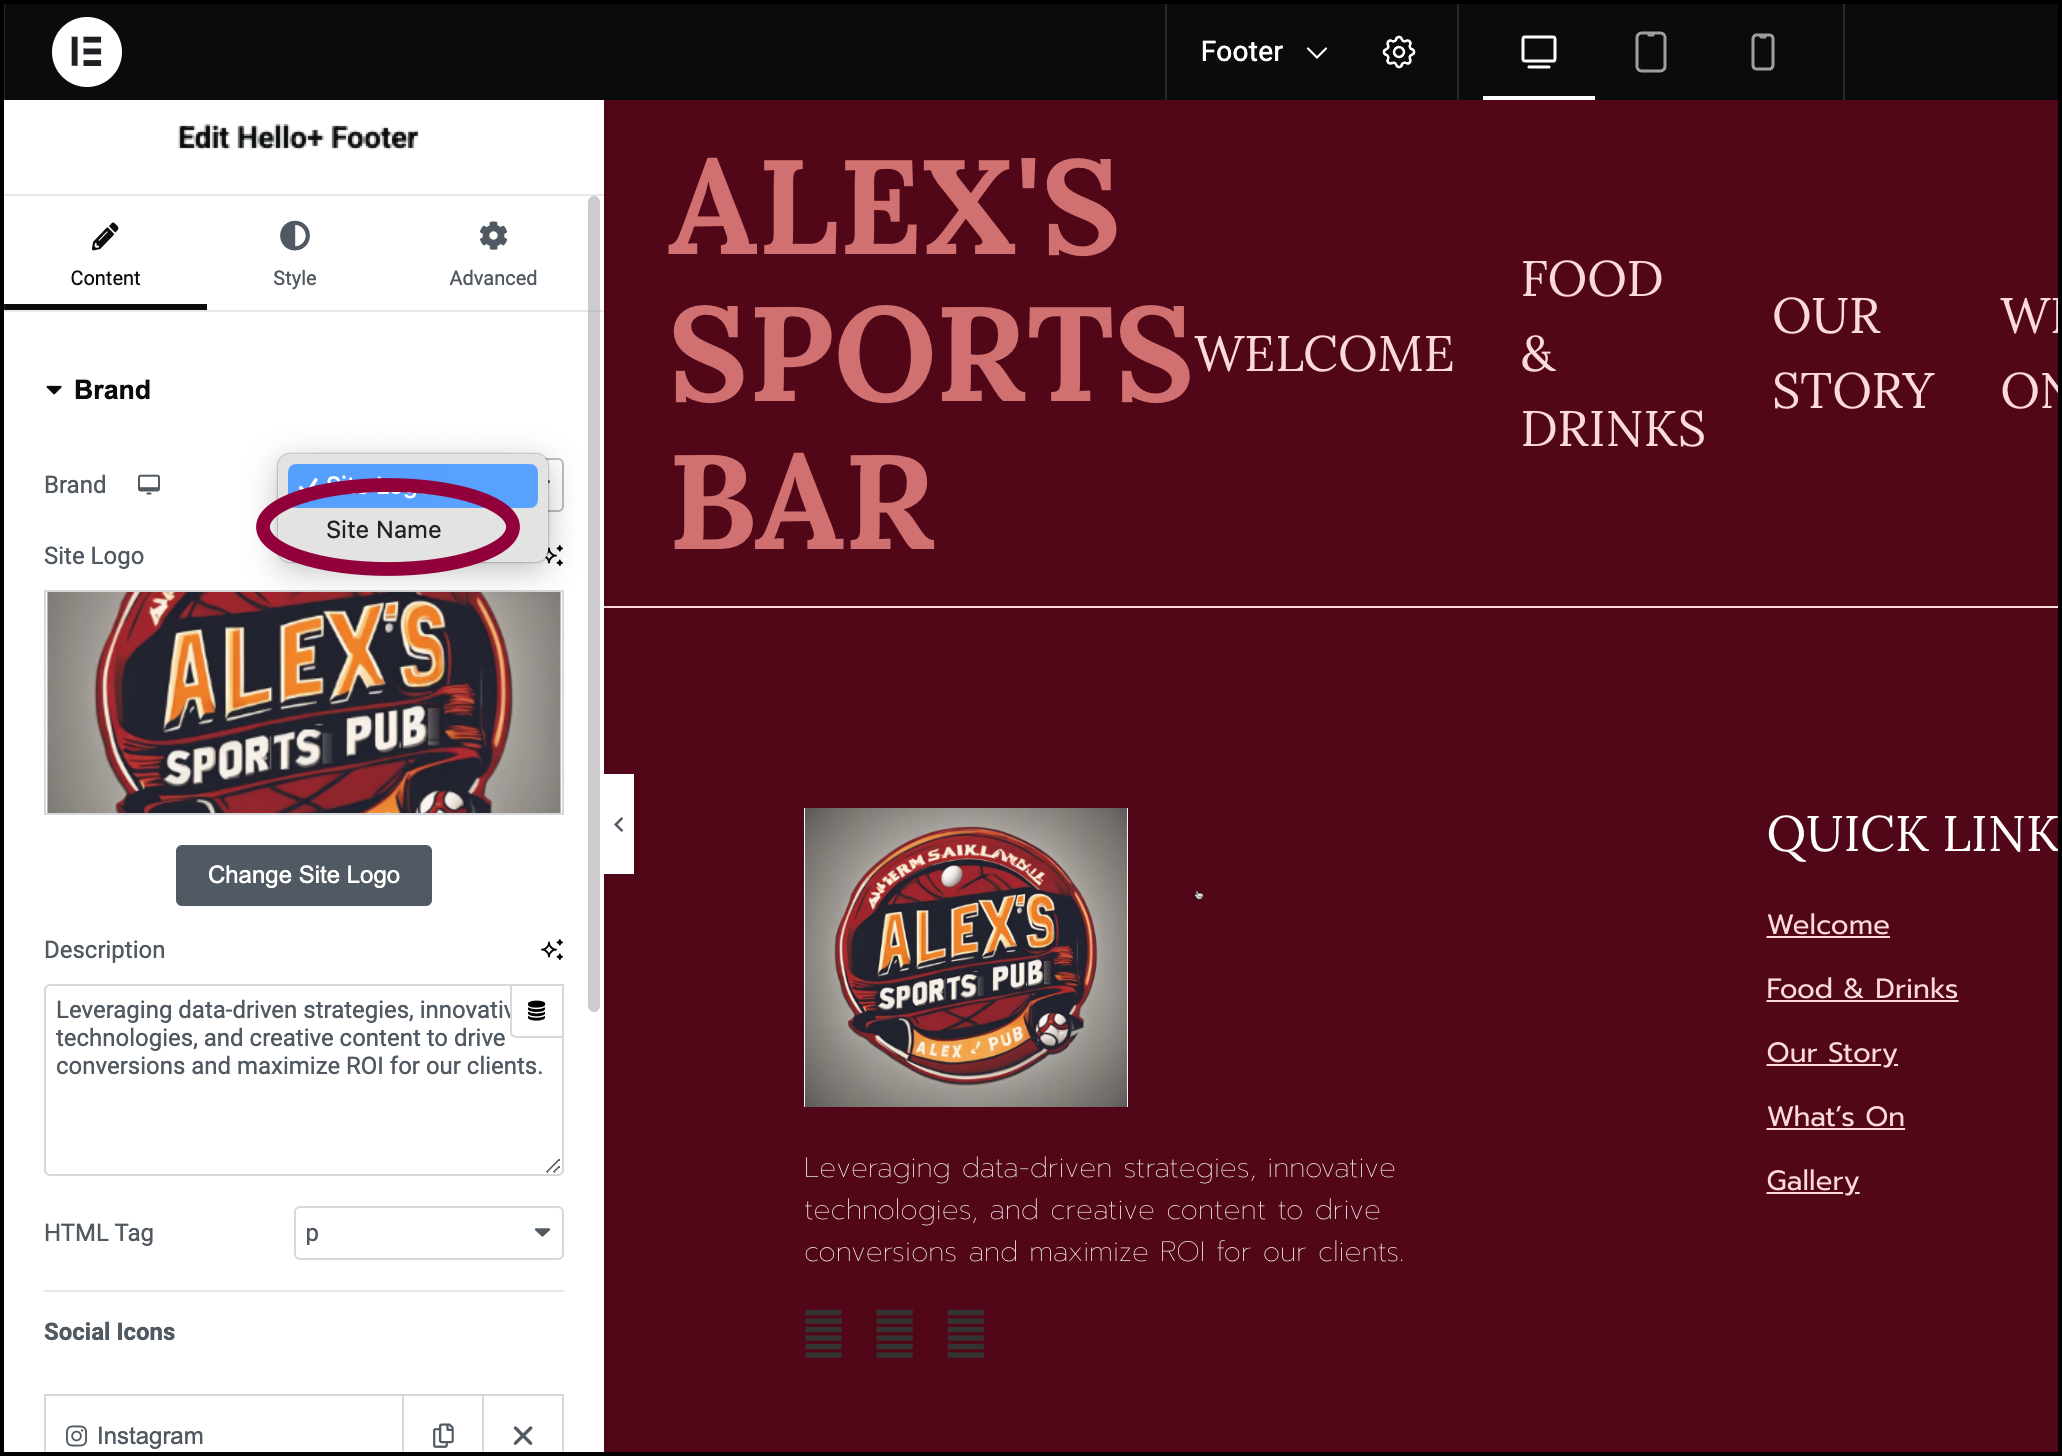
If you prefer to use the site name in the Footer, use the dropdown menu to choose Site Name.
It’s a good idea to include links to your social media presence in your footer to encourage visitors to check them out.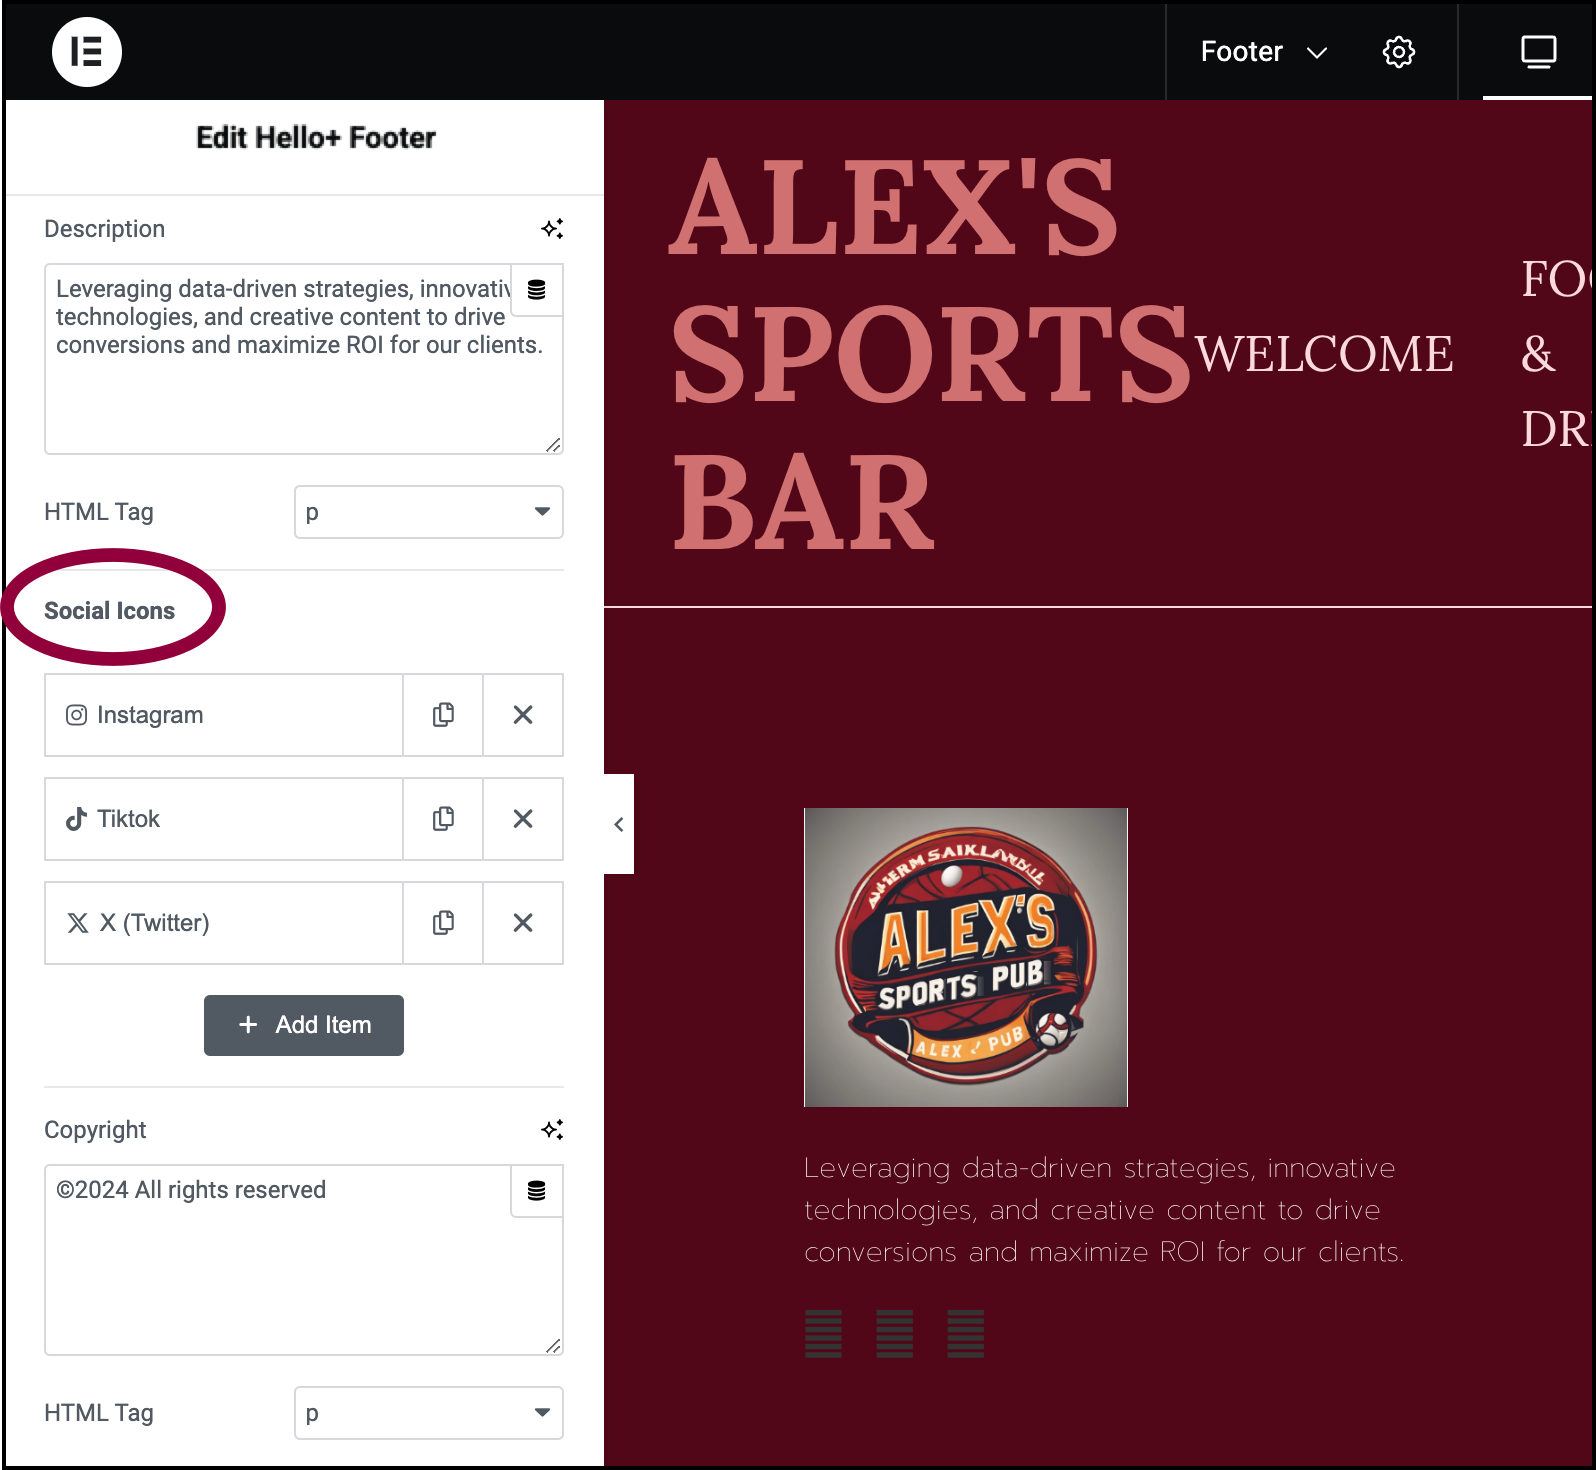
- Scroll down to the Social Icons section.
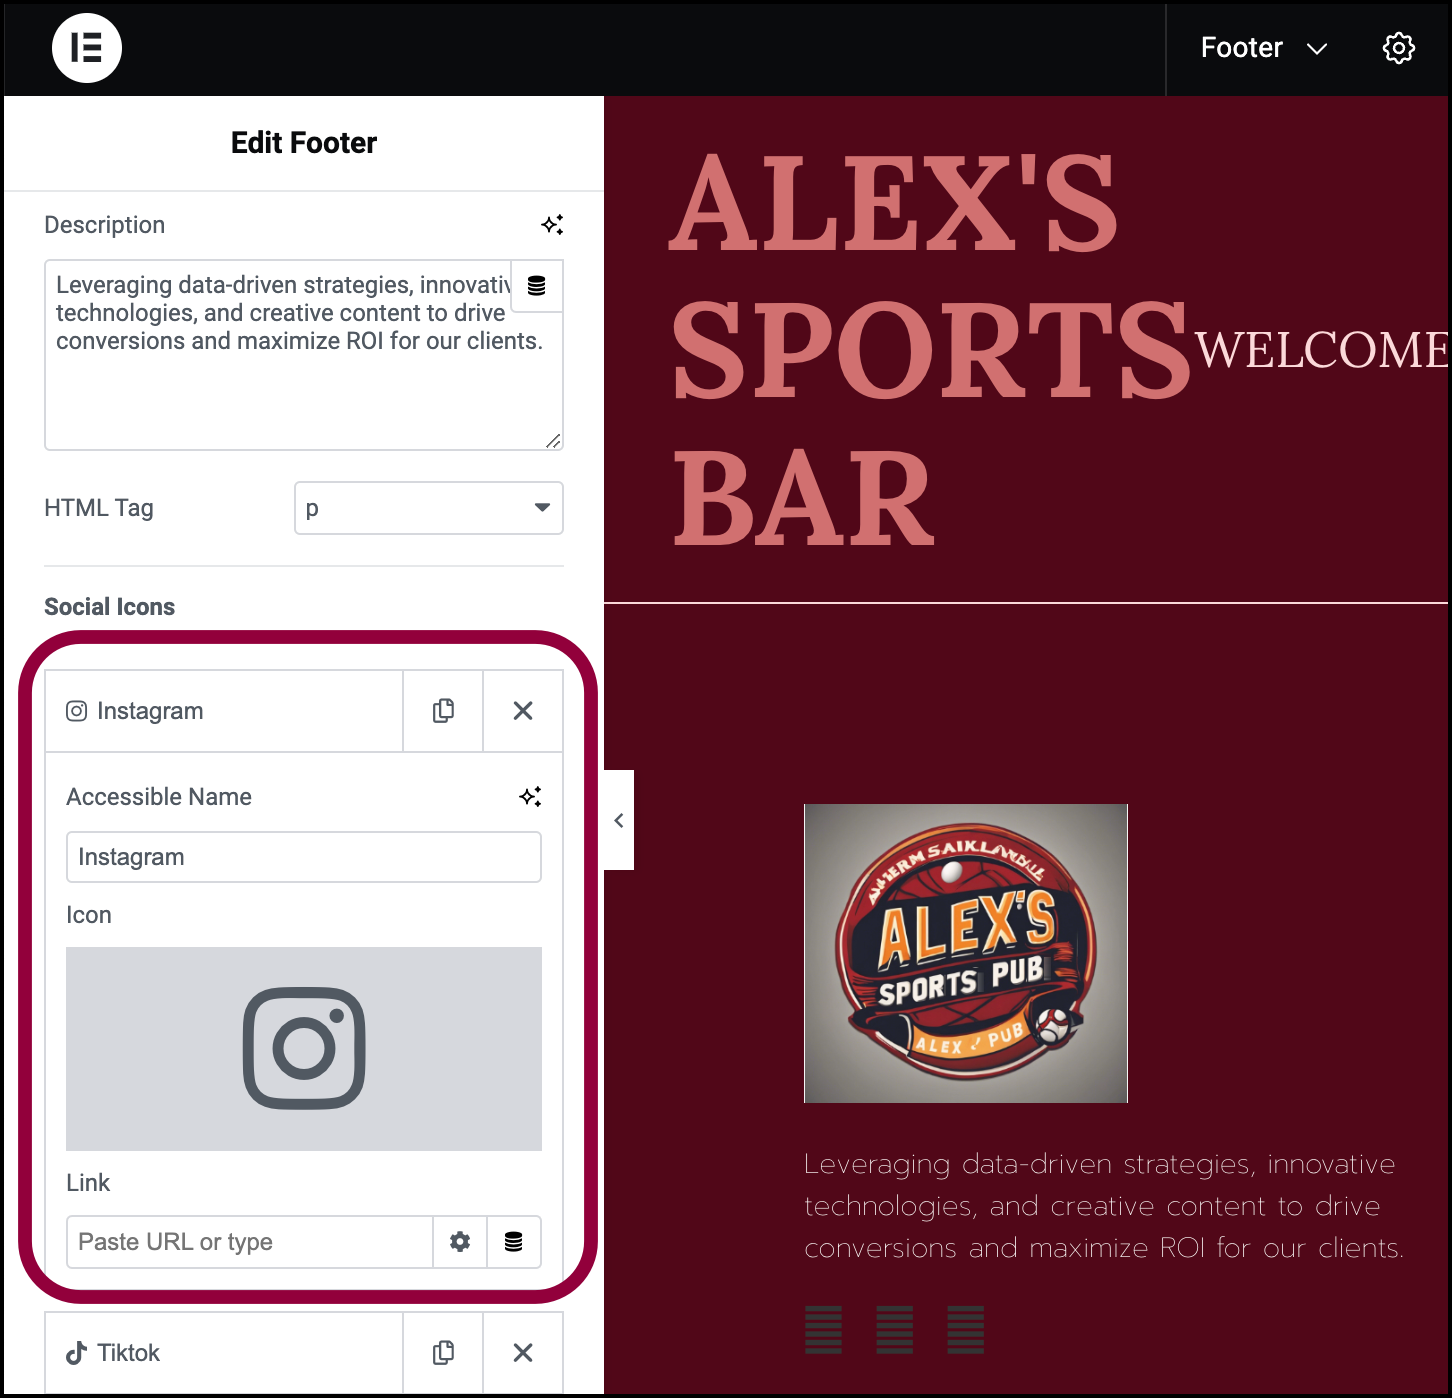
- Click Instagram to open the Instagram details section.
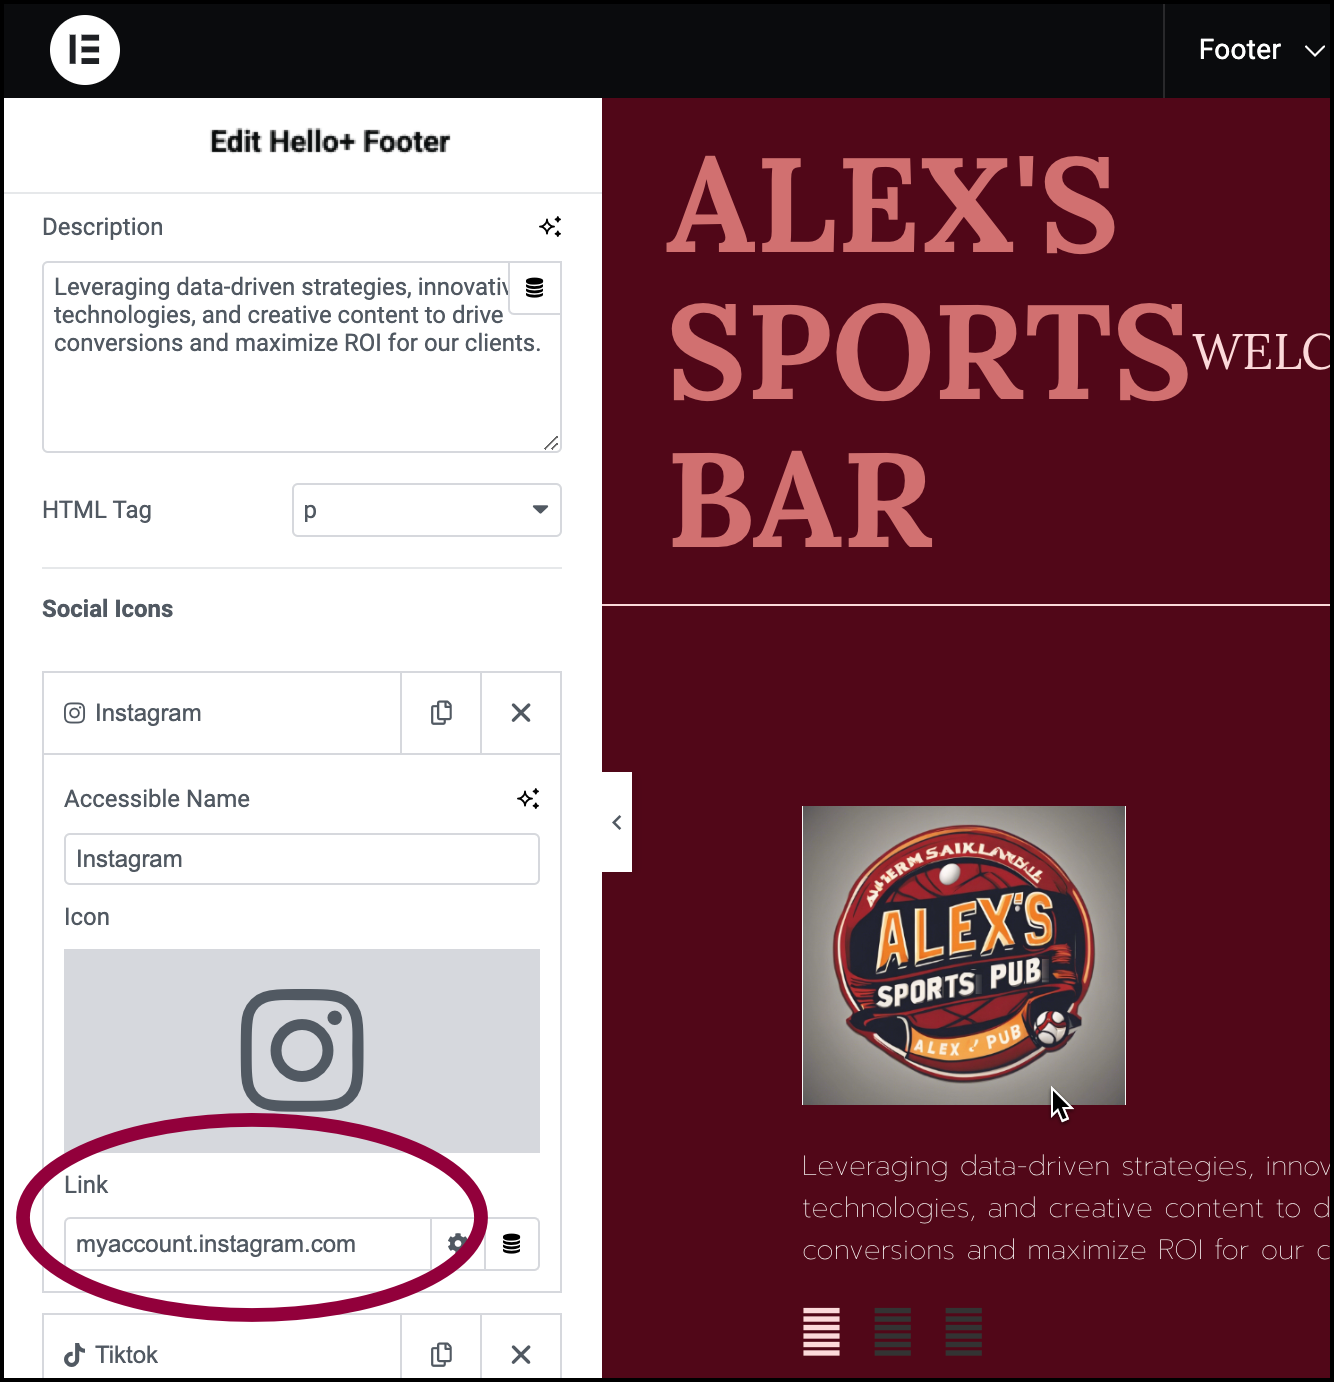
- In the Link field, enter the URL of your Instagram account.
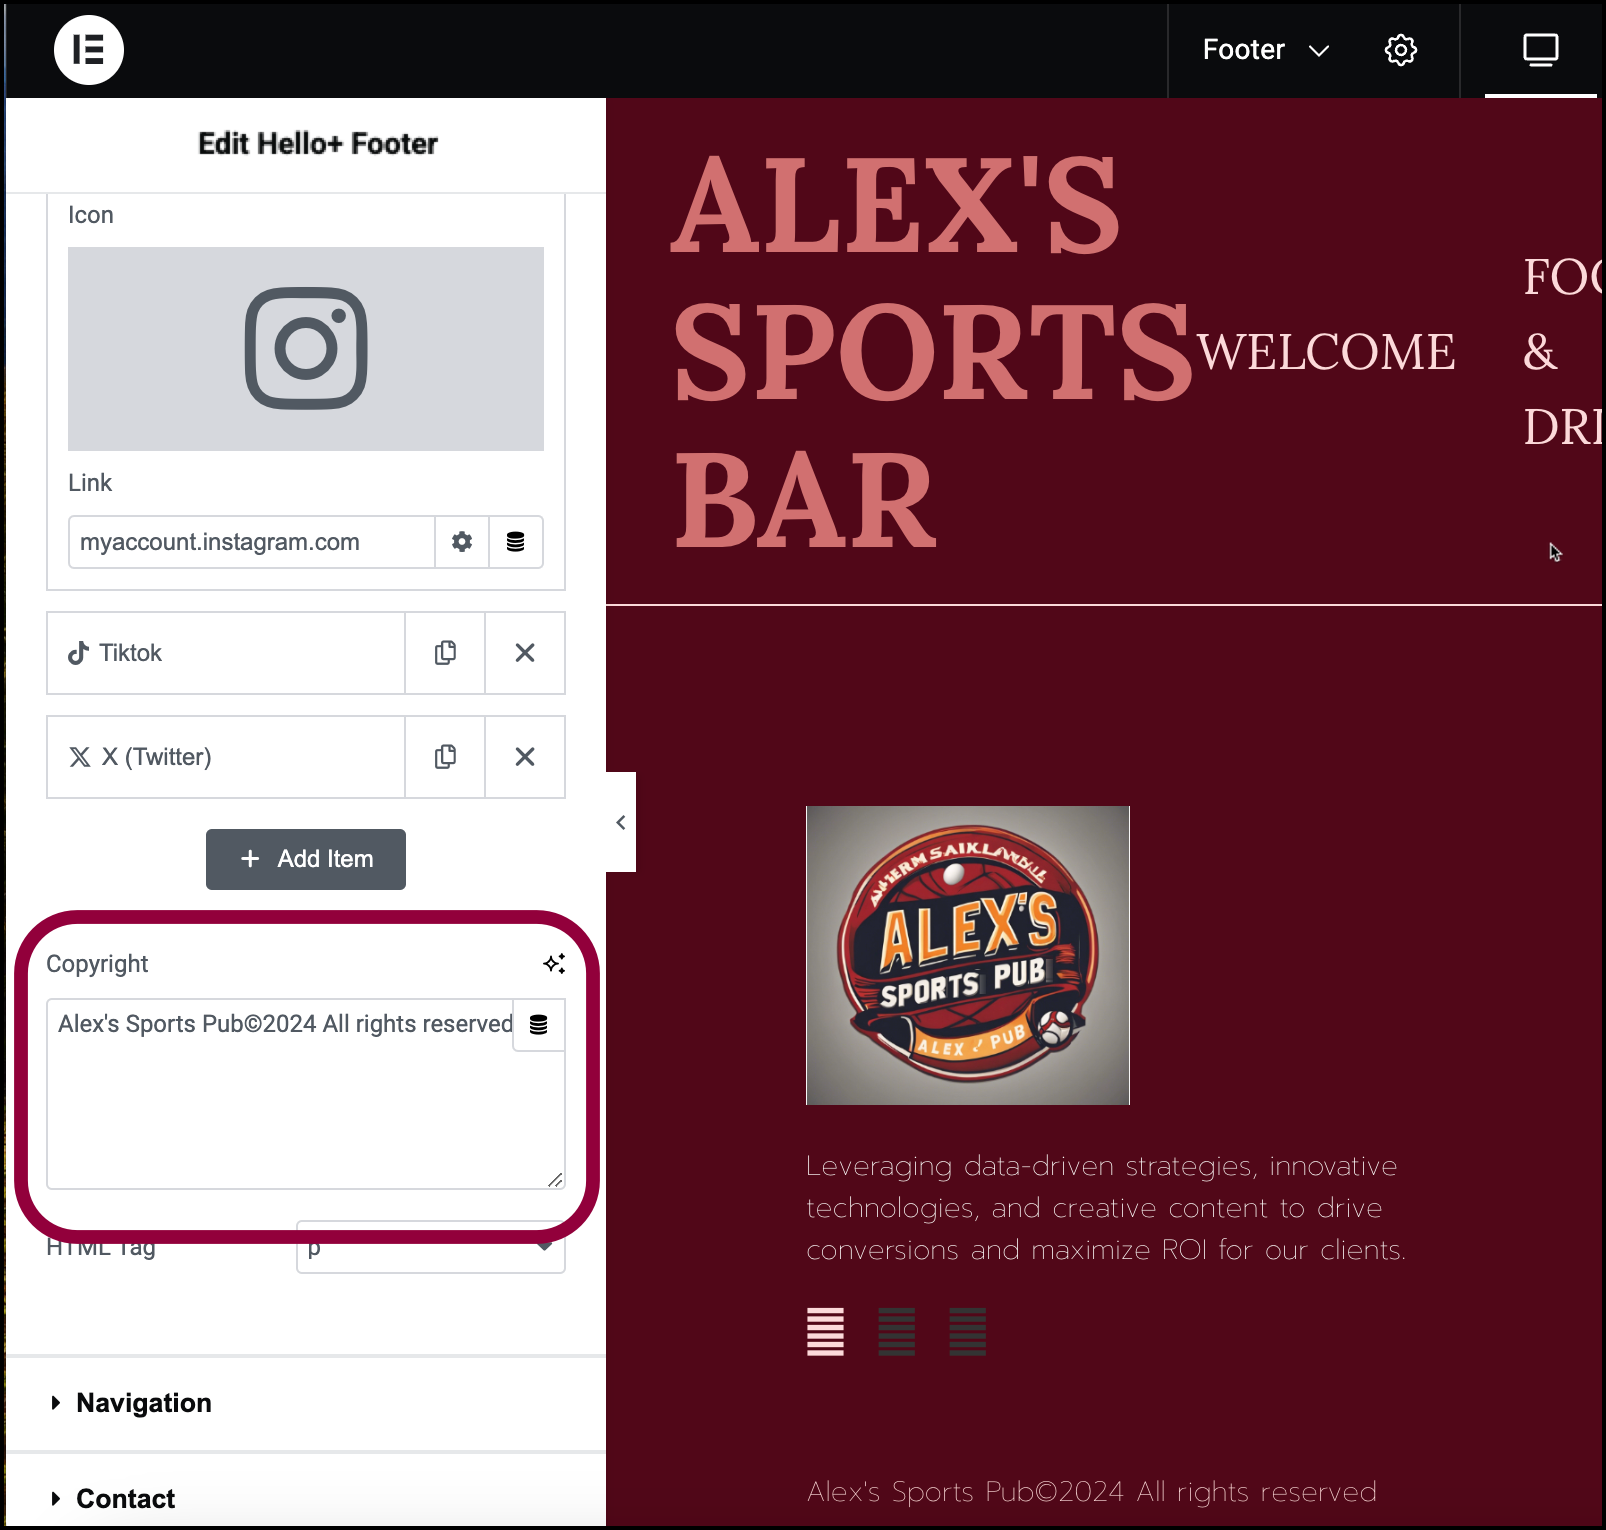
- To protect the content of your site, enter a copyright notice in the Copyright text field.
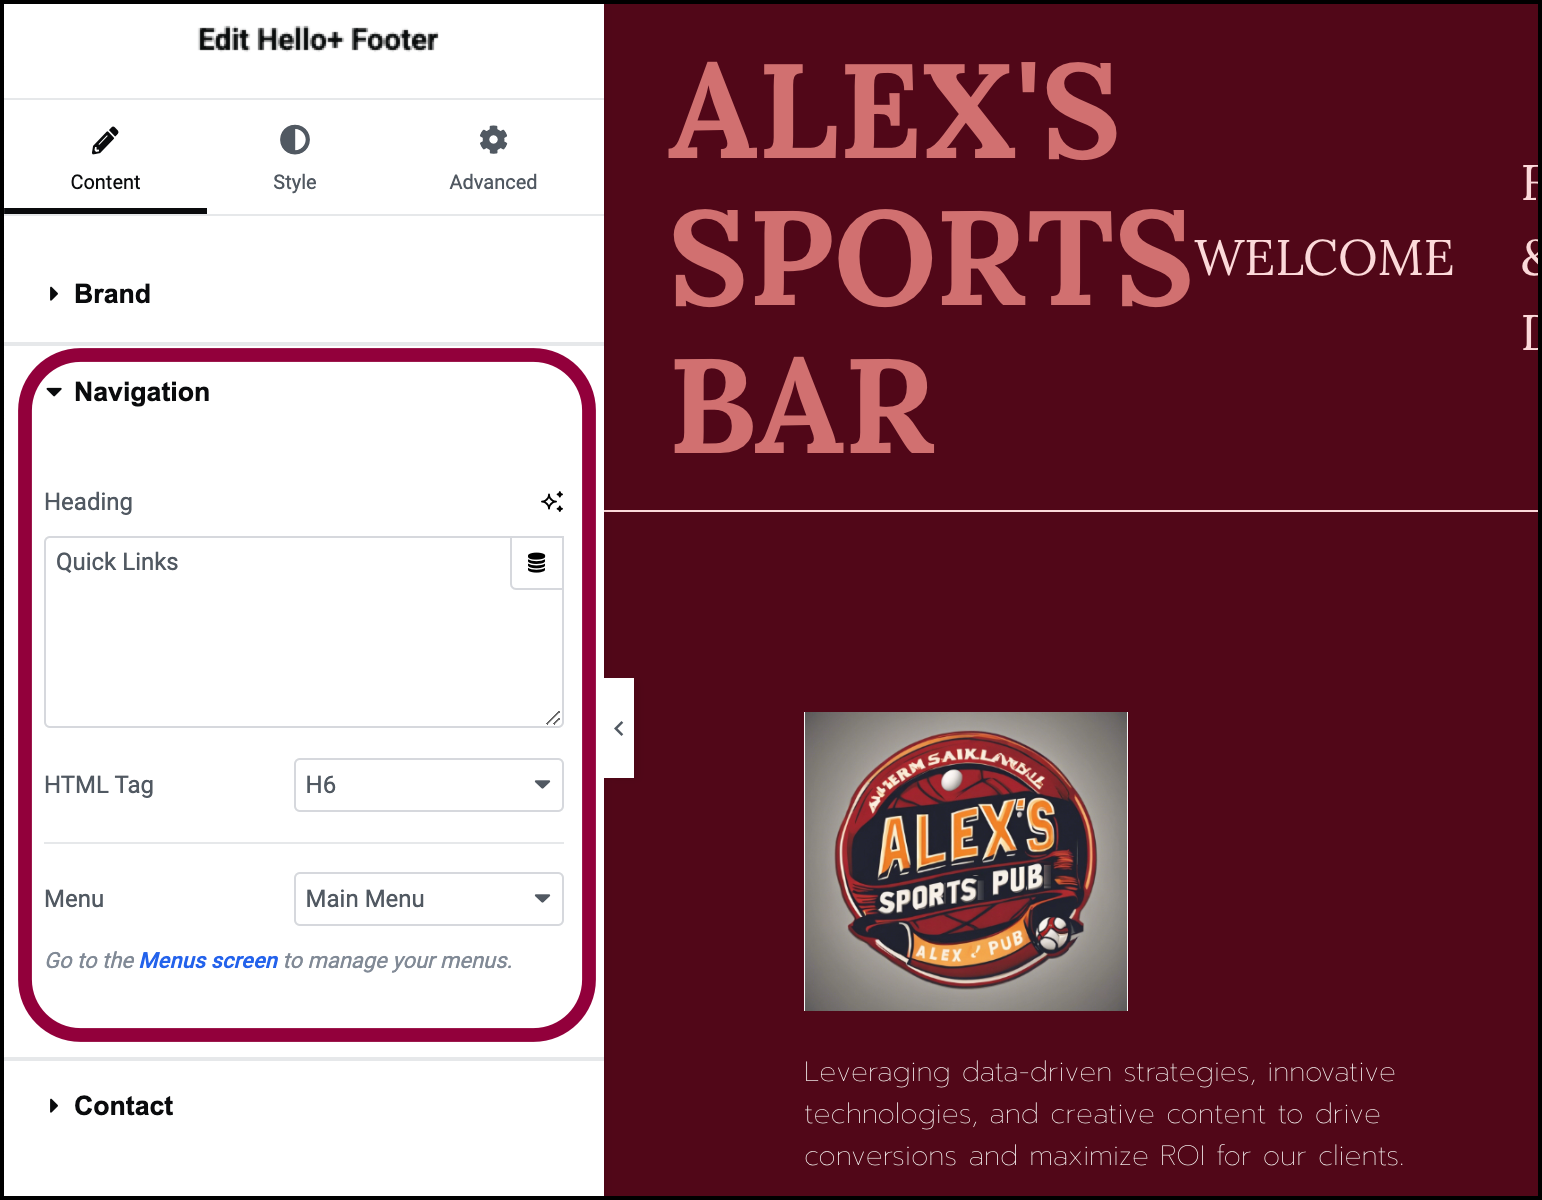
- The Navigation section controls the quick links to the site’s other pages. For now, we’ll leave that at the default settings. See below for all the navigation options.
The Contact section is where you’ll add your email, phone number and address.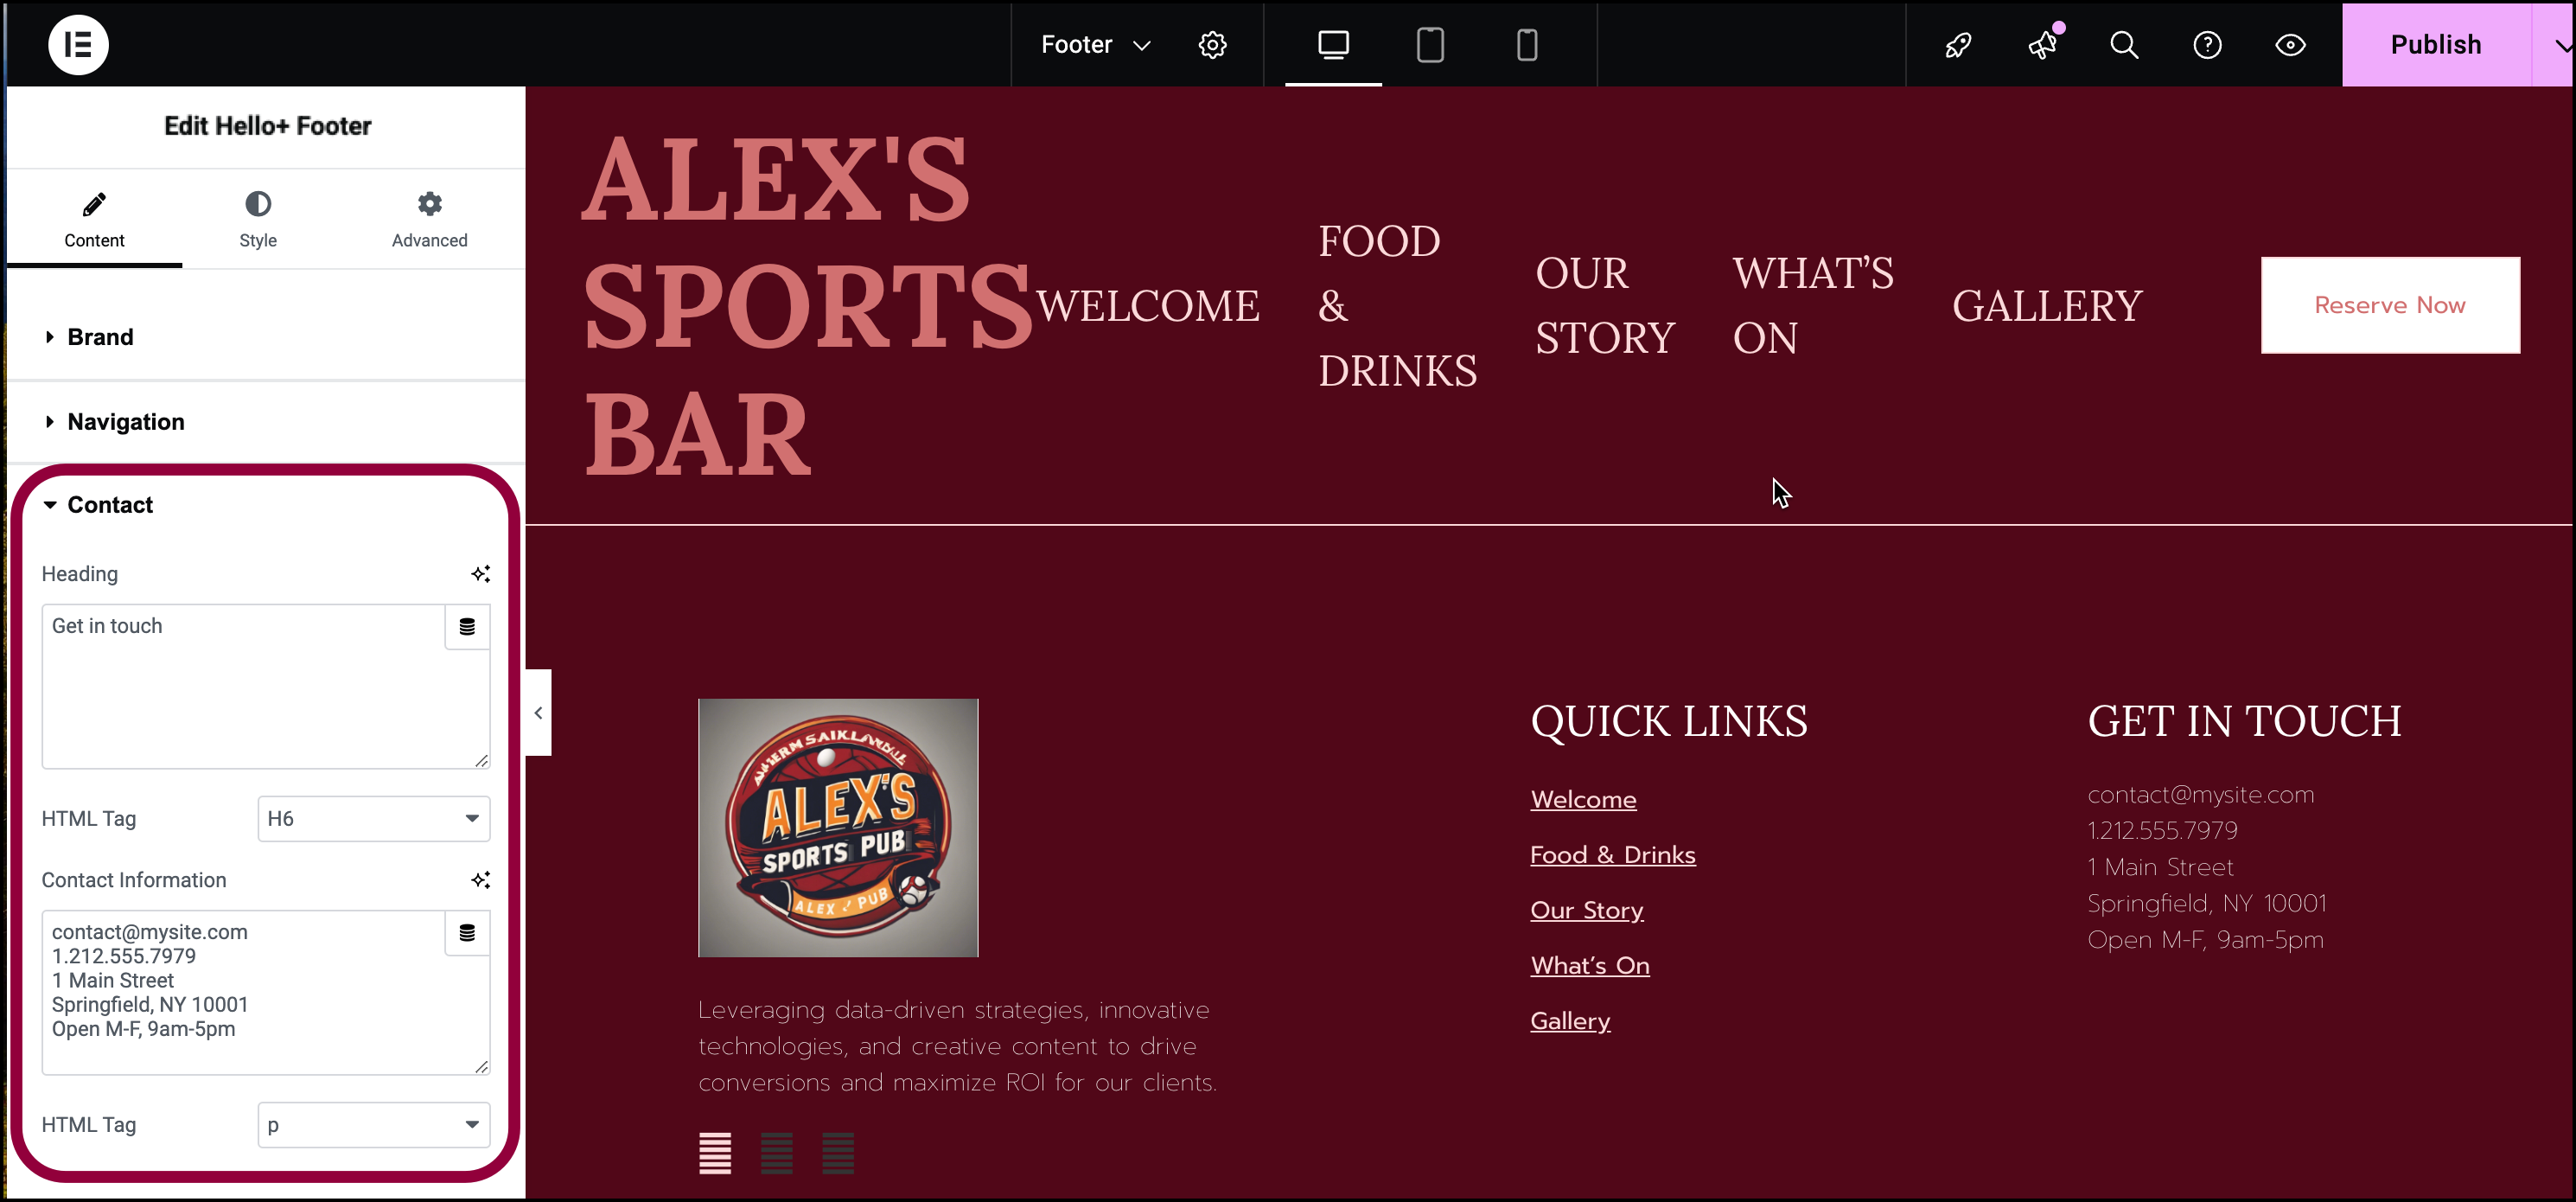
Now let’s change the style of the contact information so that it stands out more.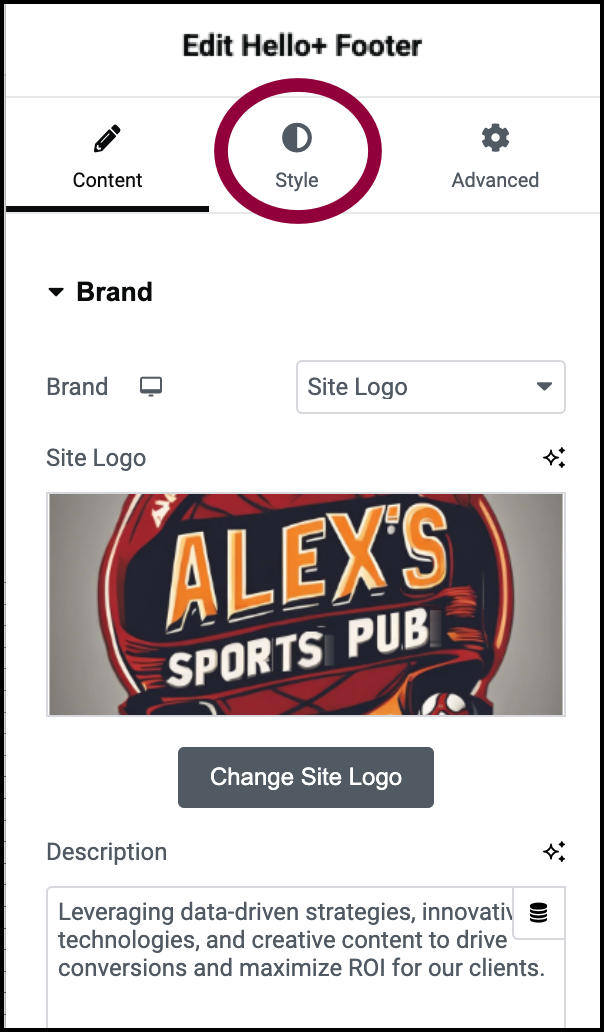
- Click the Style tab.
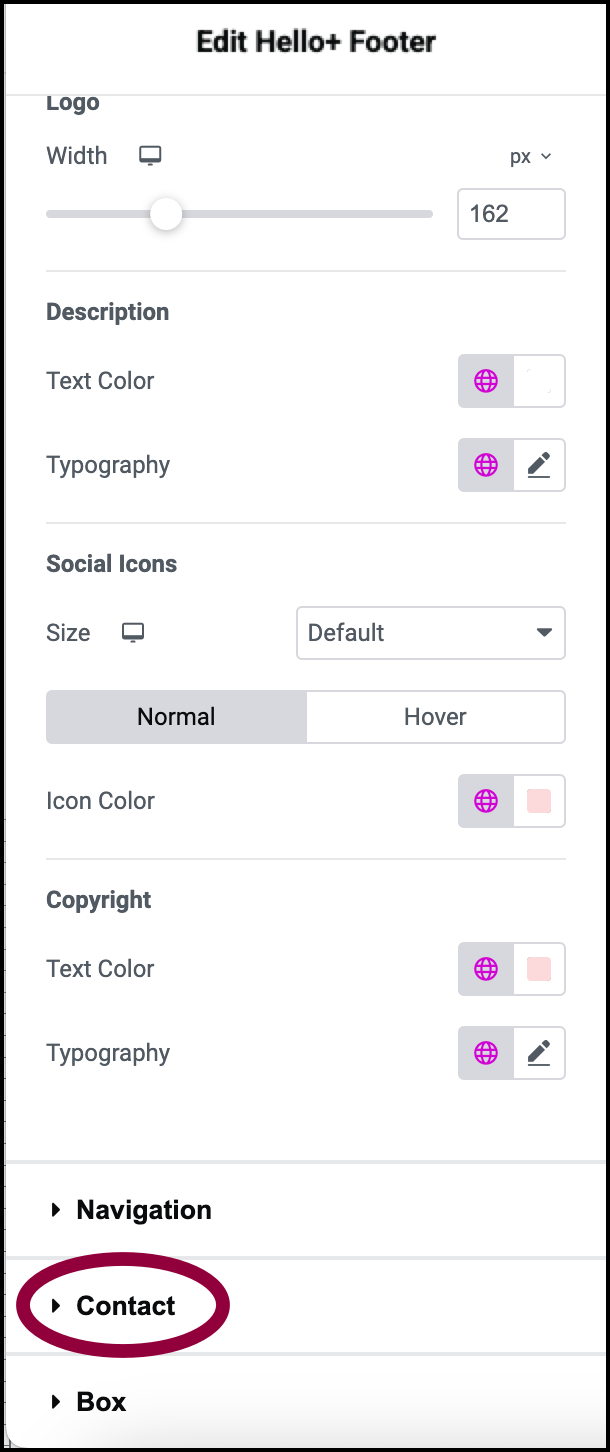
- Open the Contact section.
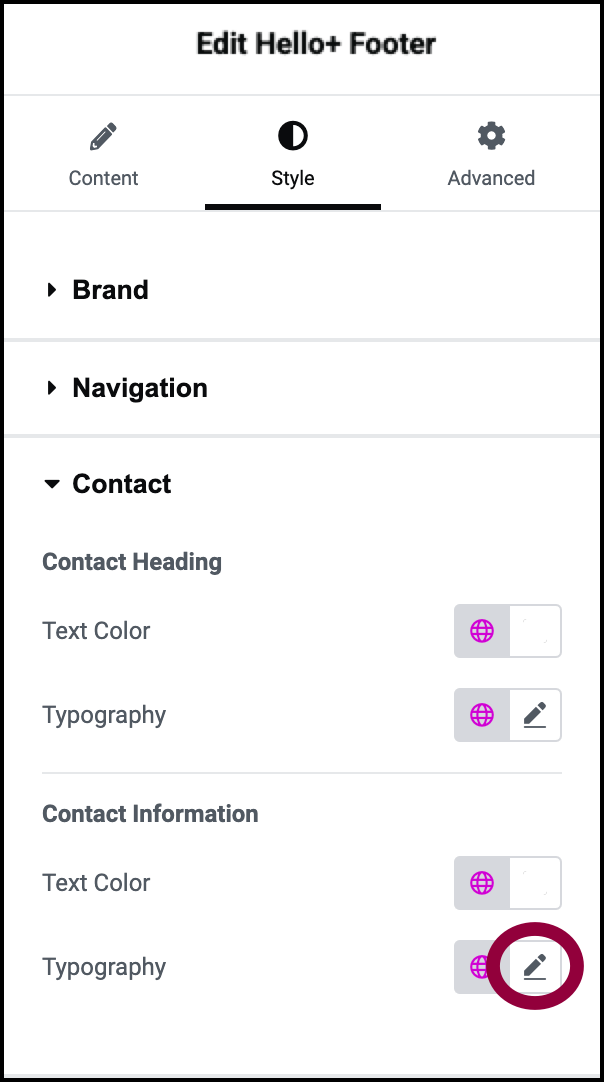
- In Contact Information, click the pencil icon next to Typography.
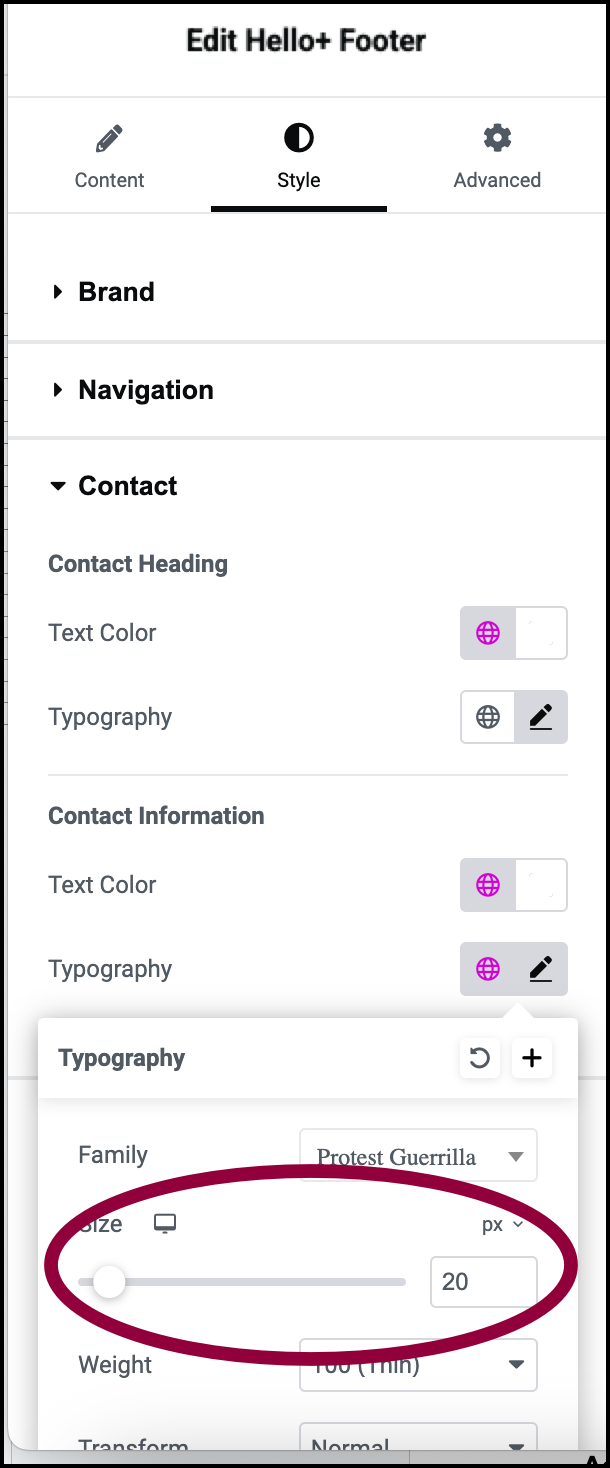
- Use the slider to change the font size to 20.
Settings for the Footer
You can customize your widgets using content, style, and other advanced parameters, offering you great flexibility in tailoring them to your needs. Click the tabs below to see all the settings available for this widget.
Content tab
Add, delete, and edit Footer items and controls.
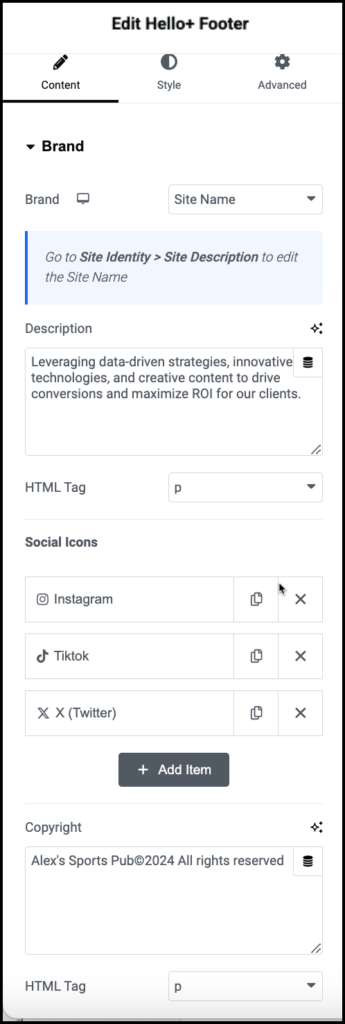
Brand
Brand: Use the dropdown menu to choose:
- Site Logo: display your logo in the header.
- Site Name: Display your company name in the Header. You can use the dropdown menu to change the HTML tag of the site name. We recommend using the default tag.
- Change Site logo: If you’re using a logo, click to select a different logo. For details, see Adding images and icons.
Description
Use the text box to describe your business.
Social Media Icons
- Click an item to edit it, adding a link to your social media account.
- Click the delete icon
 to erase a social media icon..
 - Click the copy icon
 to duplicate a social media item.
 - Click +Add Item to add another social media item.
For details, see Social Icons widget.
Copyright
Use the text box to enter your copyright information.
HTML tag
Choose the HTML tag for your heading. Choices include H1 to H6, Div, Span, or Paragraph.
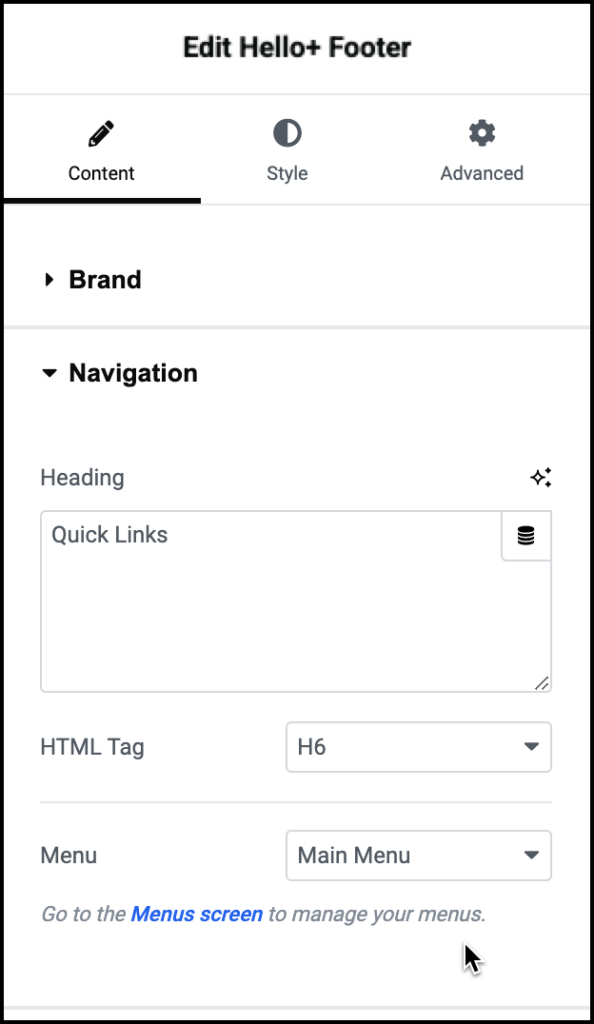
Heading
Enter a title for the navigation menu.
HTML Tag
Choose the HTML tag for your heading. Choices include H1 to H6, Div, Span, or Paragraph.
Menu
The Footer uses the WordPress menu to create its quick links. If you have more than one WordPress menu, use the dropdown to select which menu to use. For details, see Create a navigation menu.
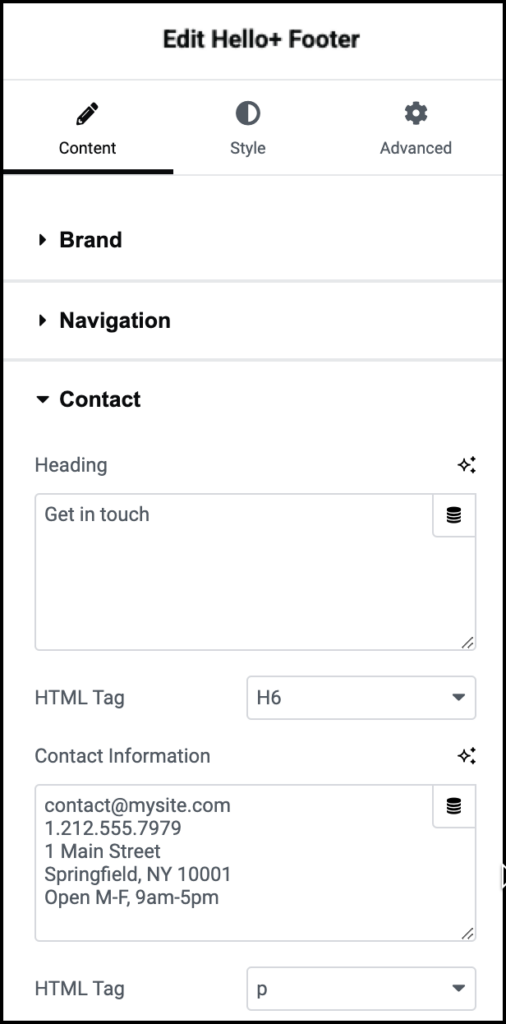
Heading
Give a title to your contact information.
HTML Tag
Choose the HTML tag for your heading. Choices include H1 to H6, Div, Span, or Paragraph.
Contact Information
Use the text box to enter your email, telephone number, and physical address.
Style tab
Determine the look and feel of the Header.
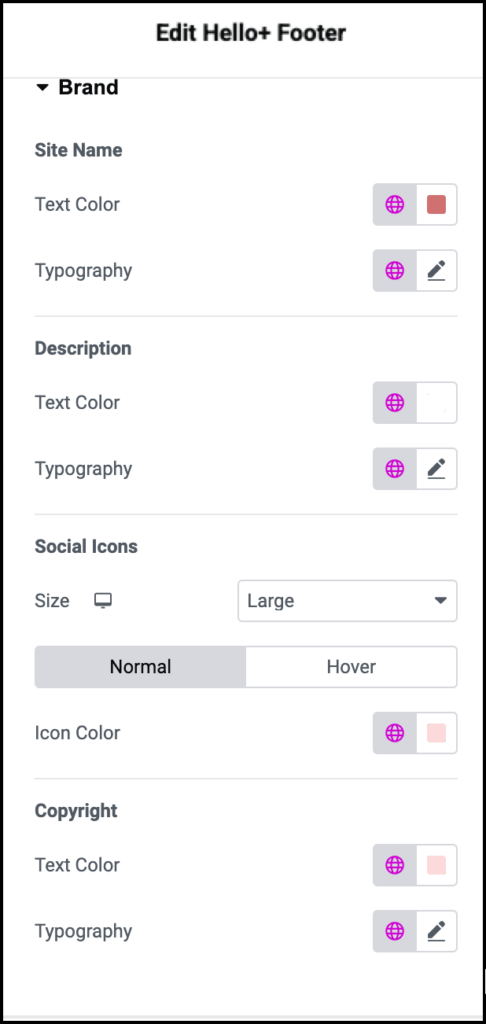
Site Name/Logo
Logo Width: When using a logo, use the slider to determine the width of the logo.
Text color: When using the site name, set the font color. For details, see Choose a color or Use global fonts and colors.
Typography: When using the site name, Set the font type and size. For details, see Typography.
Description
Text color: Set the font color of the description. For details, see Choose a color or Use global fonts and colors.
Typography: Set the font type and size of the description. For details, see Typography.
Social Icons
Size: Use the dropdown to choose between:
- Default (medium)
- Small
- Large
Normal/Hover: You can set the social icons to different colors:
- Normal: Determine the color of the social icons by default.
- Hover: Determine the color of the social icons when moused over.
Copyright
Text color: The font color of the copyright text. For details, see Choose a color or Use global fonts and colors.
Typography: Set the font type and size of the copyright text. For details, see Typography.
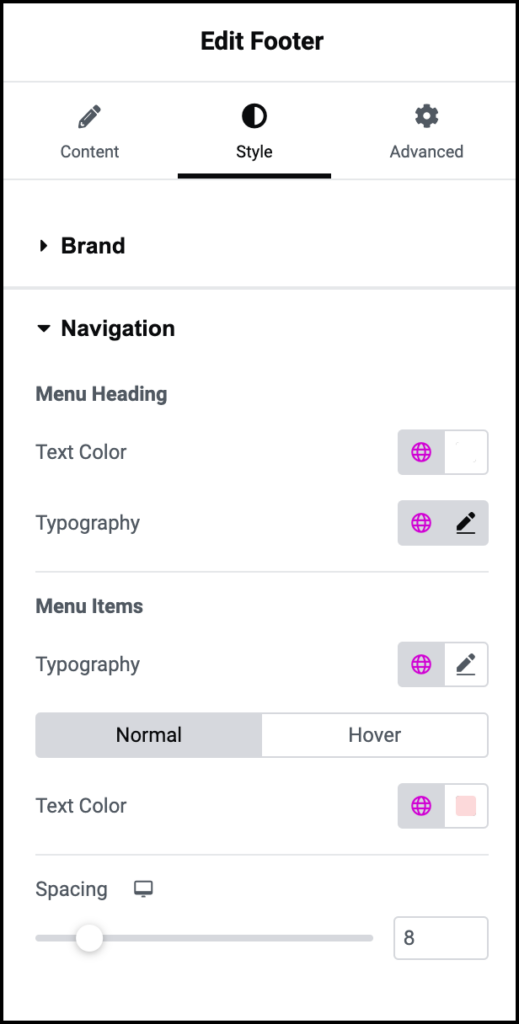
Menu Heading
Menu Heading:
Text color: Set the font color of the title above the navigation menu. For details, see Choose a color or Use global fonts and colors.
Typography: The font type and size of the title above the navigation menu. For details, see Typography.
Menu Items
Typography: Set the font type and size of the text in the navigation menu. For details, see Typography.
Normal/Hover: You can change the appearance of the menu items when visitors mouse over them:
- Normal: Determine how the navigation menu appears by default.
- Hover: Determine how the navigation menu appears when moused over.
Text color: Set the font color of the navigation menu text. For details, see Choose a color or Use global fonts and colors.
Spacing: Use the slider to set the distance between the individual items in the navigation menu.
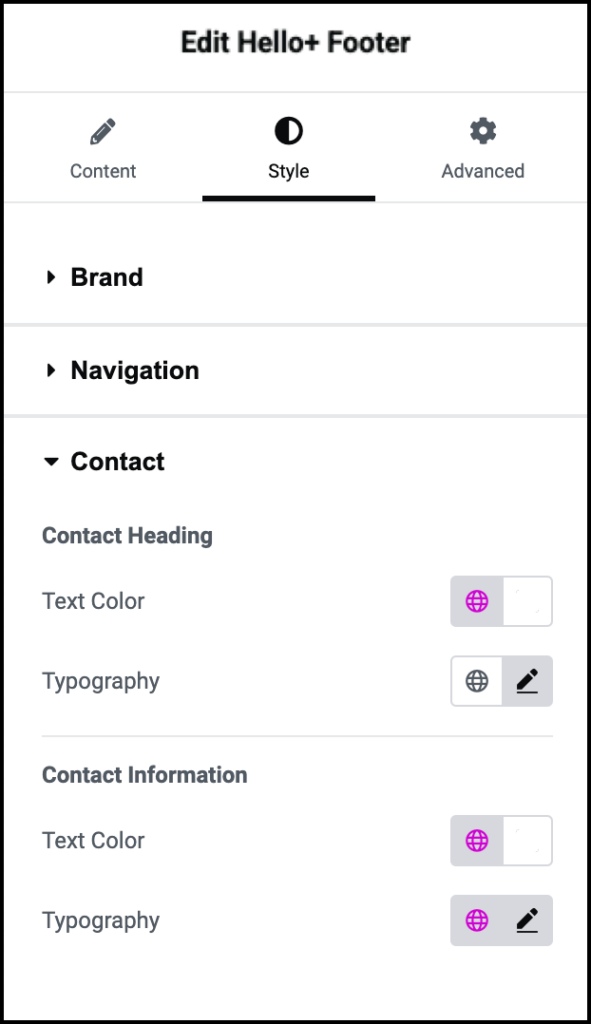
Contact Heading
Text color: Set the font color of the title above the contact information. For details, see Choose a color or Use global fonts and colors.
Typography: The font type and size of the title above the contact information. For details, see Typography.
Contact Information
Text color: Set the font color of the contact details. For details, see Choose a color or Use global fonts and colors.
Typography: The font type and size of the contact details. For details, see Typography.
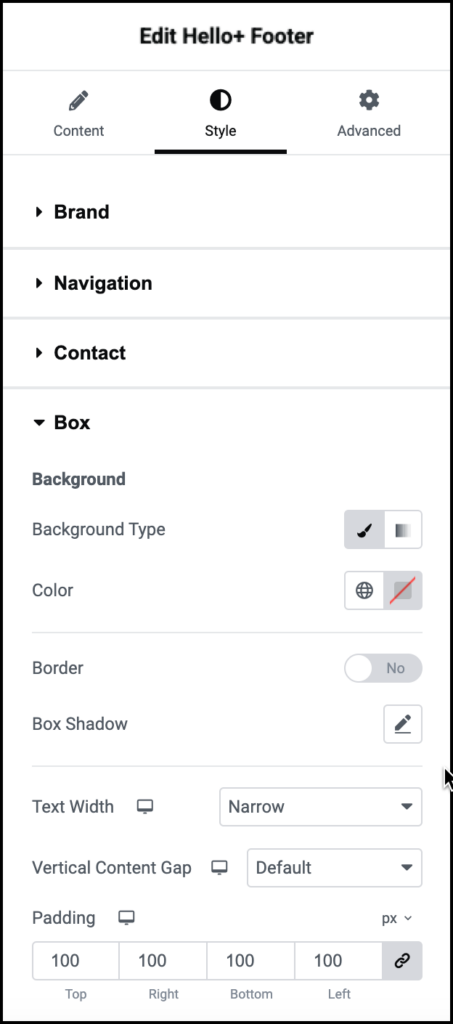
Background
Background type: Set a background for the Header. Use the icons to switch between:
 A solid background (Classic)
 A blended background (Gradient).
For details, see Create a Background.
Color: The color of the background. For details, see Choose a color or Use global fonts and colors.
Border
Toggle to Yes to add a border around the Footer. If you add a border, you’ll need to determine:
Border Width: Use the slider to set how thick the border is.
Color: The color of the border. For details, see Choose a color or Use global fonts and colors.
Box shadow
Click the pencil icon to add shadow to the Header. Learn more about shadows.
Text Width
The different elements in the footer each take up a column. Use the dropdown menu to set the amount of space allocated to each column:
- Default: Keep the columns a medium width.
- Narrow: Make the columns thinner.
- Wide: Make the columns wider.
Vertical Content Gap
Control the space between the lines of text in the Footer:
- Default: Keep the columns a medium width.
- Narrow: Make the columns thinner.
- Wide: Make the columns wider.
Padding
Add space between the Header’s border and the contents. For details, see Padding and margins.
Advanced tab
Control the placement of your widget, insert links, add custom code and more.
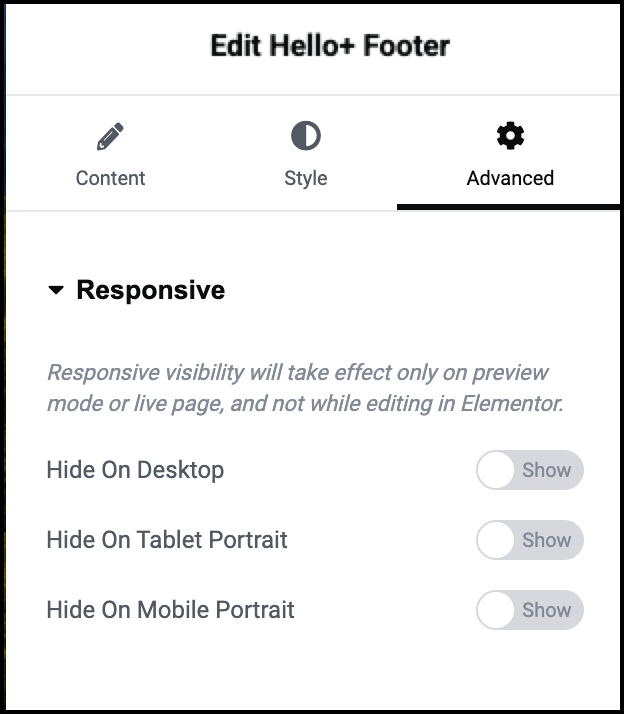
Advanced
Most of the options avaialble in the Advanced tab can be found in Advanced tab settings.
Behavior is an additional function. It allows you to select:
Float: Toggle to Yes to allow the Header to hover over other content on the page.
If you toggle flat On, you’ll have these options:
- Offset: The distance between the top of the Header and the top of the screen.
- Width: Set the width of the floating area.
- Shape: Set the floating are to be:
- Round: Smooth corners.
- Rounded: Evenly curved edges.
- Sharp: Rectangular.
Sticky: The sticky property keeps the Header visible even when the visitor scrolls through the content. Options are:
- On scroll up: Header becomes sticky as soon as visitor starts scrolling back up the page.
- Always: Header is always sticky.
- Never: Header is not sticky.

