
Updating your website design and functionality is an essential part of keeping your business fresh. Making modifications to improve the website experience can increase the engagement of your visitors and boost conversion rates. Maybe there’s a holiday coming up and you might want to change the color and theme, or maybe you want to update the way the site is built using new features or to improve overall performance.
In the world of web development, ensuring that your website runs flawlessly before making any changes is crucial. This is where a staging environment comes into play. In this guide, we’ll delve into what a staging environment is, its benefits, and how you can effortlessly set up a staging environment using Elementor Hosting.
What is a Staging Environment?
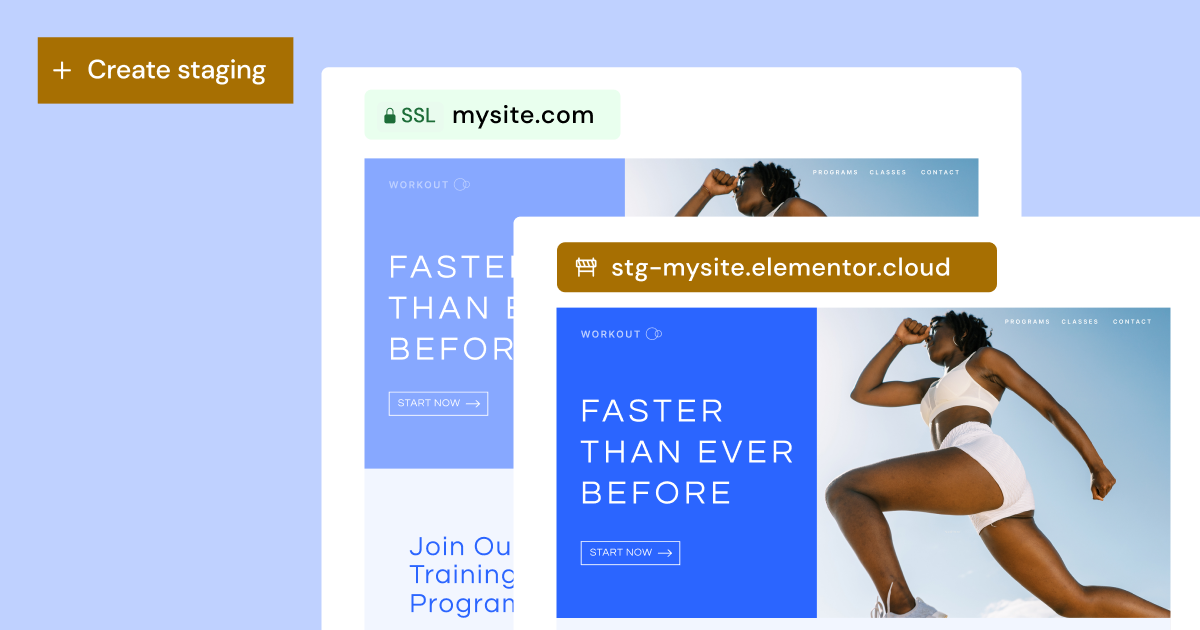
Staging is a duplicated building environment that contains a full copy of your live website. It serves as a private sandbox where you can test changes, updates, or new features without affecting the live site. Think of it as a playground where you can experiment without any consequences. Your staging site is not open to the public, so only people with the link can access it. Once you’re satisfied with the changes you made on the staging site, you can then push them to the live site. It’s that simple.
Staging has become an essential tool for web creators and website owners that are updating their websites and want them to run smoothly. Some hosting providers offer cloning as a way to test, but Elementor Hosting offers both (staging is available for ‘Business’ plan and above, and cloning for ‘Grow’ and ‘Scale’ plans) . While staging is another layer of your current website, cloning creates an entirely new duplicate of your website on the live environment, and this website can have its own staging environment as well. Live and staging environments interconnect, while a cloned website is a stand-alone site.
The Benefits of Using a Staging Environment
Embracing a staging tool brings a myriad of advantages to your web development process. At its core, a staging site offers a sanctuary for safe experimentation, allowing you to test out new themes, plugins, or custom code without jeopardizing your live site’s aesthetics or functionality.
Beyond this, the beauty of staging lies in its promise of zero downtime. We’ve all faced the pitfalls of direct modifications—unexpected glitches and potential outages. With staging, these concerns are mitigated, ensuring your live site remains uninterrupted as you make behind-the-scenes tweaks.
This environment also paves the way for effortless updates. As anyone in the web sphere knows, updates to WordPress, themes, or plugins can occasionally clash, causing conflicts. By testing these in a staging setting first, you’re better positioned to identify and address these issues before they ripple out to your live platform.
Plus, for those collaborating on web projects, share the staging link with clients or teammates, gather feedback pre-launch, and refine your collaborative process. The staging environment acts as a communal space.
Creating a New Staging Site with Elementor Hosting
Setting up a staging site can seem daunting, but with Elementor Hosting, the process is streamlined and user-friendly. Here’s how to do it:
- Go to your My Elementor dashboard.
- Locate the card of the website you want to copy and click Manage this website. Scroll down to the Staging Environment section.
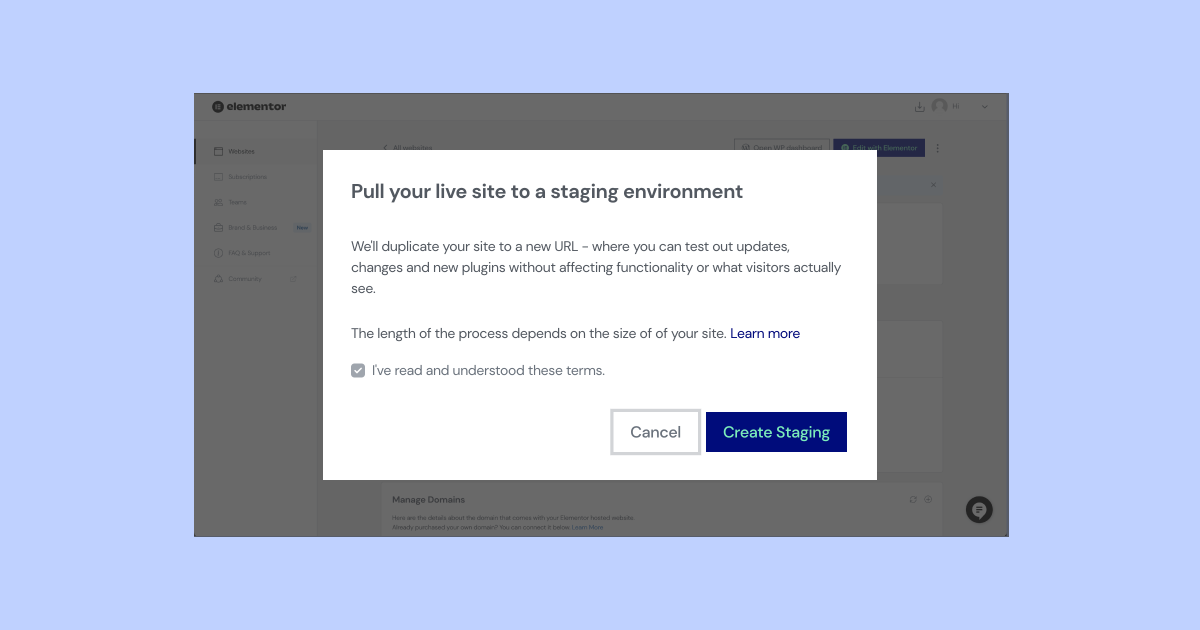
- Select Create Staging.
- Confirm you want to create a staging site and click Create Staging.
- Your live site will be copied over to your staging site.
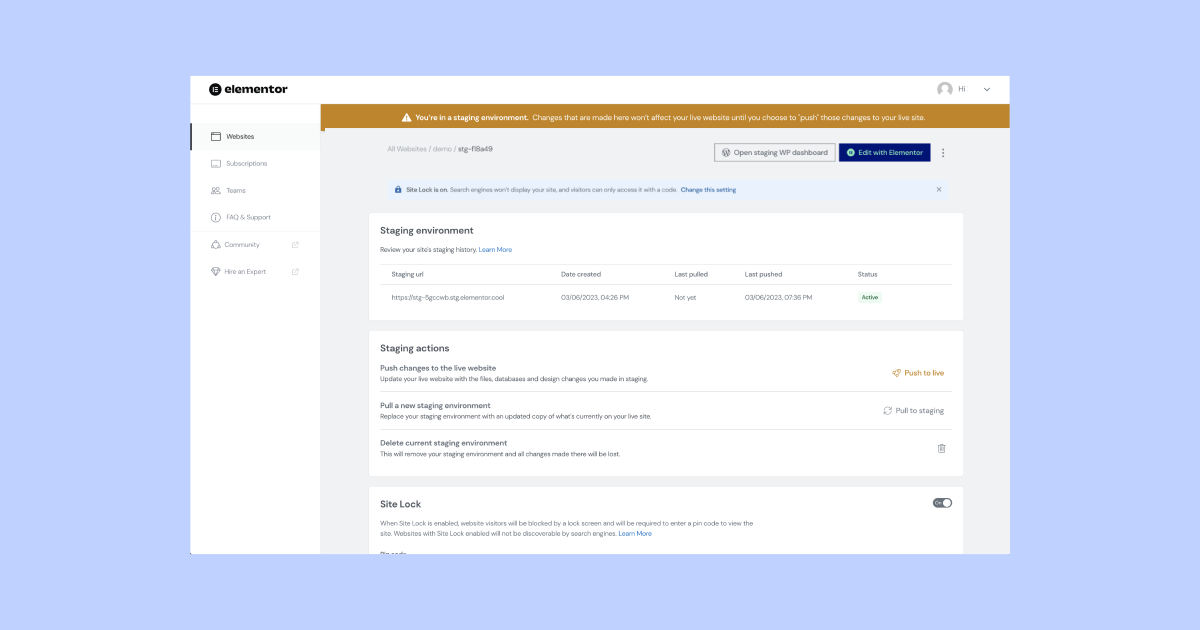
- The details of your staging site will be added to the Staging Environment section.
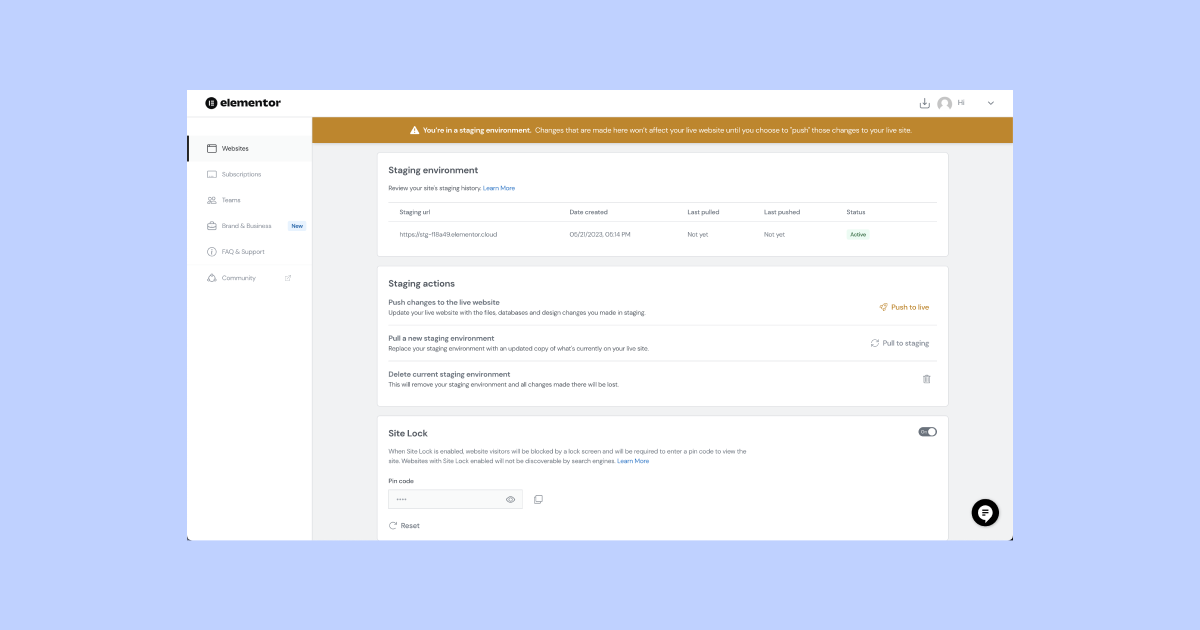
Once you’re in, you’ll notice a top golden bar that indicates you’re in the staging environment. Great! Now you can enter your staging site and test some new designs and features!
As I mentioned, every staging site has its own unique domain so you can check it live, and even share with your clients or colleagues to see the new changes or test the behavior and performance. How cool is that?
Deploying New Changes to a Live Website
When hosting a website on Elementor, you can enjoy the benefits of new features rapidly rolling out, among other improvements and enhancements. So now that we have created our staging site it’s time to access it and make our changes.
- Go to your My Elementor dashboard.
- Locate the card of the website you want to copy.
- Click Manage this website
- Scroll down to the Staging Environment section.
- Select ‘Manage Staging’ from the Staging Environment section.
A gold bar at the top of the screen, indicates you are accessing the staging environment. - Click Open staging WP dashboard.
This will take you to the dashboard of your staging site where you can edit and create pages and posts, add and update plugins and anything else you would do on your site. You can also test the changes you’ve made using the unique link of your staging site.
Great! So now that we have changed an image, updated some text, added a new feature and made sure everything works perfectly, we can ‘Push’ the changes to our live site.
Go to the staging dashboard and click “Push to live”. After approving your live website will be updated with the new changes.
Pulling Changes From Live to a Staging Site
Another option is “Pull” for pulling changes the other way around, from the live site to the staging environment. Sometimes we need to update our website immediately, it could be a wrong headline or link for example. That’s where pulling comes handy. If you want to make sure your environments are fully synchronized, you can pull the changes you made in the live site into your staging site.
- Go to your My Elementor dashboard.
- Locate the card of the website you want to copy.
- Click Manage this website.
- Select Manage Staging from the Staging Environment section.
- A gold bar at the top of the screen, indicates you are accessing the staging environment.
- Scroll down to the Staging Actions section.
- Select Pull to staging.
- Confirm you want to overwrite your staging site with your live site.
Great! now your current staging site will be copied over and replaced by the data from your live site and all your environments will be synced.
Leverage Staging for Smooth Website Updates
A staging environment is an invaluable tool in the arsenal of any website owner or developer. It offers a safe space to test, tweak, and perfect changes before showcasing them to the world. With Elementor Hosting, creating and managing a staging site becomes seamless, ensuring that you always put your best digital foot forward. Whether you’re a seasoned developer or a WordPress newbie, make the most of staging environments to elevate your website’s design, performance and user experience.


