If you’re using WooCommerce to sell products (like a WooCommerce store), there are a lot of interesting ways that you can use popups to enhance your store.
In this series of posts, we’ll show you some popup examples by covering step-by-step how to use Elementor Popup Builder to create three different types of sales-related popups at your site:
- A hello bar countdown timer popup
- An integrated popup for your shop archive pages
- A shopping cart popup
Let’s get started with the first tutorial on how to create A hello bar countdown timer popup.
How to Create a Hello Bar Countdown Timer Popup
In this first tutorial, you’ll learn how to create an eye-catching hello bar countdown timer that you can display at the top or bottom of your site.
Below, you can see an example of what you’ll be building in this tutorial:

Your popup will display to anonymous visitors after three seconds, and each visitor will get their own unique countdown timer. If a user is logged in to WordPress, though, they will not see the countdown popup.
Ready to get started? Here’s how to build this popup.
Step 1: Create a New Popup Template
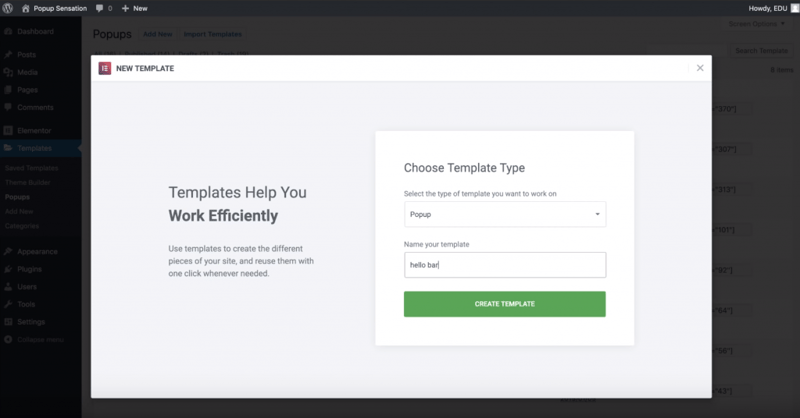
To get started, go to Templates → Popups and create a new popup template. Give it a name, then click the Create Template button to launch the Elementor interface:
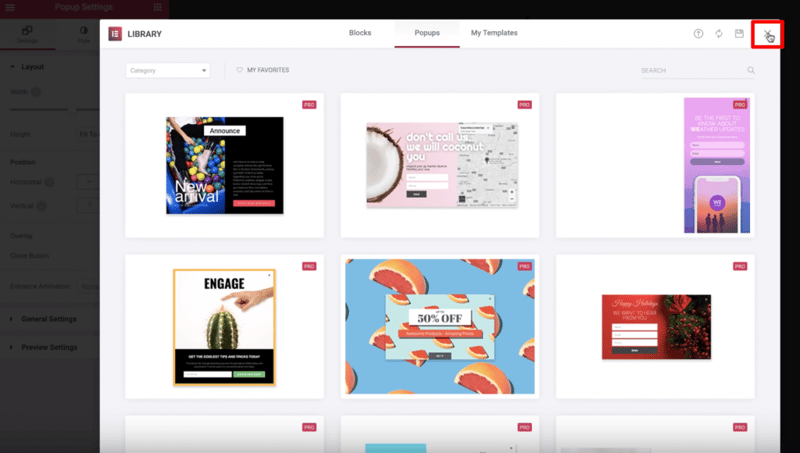
Elementor will show you a list of 100+ popup templates, but we’ll be building a custom design for this tutorial, so you can go ahead and close the template library:
Step 2: Adjust Popup Settings
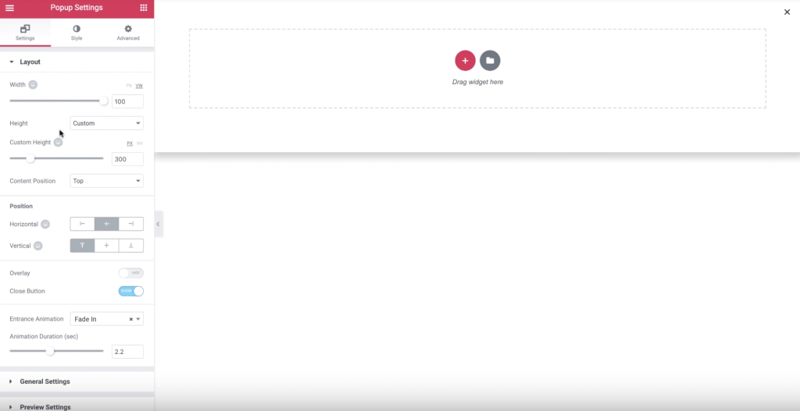
Once you close the templates, you should see the Popup Settings options in the sidebar.
Here, you’ll need to make a few adjustments:
- Set the Width to 100%
- Choose a custom Height and set it equal to 300 px
- Turn the Overlay setting to “Hide”
- Use the Vertical alignment to align the popup at the top of the page
- Choose “Fade In” from the Entrance Animation drop-down, Then, adjust the animation duration – 2.2 seconds is a good length
Once you’ve made those changes, go to the Style tab of the Popup Settings and slide the background color to transparent.
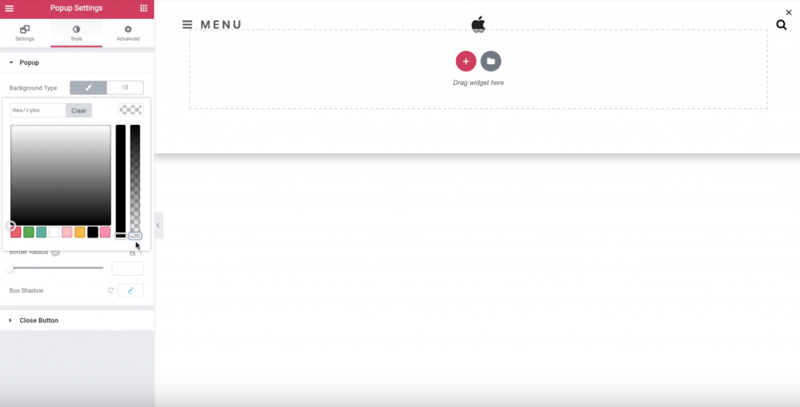
You’ll also want to:
- Turn off box shadow
- Adjust the size and position of the close button
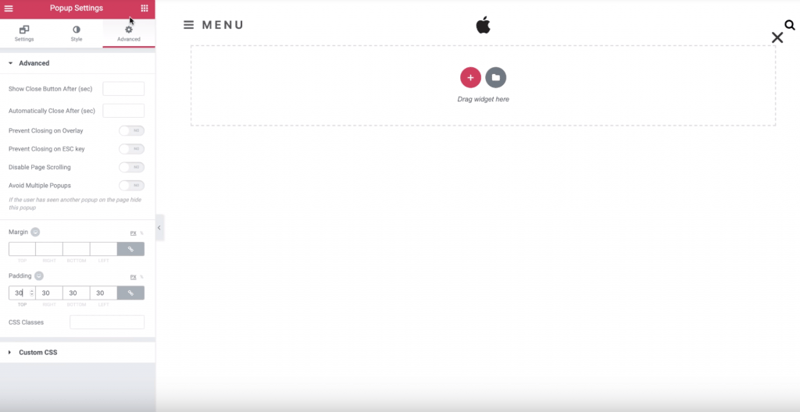
Finally, go to the Advanced tab and add some custom padding to give your design room to breathe – 30 px is a good amount:
Step 3: Create the Layout
Now, you’re ready to get into the nitty-gritty and design your hello bar countdown timer.
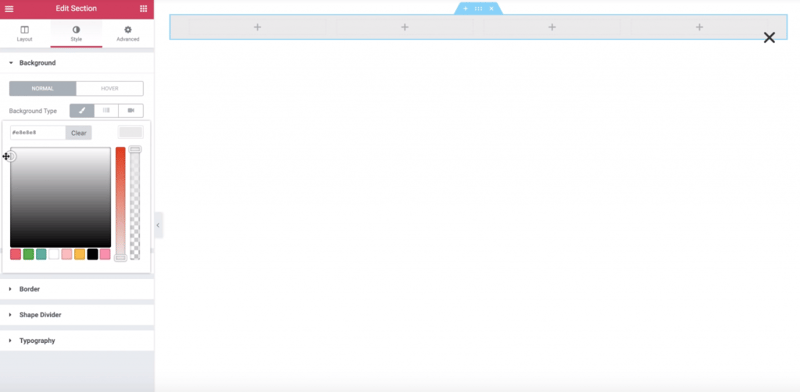
To get started, add a section with four columns and:
- Set the Content Position to “Middle” in the Layout tab
- Add a grey background in the Style tab
Step 4: Add Content
Now, you can drag in a Headline widget to the left-most column and add your content:
Adjust the font size and weight as needed.
Below your headline, add a button and play around with the font and colors until you get something that you like:
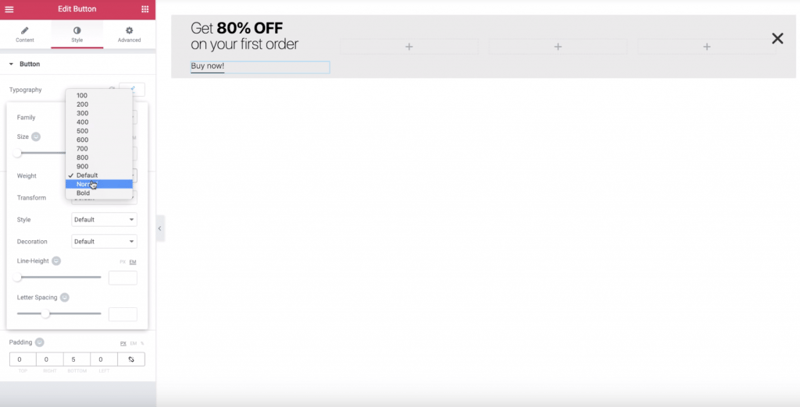
Then, add the Countdown widget to the second left-most column and drag the column to make it wider.
Choose Evergreen Timer from the Type drop-down so that every user starts with their own unique timer.
Then, set the timer duration and choose what will happen when the timer expires using the Actions After Expire box by selecting Hide and Show Message. Then, you can add your message:
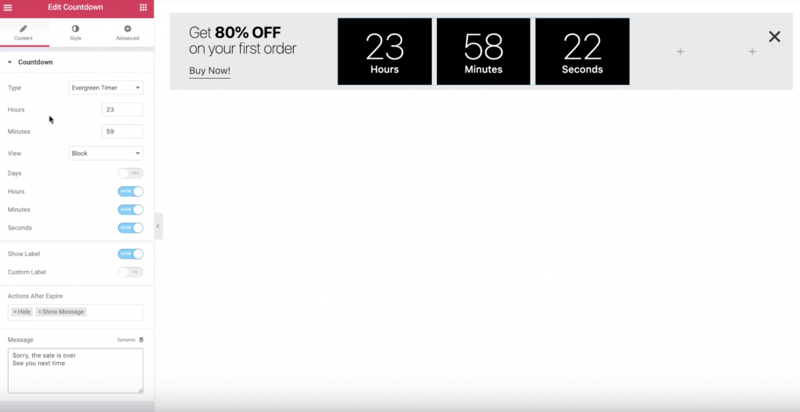
Next, go to the Style tab and change the countdown timer’s background color, as well as other settings like font size, weight, etc.
Once you’ve finished configuring the countdown timer, add an Image widget to the second column from the right. Then:
- Choose a photo from your library
- Adjust the image size as needed
- Use the Advanced tab to add a minus margin on the bottom so that your image floats slightly below the hello bar
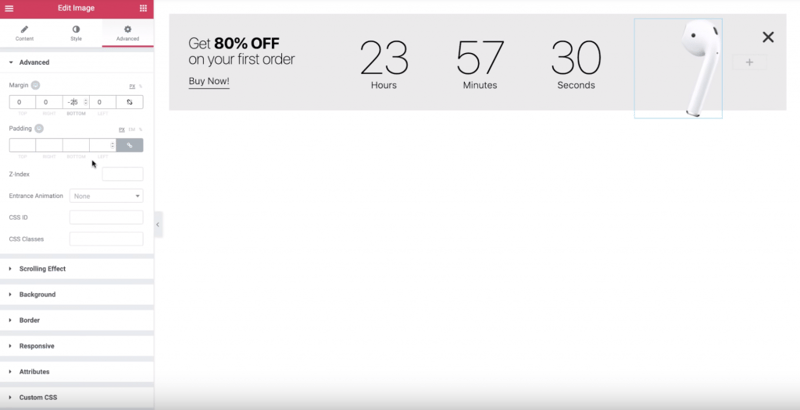
You can also add an entrance animation to add some spice. We used Rotate in Down Left.
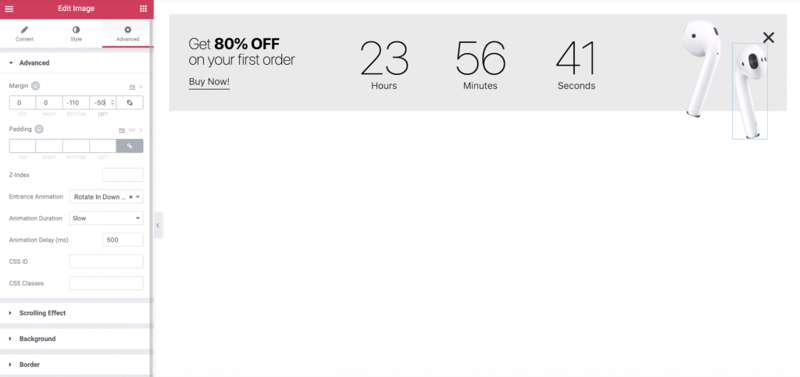
Then, to create the paired image, duplicate the existing Image widget and add the copied widget to the right-most column. You can also flip the image to add visual interest and choose a different minus margin and entrance animation:
Step 5: Choose Publish Settings
Once you’ve finished adding content, click Publish to configure the popup’s Publish Settings.
First, use the Conditions tab to target your entire site:
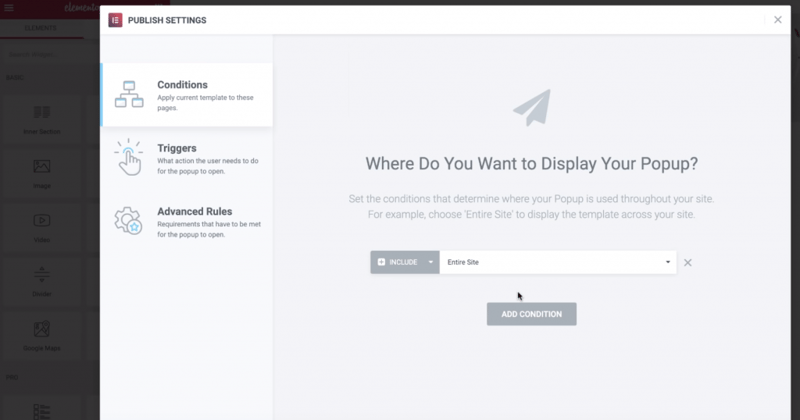
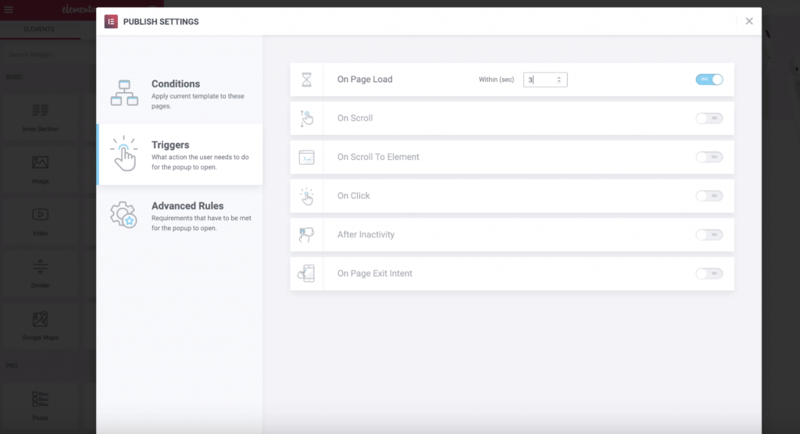
Then, go to the Triggers tab and turn on the On Page Load trigger. Then, set the time to 3 seconds:
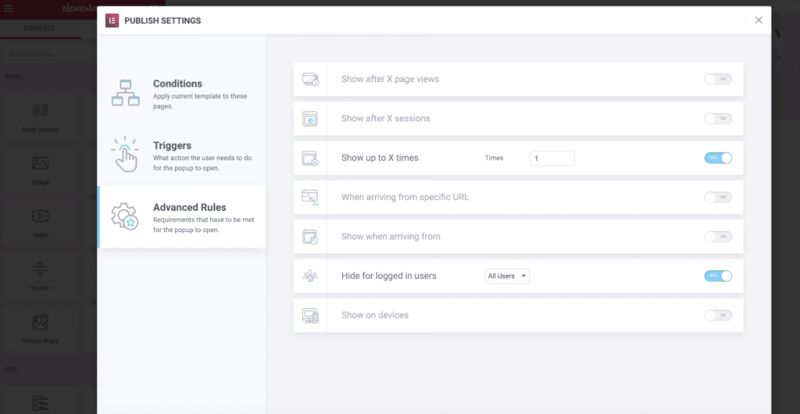
Finally, go to the Advanced Rules tab and turn on the Hide for logged in users option. Then, you can also use the Show up to X times setting to define how many times your countdown popup should appear for each user:
Once you’ve done that, click Save & Close to make your popup live.
Congrats! You just created a hello bar countdown popup with Elementor Popup Builder.
Looking for fresh content?
By entering your email, you agree to receive Elementor emails, including marketing emails,
and agree to our Terms & Conditions and Privacy Policy.
