Table of Contents
‘Tis the season to be jolly, and for many, ‘tis also the season to start holiday shopping.
E-commerce websites see a huge surge of traffic during the days leading up to Christmas. Now more than ever, as people are home-bound due to the pandemic, consumers are looking for a comforting alternative to their usual window shopping. This year, instead of crowding around to see holiday display windows, shoppers will be happy to be welcomed by a snowfall effect on e-commerce websites. Why not encourage your site visitors to buy or sign up for your services by decorating your website with a warm and cozy snowfall effect?
Adding a CSS snow effect can have a positive impact on your holiday sales and brand sentiment. Plus it’s fun and cheerful, so, why not do it?
Follow these steps to add a snowfall effect to any section, column or widget on your Elementor site.
Step 1 - Find the Page's Custom CSS Settings
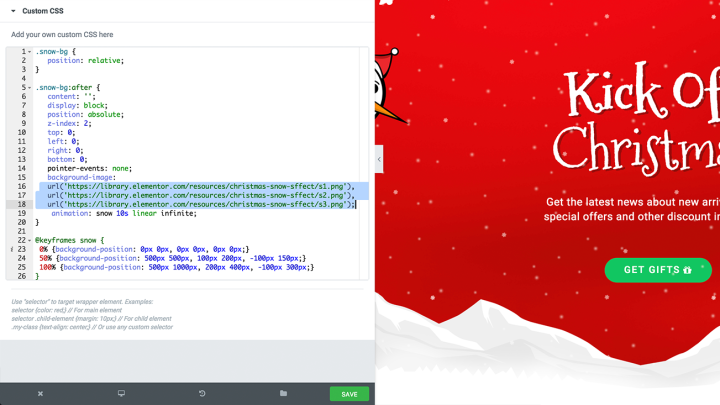
Go to Menu > Page Settings > Style > Custom CSS

We will be pasting the CSS code inside the Custom CSS section.

Step 2 - Paste the CSS code
Paste the CSS Snowfall effect code from Pastebin.
You can get the code here:
					.snow-bg {
   position: relative;
}

.snow-bg:after {
   content: '';
   display: block;
   position: absolute;
   z-index: 2;
   top: 0;
   left: 0;
   right: 0;
   bottom: 0;
   pointer-events: none;
   background-image: url('https://library.elementor.com/resources/christmas-snow-effect/s1.png'), url('https://library.elementor.com/resources/christmas-snow-effect/s2.png'), url('https://library.elementor.com/resources/christmas-snow-effect/s3.png');
    animation: snow 10s linear infinite;
}

@keyframes snow {
 0% {background-position: 0px 0px, 0px 0px, 0px 0px;}
 50% {background-position: 500px 500px, 100px 200px, -100px 150px;}
 100% {background-position: 500px 1000px, 200px 400px, -100px 300px;}
}
This code has been based on a Codepen by Nicky Christensen, and I’d like to take this opportunity to thank her for the code.

Important Note: We recommend you download the snowflake images, upload them to your website, and replace the links in the code to your own URL.

Step 3 - Add the CSS class
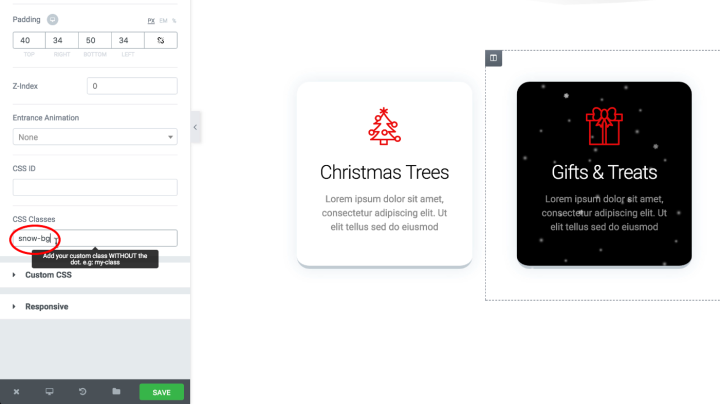
Choose the element you want to apply the snowfall effect to, click on the Advanced tab, and paste ‘snow-bg’ in the CSS class field.

DONE!
Have a very merry Christmas and a jolly good time decorating your site.
If you have an innovative idea for making your website more festive, I’d love for you to write about it in the comments below.
Looking for fresh content?
By entering your email, you agree to receive Elementor emails, including marketing emails,
and agree to our Terms & Conditions and Privacy Policy.


