Create a popup that seamlessly blends into your product archive pages, making the popup feel like a natural design element.
You’ll learn how to create a popup that:
- Blends in naturally with your website
- Displays on its corresponding category / product archive page
Design Product Archive Templates
- Go to WooCommerce > Categories and create product categories if you haven’t already done so.
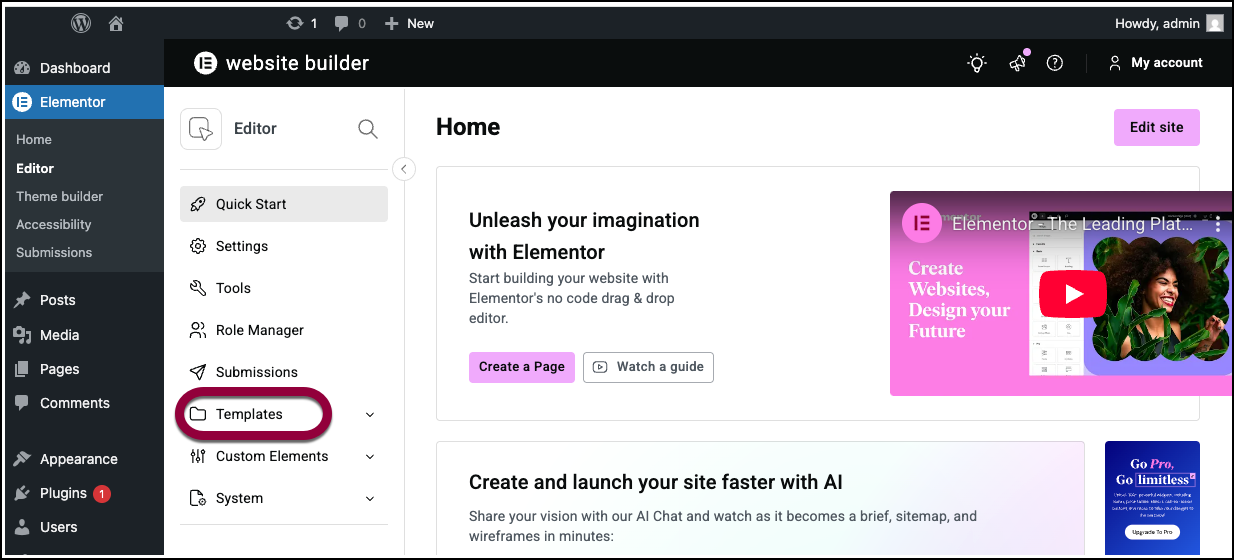
- Go to Elementor>Editor and click Templates to create an archive template for each product category.

Make sure your category image is positioned in an area that will coordinate with the popup you design, as it will be an integral part of the entire animated effect.
Set The Product Archive Templates’ Publish Options
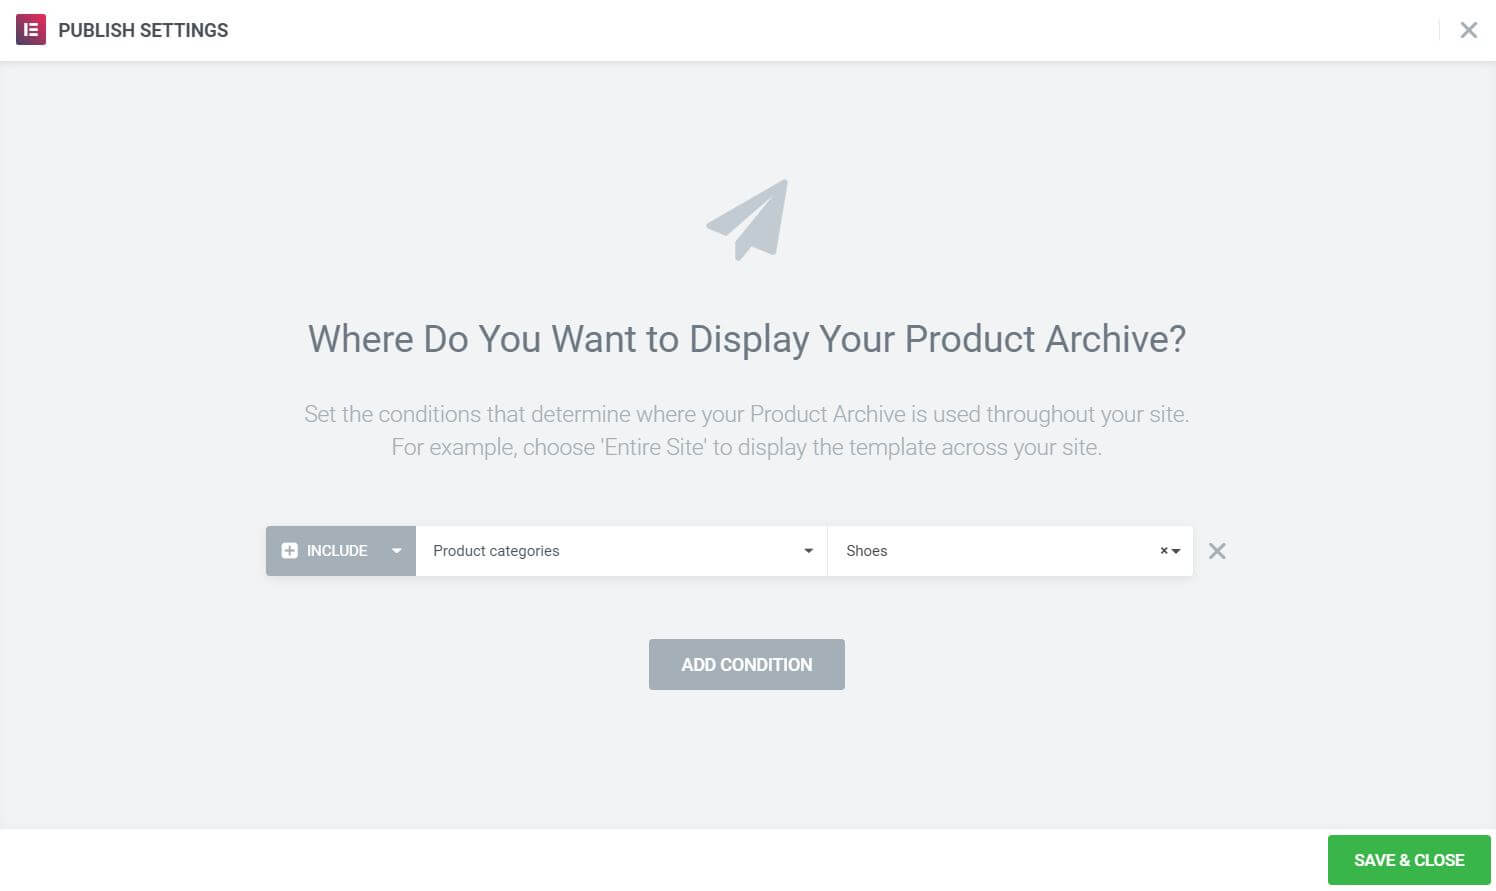
- For each template, set the Display Conditions to Include: Product Categories > search and select the relevant category for each

Design the Popup and Its Content
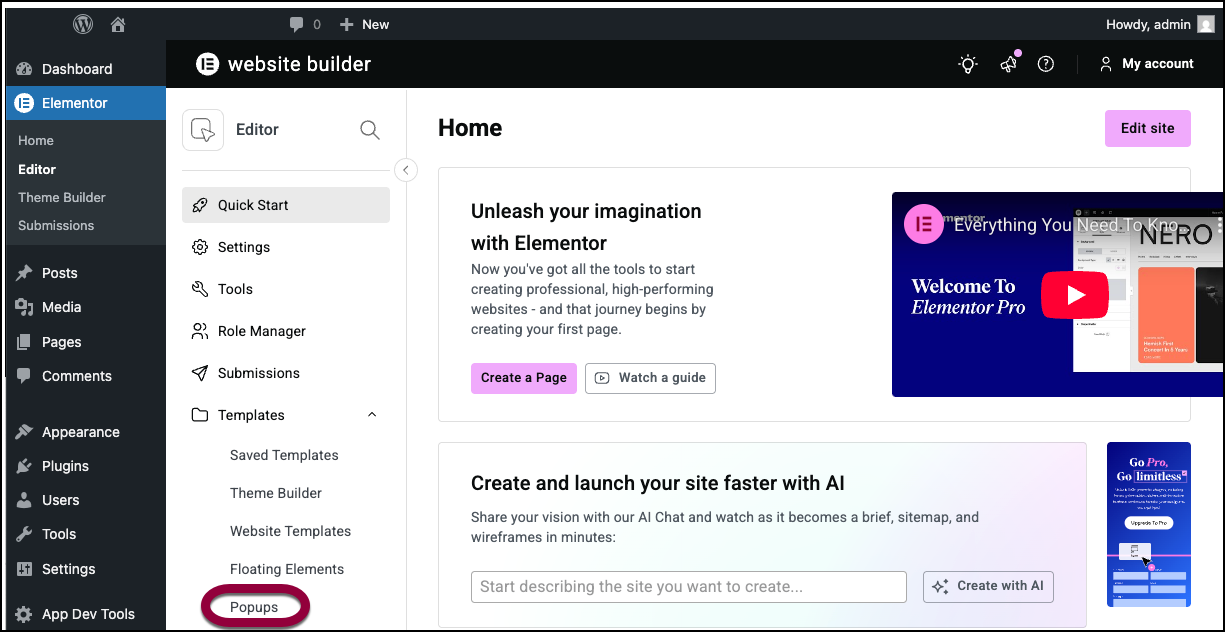
- Go to Elementor>Editor and open the Templates field.

- Select Popups to create a new popup.

- Choose a pre-designed Popup template or close the Library overlay and design your Popup from scratch. Because this popup will closely integrate with the design of the product archive templates, it’s best to design your own. For details, see Create a popup.
- Design the popup content with the category in mind. Leave an area on the top of the popup with some blank space, so the archive template image can overlay it nicely.
- In Popup Settings > Layout, set Entrance Animation to Slide In Left.
- In Popup Settings > Advanced, set Disable Page Scrolling to Yes.
Set The Publish Options
- Go to Publish Settings > Conditions, and set Include > WooCommerce > Product Categories > search and select the relevant category.
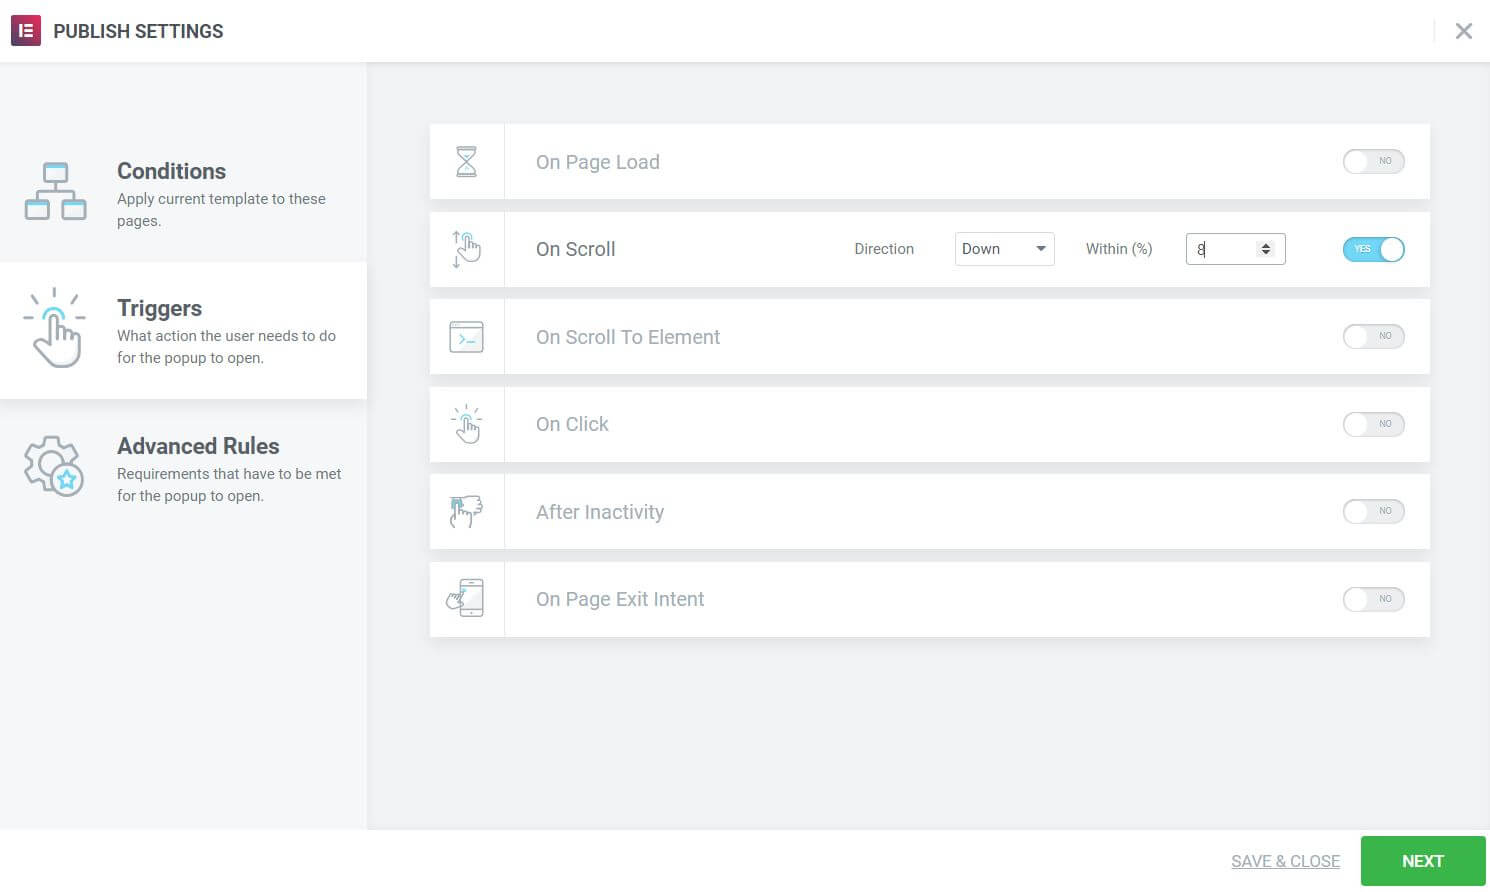
- Go to Triggers and set On Scroll Direction to Down and Within 8% of scrolling. Of course, adjust the percentage to accommodate your design so that the popup coordinates with where you have your category image displaying on the product archive page.
- Go to Advanced Rules and set Show On Devices only to Desktop, since this design concept won’t work as well on laptop or mobile. You can always create different popups and design schemes for those devices if you choose.

Adjust The Product Archive Template
- Go to Elementor>Editor and click Template to edit your product archive template that will be using this popup.
- Edit the category image widget and go to its Advanced tab, and set the Z-Index to 10,000. This will allow the category image to appear on top of the overlay and popup.
Repeat the steps for each product category, creating a relevant popup for each. Ensure that every popup focuses on a product in the category that pairs well with the category’s image. Use Conditions to assign each popup you design to its product category.
All done. Now visit the live product category pages, and see how seamlessly your popups blend with your archives.

