Table of Contents
In this post, you’re going to learn how to migrate WordPress and your Elementor content to a new host and/or a new domain name.
This tutorial will help you if you’re:
- Changing hosts while keeping the same domain name.
- Changing your site’s domain name while also changing hosts.
- Moving a site from your local or development server to a live server.
To help you find the solution that’s right for you, I’ll give you tutorials for two different methods:
- The Duplicator plugin – this free plugin makes the entire process easy and is a great option for most situations.
- Manual migration – you can move things manually, it will just take a little elbow grease and attention to detail.
Ready to start migrating? I’ll begin with an in-depth tutorial for migrating your site with the Duplicator plugin. Then, I’ll cover a more high-level look at the steps you need to take to do it manually.
How to Migrate WordPress With the Duplicator Plugin: Step-By-Step
The nice thing about using the Duplicator plugin is that, in addition to moving your site’s files and database for you, Duplicator can also handle general database serialization issues and can replace URLs in your site’s database (if you need to change your site’s domain name as part of the process).
Step 0: Some Preliminary Housekeeping
Before getting started, you’ll want to get some basic housekeeping out of the way.
First, always take a full backup of your site before migration. Moving your site involves working with some delicate areas, so you always want to have a backup just in case.
Second, if you’re moving your site to a new domain name, you’ll want to make sure that you’ve already changed the new domain’s nameservers to point to the host to which you’re migrating your site.
Third, make sure that you have the hosting credentials for the host to which you want to migrate your site. You’ll need to be able to upload files to your server and create a new database.
Finally, go ahead and install and activate the free Duplicator plugin on the site that you want to migrate.
Now, let’s get started.
Step 1: Create a New Duplicator Package
Once you’ve installed and activated the free Duplicator plugin, you need to create a “Package”, which is basically a portable copy of your entire site.
To create a package, go to the Duplicator tab in your WordPress dashboard and choose Create New:

On the next screen, you can leave the values as the defaults. Just click the Next button:

Duplicator will then scan your site for potential issues and should hopefully come back with all “Good”. If it does find potential issues, you can expand the accordion tab to learn more.
One potential issue is the size of your site. If your site is especially large (“2GB+ on most budget hosts & 10GB+ on higher end hosts”, according to the Duplicator team), you might need to purchase Duplicator Pro because it’s better suited for large sites.
Assuming everything looks good, click the Build button to finish the process and create your site’s package:

Once the build process finishes, which might take some time for larger sites, Duplicator will give you two files to download:
- A zip file archive
- A PHP file called installer.php
Download these two files to your computer and keep them handy because you’ll need them in the next steps:

Step 2: Create New Database at New Location
Next, you need to create a new, empty database at the host to which you want to migrate WordPress.
If you’re using a host with cPanel, you can do that from the MySQL Databases area in cPanel:
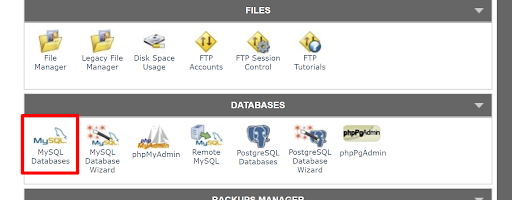
First, give your database a name:

Then, after you’ve created the database, create a new database user/password and then assign that user to the database that you created:

Make sure to give the user All Privileges and keep the database name, database user, and database user password handy because you’ll need them soon:

Step 3: Upload Duplicator Files to New WordPress Location
Next, use FTP or cPanel File Manager to upload the two files from Duplicator to the directory where you want your migrated WordPress site to be.
Remember, it should be one zip file and one file named installer.php.
Step 4: Run Duplicator Installer to Set up Site
Once you’ve uploaded those two files, you’re ready to run the installer process to finish your migration.
If you’re migrating your site to a new domain name, you can just go to yournewdomain.com/installer.php (assuming you’ve already changed that domain’s nameservers).
If you’re keeping the same domain name but just moving your site to a new host, you won’t be able to do that because your domain’s nameservers are likely still pointed at your previous host. A nice workaround here is to edit your computer’s hosts file. This lets you force your computer to connect your domain to your new host, even before you change your domain’s nameservers. This Pagely article explains how to do it.
Once you open the installer.php file, you should see a setup wizard that will take you through the process. Click Next to get started:

After a short wait, while Duplicator extracts your site’s files, you’ll be prompted to enter the database credentials that you created in Step 2. After entering the credentials, click Test Database to make sure that they work:

If everything looks good, you’ll be able to click Next to continue:

After Duplicator imports your database, it will give you the option to Update Data. This is an important consideration because it lets you update the URLs in your WordPress site’s database to reflect any changes to your domain name.
Duplicator should automatically detect any changes to your domain name and fill in the fields accordingly. However, make sure that the information in the URL field matches the domain that you want to use on your newly migrated site:

Once you’ve verified that the information is correct, click Next.
Then, you should see a prompt to log in to the admin area for your newly migrated site:

After you log in for the first time, Duplicator will automatically delete the migration files and clean everything up.
Step 5: Find and Replace Urls in Elementor Content (If Changing Domain)
While Duplicator will handle replacing URLs for most of your site’s content, you might also need to replace URLs using Elementor’s built-in tool if you changed your site’s domain name and your Elementor content isn’t working after the migration.
To access this tool, go to Elementor → Tools. Then, click on the Replace URL tab.
Enter your old domain name in the box on the left and your new domain name in the box on the right. Then, click Replace URL:

Step 6: Regenerate Elementor CSS
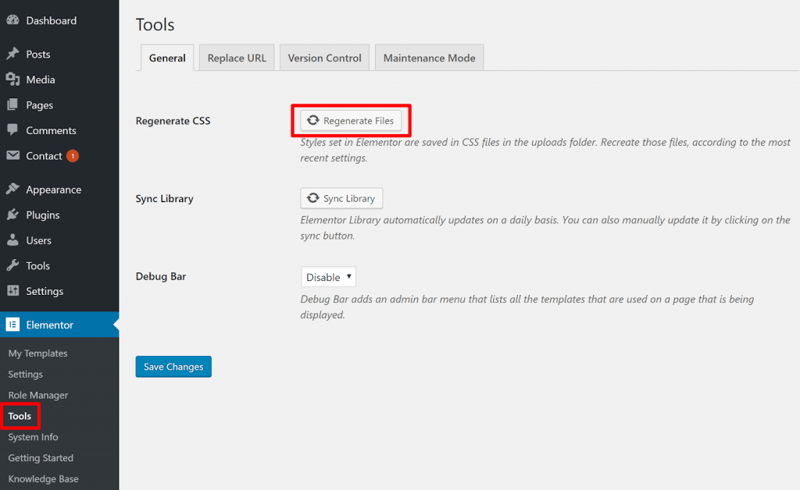
At this point, your site should be working. However, to make absolutely sure that everything is functioning properly, you can finish things out by forcing Elementor to regenerate its CSS files.
To do that, go to Elementor → Tools and click Regenerate Files:
And that’s it!
You’ll still want to give your site a thorough test, but it should function exactly as it did before the migration process.
How To Migrate WordPress Manually: Step-by-Step
If you have an especially large site, or if you just want to do things manually for some reason, it’s also not that difficult to manually migrate your WordPress site.
For this section, I won’t go as in-depth because I only recommend that you go this route if you’re already comfortable with some of the more technical workings of WordPress.
Step 0: Some Preliminary Housekeeping
Before you start this tutorial, you will want:
- A recent backup of your site
- FTP and hosting credentials for both your existing site and the host to which you want to migrate your site
And if you’re changing domains, you should also point your new domain’s nameservers towards the server to which you’re migrating your site.
Then, here’s how to migrate WordPress manually.
Step 1: Move Files to New Server
There are several ways to move your existing site’s files to the new server. One way would be downloading all of the files using FTP and then upload them to the server.
However, as this process might take hours and hours, the more efficient way would be creating a compressed archive file in cPanel File Manager and then extracting it in the new host.
Step 2: Export Database
Next, you need to export the database for your existing site.
While you can do this manually via phpMyAdmin, a simpler solution is Delicious Brains’ free WP Migrate DB plugin.
In addition to making it easy to export your database, WP Migrate DB also handles serialized data and lets you run a search and replace on URL/file paths to ensure that all your content functions properly if you’re changing domain names.
Install and activate the plugin at the site that you want to migrate. Then, go to Tools → Migrate DB.
Choose the Export File radio button (it should be selected by default).
If you’re changing domain names, you can also use the Find/Replace feature to replace the URLs in your database with your new domain name.
Then, click Export to download a copy of your database:

Step 3: Create a New MySQL Database
Next, create a new MySQL database at the host to which you’re migrating your site, along with a new database user and password.
Keep this information handy because you’ll need it in a second.
Step 4: Import Database
Open phpMyAdmin at the host to which you’re migrating your site and:
- Find the database that you just created in Step 3 using the sidebar on the left
- Click on the Import tab
- Select the database file that you downloaded from WP Migrate DB in Step 2
- Click Go

Step 5: Edit wp-config.php
At this point, both your site’s files and database should be at their new location.
Now, you need to tell your migrated site to use the new database that you created in Step 3.
To do that, edit the wp-config.php file at your migrated site and input the information for your new database:

Step 6: Find and Replace Urls in Elementor Content (If Changing Domain)
If you’re changing domain names, go to Elementor → Tools. Then, click on the Replace URL tab and use the tool to update the URLs in your Elementor content:
")
Step 7: Regenerate Elementor CSS
After updating your Elementor content’s URLs, go to Elementor → Tools and click the Regenerate Files button to force Elementor to regenerate its CSS:
")
Any Questions on How to Migrate WordPress?
And that wraps up our guide on how to migrate WordPress, including your Elementor content.
Do you have any questions on how to safely move sites that you’ve created with WordPress and Elementor Pro to new hosts and/or domain names? Let us know in the comments!
Looking for fresh content?
By entering your email, you agree to receive Elementor emails, including marketing emails,
and agree to our Terms & Conditions and Privacy Policy.


