Table of Contents
This guide provides a comprehensive, technical walkthrough of the Wix ecosystem. We will dissect the account setup process, analyze the functional differences between its editor interfaces, and detail the step-by-step workflows for publishing a site. Furthermore, we will critically examine the architectural limitations of closed platforms and explore why professional developers often migrate to open ecosystems like Elementor to achieve greater flexibility and control.
- Platform Fundamentals: Wix operates as a closed SaaS environment, providing hosting, security, and design tools in one subscription. This simplifies initial setup but limits code-level access and data portability compared to open-source solutions like WordPress.
- Editor Architecture: Users must choose between three distinct interfaces: the ADI (AI-generated), the Standard Editor (absolute positioning), and Wix Studio (agency-focused responsive design). Switching between these mid-project is often restricted.
- Scalability Constraints: While effective for small business sites, the proprietary nature of Wix can create friction for complex eCommerce or custom functionality as a business scales.
- Professional Alternatives: For creators demanding pixel-perfect control, full data ownership, and open-source flexibility, the Elementor ecosystem on WordPress provides a robust, scalable upgrade path.
Part 1: The Technical Architecture of Website Builders
To master any tool, one must first understand its underlying infrastructure. Wix operates on a Software as a Service (SaaS) model. In this architecture, the user does not own the software or the server environment; they rent access to it. The provider manages all backend maintenance, security patches, and performance optimizations. This “all-in-one” approach reduces the barrier to entry but inherently creates a dependency on the provider’s ecosystem.
This stands in contrast to open-source content management systems (CMS) like WordPress. In an open-source environment, the user maintains ownership of the software instance and the data. When paired with a comprehensive platform like the Elementor Website Builder, users gain the creative freedom of open software backed by the reliability of managed infrastructure. This distinction—renting vs. owning—is the foundational strategic choice for any digital project.
Part 2: Account Initialization and Interface Selection
The initial onboarding phase in Wix involves more than simple registration; it requires a strategic choice between distinct editing interfaces that dictate the future flexibility of the project.
Step 1: Registration and Intent Profiling
Navigate to the homepage and select “Get Started.” The platform utilizes OAuth protocols for third-party login (Google, Facebook) or standard email authentication. Post-registration, the system initiates an intent profiling sequence. It queries the user on site type (e.g., Online Store, Blog, Portfolio) and experience level. This data is used to filter the template library and suggest specific functional modules (apps).
Step 2: Selecting the Editor Core
This is the most critical technical fork in the road. Wix offers three primary construction environments:
- Wix ADI (Artificial Design Intelligence): A generative automation tool. It constructs a site structure based on user inputs. While rapid, it offers the least amount of design granularity.
- The Standard Editor: The classic drag-and-drop interface. It utilizes an absolute positioning engine, meaning elements are fixed to specific X/Y coordinates on the canvas.
- Wix Studio: A newer, agency-focused environment designed for responsive behavior. It utilizes breakpoints and distinct layout logic but comes with a steeper learning curve.
Pro Insight: Unlike Elementor, which allows for a fluid transition between AI-assisted creation and manual, pixel-perfect editing within the same interface, moving between Wix ADI and the Standard Editor can be restrictive. Users should choose their path carefully to avoid rebuilding later.
Part 3: Mastering the Standard Editor
For the majority of users, the Standard Editor serves as the primary workspace. This section deconstructs its functional components and layout logic.
The Editor Workspace
The interface is divided into three control zones:
- The Component Library (Left Panel): This toolbar houses the “Add” modules. Here, users access static elements (text, images, shapes) and dynamic widgets (forms, galleries).
- The Properties Panel (Right Panel): This context-aware panel controls the specific attributes of a selected element, such as dimensions (pixels), rotation (degrees), and alignment.
- The Viewport Controller (Top Bar): This navigation bar manages page switching, mobile view toggles, and the undo/redo history stack.
Layout Logic: Strips and Columns
Structure is created using horizontal containers known as “Strips.”
- Implementation: Select the “Add” (+) button and choose “Strip.” These containers are designed to span the full width of the browser viewport.
- Segmentation: Strips can be subdivided into columns. This mimics a grid layout, allowing content to be organized into vertical stacks.
- Backgrounds: Users can assign video, image, or solid color backgrounds to these strips.
The Absolute Positioning Model
The defining characteristic of the Standard Editor is its absolute positioning model. When a user drags an element, it stays exactly where it is dropped.
- The Safe Zone: The editor displays vertical dotted grid lines, typically set at 980 pixels wide. Content placed outside these lines may not render correctly on smaller monitors or tablets.
- Contrast with Elementor: Professional developers often prefer the Elementor Flexbox and Grid Container systems. These modern CSS standards allow elements to reflow naturally based on the device, rather than relying on fixed coordinates. This creates a more robust, “fluid” responsive design.
Typography and Content Injection
Text management involves a direct manipulation workflow.
- Insertion: Select “Text” from the Add menu. The system offers a hierarchy of pre-styled options (Heading 1–6, Paragraphs).
- Styling: Double-clicking a text box opens the typography settings. Users can adjust font family, size, kerning, and line height.
- Dynamic Text: For advanced users, text elements can be connected to the Content Manager (CMS) to display dynamic data from a collection.
Media Assets and Optimization
Visual assets are managed via the Media Manager.
- Upload: Files are uploaded to the platform’s cloud storage.
- Manipulation: The built-in photo studio allows for basic cropping and filter application.
- Performance Note: The platform handles image compression automatically. For creators prioritizing maximum site speed and Core Web Vitals, external tools or professional plugins like the Image Optimizer by Elementor offer more granular control over compression algorithms (Lossy vs. Lossless) and Next-Gen format conversion (WebP/AVIF).
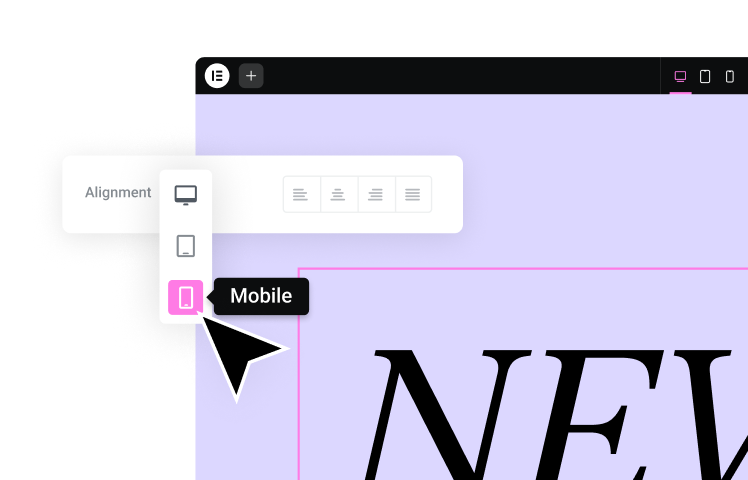
Part 4: The Mobile Optimization Workflow
A distinct feature of the Standard Editor is its approach to mobile responsiveness. It does not automatically reflow content for mobile devices in a fully responsive manner. Instead, it generates a secondary “Mobile View” based on the desktop layout.
The Mobile Editor
- Access: Click the mobile icon in the top viewport controller.
- Separation of Concerns: Changes made here (hiding elements, resizing text, reordering sections) do not affect the desktop site.
- The “Optimizer”: The Page Layout Optimizer tool attempts to automatically order elements for mobile, though manual refinement is almost always required.
Technical Consideration: This separate view can lead to double-handling of content. In contrast, modern platforms utilize a single, responsive codebase where changes propagate intelligently across breakpoints, a workflow central to the Elementor design philosophy.
Part 5: Extending Functionality via the App Market
The core editor provides design tools, but functional requirements (eCommerce, Booking, Events) are handled through the App Market.
Installation Workflow
- Discovery: Navigate to the “App Market” icon.
- Integration: Select an app (e.g., “Wix Chat”) and click “Add to Site.”
- Configuration: The app injects a widget onto the canvas and adds a corresponding settings panel to the dashboard.
Wix Stores (eCommerce)
For retail functionality, the “Wix Stores” app is the standard solution.
- Product Management: Users input SKU data, pricing, and inventory levels via the dashboard.
- Payment Processing: The platform integrates with major gateways (PayPal, Stripe) and its own native processor.
- Limitations: While effective for simple catalogs, scaling businesses often encounter friction with complex variations or bespoke checkout flows. Professional eCommerce sites often leverage the Elementor WooCommerce Builder, which allows for the total customization of product templates, cart pages, and checkout experiences using a visual interface.
Part 6: SEO Configuration and Marketing
Visibility is as critical as design. The platform provides a suite of SEO tools accessible through the dashboard.
On-Page SEO
- Meta Data: Navigate to the “Menus & Pages” panel. Select a page, click the ellipsis (…), and choose “SEO Basics.” Here, users can define the Title Tag and Meta Description.
- URL Structure: The “URL Slug” field allows for the customization of the page address.
- Sitemaps: The platform automatically generates an XML sitemap for submission to search engines.
Marketing Tools
The dashboard includes native email marketing capabilities for sending newsletters. However, for businesses where transactional email reliability is paramount (e.g., order confirmations, password resets), relying on basic server protocols can be risky. Professional WordPress sites utilize specialized plugins like Site Mailer to bypass default mail functions, ensuring high deliverability rates through authenticated SMTP services.
Part 7: The Architectural Limitations of Closed Systems
While the SaaS model offers convenience, it imposes structural limitations that become apparent as a digital presence scales.
1. Data Portability and Lock-in
The most significant technical constraint is the lack of code export. Users cannot download their site’s HTML, CSS, or PHP files to host them elsewhere. Migrating away from the platform typically involves a manual reconstruction of the frontend and a complex data migration for the backend.
2. The “Black Box” Server Environment
Users have no access to the server configuration. This means one cannot implement server-side caching rules, database optimizations, or select specific CDN endpoints. Performance is entirely dependent on the provider’s global infrastructure.
3. Development Restrictions
While Velo (the platform’s coding environment) allows for JavaScript injection, it operates within strict API limits. Developers cannot modify the core application code or integrate custom backend frameworks, limiting the ability to build truly bespoke applications.
Part 8: The Professional Upgrade: The Elementor Ecosystem
For creators, agencies, and businesses that hit the ceiling of a closed builder, the Elementor ecosystem on WordPress offers a professional migration path. It combines the ease of visual building with the limitless scalability of open-source software.
1. The Open-Source Advantage
By building on WordPress, users own their data and their code. They can move their site to any host, modify any file, and integrate with any third-party API. Elementor acts as the visual interface layer, providing pixel-perfect design control without sacrificing this fundamental freedom.
2. Managed Infrastructure
Professional hosting no longer requires a sysadmin. Elementor Hosting provides a managed Google Cloud environment specifically optimized for the builder. This delivers the reliability and security of a SaaS platform—including Cloudflare CDN integration and premium SSL—while retaining the open-source architecture.
3. Next-Generation AI Integration
Elementor integrates AI deeply into the creative workflow, surpassing simple template generation.
- AI Site Planner: Accelerates the initial build phase by generating sitemaps, wireframes, and layout structures from a prompt.
- Elementor AI: Allows creators to generate custom code (CSS, HTML snippets), write copy, and create unique images directly within the editor.
4. Specialized Professional Tools
The ecosystem includes utilities designed for serious webmasters:
- Ally Web Accessibility: An AI-powered tool that scans and remediates accessibility violations, ensuring sites meet WCAG standards—a critical compliance step for modern businesses.
- Send by Elementor: A fully integrated marketing automation platform that connects directly to the site, allowing for the creation of complex customer journeys and campaigns.
Part 9: Comparison Workflow: Building a Custom Landing Page
To illustrate the functional difference, let’s compare the workflow for a common task: creating a custom landing page with dynamic content.
The SaaS Workflow:
- Select a “Landing Page” template.
- Manually replace text and images.
- Constraint: If you need to change the layout logic (e.g., turn a 3-column grid into a 4-column grid), you must often delete the section and rebuild it. Dynamic data connections require a complex setup in the CMS manager.
The Elementor Workflow:
- Open the Hello Theme—a lightweight canvas designed for speed.
- Use the Container widget to define a responsive Flexbox layout.
- Drag in elements.
- AI Assistance: Use Elementor AI to generate the headline copy and a custom hero image instantly.
- Dynamic Tags: Connect the headline to a custom field in the database.
- Global Styles: Apply global fonts and colors with one click, ensuring the page matches the brand guidelines perfectly.
Part 10: Step-by-Step Migration Strategy
If your analysis leads you to the conclusion that a professional open ecosystem is required, follow this migration protocol:
- Audit: Map out your current sitemap and catalog all static and dynamic assets (images, blog posts, products).
- Environment Setup: Initialize an Elementor Hosting account. This ensures your new WordPress foundation is secure and optimized.
- Data Extraction: Export your product data to CSV and your blog posts to XML/RSS.
- Import: Use the WordPress import tools to ingest your content.
- Design Reconstruction: Use the Elementor Website Builder to recreate your visual identity. Because you are using a professional builder, you can now optimize your DOM structure for better performance.
- Functionality Upgrade: Replace basic widgets with professional plugins (e.g., replace standard forms with Elementor’s advanced Form Builder).
- Launch: Update your DNS records to point to your new professional environment.
Conclusion
Wix serves a vital role in the web ecosystem as an accessible entry point for users who prioritize simplicity over ownership. Its standard editor allows for rapid visual creation, and its integrated app market solves many common business needs.
However, as a digital presence matures, the requirements for scalability, performance, and customization often outpace the capabilities of a closed system. For professional creators and growing businesses, the Elementor ecosystem represents the logical evolution. It offers the “best of both worlds”—the intuitive visual workflow of a modern builder combined with the infinite extensibility and data sovereignty of the open web.
Frequently Asked Questions
1. Is the Standard Editor truly drag-and-drop? Yes, the Standard Editor utilizes an absolute positioning model. You can drag an element to any X/Y coordinate on the page. However, this differs from professional responsive builders like Elementor, which use container-based layouts (Flexbox/Grid) to ensure elements reflow naturally across devices.
2. Can I export my code if I decide to leave the platform? No. A primary limitation of the platform is that you cannot export your site’s HTML, CSS, or PHP code. Migrating to a platform like WordPress requires rebuilding the frontend design, though content (text/images) can often be migrated via CSV/XML imports.
3. How does mobile optimization work? The platform generates a separate “Mobile View” based on your desktop design. Changes made to the desktop view do not always propagate perfectly to mobile. You must often enter the Mobile Editor to manually rearrange or hide elements.
4. What is the difference between ADI and the Standard Editor? ADI (Artificial Design Intelligence) builds the site for you based on a questionnaire but offers limited design control. The Standard Editor provides manual control over layout. Elementor’s AI Site Planner offers a more advanced approach, generating professional wireframes that can be fully customized in a pro-level editor.
5. Can I use a custom domain name? Yes, but only on premium plans. On the free tier, your site will be hosted on a subdomain (e.g., https://www.google.com/search?q=username.wixsite.com) and will display platform branding.
6. Is the platform suitable for advanced SEO? The platform provides basic SEO tools like meta tag editing and sitemap generation. However, for advanced technical SEO (e.g., complex schema, server-side caching, log file analysis), professional SEOs often prefer the open architecture of WordPress.
7. How do I add an online store? You must install the “Stores” app and upgrade to an eCommerce subscription plan. For highly custom shopping experiences, the Elementor WooCommerce Builder allows for the visual design of cart pages, checkout flows, and product templates without code.
8. Can I add custom code to my site? You can inject JavaScript via Velo, but you are limited to the platform’s API. You cannot modify core files or add server-side languages like PHP, which limits the ability to build truly bespoke applications compared to an open-source environment.
9. Is collaboration possible? Yes, you can invite contributors to your site dashboard. However, real-time collaboration on the same page can result in conflicts. Elementor Hosting supports staging environments, allowing teams to develop and test changes safely before pushing them to production.
10. Why do professionals switch to Elementor? Professionals migrate to Elementor to gain ownership of their data, pixel-perfect design control, and access to the open-source ecosystem. It combines the ease of a visual builder with the power of WordPress, backed by managed infrastructure and advanced AI tools.
Looking for fresh content?
By entering your email, you agree to receive Elementor emails, including marketing emails,
and agree to our Terms & Conditions and Privacy Policy.