GetResponse is an email marketing system. With this integration you can send form submissions to their system.
Note
Integrations are only available for plugin subscribers with Advanced plans (and above) and Elementor Hosting users with Business plans (and above) or Sell+ Pro plans (and above).
Enter your API key
Note: Before integrating your form with GetResponse, you’ll need your GetResponse API key. Refer to the GetResponse website to get your API key.
- From WP Admin, navigate to Elementor>Settings.
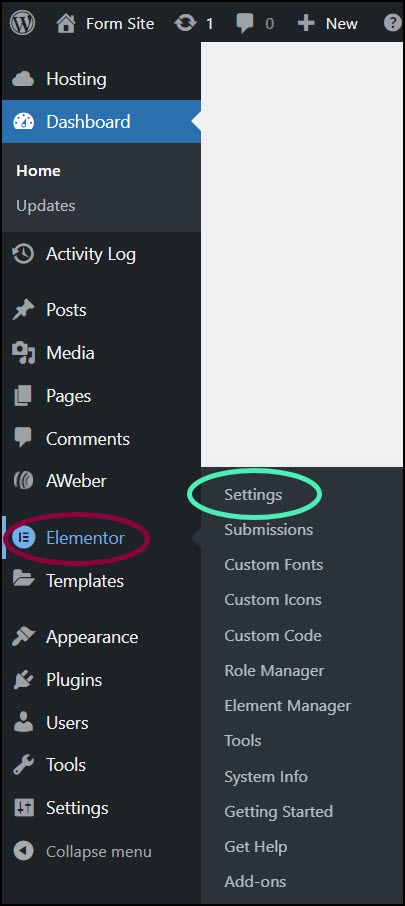
The Elementor Settings appear in the right pane.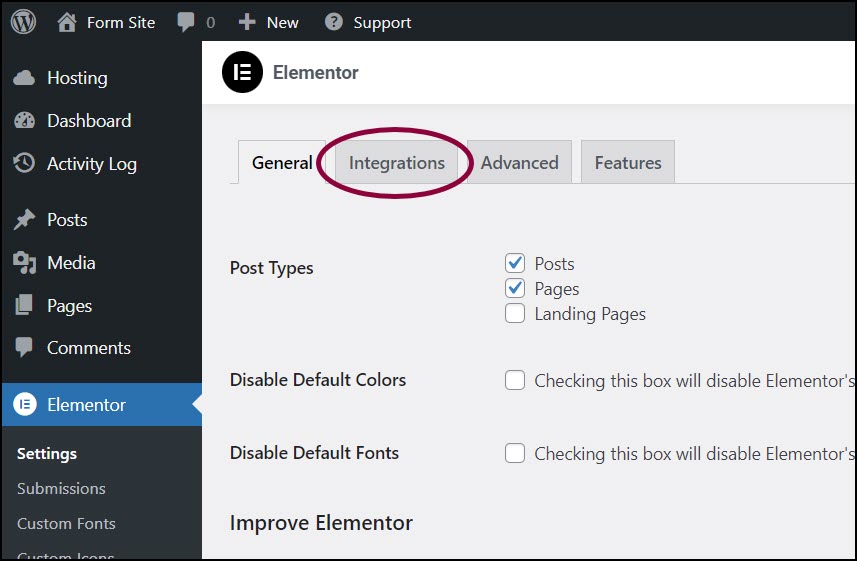
- Click the Integrations tab.
- Scroll down to the GetResponse section.
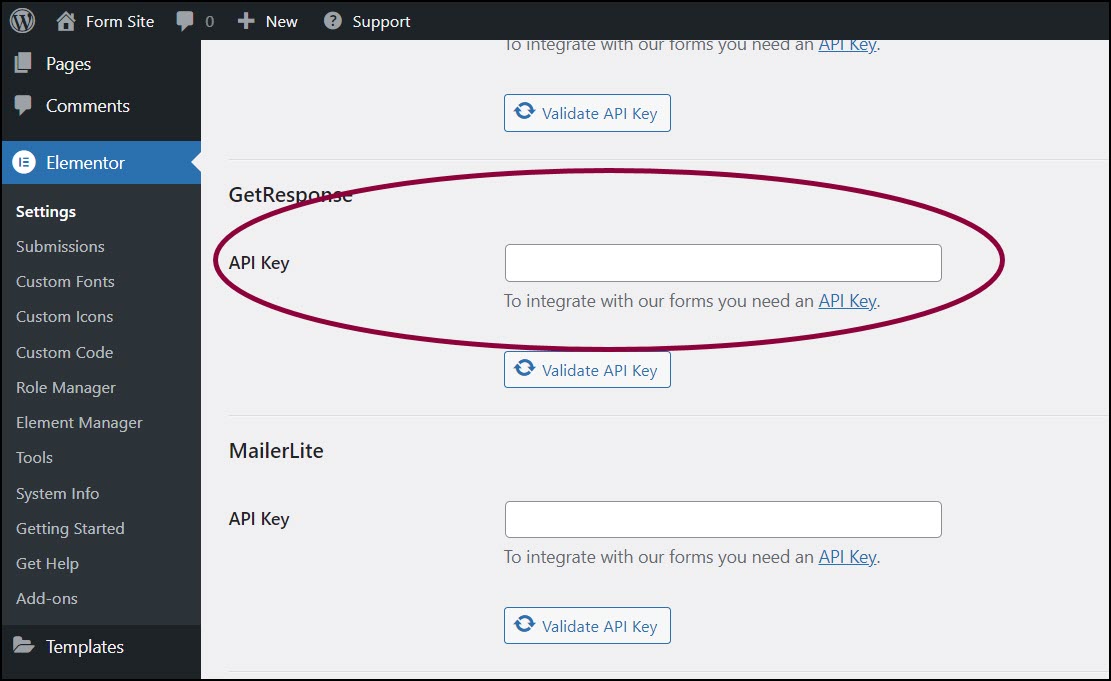
- In the text box, enter the GetResponse API.
- Click Validate API Key.
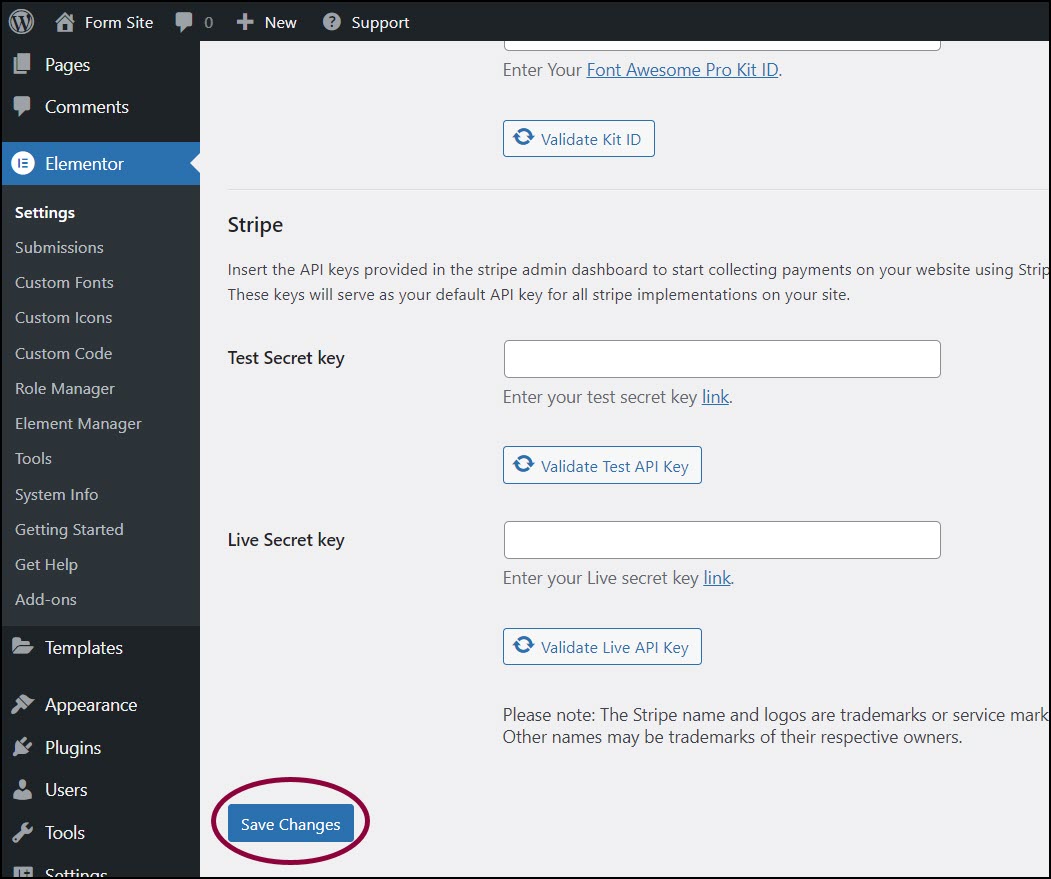
- Scroll to the bottom of the screens and Click Changes.
Add GetResponse to your form
- In the Elementor Editor, return to your form.
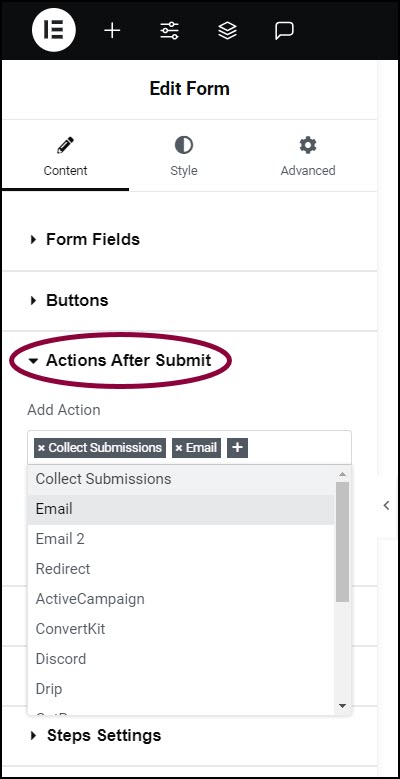
- In the panel, expand the Actions After Submit section.
- In the Add Action box, click the + sign.
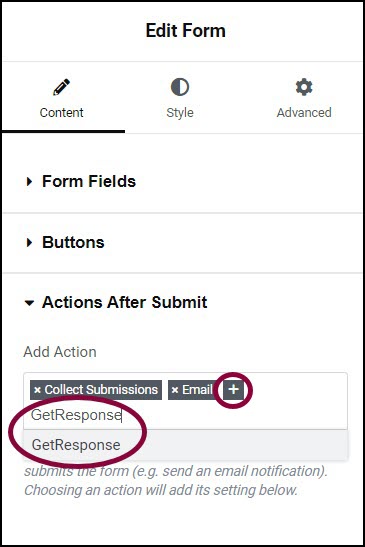
- In the text box enter GetResponse and choose it from the dropdown menu.

This adds a GetResponse section to the panel. - In the panel, expand the GetResponse section.
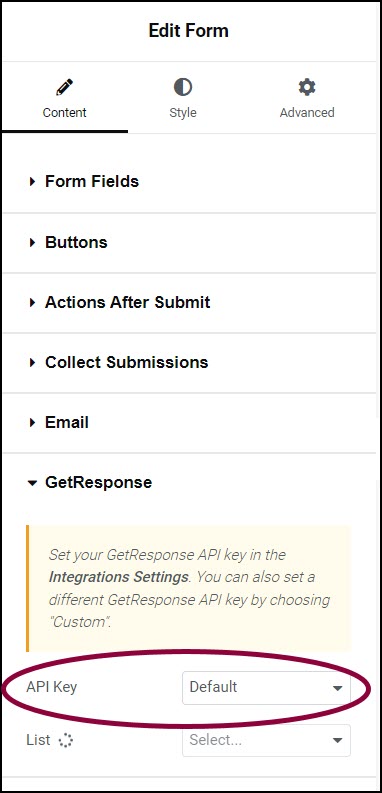
- Confirm the API key is set to Default. This will use the API key you entered via WP Admin. NoteYou have the option of entering a custom API key. This will allow you to assign specific forms to different campaigns.
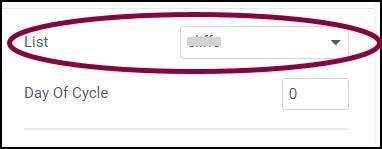
- (Optional) If you have more than one mailing list set up with your GetResponse, use the List dropdown menu to select settings for a specific list.
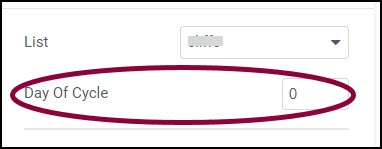
- In the text box, enter a Day of Cycle. This assigns the autoresponder a specific day in a cycle. For example, if you set the Day of Cycle to 0, messages will be sent to the visitor on the day they submit the form.
- Click the List dropdown menu and select your username.
A list of fields used by GetResponse appears with a dropdown menu to the right.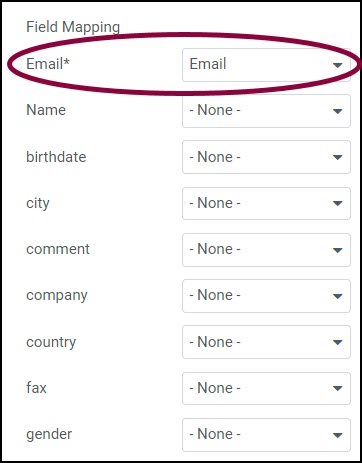
- Use the dropdown menu to map the GetResponse fields to the form fields. In the example above, The GetResponse Email field is mapped to the form’s Email field.
Form submissions will be sent to your GetResponse account.
Troubleshooting a 400 Error
If you receive a 400 error, you may have used an unsupported form field type. For example, the “phone” type is not supported. If you have this particular problem, take the following steps:.
- Within your GetResponse account, please change the Phone Number field type to a Text field.
- Within your Elementor form, set the Type of field to Tel.
Still need help creating the perfect form? Check out Elementor Premium Services for expert advice.

