Welcome to Site Mailer! By the end of this walkthrough, you’ll have connected your account, set up a custom domain, and tested your email system to ensure everything works seamlessly. Let’s get started!
- Install and activate Site Mailer. For details, see Install and activate Site Mailer, Elementor One learn how to add email deliverability here.
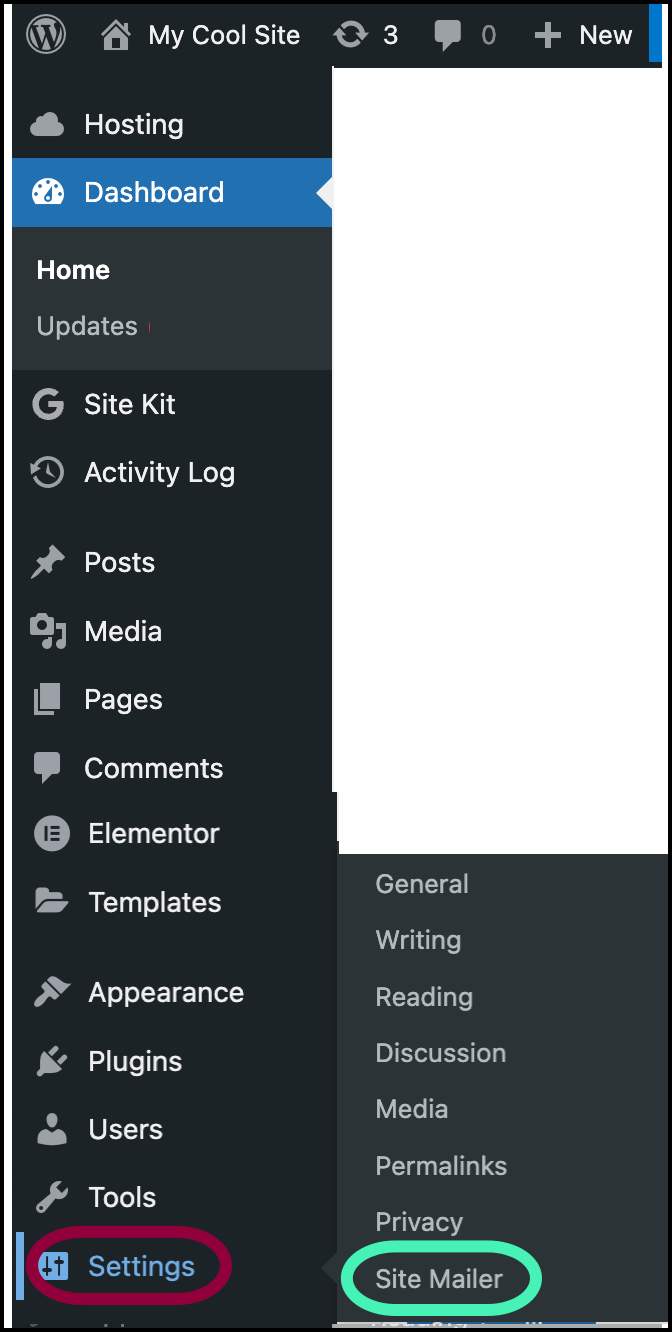
- From WP Admin, go to Settings>Site Mailer.
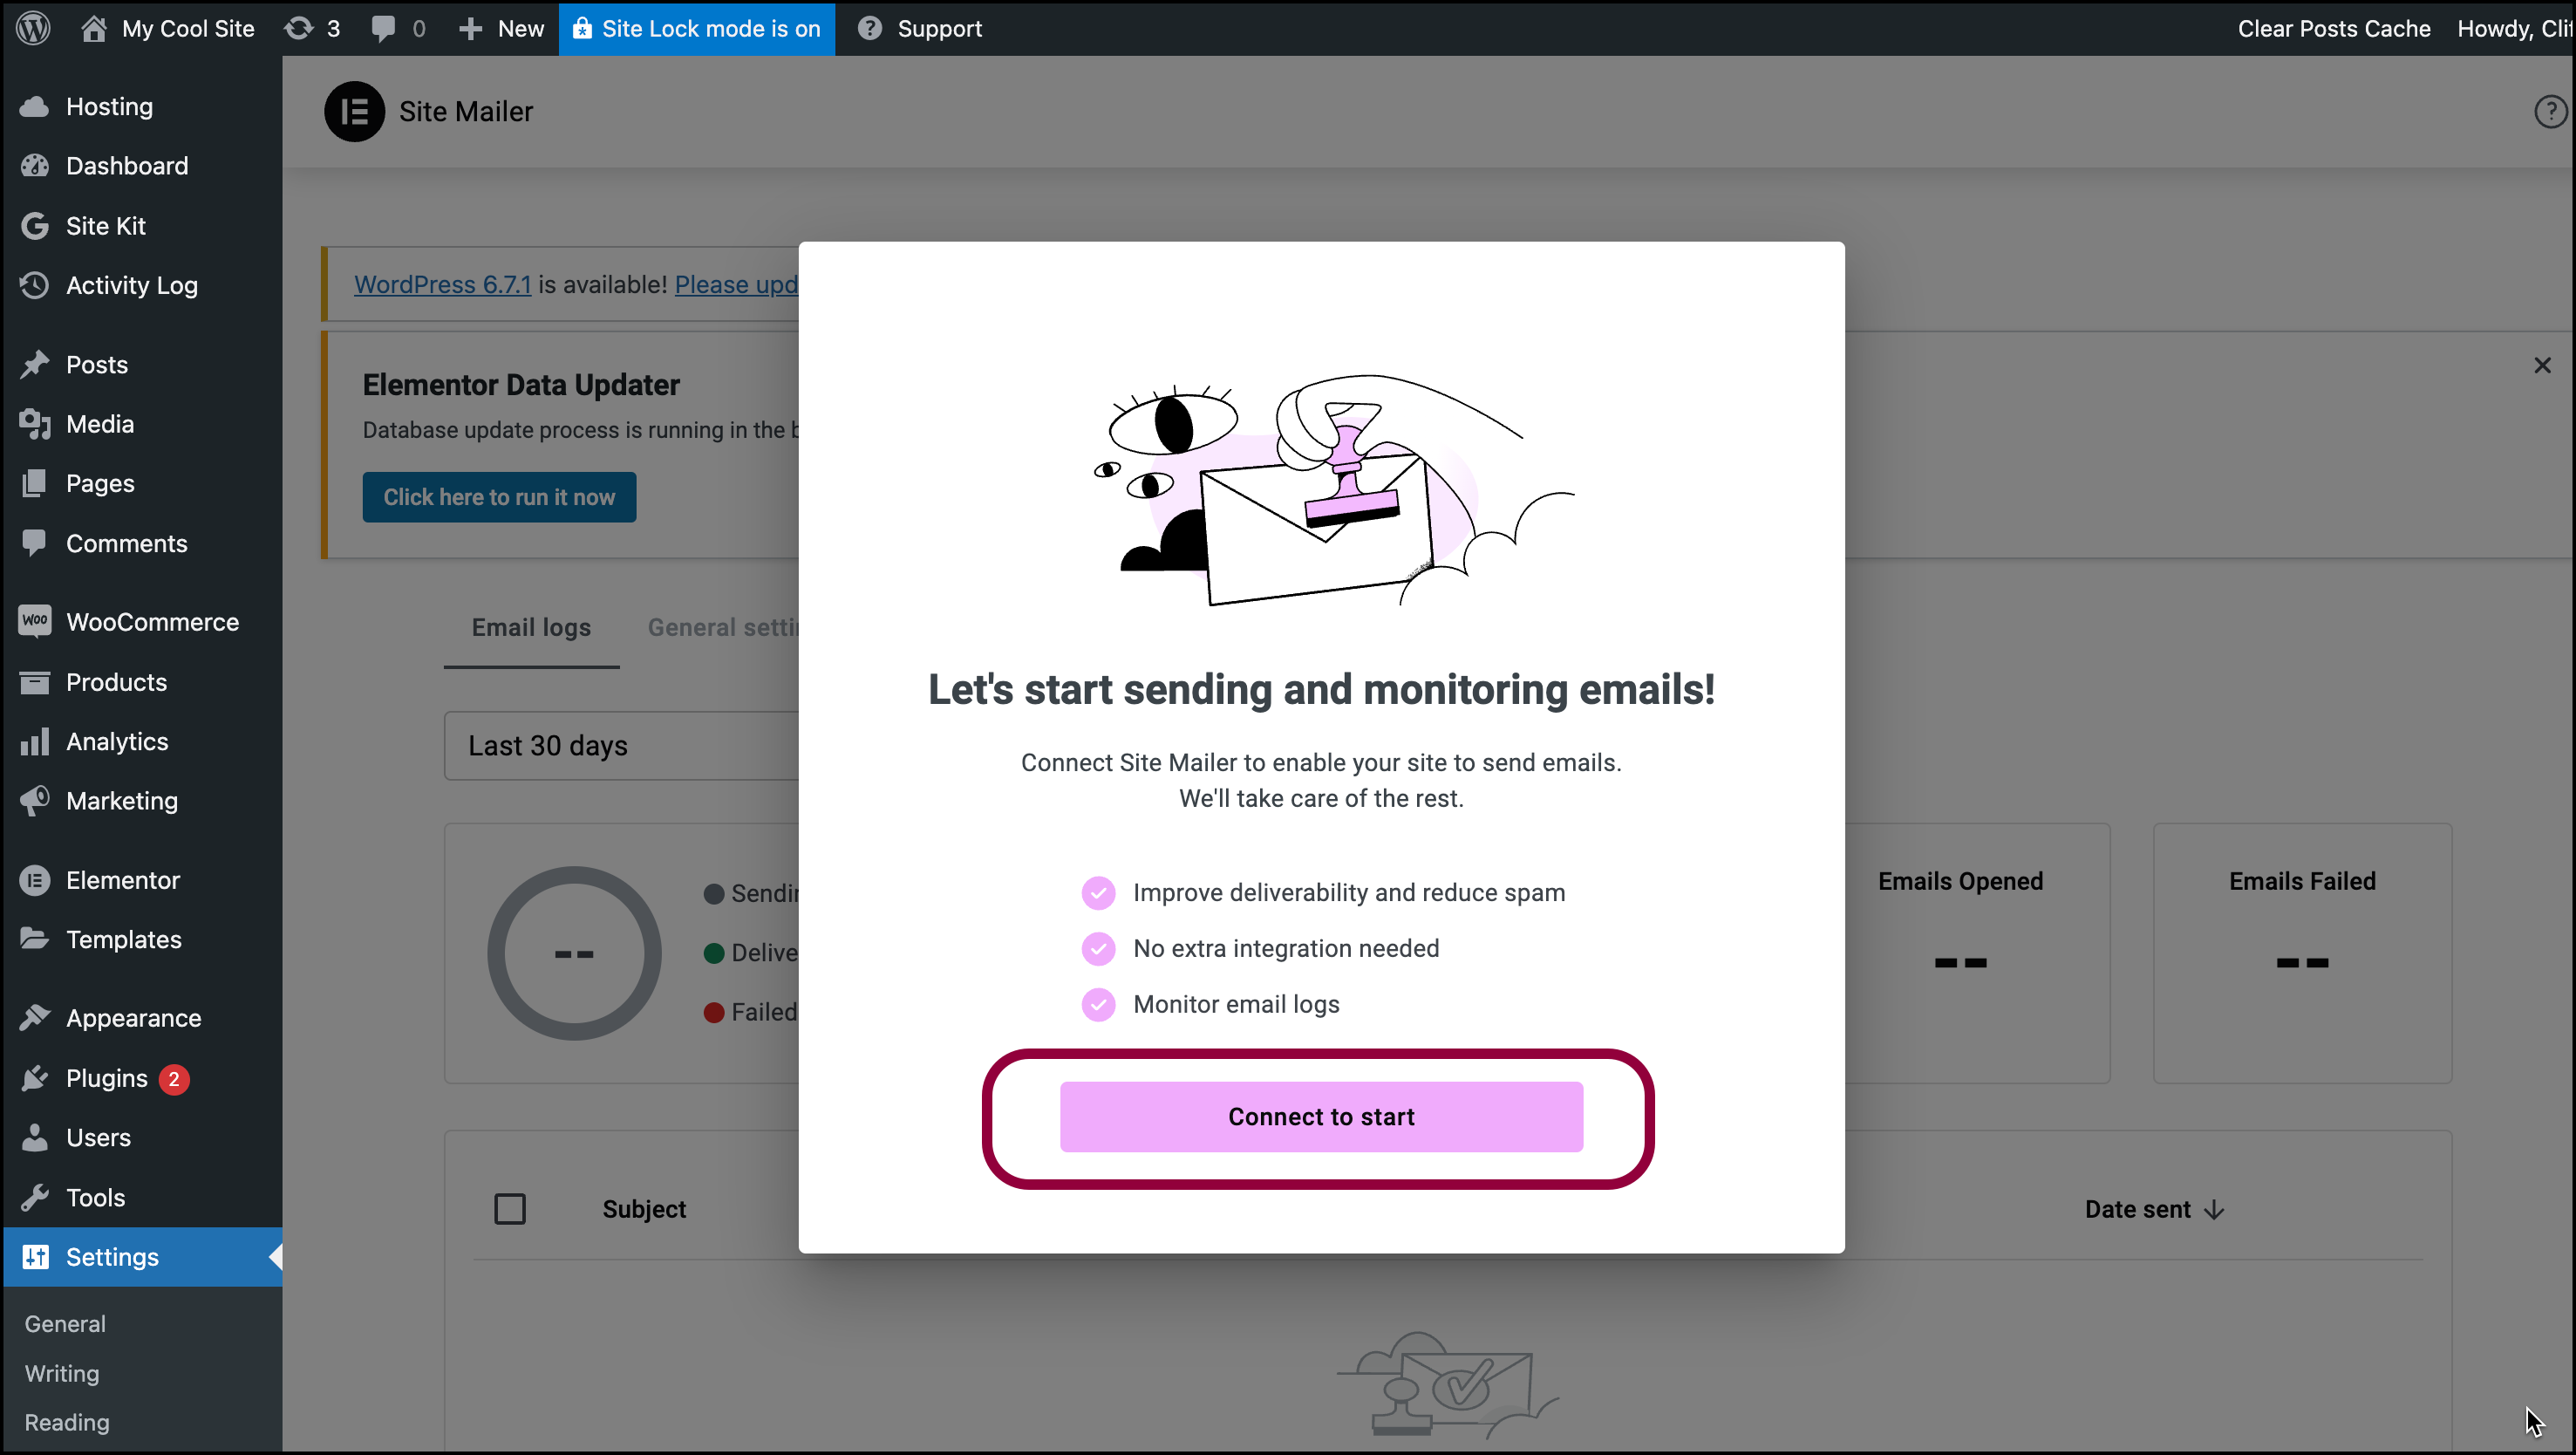
- Click Connect to start.
If you don’t have an Elementor account, you’ll have to create one. If you have an Elementor account, you’ll be asked to log in. This securely links the Site Mailer to our servers.
After you login, the dashboard appears. The dashboard has three tabs: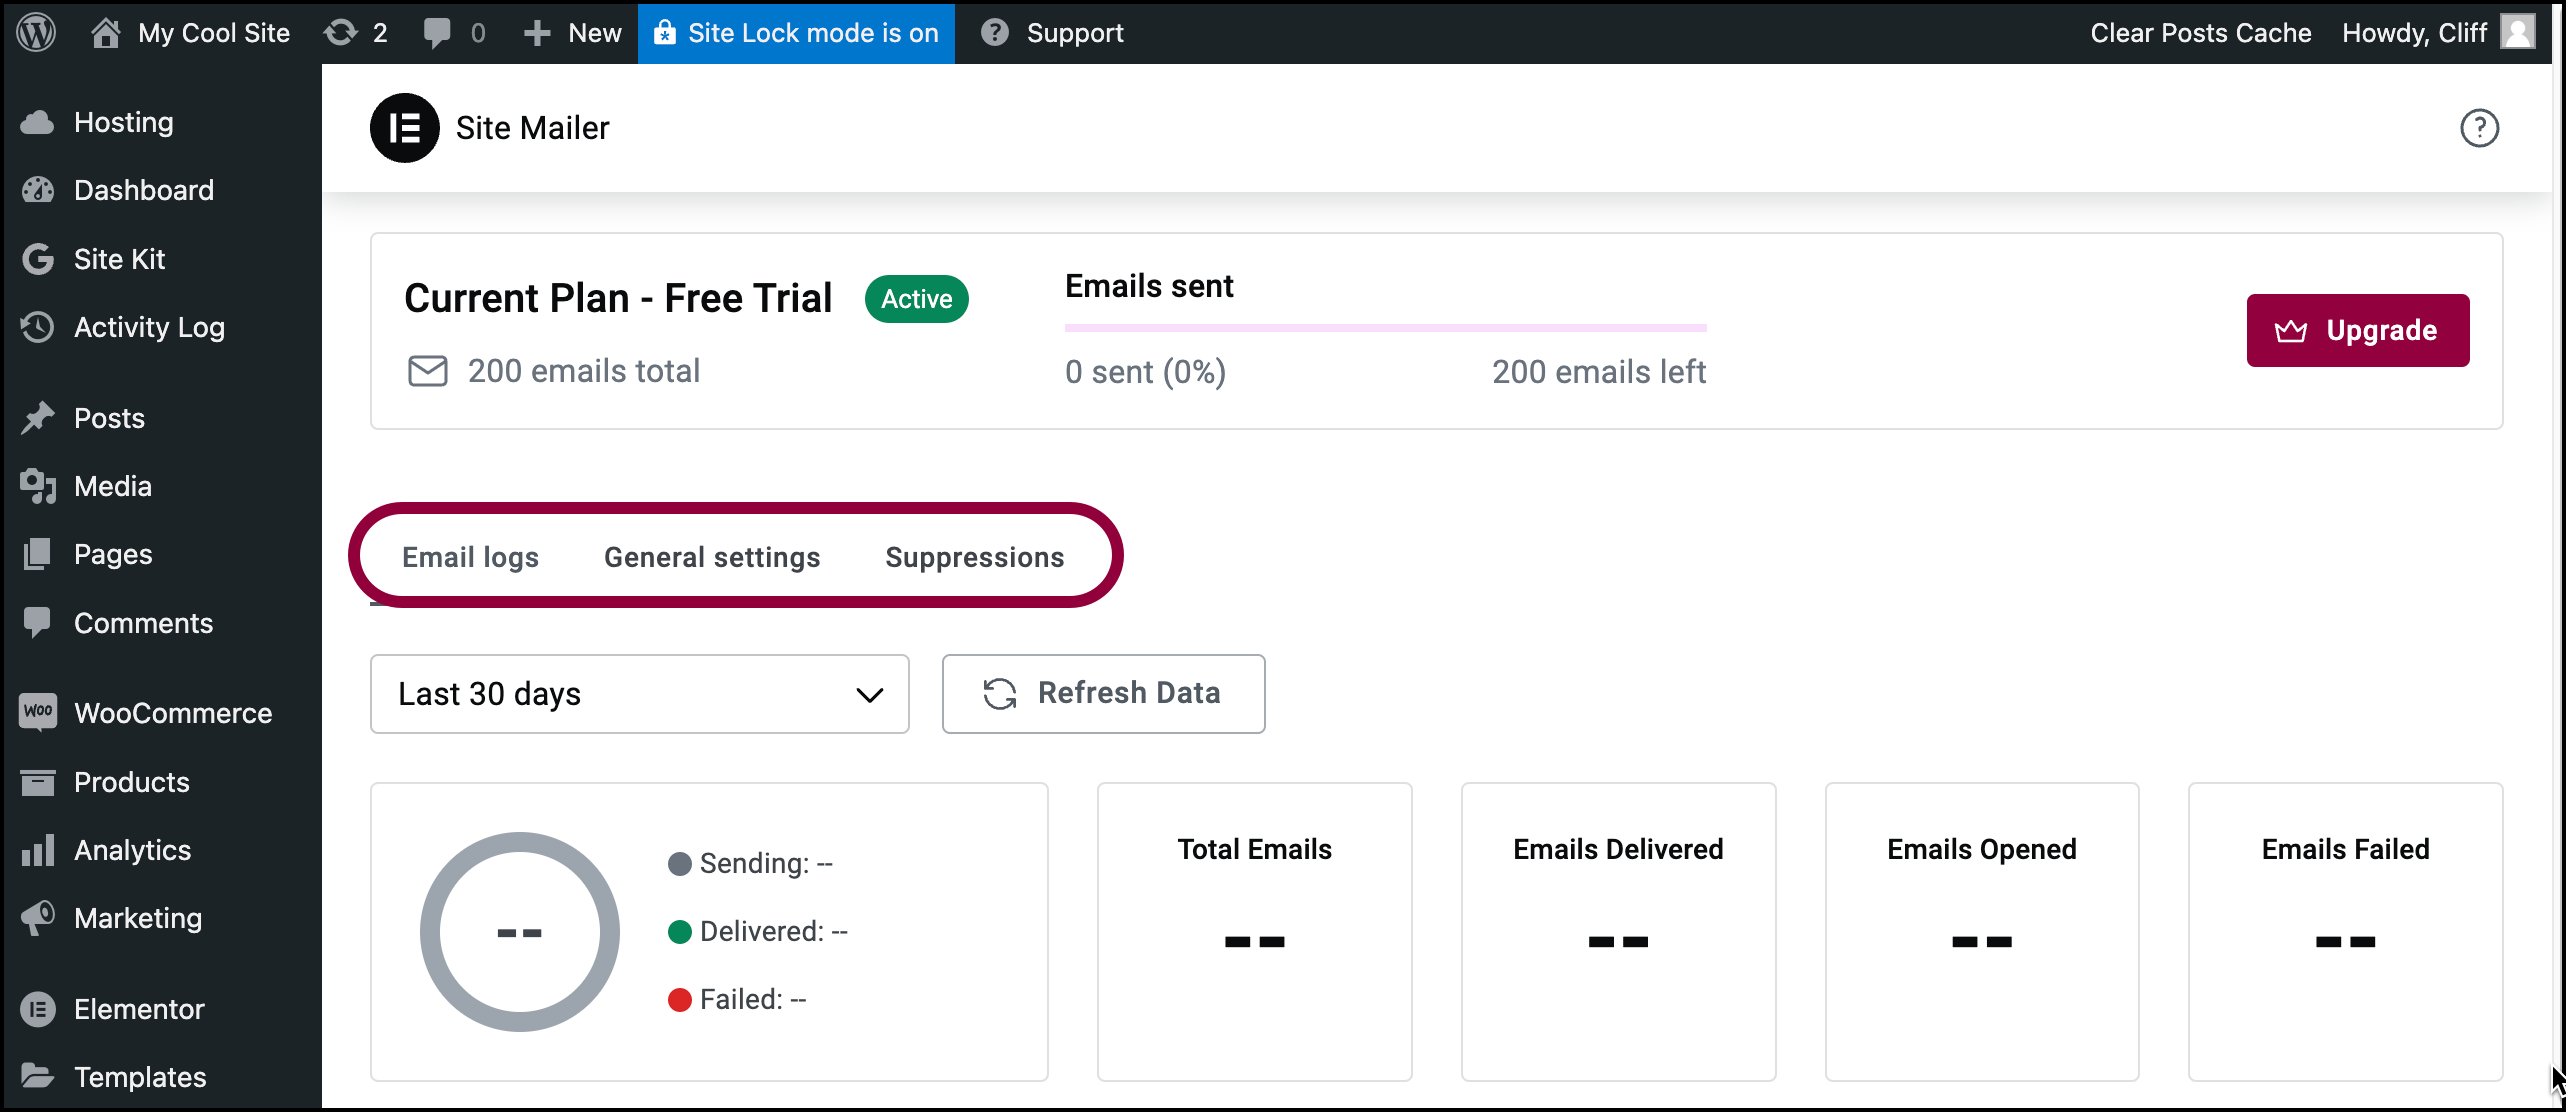
- Email Logs: Tracks every email sent by your site.
- General Settings: Adjust key email settings.
- Suppressions: Manage unsubscribed users.
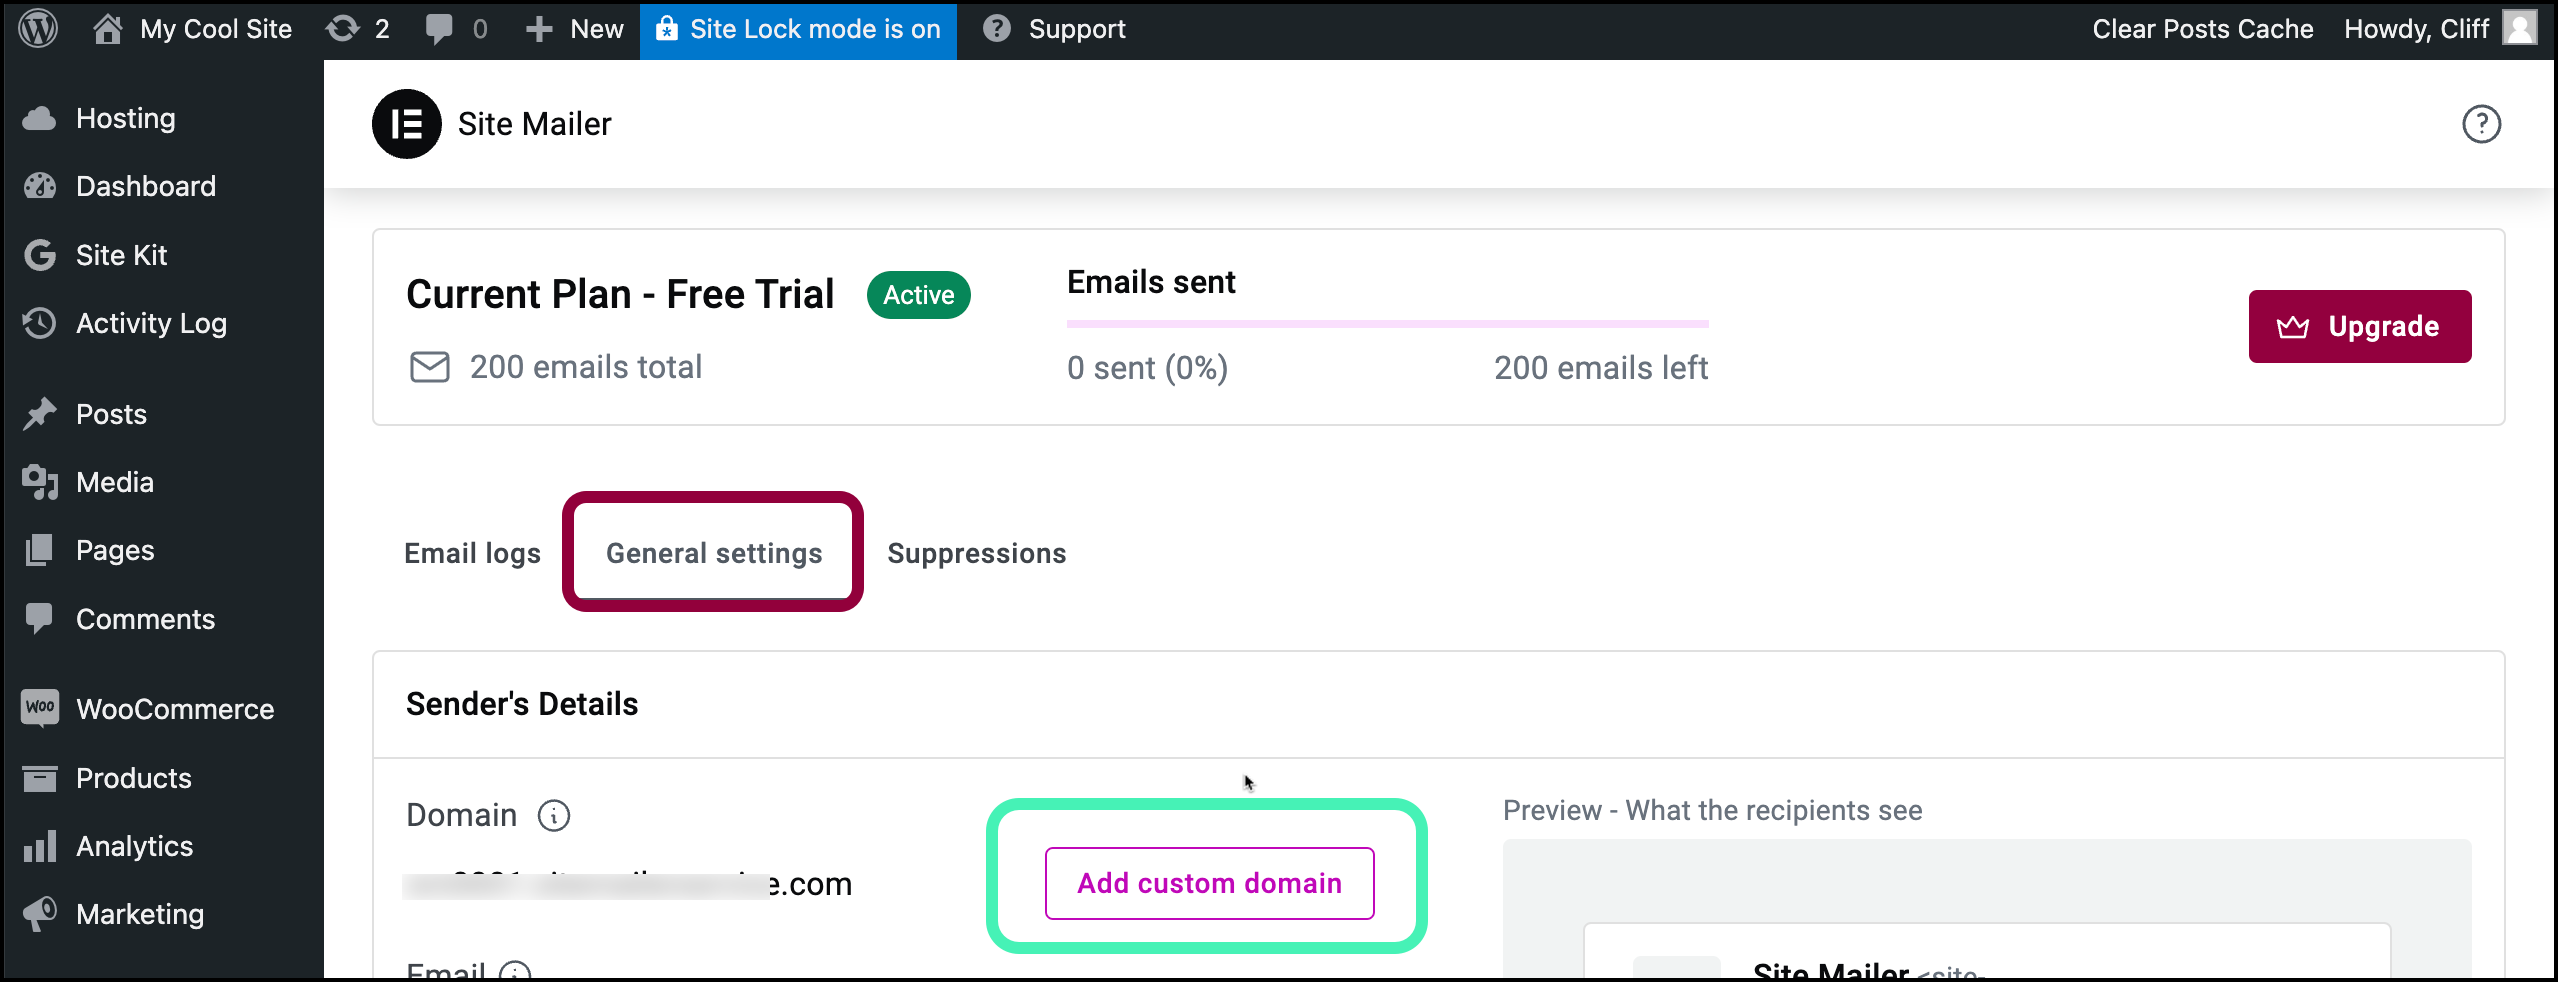
- Go to General Settings and click Add Custom Domain. Adding a custom domain step improves your email deliverability by sending emails from your site’s domain. For details, see Add a custom domain to Site Mailer.NoteA Site Mailer subscription comes with one free custom domain connection.
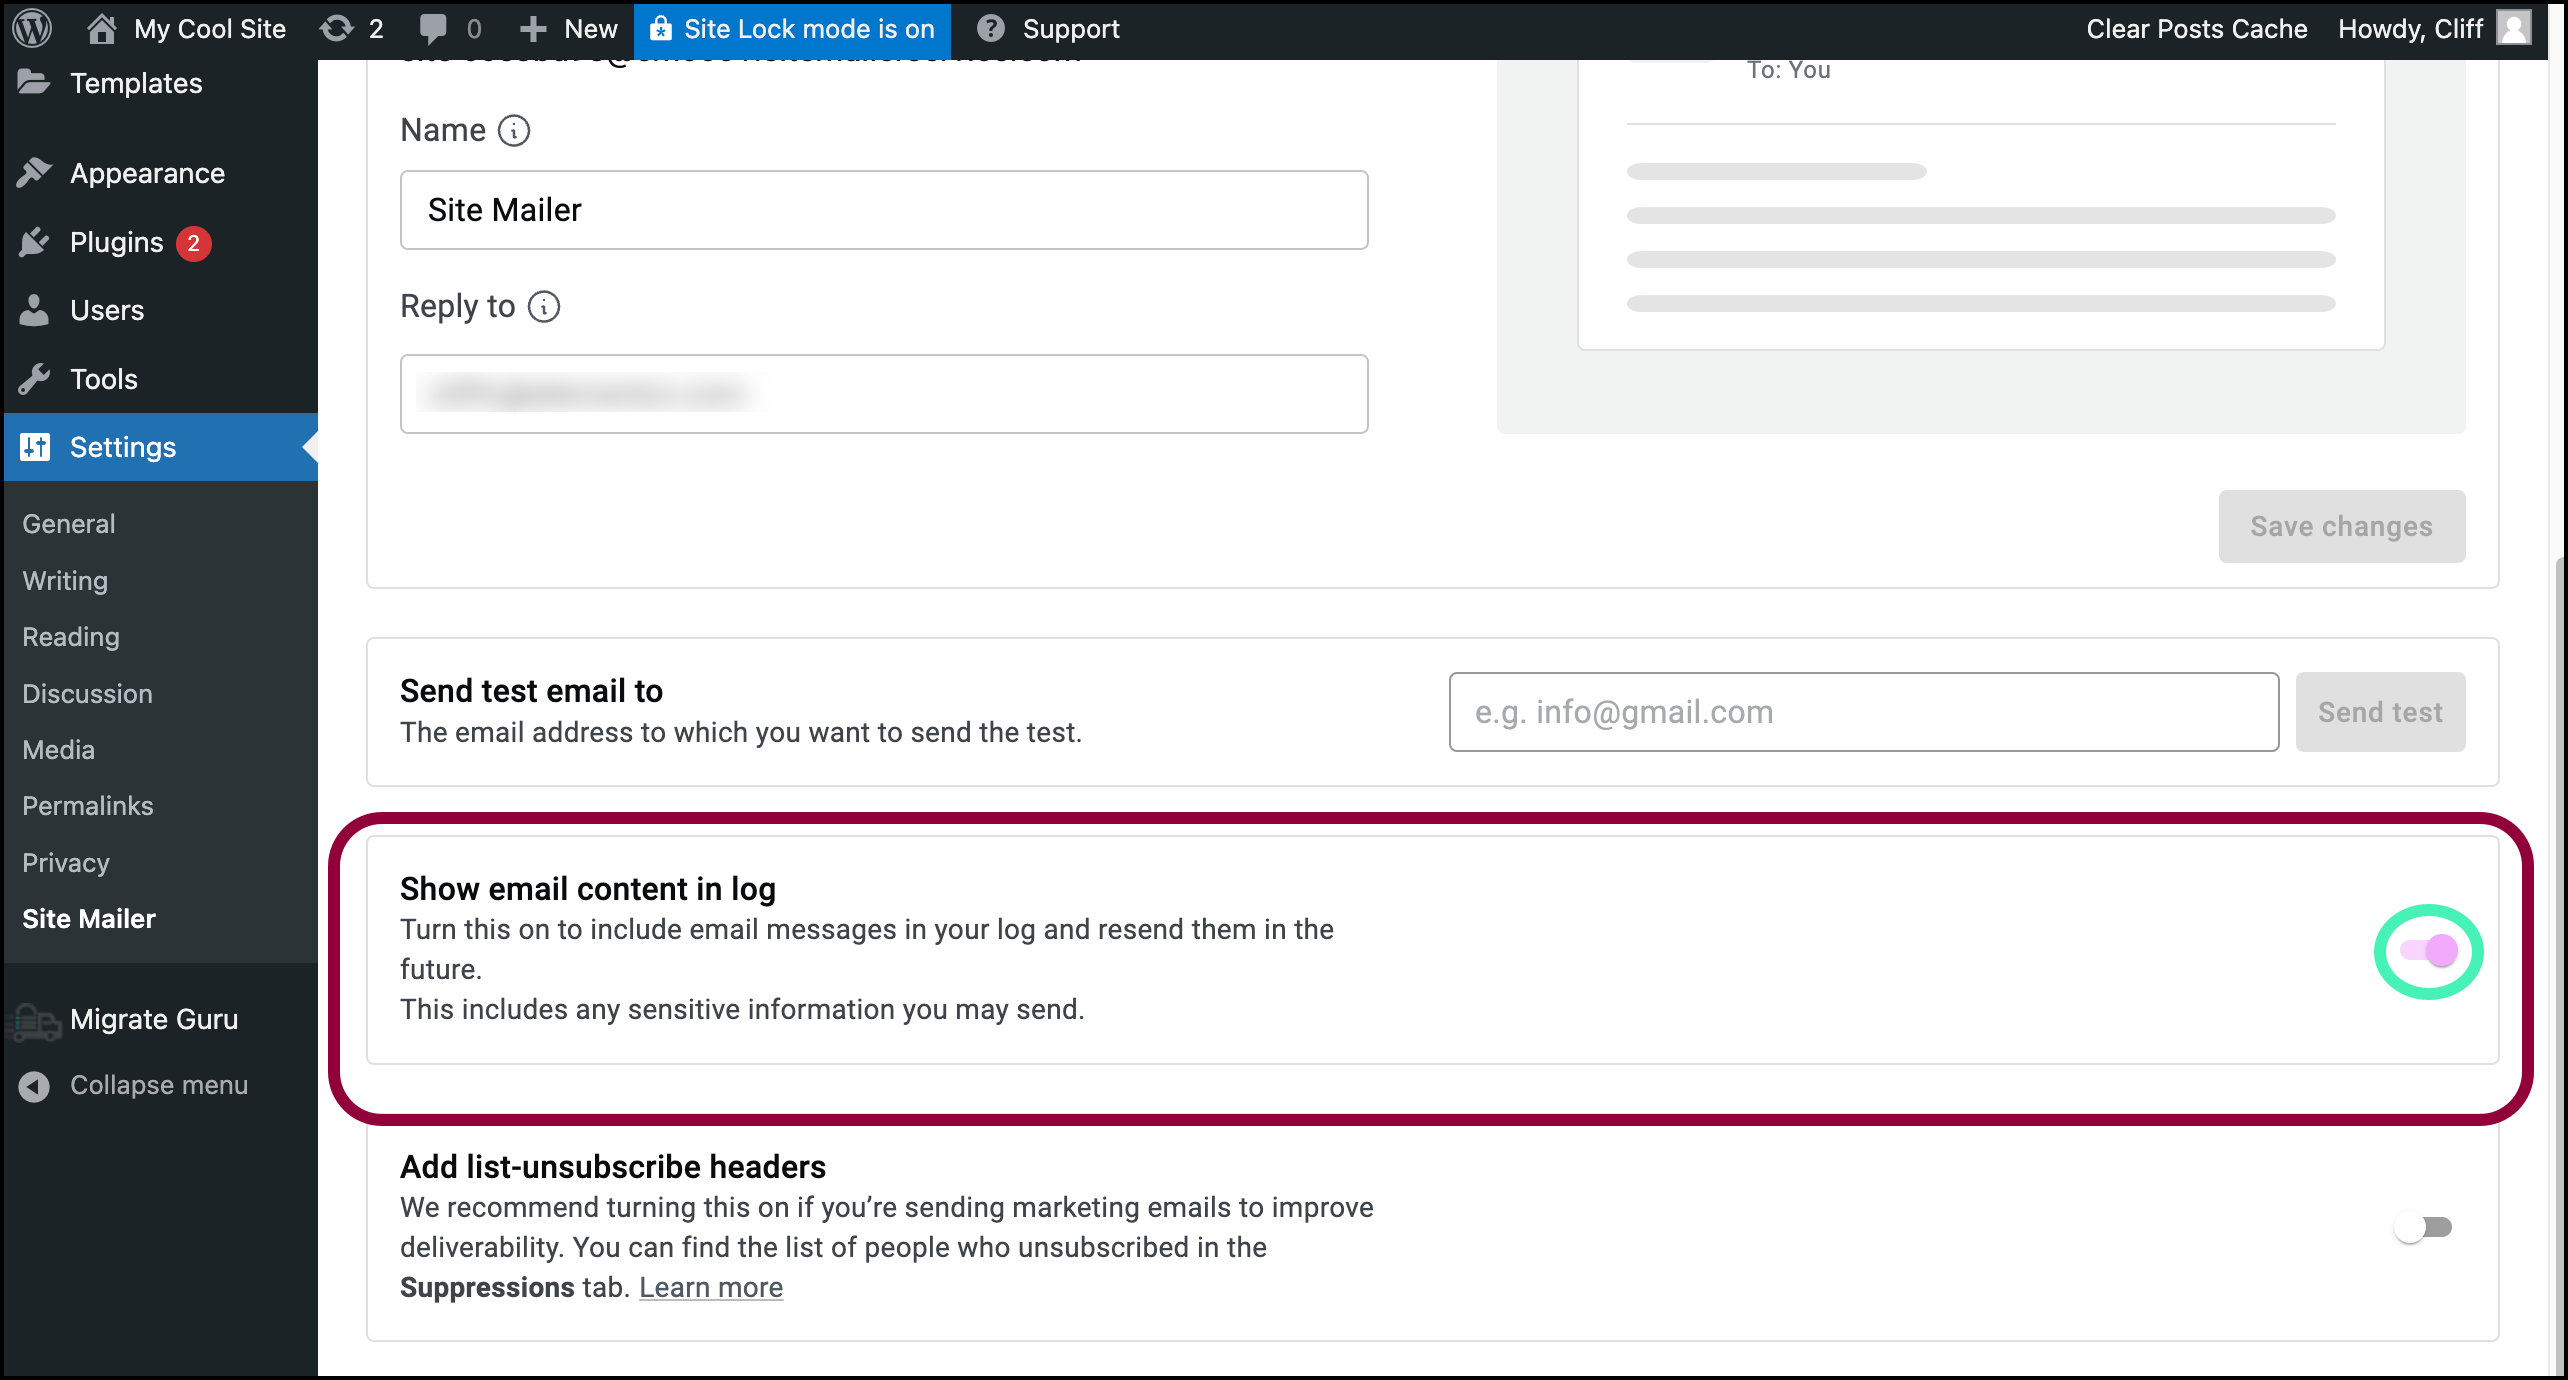
- Scroll down to the Show email content in log section and toggle it on. This way you have access to more detailed logs and be able to resend failed emails.
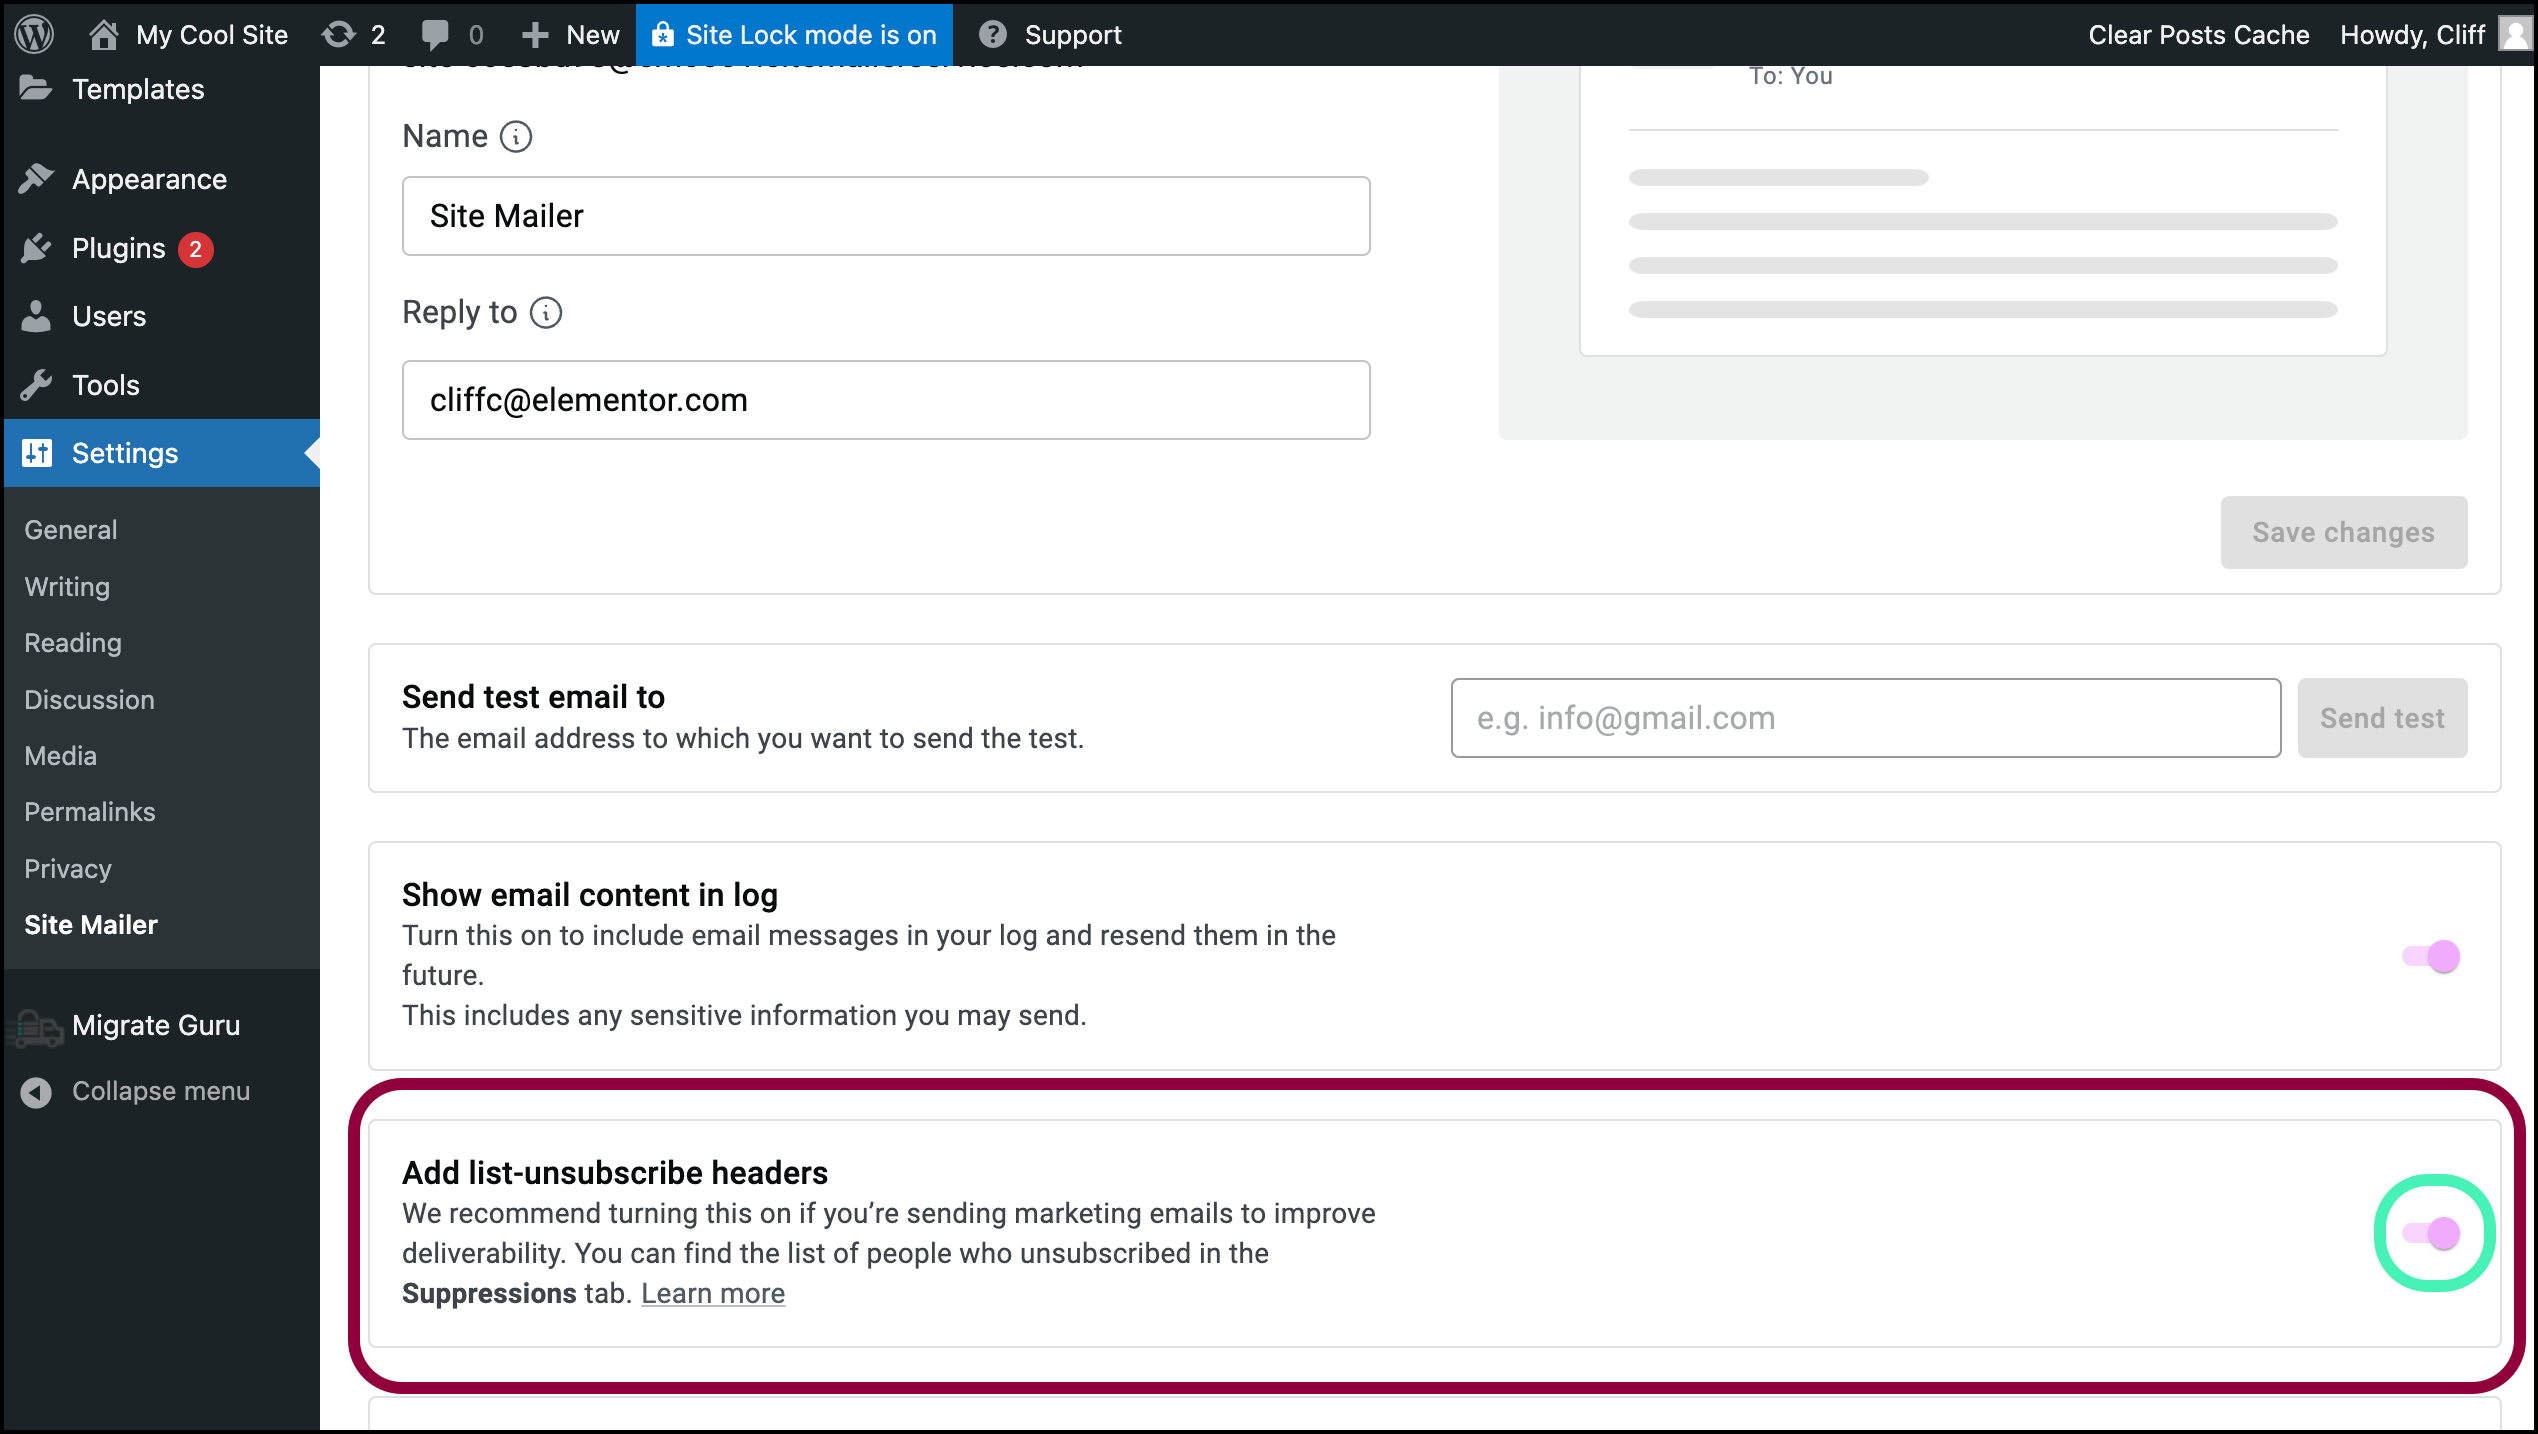
- Toggle Add list-unsubscribe headers on. This will allow you to comply with email regulations and give recipients an easy way to unsubscribe.
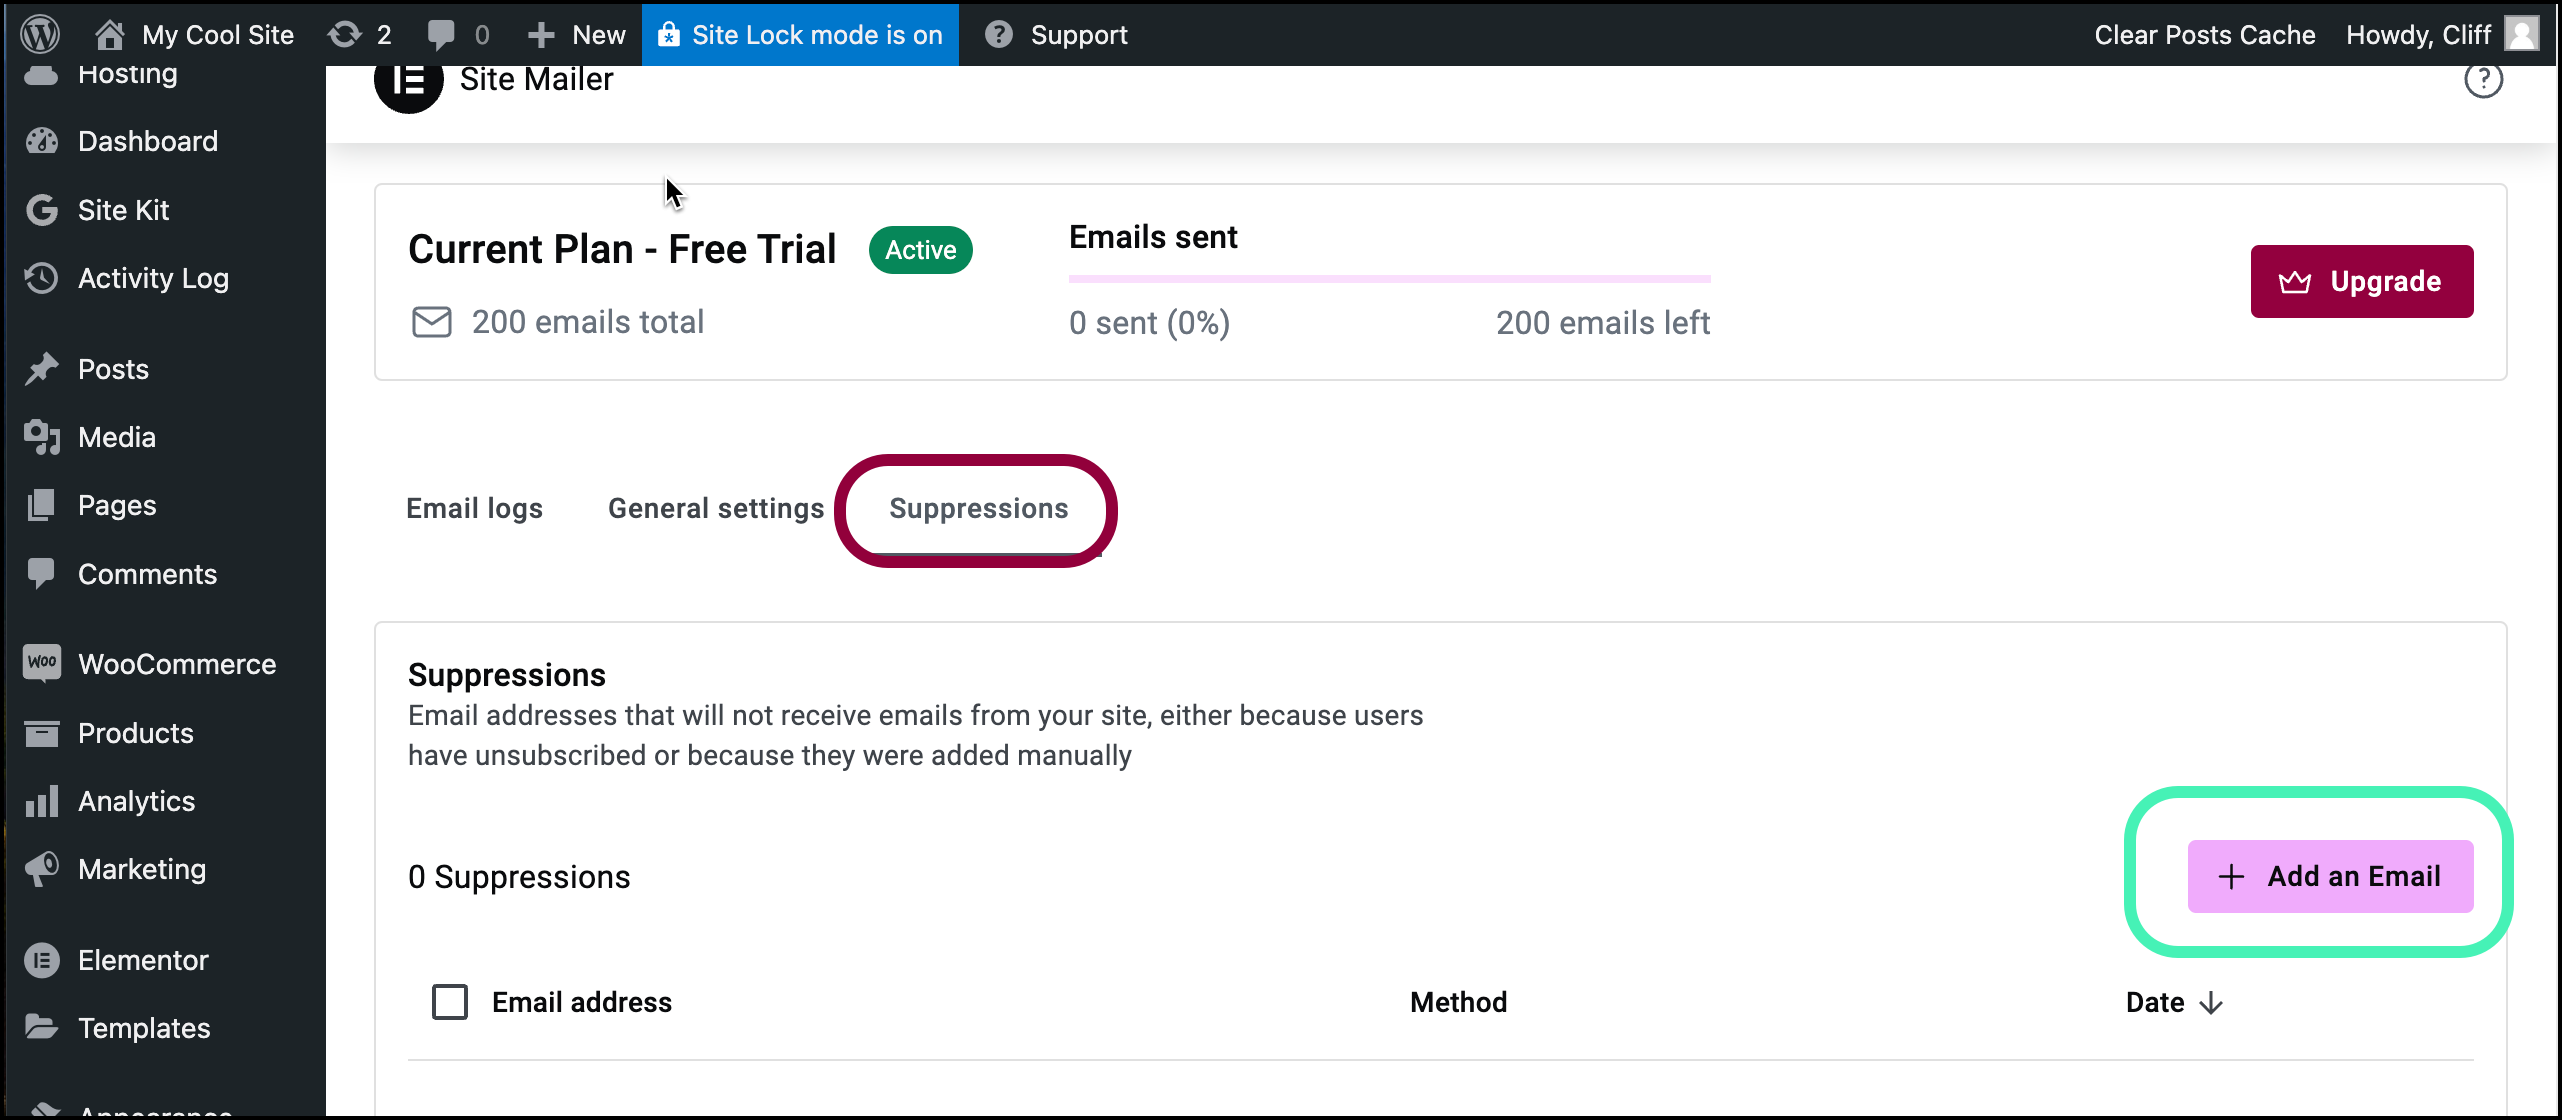
- The Suppressions tab lists users who have unsubscribed, ensuring compliance with email regulations. You can manually add addresses to the suppressed list by clicking Add an Email, and entering the email address to block.
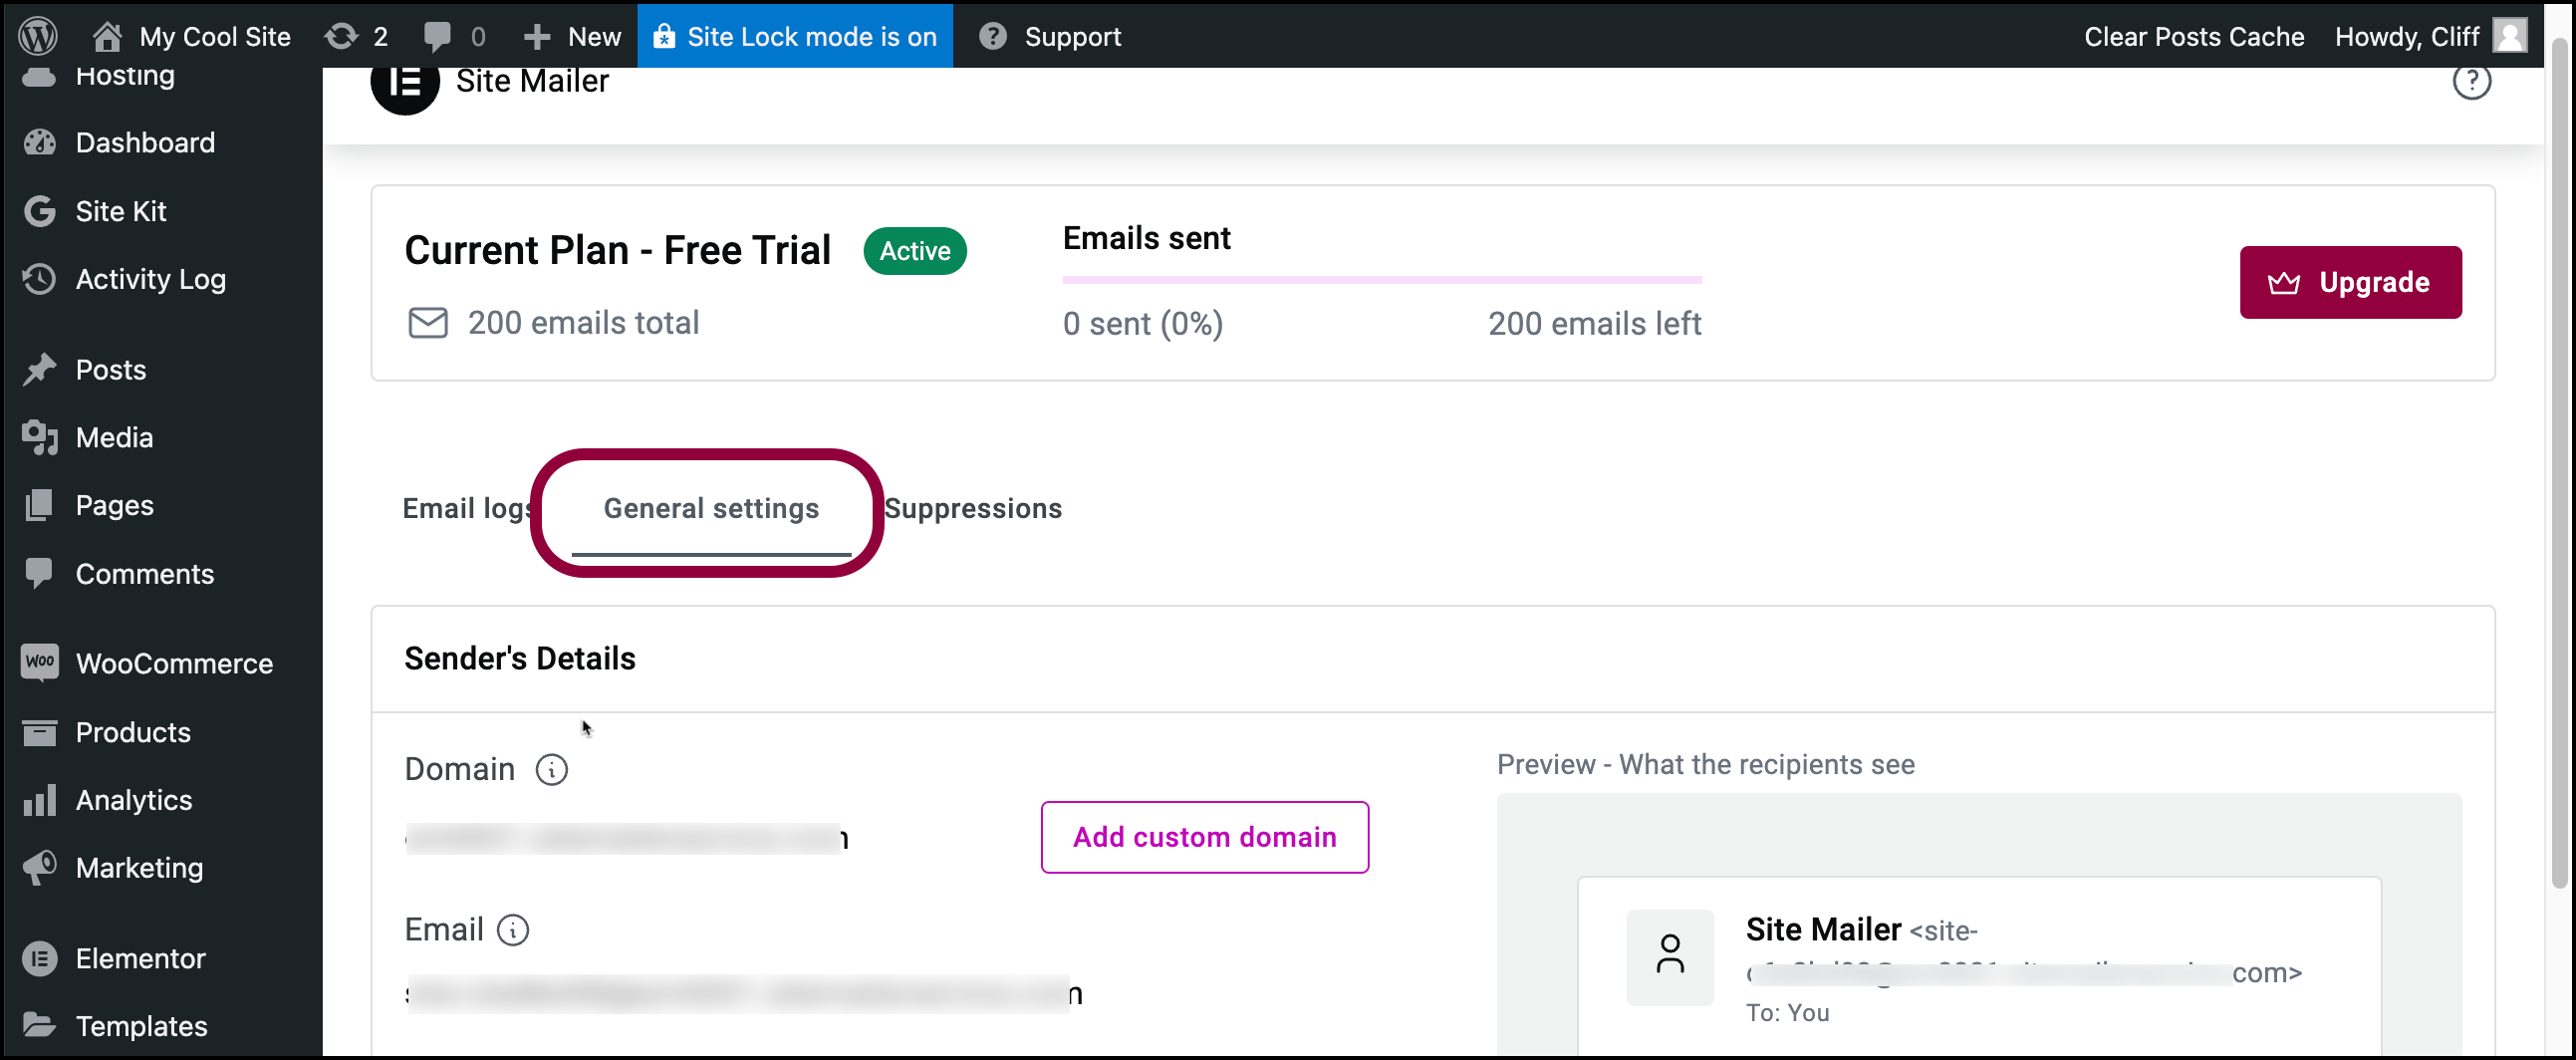
- Click General Settings.
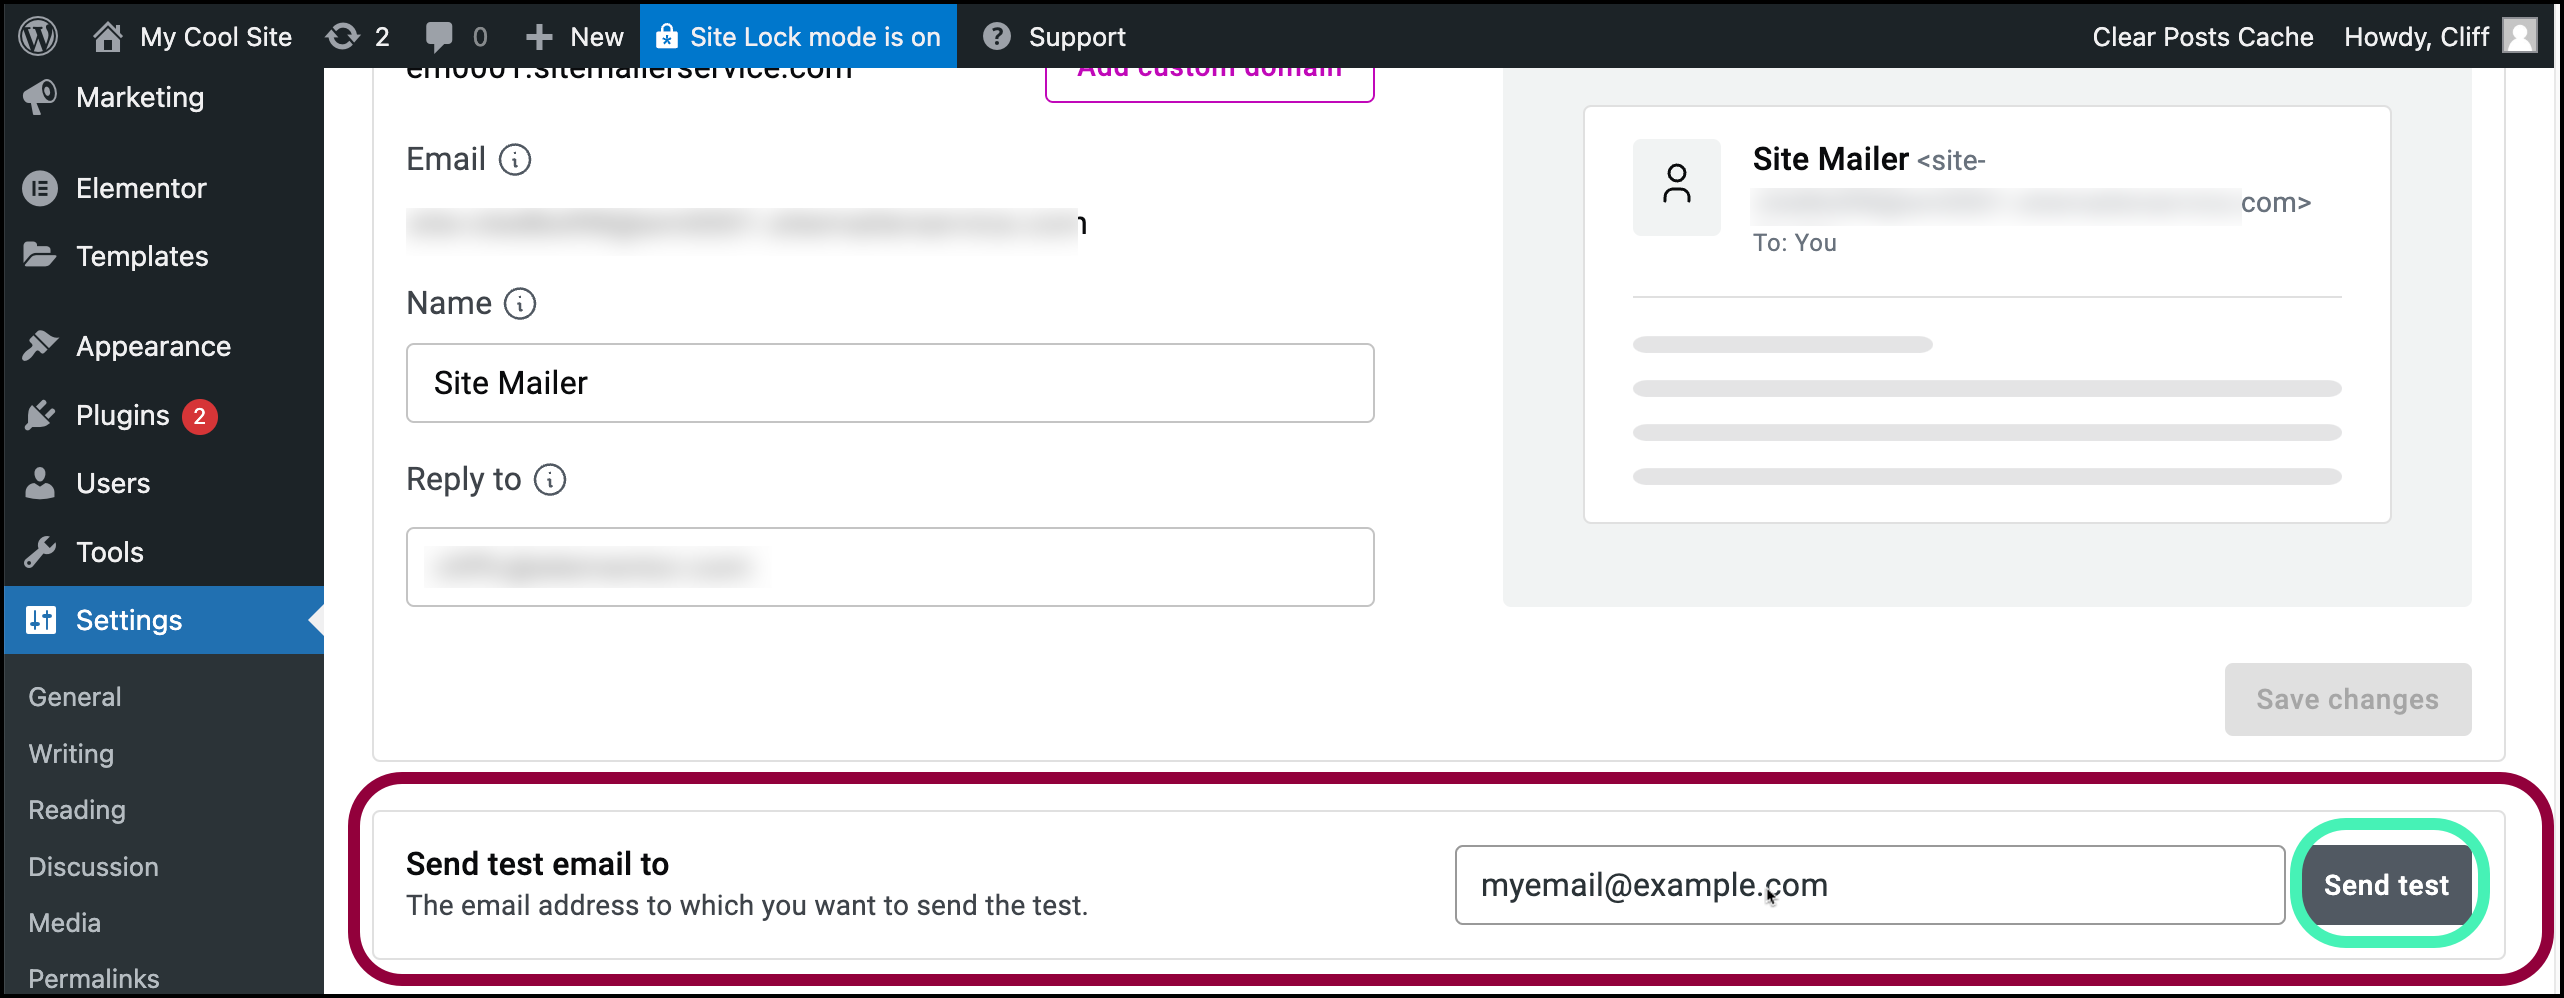
- Scroll down to the Send test email to section. Then send a test email by entering your email address and clicking Send test email. Check your inbox to confirm receipt. If it doesn’t arrive, check the delivery status in Site Mailer, and note the reason for failure. For details see, Send test email.
- The email logs screen contains records of emails sent over the past 30 days. This dashboard displays:
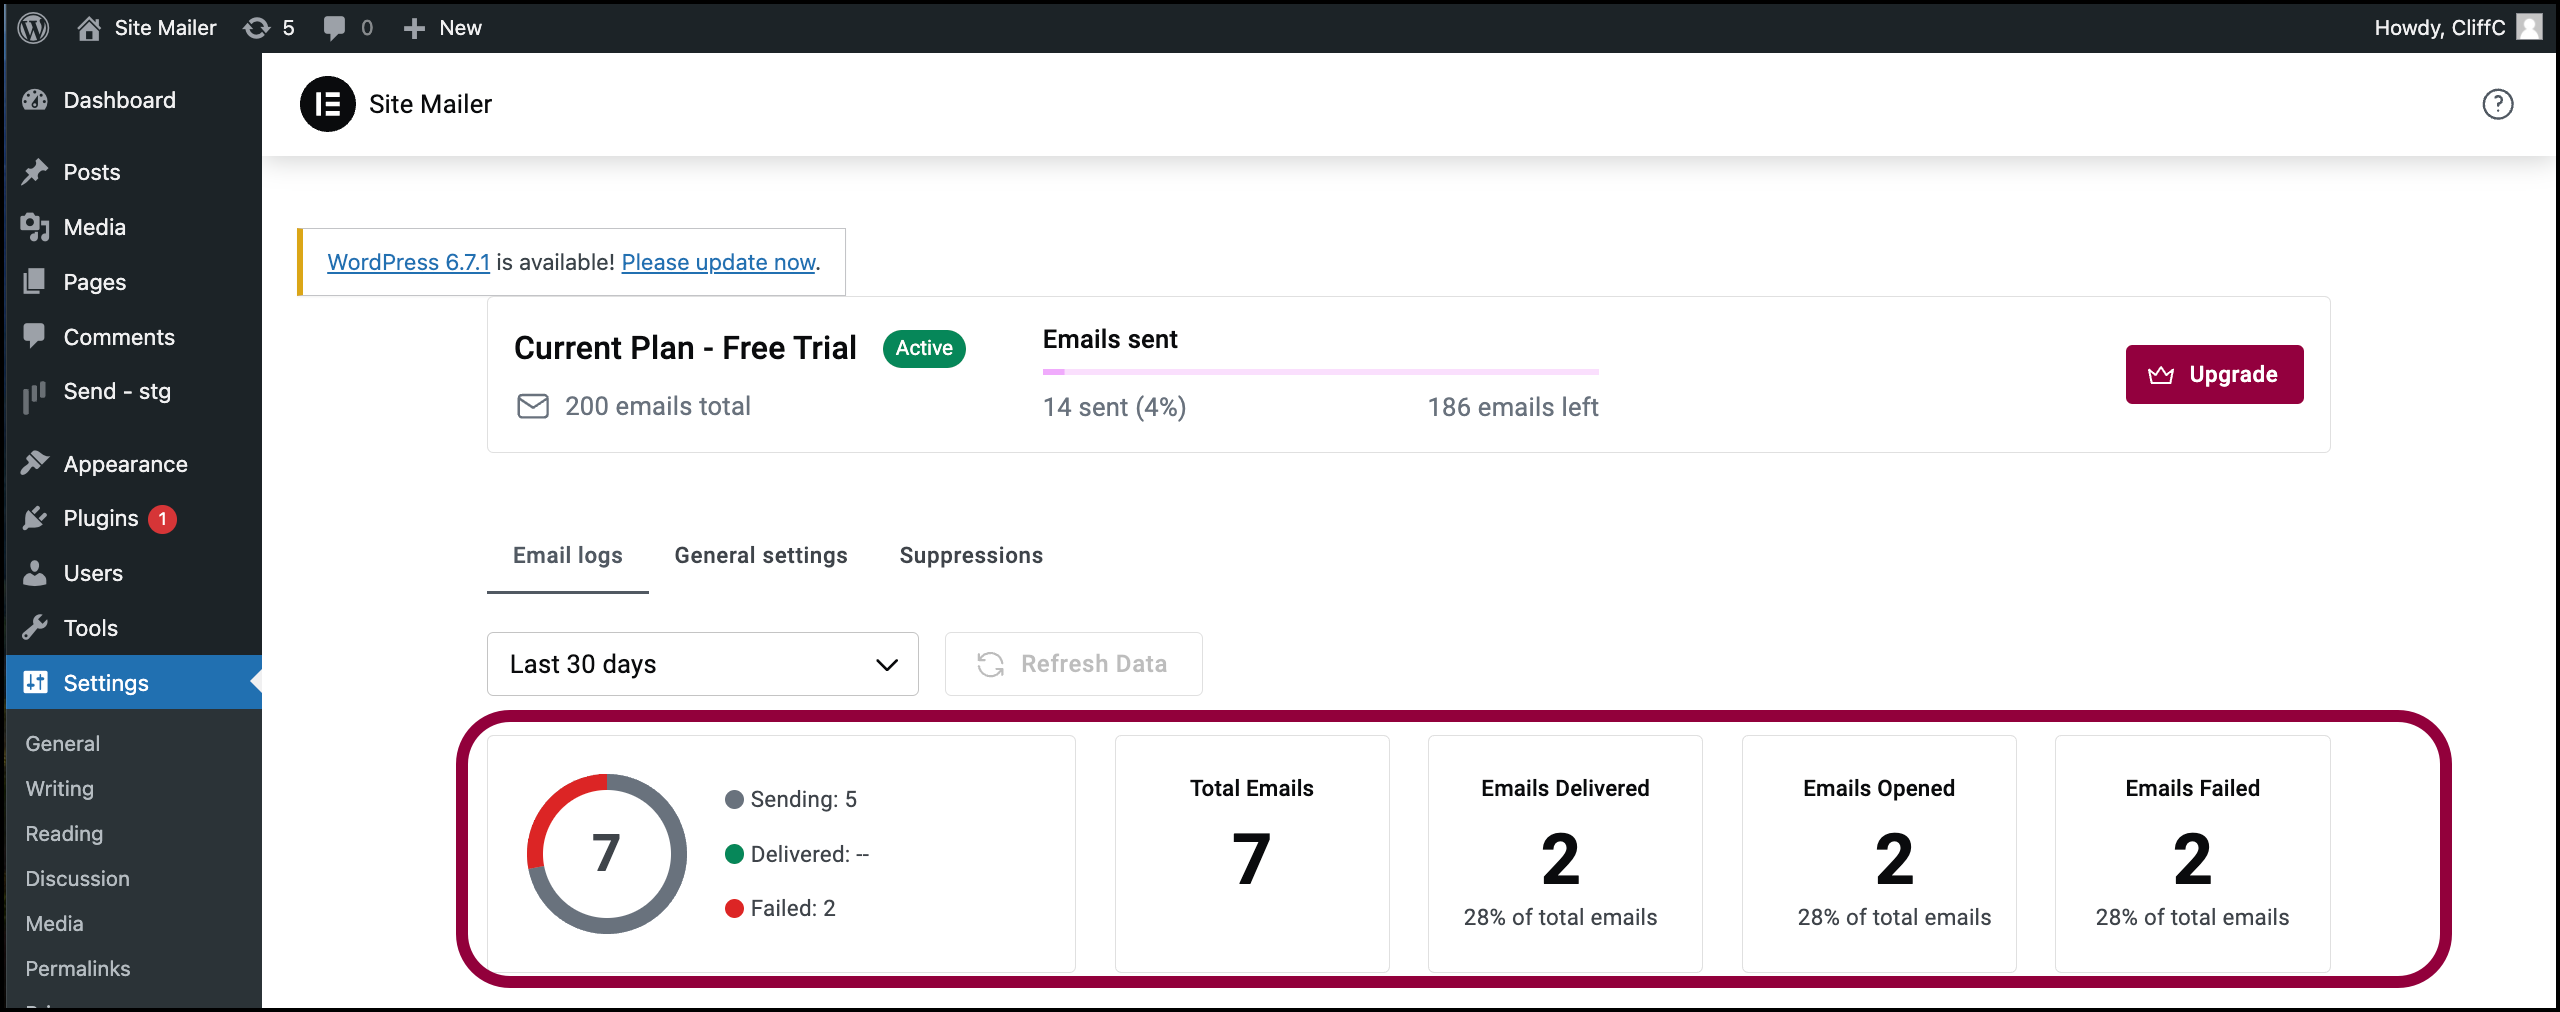
- The total number of emails sent.
- The number of emails delivered.
- The number of emails opened.
- Emails that failed to be delivered.
- The log itself contains:
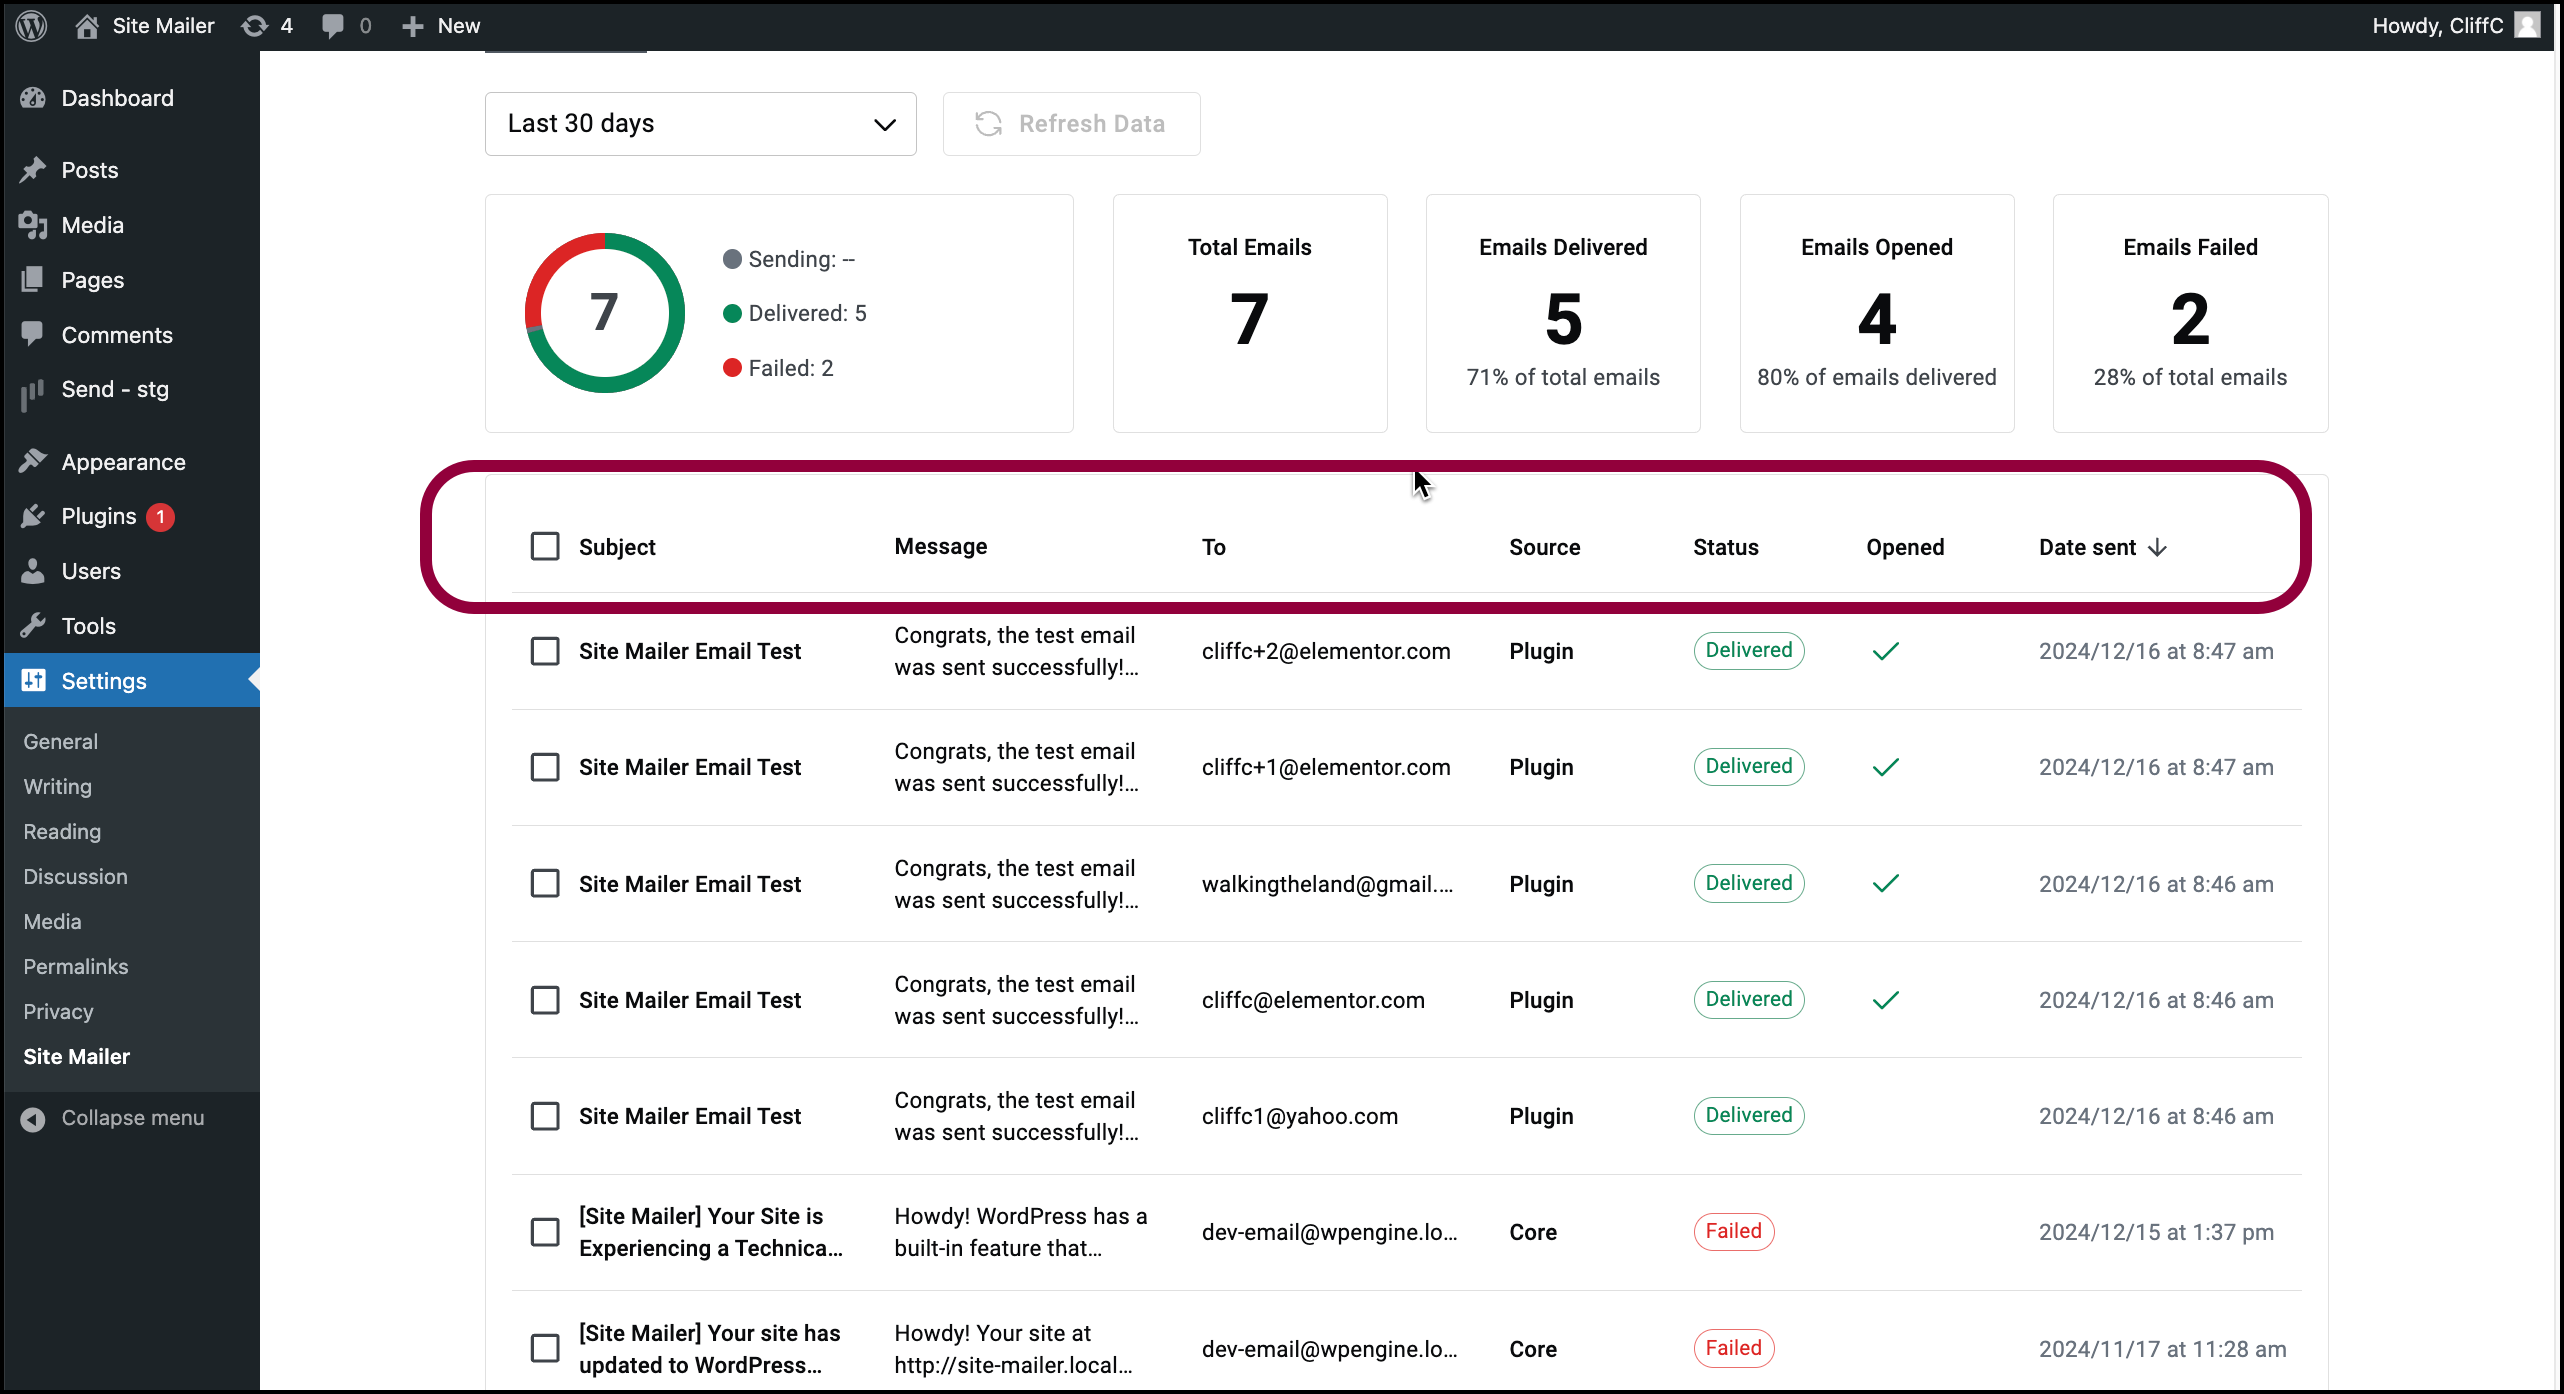
- The Subject line.
- The start of the Message. If you toggled Show email content in log on, then hovering over the message field will display the entire message.
- To whom the email was sent.
- The Source of the email (usually the Site Mailer plugin)
- The Status of the email, for example, if it is in the process of being sent, if it has been received, if it failed to be delivered. If the email failed to be delivered, hover over the Failed, notice and the reason for failure will appear as a tooltip. You can resend or delete the email.NoteUnderstanding why emails don’t reach their destination, can help you troubleshoot your email list.
- A checkmark if the email was Opened.
- The date the email was sent.NoteThese email analytics help you efficiently manage your sites messages and give you helpful insights about your customers.
Install for Elementor One plugin users:
Choose from two options to install Email Deliverability (formerly Site Mailer)
Option 1 to get Email deliverability – install it through the setup of Elementor One:
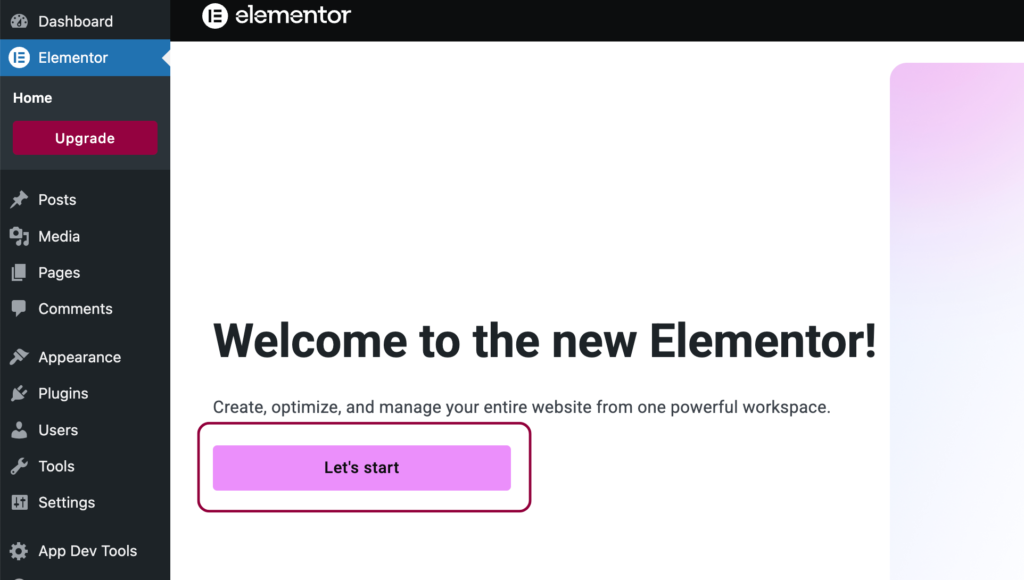
- From WP Admin, navigate to Elementor>Editor.
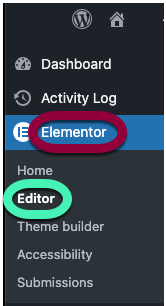
- Click Let’s start.
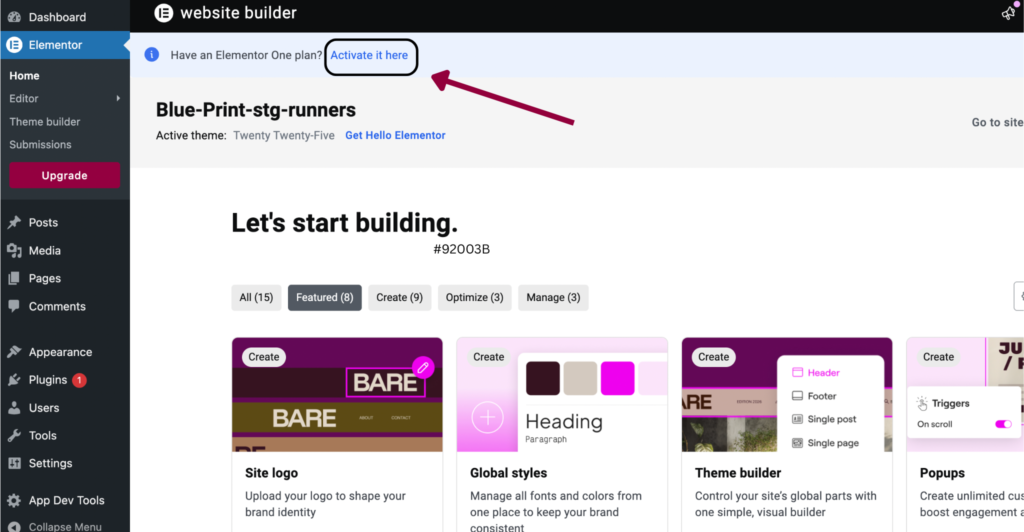
- Click Activate it here.
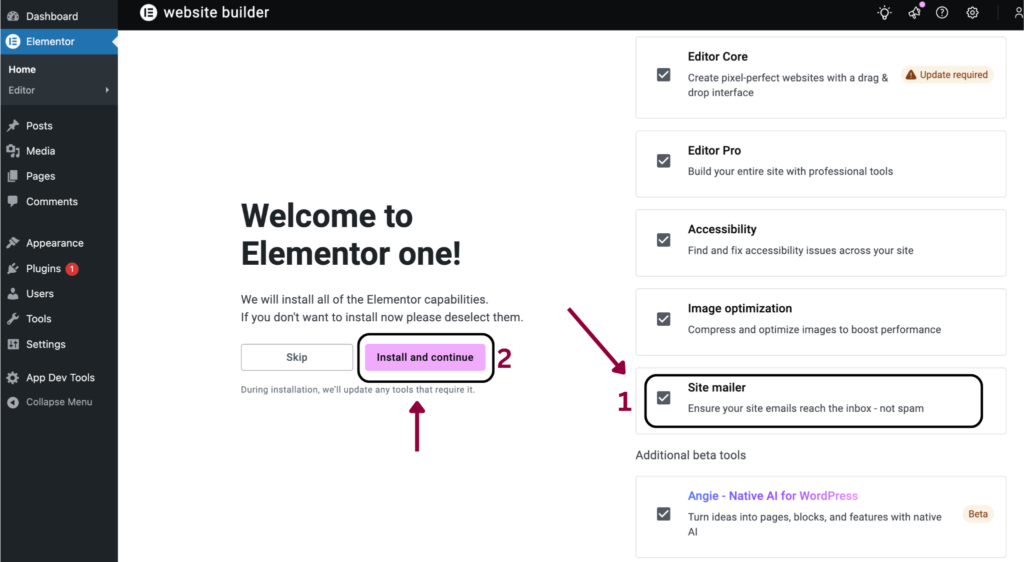
- Leave Site Mailer checked and click Install and continue.
- Refresh the page, then you could see the Site Mailer under WordPress Dashboard > Settings.
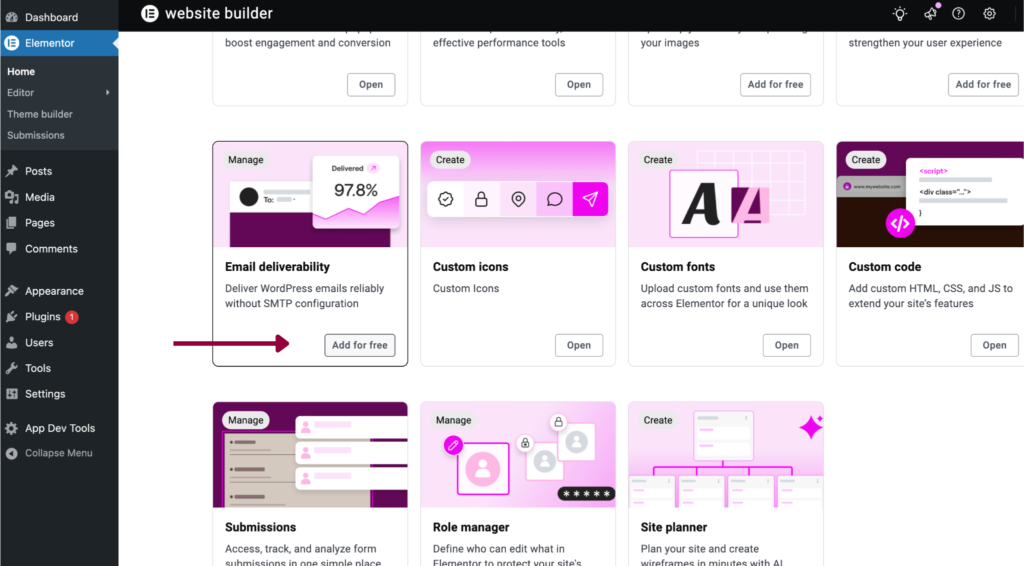
Option 2 to get Email deliverability – after ONE is installed:
- From WP Admin, navigate to Elementor>Home.
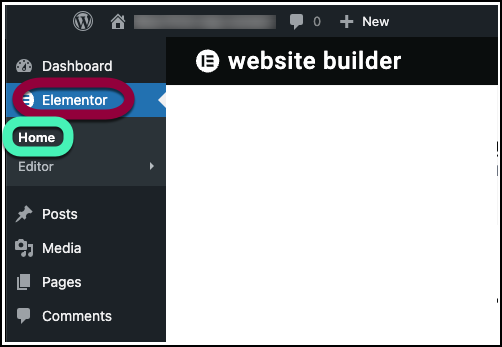
- Scroll down till you see Email Deliverability and click Add for free
Benefits of Site Mailer
- 1 custom domain.
- No need for an additional SMTP plugin.
- No API or integration needed.
- 30 day log retention.
- No daily email limit.
- Email details and analytics.
- Open rate tracking.
- DKIM, DMARC & SPF support.
- Failure Reason Troubleshooting.
- Email resend and testing options.
- Manage suppressed emails.
- Multiple recipient logs.
- Expert support (paid subscriptions only).
You’ve successfully set up Site Mailer on your website. Your emails are now configured to send reliably through our system, improving deliverability and user experience.
If you encounter any issues, visit our support documentation or contact our support team for assistance. We’re here to help ensure your email communication runs smoothly.
Thank you for choosing Site Mailer!

