Site Mailer has two dashboards:
- Email logs
- General Settings
Email logs
Email logs include a wide range of information about the emails Site Mailer has sent out, including a list of all sent emails.
General information
The general information section includes:
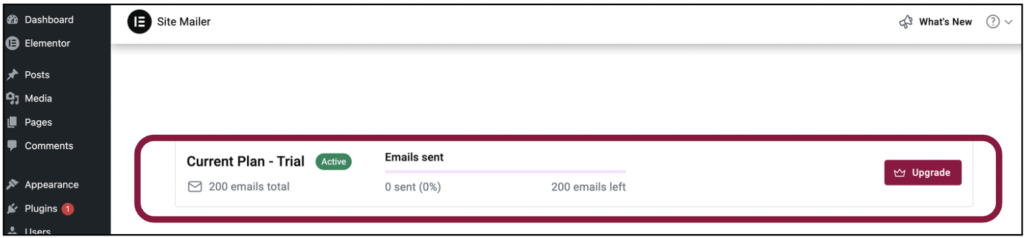
- Plan Status. This includes:
- Your plan type.
- How many emails are included in your plan.
- The percentage of your email quota that you’ve used.NoteThe free plan includes a lifelong quota of emails. Other plans limit the number of emails sent per month.
- The Upgrade button.
- If you’ve used up you quota of emails, a notification will appear here.

- A dropdown menu filtering the results below:
- Emails sent in the last 30 days.
- Emails sent today.
- Emails sent yesterday.
- The refresh icon
 : Normally the email log is updates every 12 hours. Click to refresh icon to automatically update your email log.
 - Total emails: The total number of emails sent by Site Mailer.
- Emails delivered: The number of emails that reached their destination.
- Emails opened: The number of emails that recipients actually opened.
- Emails failed: The number of emails that were not successfully delivered.
- Resend icon: Send the email again.
The email log
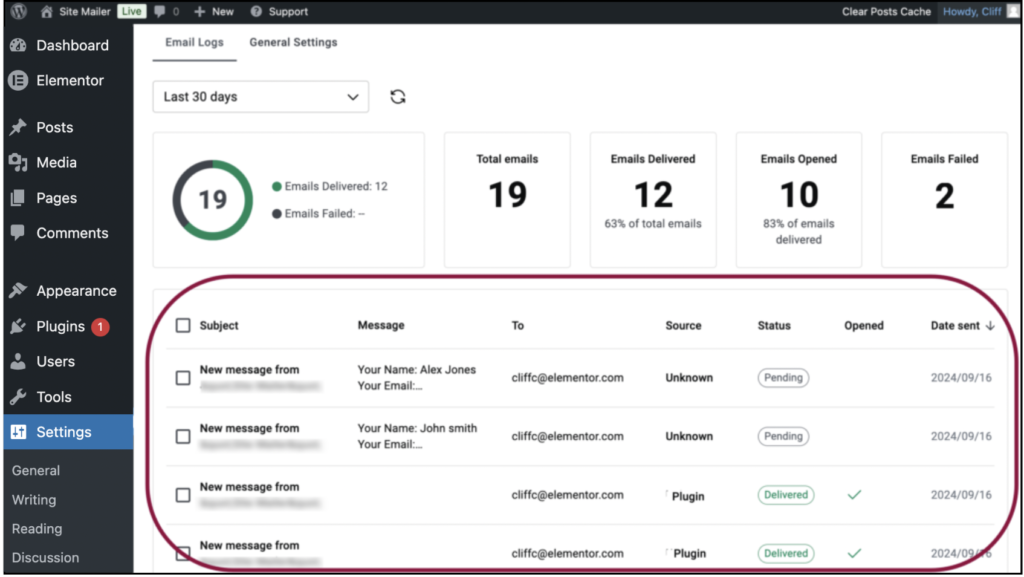
The email log contains a list of all emails sent by Site Mailer. The information about these emails includes:
- Subject: What appears in the subject line of the email.
- Message: The content of the email. Will only display if you elect to keep a record of all emails. For details, see Enable/Disable email logging.
- To: The address where the email was sent.
- Source: Where the email was sent from. Some possible sources are:
- Plugin: Emails from Site Mailer, such as test emails.
- Core: emails notifications sent by WordPress.
- Status: Emails can have one of the following statuses:
- Pending: Site Mailer hasn’t sent it out yet.
- Delivered: The email reached it’s destination.
- Failed: Was not delivered.
- Not sent: The email was not sent. This generally occurs if you’ve surpassed your email quota.NoteEmail status is updated every 12 hours.
- Opened: Was the email actually opened by the recipient.
- Date Sent: When Site Mailer sent the email.
General Settings
General Settings lets you control where and from whom your emails are sent. It is also used to send test emails.
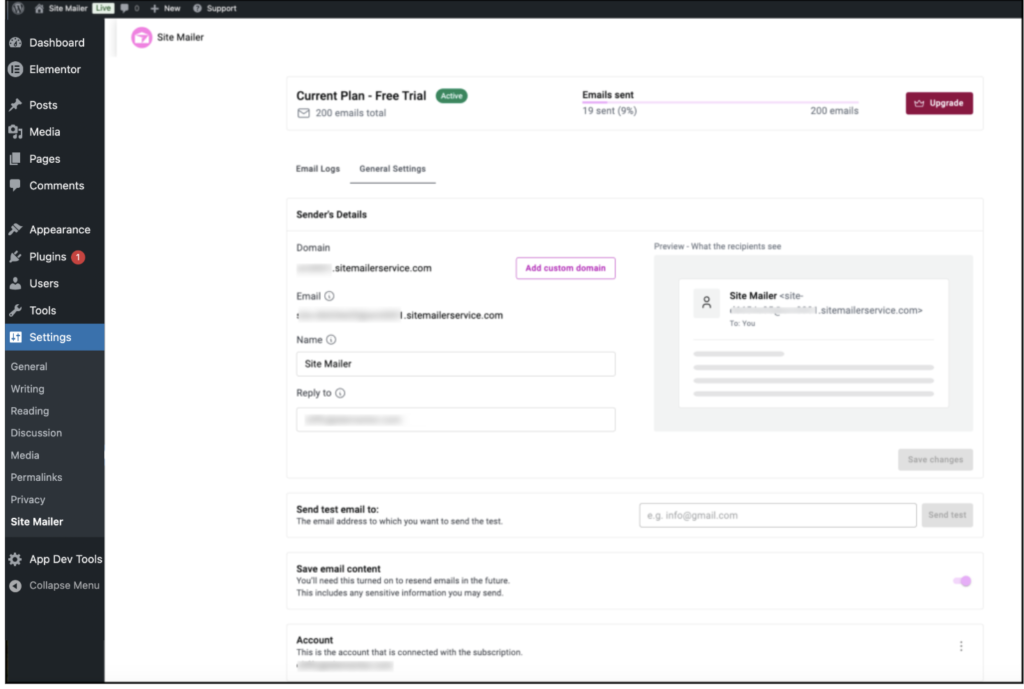
Sender’s Details
Sender’s details include:
- Domain: By default, these emails are sent from the Site Mailer’s servers, however you can link Site Mailer to your domain so the emails look like they are sent from your site. This is recommended as it will give your emails greater visibility. For details, see Add custom domain.
- Email: Change how email recipients see sender information.
- “From” email: When you install Site Mailer, you are assigned an email address that is used as the Sender’s email, for example [email protected]. If you add a custom domain to Site Mailer, you’ll be able to customize this address for greater visibility.
- Name: In addition to a sending address, Site Mailer assigns a default name as the sender’s name. Use the text box to customize this name. For example, you can have emails sent from Info instead of Site Mailer.
- Reply to: (Optional) By default this is the email of the site admin. You can assign a custom email for use when customers respond to emails. For instance, when a customer replies to an email sent by Site Mailer you can send it to the address – [email protected] so you can give it special consideration.
- Preview: Show you the sending name and address of your emails. A good way to make sure the changes you make are implemented.
Send test email to
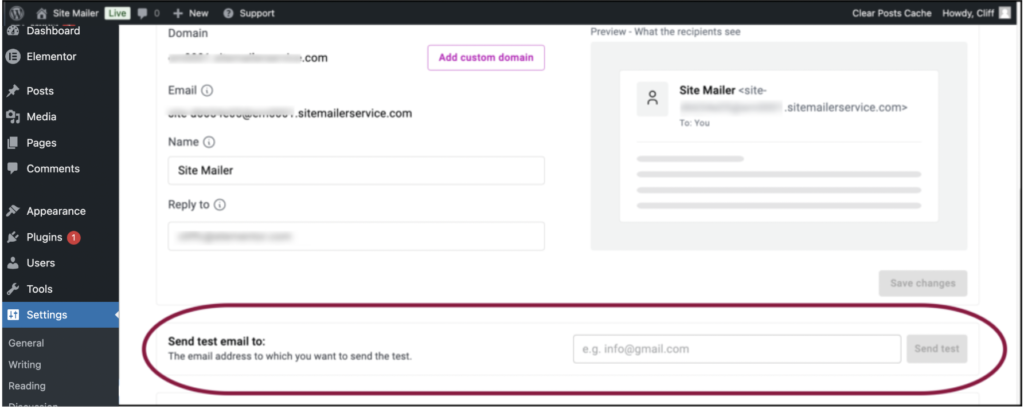
In order to make sure your emails are sent properly, you can send a test email. Just fill an address and click Send mail. For details, see Send a test email.
Save email content
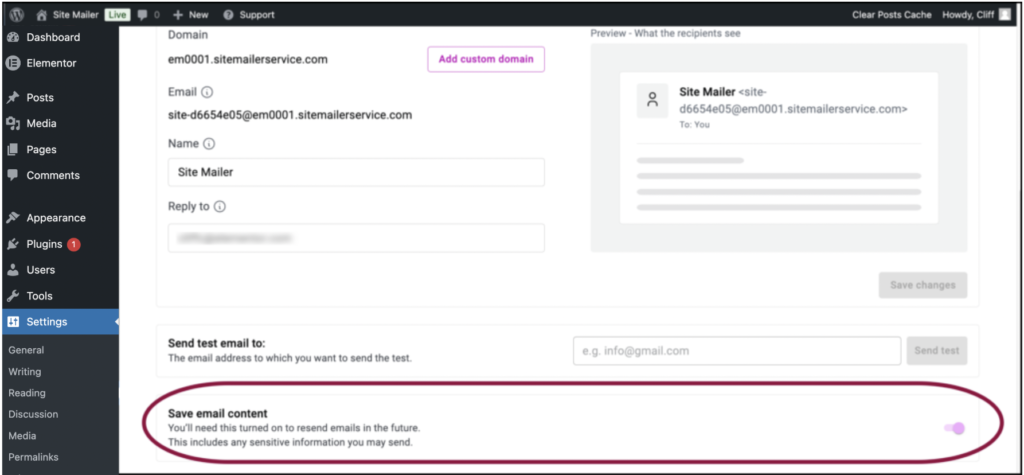
Site Mailer can keep track of all the emails set by the system. Toggle on in order to start tracking emails. You’ll need to toggle this feature on in order to resend emails.
Account
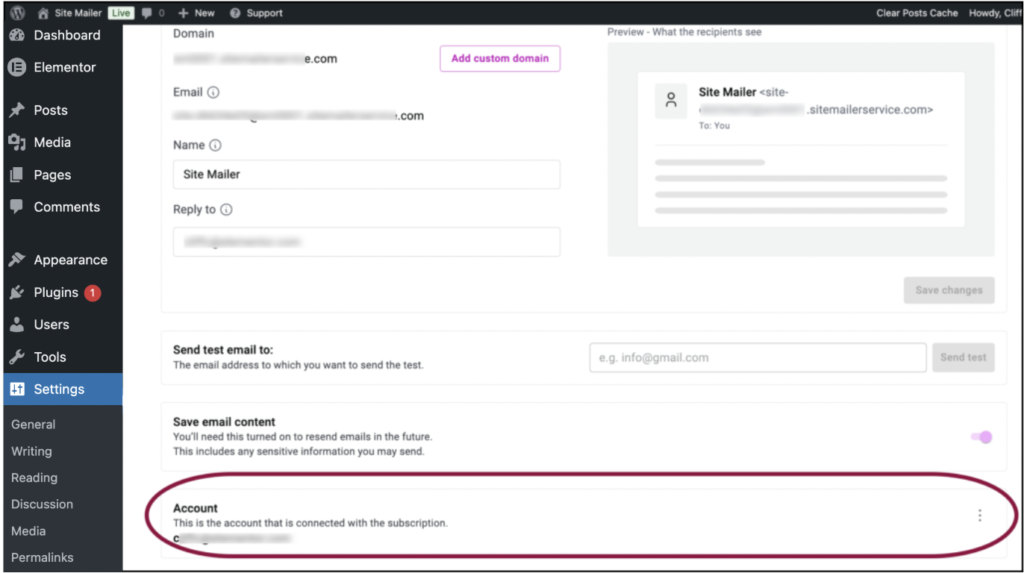
In the Account area you can see what account Site Mailer is linked to. Click the ellipses to switch accounts or deactivate your subscription. See Switch accounts or Deactivate your subscription for details.

