
Keeping your WordPress site compliant with European privacy laws can feel like a moving target, but you don’t have to do it alone. You’ll learn the core GDPR requirements, how to scan for tracking scripts, and set up a compliant consent banner.
Key Takeaways
- Prioritizes user consent by blocking tracking scripts before explicit permission is granted.
- Integrates Google Consent Mode v2 to maintain campaign performance while respecting privacy.
- Minimizes external database bloat by using native WordPress dashboard solutions.
- Maintains complete consent logs to defend against future regulatory audits.
- Simplifies user settings by giving visitors an easy way to change or withdraw their choices.
Understanding EU Cookie Law in 2026
You might assume EU rules don’t apply if your business sits outside Europe, but that’s a misconception. The GDPR protects European citizens, so tracking a visitor from France, Germany, or Spain means the rules apply no matter where you’re based.
A cookie is a small text file placed on a visitor’s device to track behavior, remember settings, or serve ads. EU law splits cookies into categories, from session to behavioral trackers. You’ll typically find these on a site:
- Identifies user sessions via
_gatracking cookies for statistical analysis. - Stores advertising target profiles through
_fbppixel cookies. - Saves customer shopping preferences using standard e-commerce session data.
- Monitors load balancing using server affinity cookies to protect hosting performance.
- Tracks video viewer preferences through embedded media players.
- Remembers cookie consent selections via local compliance storage keys.
The ePrivacy Directive requires prior, informed consent before placing any non-essential cookie. Your site can’t load analytics or marketing trackers the moment someone arrives; wait until they say it’s okay.
The Essential Pillars of Valid Consent
To keep your site safe, your consent banner needs to follow specific rules. A bar saying “By using this site, you accept cookies” is no longer acceptable. Consent has to be explicit, active, and easy to manage.
Here are the four legal definitions of valid consent you need to build into your site:
- Freely Given Consent – Your visitor needs a real choice. You can’t block content because someone refuses tracking; a “cookie wall” violates EU rules.
- Specific Opt-Ins – You can’t bundle all trackers together. A visitor should approve analytics cookies while keeping marketing trackers off. Granular control is a real legal requirement.
- Informed Choice – Your banner must state what cookies you use, who operates them, and why, in plain language, not legal jargon.
- Unambiguous Actions – Consent requires an active step, like clicking “Accept.” Pre-checked boxes or assumed consent from scrolling are both banned under EU law.
Beyond those four pillars, make it easy for visitors to withdraw consent any time. If someone changes their mind, they should be able to reopen the panel and adjust their settings. A small, accessible tab in a page corner works well.
The Importance of Google Consent Mode v2 in 2026
If you use Google Ads, Analytics, or Tag Manager, Google Consent Mode v2 deserves your attention. Google made it mandatory for any site using its ad features to reach European users.
When a visitor declines cookies, Google’s tags get blocked, leaving gaps in your data. With Consent Mode v2, your site sends the visitor’s decision to Google, which switches to cookieless signals and anonymous data, keeping campaigns running without violating privacy.
Introducing Cookie Consent: The Dashboard-Native Feature
Managing compliance used to mean signing up for external platforms, paying fees, and pasting heavy script code into your header, slowing pages down. The Cookie Consent capability takes a different approach: built natively for WordPress, alongside Web Accessibility, managed from one dashboard.
Because it’s built into Elementor, you don’t need extra tabs to check cookie logs or adjust your banner. Access the Cookie Consent feature in minutes, in an entry-level plan or the complete Elementor One package.
“In the modern regulatory climate, using third-party iframe cookie widgets often slows down your page speeds and introduces security risks. Managing consent natively within your primary site-building ecosystem keeps your data clean and your compliance audit-ready.”
– Itamar Haim, Web Compliance Specialist
Here’s how the Cookie Consent feature handles your compliance requirements under the hood:
- Runs natively from your main WordPress dashboard without third-party cloud accounts.
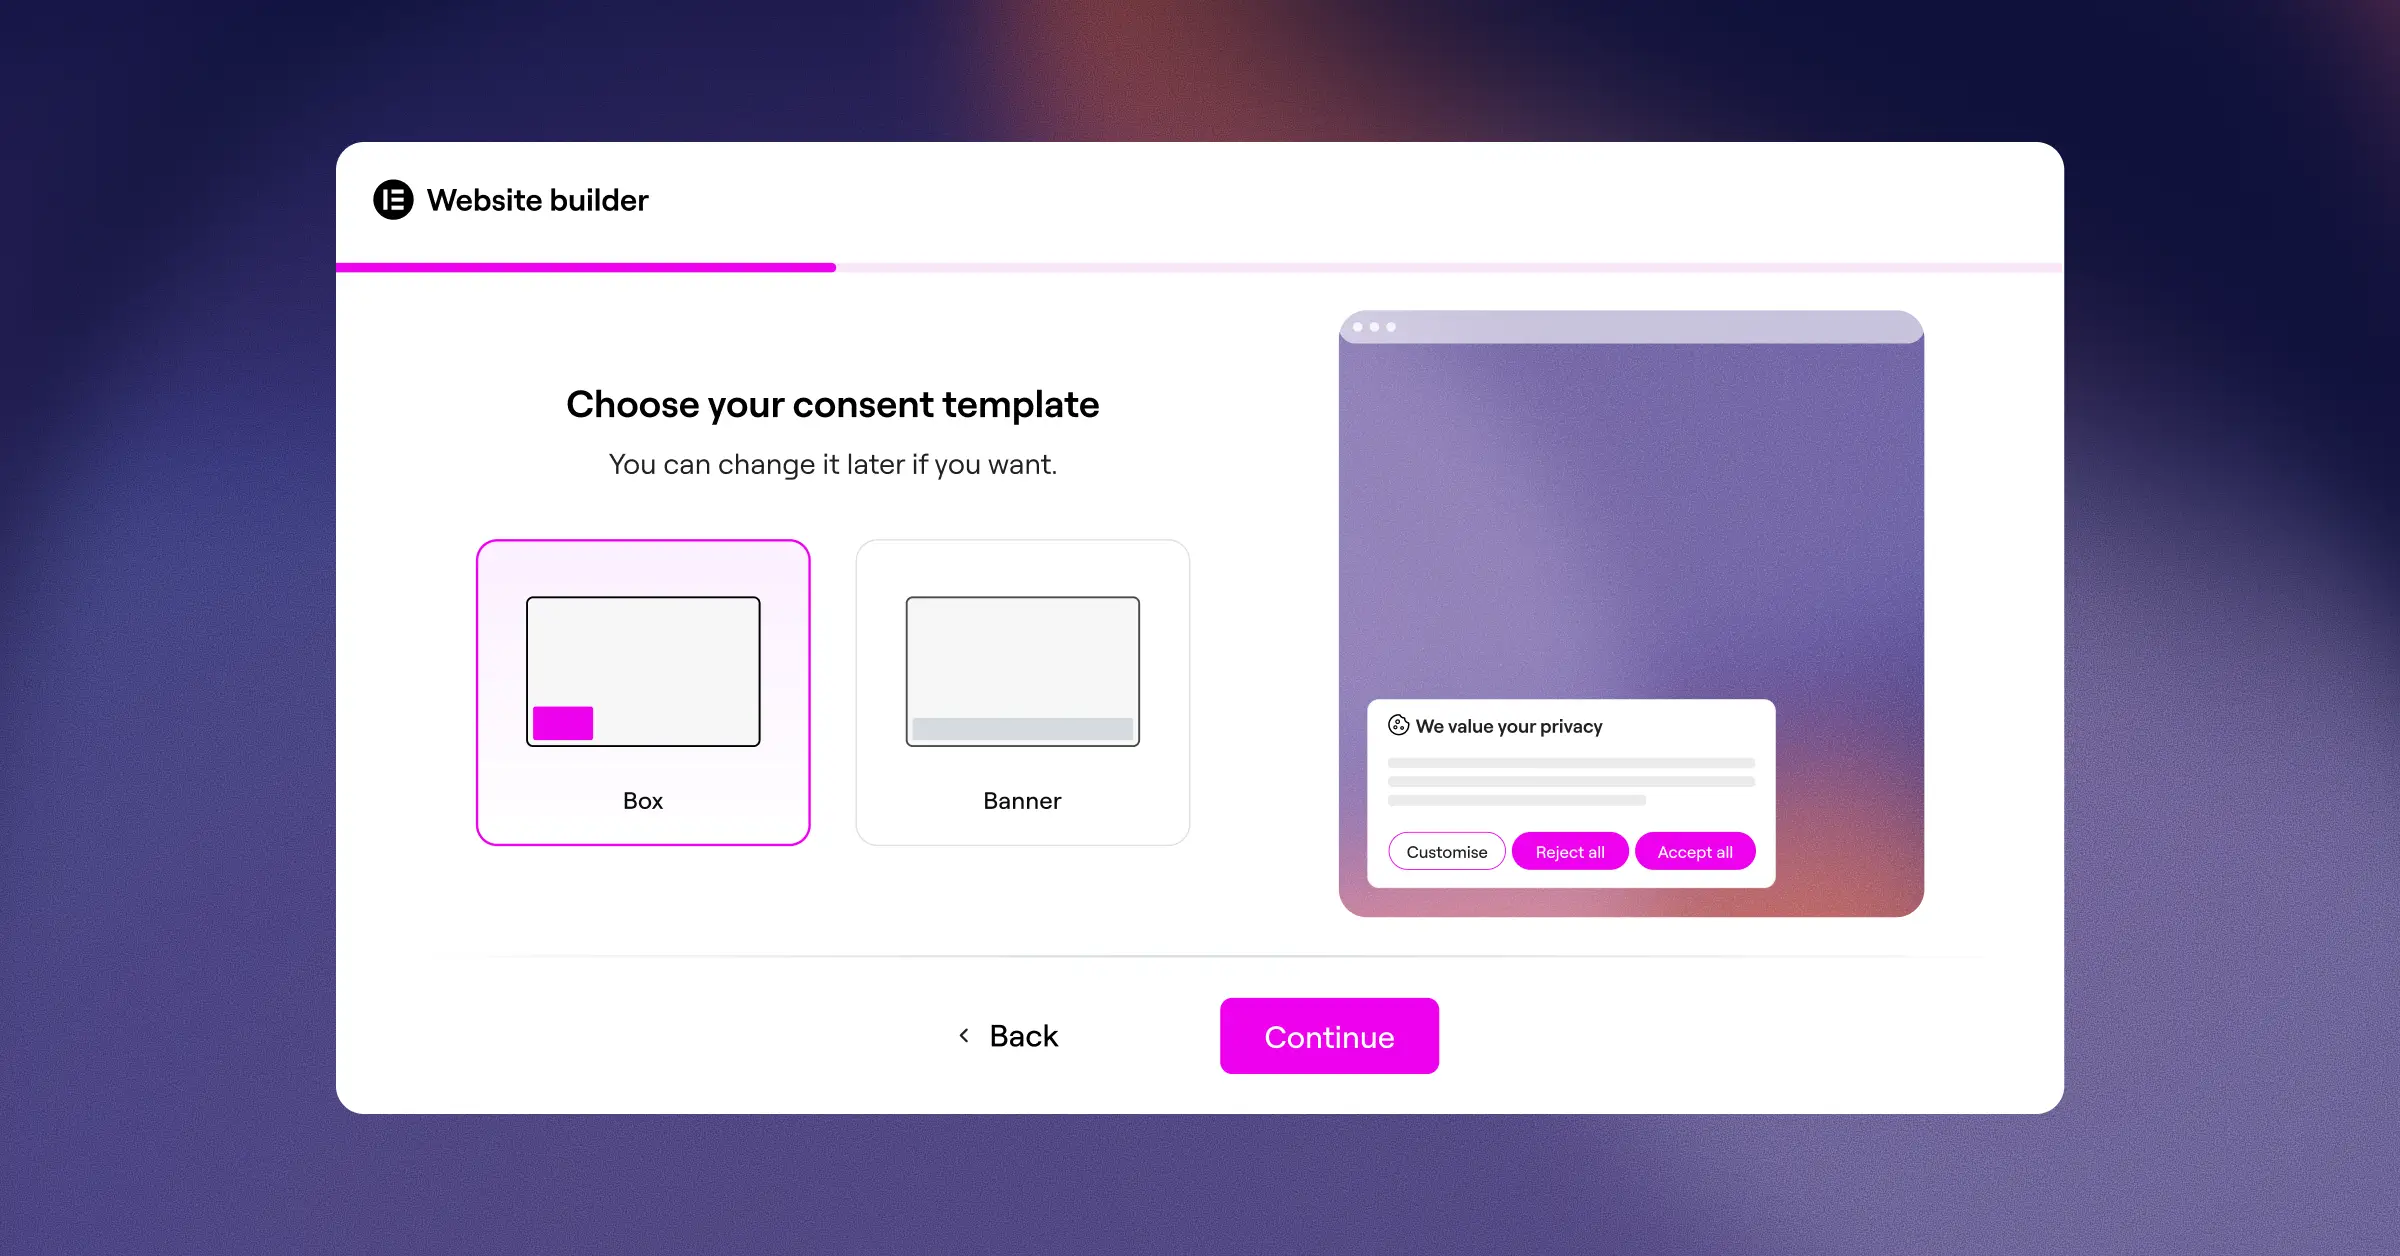
- Configures your basic settings in a three-step setup, done in under five minutes.
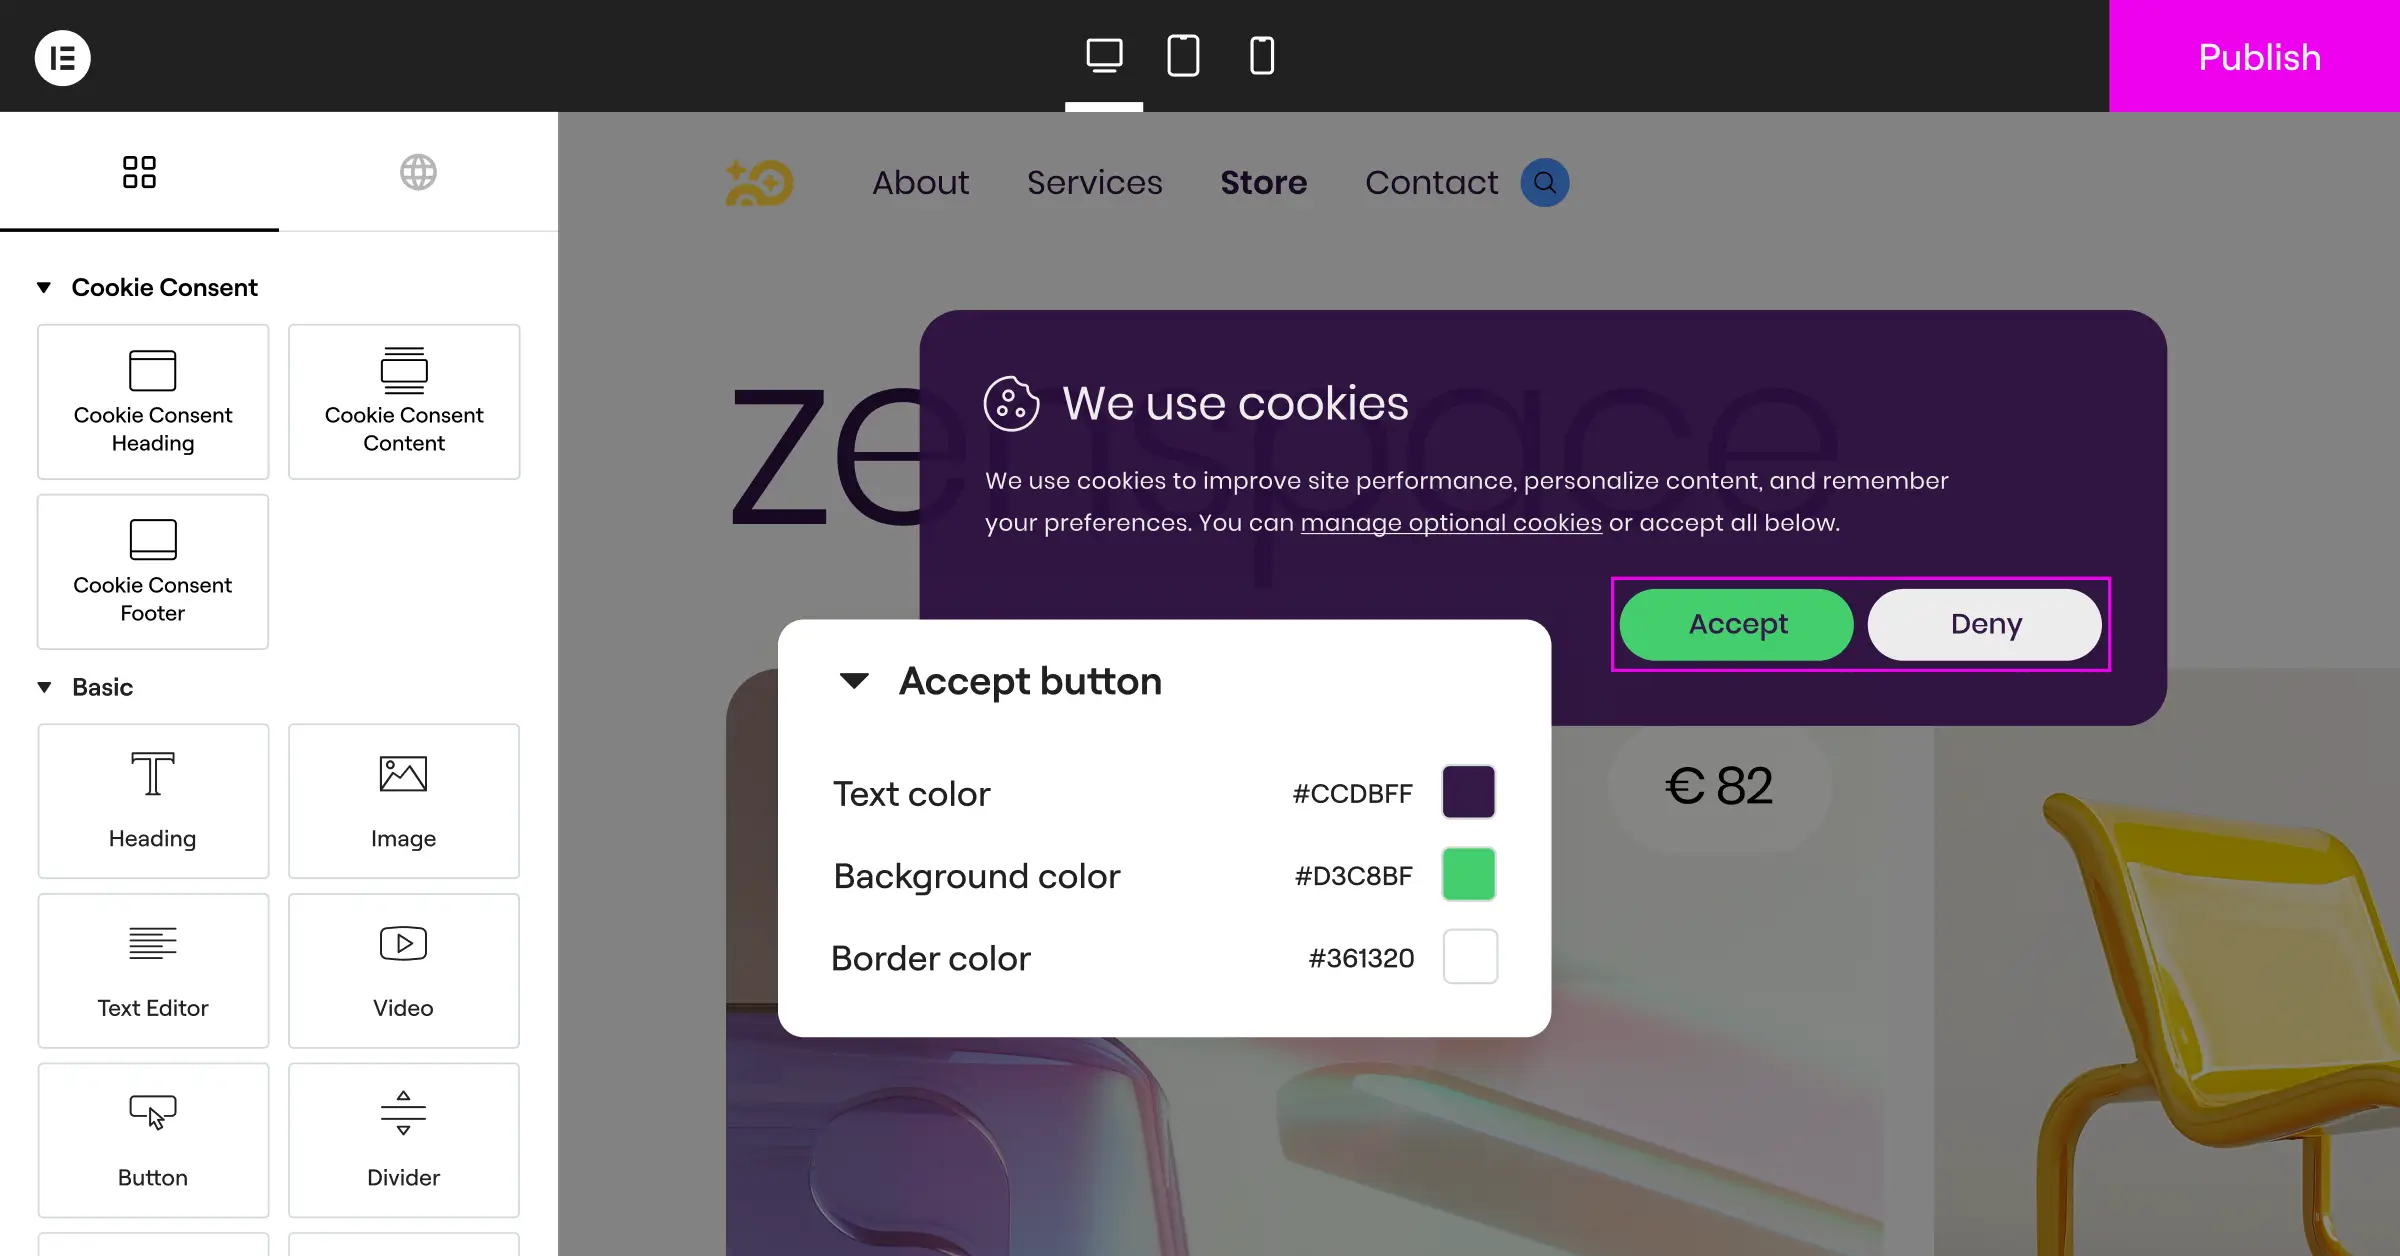
- Customizes the design of your banner to match your brand style guidelines.
- Supports multilingual translations so your global visitors read the banner in their own language.
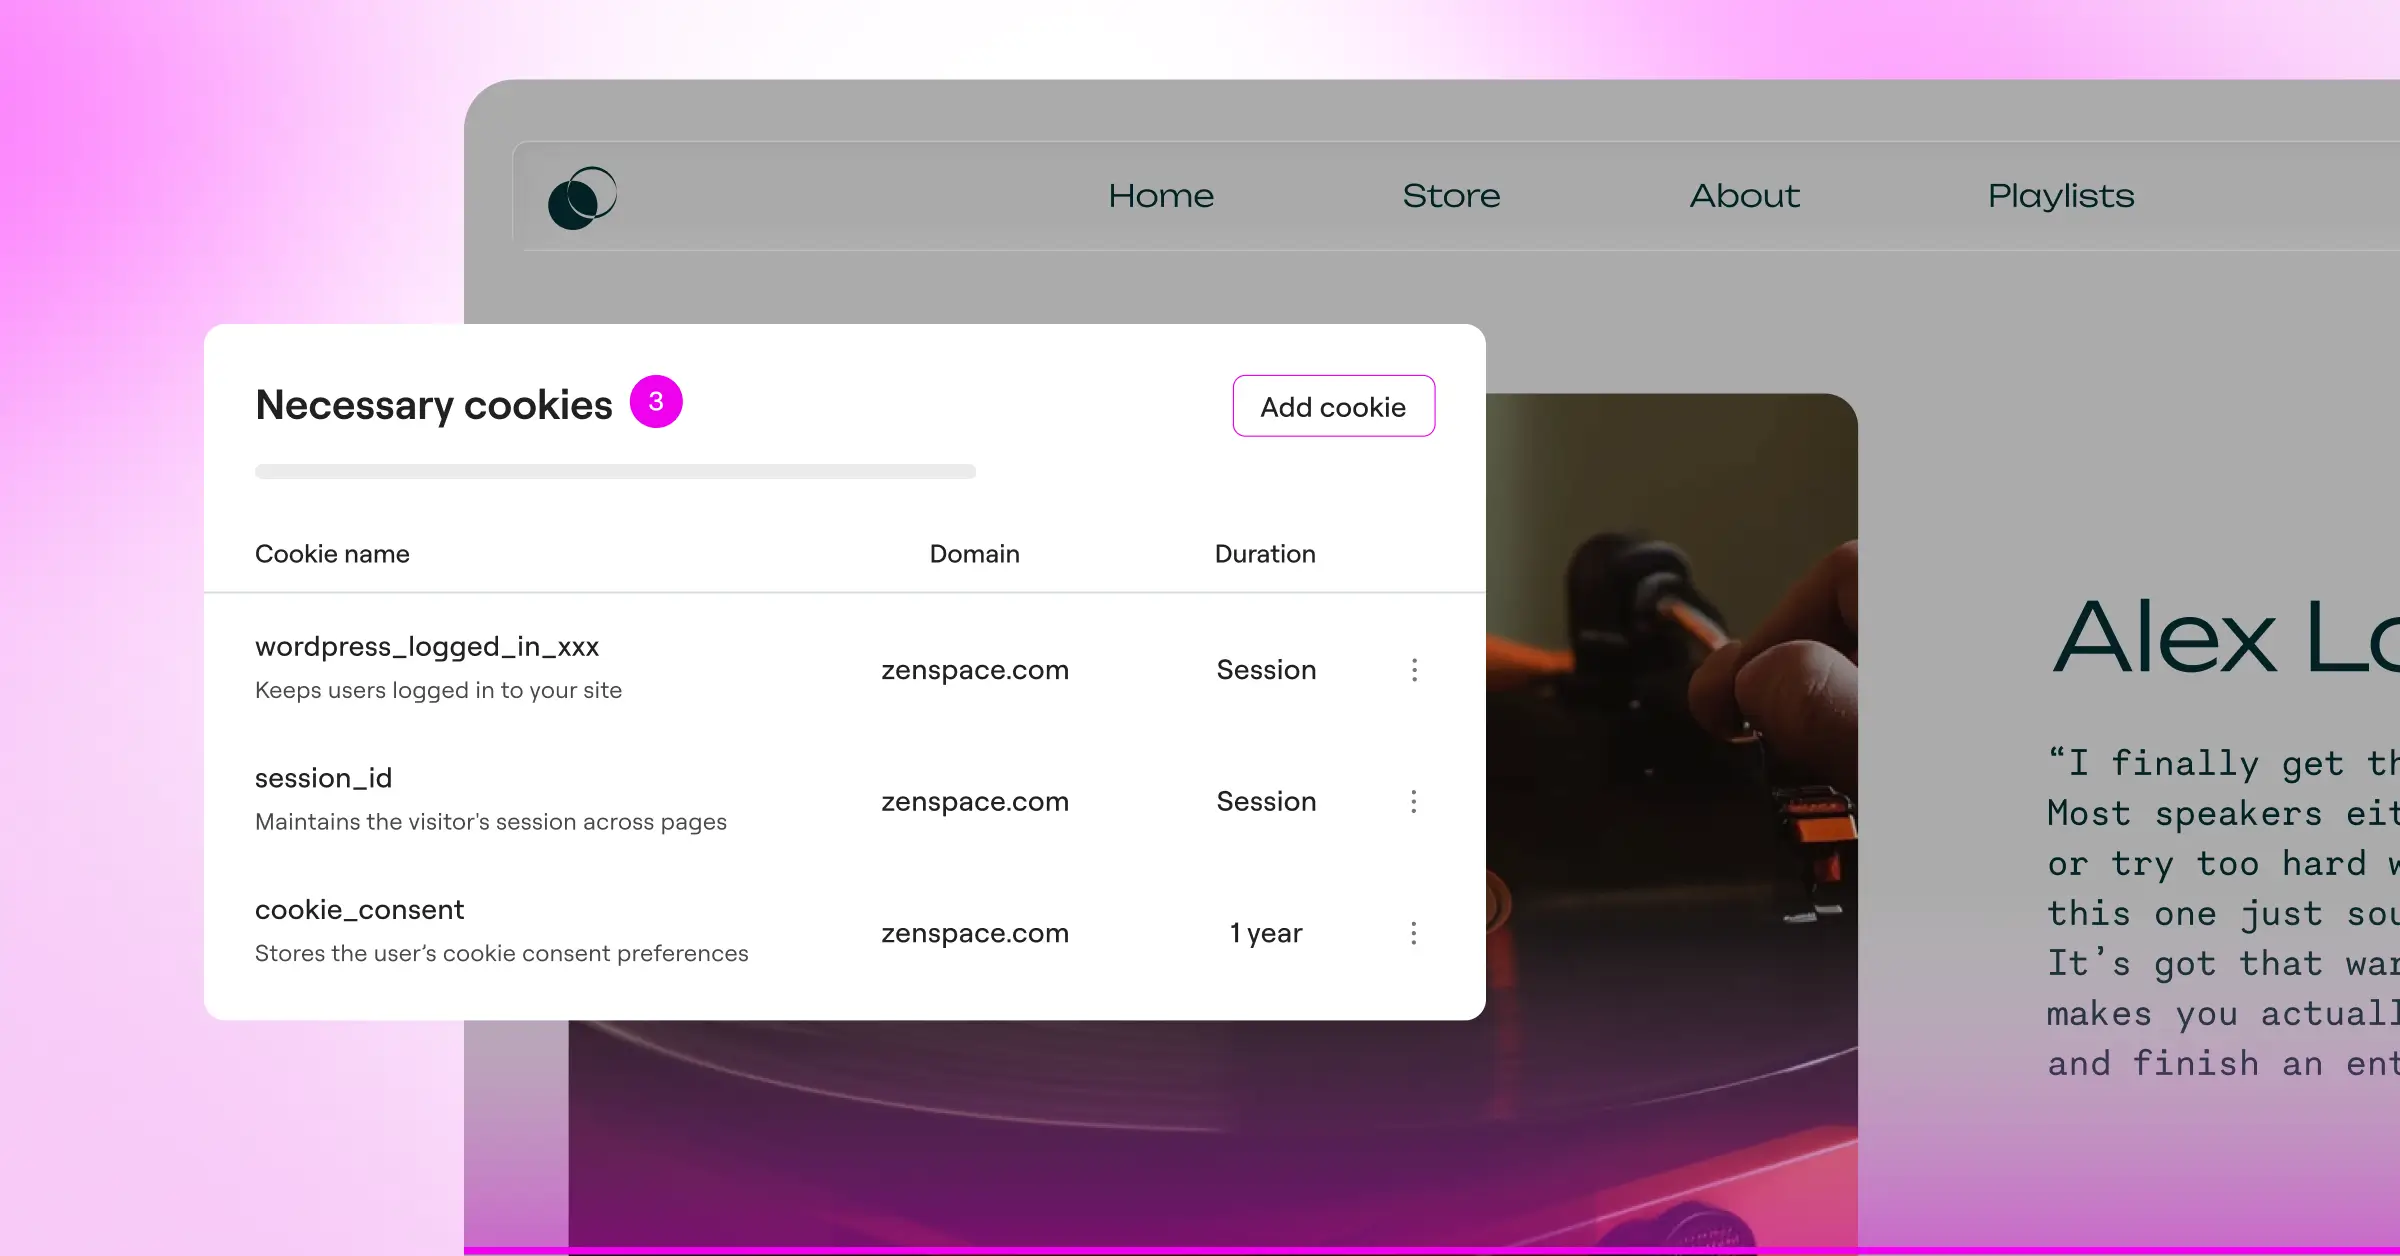
- Scans your website automatically to identify and categorize tracking cookies.
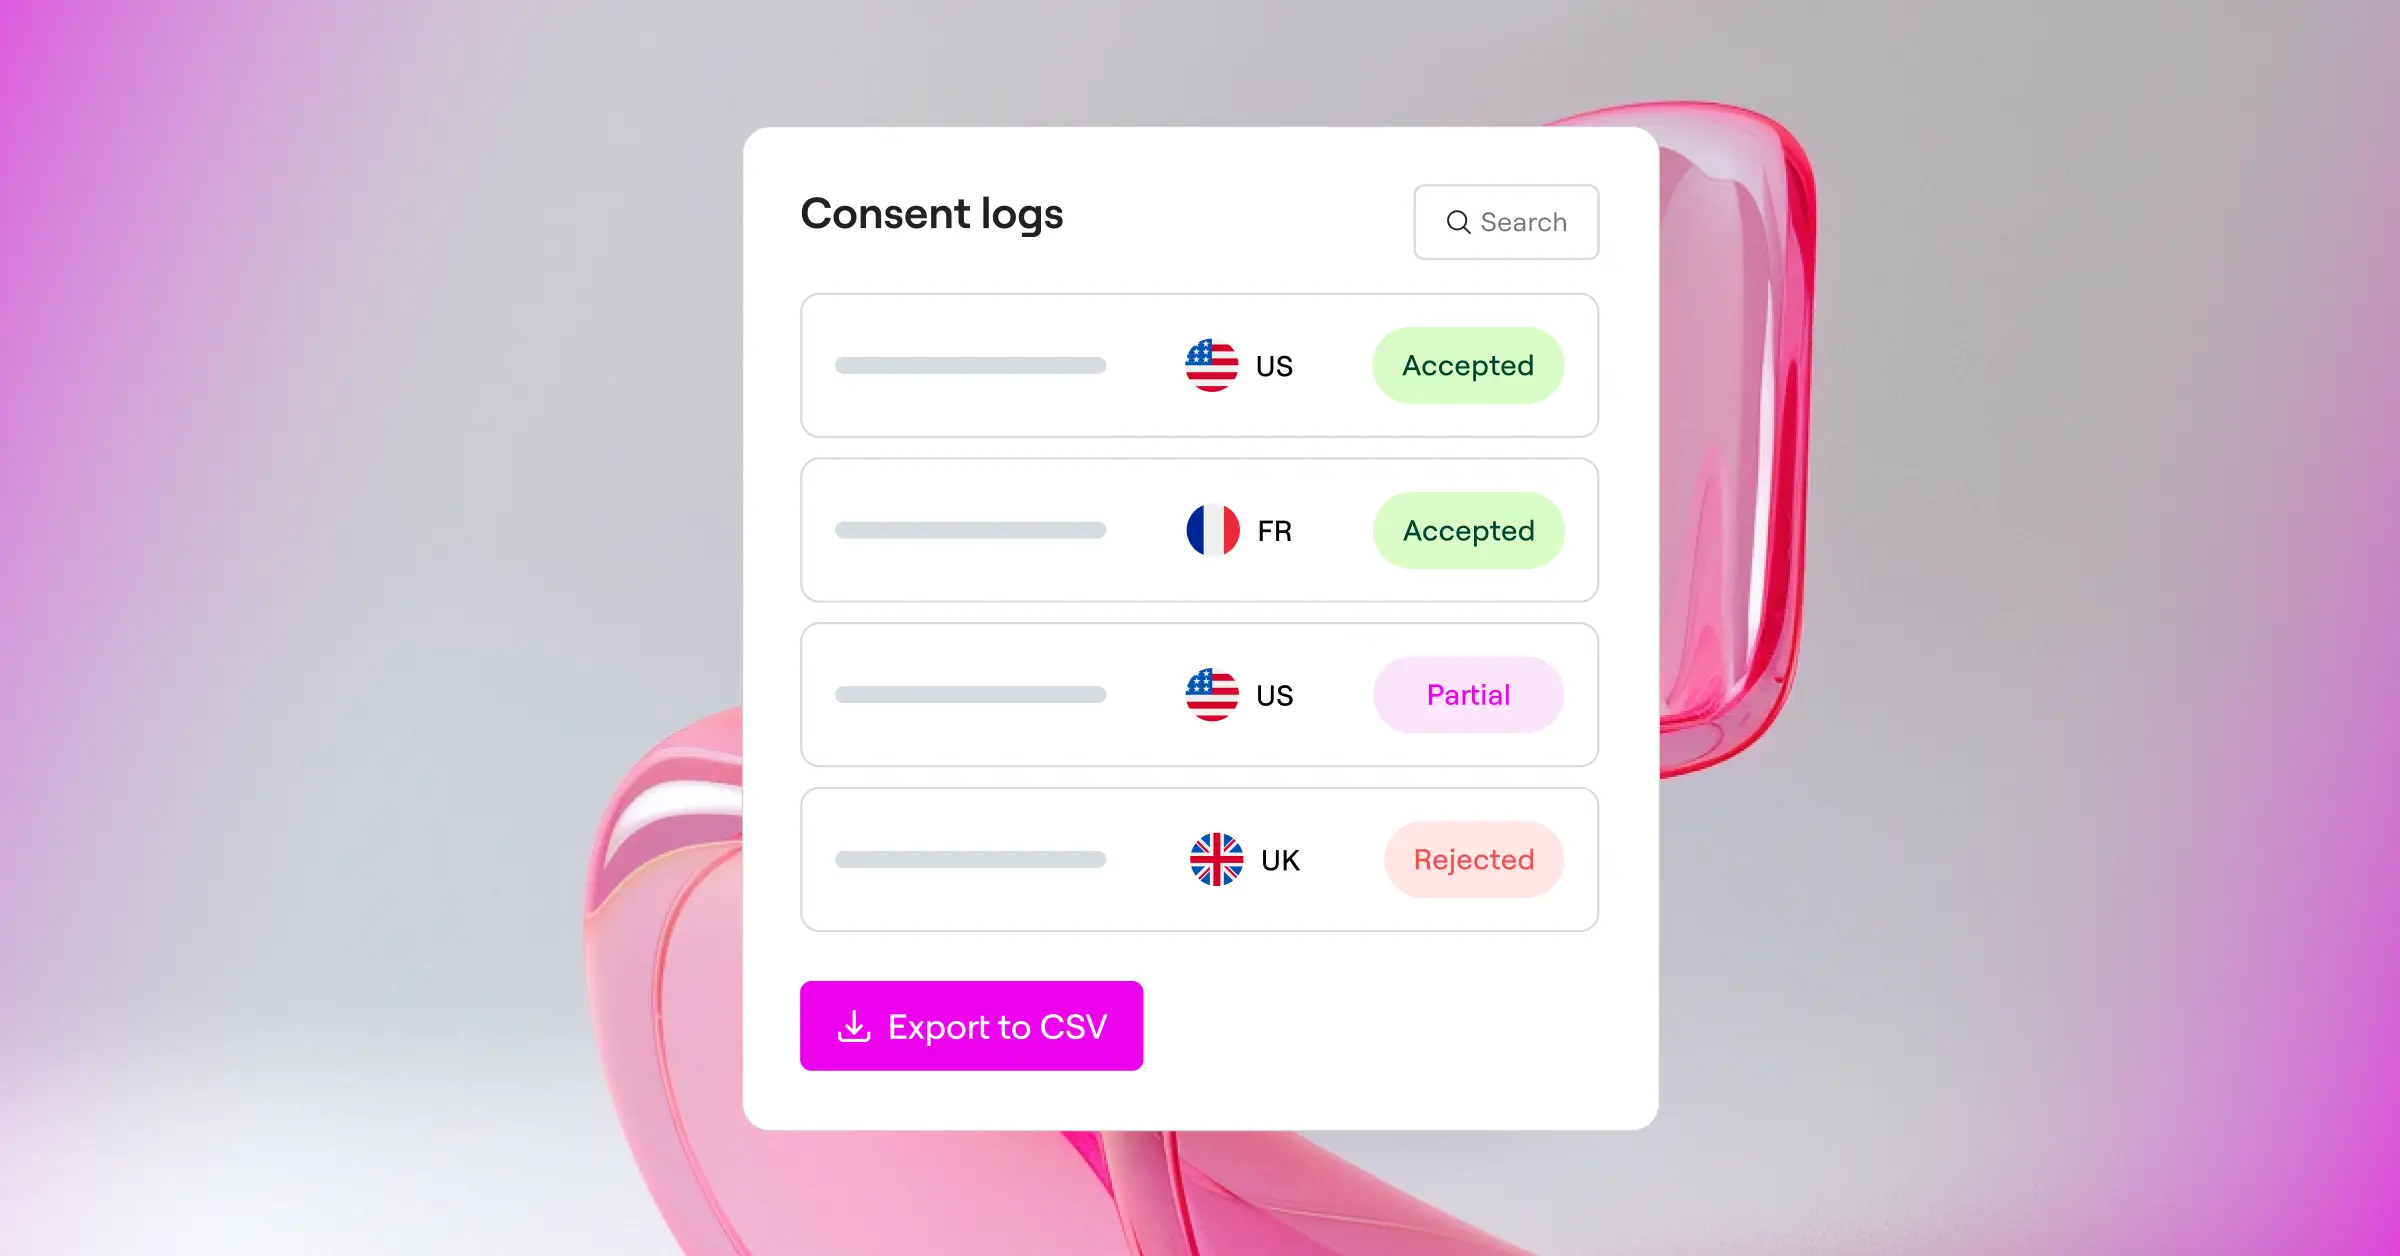
- Saves complete consent logs to provide an audit trail for privacy inspectors.
- Adjusts to regional laws, covering both GDPR and California’s CCPA.
- Connects with Google Consent Mode v2 to keep your analytics and ad tracking accurate.
- Respects Global Privacy Control signals sent from modern privacy-focused web browsers.
- Targets banners geographically so only visitors in specific regions see them.
A dashboard-native tool also avoids the script conflicts external widgets can cause. Your code stays clean, pages load faster, and visitors get a smooth experience from the moment they arrive.
Step-by-Step Tutorial: Setting Up Native Cookie Consent
Setting up your compliance banner doesn’t need to be a big project. You can have a fully legal system running in under five minutes. Let’s walk through the process together.
- Activate the Feature – Log into your WordPress admin, find the compliance options in site settings, and turn on Cookie Consent. This starts the native script blockers on your server.
- Scan Your Site – Let the system run its automated scan. It searches your pages for marketing pixels, analytics trackers, and session cookies, then groups them into categories. (Simpler than it looks, promise.)
- Create Your Layout – Choose a built-in template, and adjust the colors, fonts, and button sizes to match your site. Keep “Accept” and “Reject” equal in visual weight so visitors have a genuine choice.
- Connect Google Consent Mode v2 – If you use Google Analytics, toggle the GCM v2 setting. Cookie Consent maps visitor responses directly to Google’s tags, no custom code needed.
- Publish and Test – Save your changes, open an incognito window, and check that no scripts run until you click accept. Your browser’s inspect tool can confirm storage stays empty on first load.
Once those steps are done, your site handles traffic from any region. It serves the right banner based on visitor location, keeping you compliant without interrupting visitors elsewhere.
Why Native Tools Outperform External SaaS Solutions
Many site owners install external widgets that load compliance banners from third-party servers. Every call to an external server adds connection overhead, and those milliseconds add up and can drag on your search rankings.
Here are the primary advantages of keeping your compliance tools local:
- Reduces external HTTP requests that slow down initial page rendering.
- Eliminates third-party script bloat that hurts your Core Web Vitals scores.
- Avoids layout shifts by rendering the consent banner directly with the page.
- Prevents database bloat by keeping consent logs clean and optimized.
- Secures user interaction data without sharing it with external analytics companies.
- Minimizes server response times by running locally inside WordPress.
To help you choose the right path for your project, here’s how the main tools compare on key privacy features:
| Consent Tool | Native Dashboard? | Google Consent Mode v2? | Consent Logs? | Ideal Target |
|---|---|---|---|---|
| Cookie Consent | Yes | Yes | Yes | WordPress sites wanting fast, native setup |
| Cookiebot | No (External SaaS) | Yes | Yes (Premium) | Multi-site enterprise portfolios |
| CookieYes | No (External SaaS) | Yes | Yes (Premium) | Sites using different CMS platforms |
| Complianz | Yes | Yes | Yes | WordPress users seeking legal document generators |
| iubenda | No (External SaaS) | Yes | Yes (Premium) | Websites needing complex custom privacy policies |
| OneTrust | No (External SaaS) | Yes | Yes | Large-scale enterprise compliance divisions |
As the table shows, native integration keeps your WordPress management simple. You avoid juggling multiple logins and keep your data in one place under your own control.
Common Compliance Pitfalls to Avoid on WordPress
Even with good tools, simple configuration mistakes can leave your site exposed. Here are the most frequent errors to avoid.
Watch out for these common mistakes during setup:
- Blocks essential security cookies by mistake, which can break your login page or shopping cart.
- Hides the reject button in small text, which regulators treat as non-compliant design.
- Launches tracking scripts through manual theme edits, which bypasses your consent manager’s blockers.
- Forgets to translate the banner text for foreign language versions of your website.
- Omits a clear link to your privacy policy page inside the cookie banner copy.
- Deletes consent history files during routine server cleaning, leaving you without audit records.
Make it a habit to check your settings whenever you add something new to your site. Installed a new email tool or social widget? Run a quick scan to catch anything slipping past. More tips live in Elementor’s guide archive.
A Quick Compliance Checklist for Site Administrators
Before you declare your site fully compliant, run through this checklist. Ten minutes now can save hours later.
Follow these steps to complete your validation:
- Check All Forms – Make sure contact or signup forms on your site link to your privacy policy and explain how you handle submission data.
- Verify External Embeds – If you embed YouTube, Google Maps, or social feeds, confirm their tracking cookies are blocked until the user consents.
- Test Global Privacy Control – Use a browser that sends GPC signals to verify your consent system honors the opt-out preference.
- Confirm the Opt-Out Button – Make sure a small, accessible tab or link on every page (usually the footer) lets users reopen the banner and change their settings.
- Backup Consent Logs – Make sure your automated backups include your consent logs so you never lose your compliance history.
If you ever migrate to a new host, take extra care to protect your compliance configurations. Here’s how to handle the move without losing your settings:
- Export Existing Logs – Download the database tables with user consent history to preserve your compliance trail.
- Migrate the Tool Configuration – Export your banner styling and script mapping rules so you don’t rebuild from scratch.
- Set Up Redirections – Make sure your privacy policy URLs stay the same so your banner links don’t break.
- Run a Fresh Scan – Run a new cookie scan on the new server to confirm it didn’t introduce new tracking cookies.
This methodical approach keeps your compliance records intact and prevents unexpected tracking errors, wherever your site ends up hosted.
The Role of Web Accessibility in Privacy Banner Design
True compliance covers more than privacy. It’s about making sure your site works for everyone. Visitors with visual impairments or physical limitations need to interact with your cookie banner too, or you’re still falling short.
This is why Cookie Consent works well alongside accessibility features. Your site stays legally sound and genuinely inclusive. Check out the Elementor features page for the full range of tools.
Here’s how to optimize your privacy banner for accessibility:
- Applies high contrast colors so text is easy to read against the banner background.
- Supports keyboard tab navigation so visitors can make choices without a mouse.
- Labels every button with a clear aria-label so screen readers can explain its purpose.
- Avoids full-screen overlays that disrupt screen reader navigation entirely.
- Optimizes font sizing so legal text stays readable on mobile screens.
- Retains the visitor’s focus within the cookie popup until they make their privacy selection.
Building with these accessibility points in mind protects your site from both privacy audits and accessibility complaints, no matter how visitors browse.
Clearing Up Common Compliance Myths
There are quite a few misconceptions about privacy compliance floating around the WordPress community. Let’s clear up the most common ones.
Myth 1: “My site is too small to be fined.” Many owners assume regulators only chase large tech companies. But scanner bots crawl the web constantly, and a small shop or blog can get an automated warning for loading tracking pixels without consent.
Myth 2: “If I have a privacy policy page, I’m fully compliant.” A privacy policy describes your practices in writing, but it doesn’t block cookies. If your site loads tracking scripts before consent, you need a system that manages scripts in real time.
Myth 3: “Analytics cookies don’t count as tracking.” Some site owners think analytics don’t need consent since they improve the site. Under EU law, most analytics cookies, including Google Analytics, count as personal data, so you need consent unless you’ve set up a fully anonymous, first-party setup.
Using a native tool like Cookie Consent takes the guesswork out of this, so you can focus on your business instead of regulations. For a full look at available plans, visit the Cookie Consent feature page.
Frequently Asked Questions
What is the main difference between GDPR and the EU Cookie Law?
The GDPR covers how personal data is collected, stored, and processed. The EU Cookie Law (ePrivacy Directive) focuses on placing cookies on a user’s browser. Together, they require active consent before tracking any European visitor.
Can I just write my own cookie consent banner code?
You can write custom code, but managing script blocking natively gets complex fast. You’d need to pause every marketing pixel, analytics script, and social widget until consent is given, and keep logs of every action.
What happens if I ignore EU cookie compliance rules?
Ignoring compliance can bring warnings from data protection authorities, audit requests, and real financial fines. It can also damage your brand reputation and erode visitor trust.
Do I need a cookie banner if I don’t specifically target European users?
If your site is visible in Europe and gets EU traffic, you’re technically required to follow GDPR guidelines. Since blocking European traffic is impractical, geo-targeting your banners to EU visitors is the cleanest solution.
Does Google Consent Mode v2 work without a consent banner?
No. Google Consent Mode v2 needs a consent management system to function. The banner collects each visitor’s choice and sends it to Google’s tags, so without one, it can’t pass the right instructions to your systems.
How does Global Privacy Control (GPC) affect my cookie banner?
Global Privacy Control is a browser setting that lets users signal privacy preferences automatically. Modern consent tools pick up this signal on page load and opt the visitor out of non-essential tracking, no banner interaction needed.
What are “necessary cookies” and do they need user permission?
Necessary cookies are strictly required for your site to work, like keeping a user logged in or holding cart items. These don’t require prior consent, but you still need to list them in your privacy policy.
Will a WordPress cookie consent tool slow down my site?
External cookie widgets can slow things down since they rely on third-party servers. A WordPress-native tool like Cookie Consent keeps everything local, minimizing database queries and preserving your Core Web Vitals scores.

