Table of Contents
In the second tutorial of the series of sales-related popups, you’ll learn how to create unique popups for your WooCommerce product archive pages that blend into your store:

In addition to helping you create the popup, we’ll also show you how to connect your product archive pages to WooCommerce categories. Each product archive page will get its own unique popup targeted to that category’s products.
Here’s how to do it:
Step 1: Create Woocommerce Categories
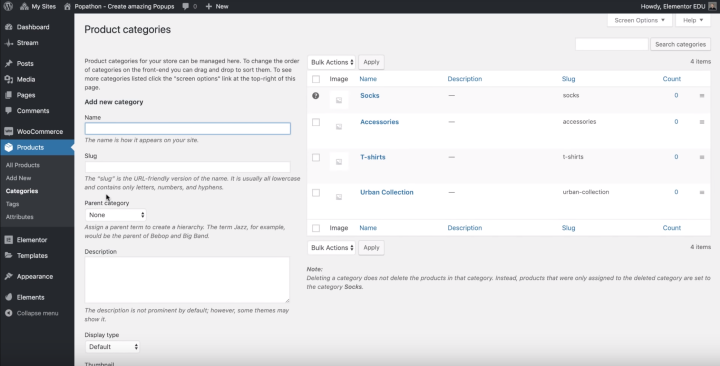
To get started, use the native WooCommerce functionality to create new product categories (Products → Categories):
Step 2: Link Product Archive Page to Category
Next, go to Templates → Theme Builder and edit your product archive pages in Elementor. Then, hit the Save button and use the Display Conditions to match your product archive page to the WooCommerce category:
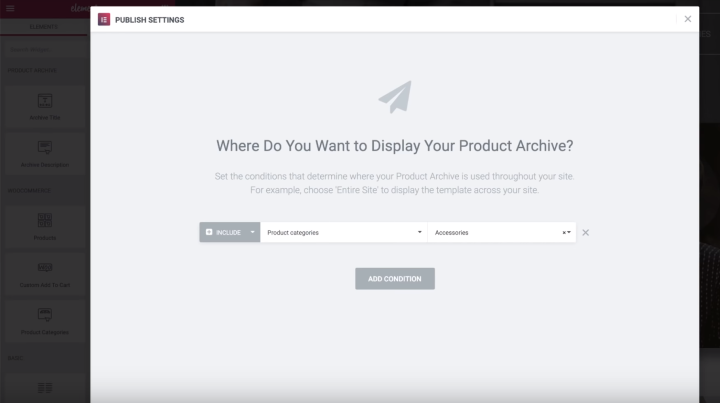
Then, repeat the process for your other categories and product archives.
Step 3: Create New Popup Template
Use finder to add a new popup, or go to Templates → Popups → Add New. Give the popup a name and create the template.
Then, choose from one of the 100+ included templates or create one from scratch.
Step 4: Configure Popup Settings
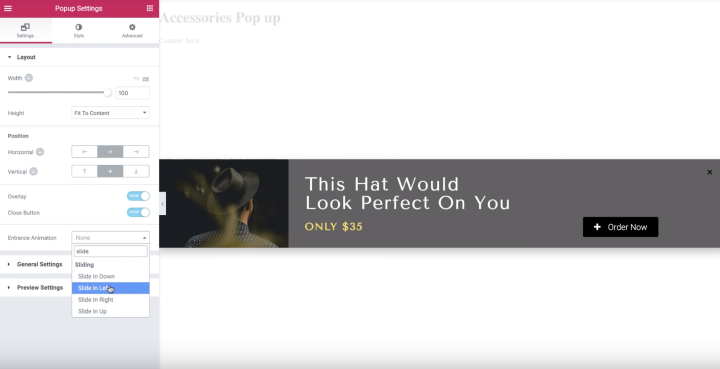
Use the Popup Settings area to add an entrance animation. Slide In Left is a good option that makes your popup feel like part of the page:
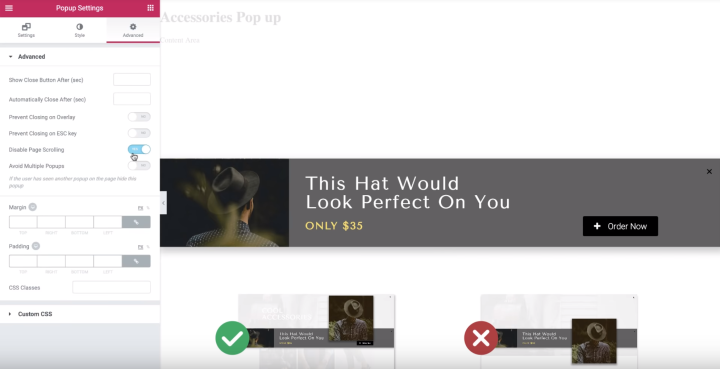
Then, go to the Advanced tab and enable Disable Page Scrolling so that the popup creates a cohesive design with the rest of the page:
Step 5: Add Conditions, Triggers, and Advanced Rules
Once you’ve finished designing your popup, click Publish to open the Conditions, Triggers, and Advanced Rules.
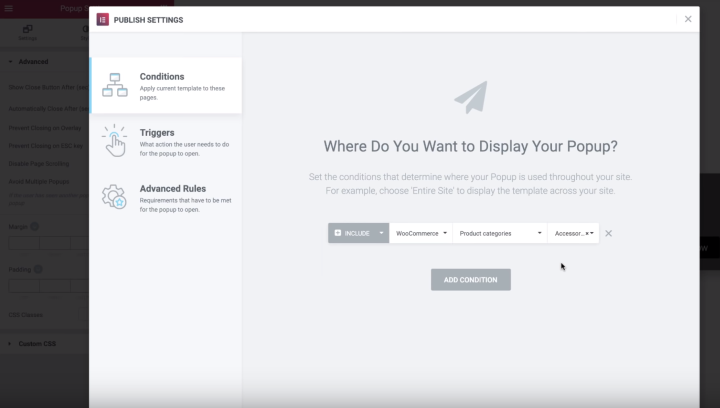
First, use the Conditions tab to target your popup to a specific WooCommerce product category archive page:
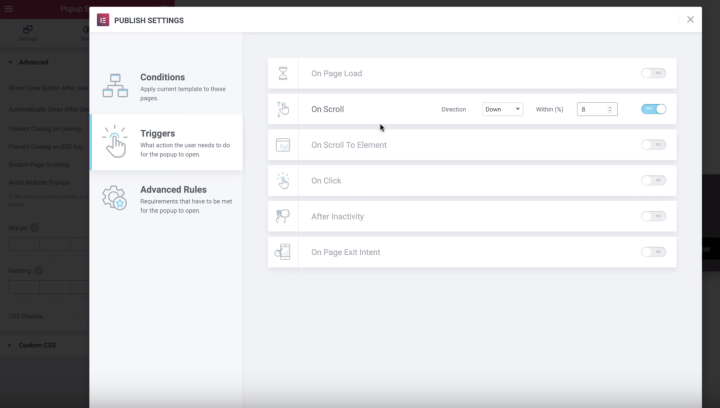
Then, go to the Triggers tab and enable the On Scroll trigger. Use the percentage to match your popup with the empty space on your category archive page – that’s 8% for our example:
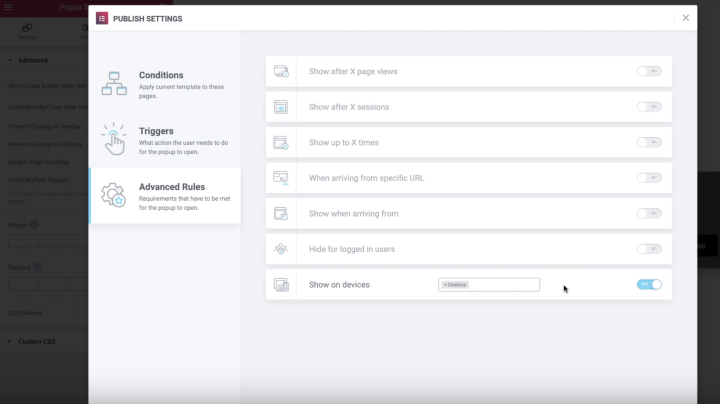
Finally, use the Advanced Rules tab to set the Show on devices setting to desktop only. You need to do this because your popup is designed to match with the desktop version of your store – not the mobile or tablet designs:
If you want, you can create separate popups for mobile and tablet visitors.
Once you’re finished, click Save & Close to make your popup live.
Step 6: Edit Z-Index on Shop Archive Page
Depending on your design, you might run into an issue where the category image is behind the popup. You can see the problem below:
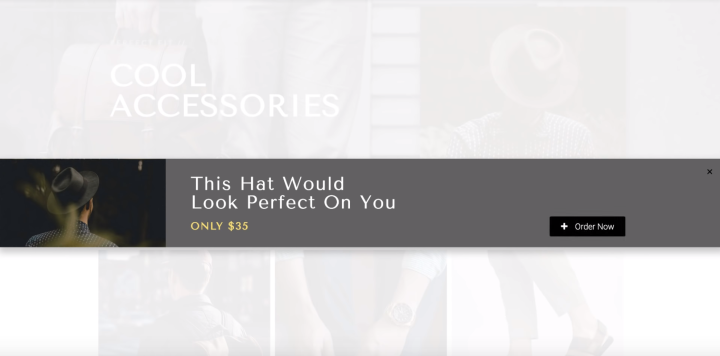
To fix this, use Theme Builder to edit the product archive page. Then, go to the Advanced tab of the image widget and set the X-Index to 10,000 (the popup has a default Z-Index of 9,999):
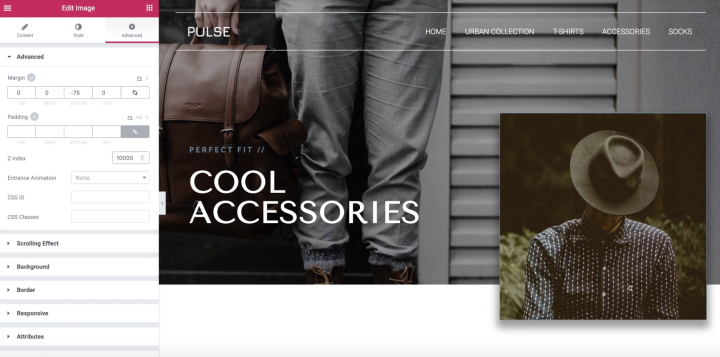
Now, the image will appear above the popup and overlay.
Step 7: Repeat for Other Shop Archive Pages
Now, all you need to do is repeat these steps for the other shop archive pages at your store.
Looking for fresh content?
By entering your email, you agree to receive Elementor emails, including marketing emails,
and agree to our Terms & Conditions and Privacy Policy.


